Skip to content
| Marketplace
Sign in
Visual Studio Code>Snippets>XState VSCodeNew to Visual Studio Code? Get it now.

XState VSCode

Stately

stately.ai
|
27,876 installs
| (13) | Free
Visual editing, autocomplete and typegen for XState
Installation
Launch VS Code Quick Open (Ctrl+P), paste the following command, and press enter.
Copied to clipboard
More Info

XState VSCode enhances the XState development experience by providing VSCode users with features like visual editing, autocomplete, typegen and linting.

Quickstart

  1. Install via the Visual Studio Code Marketplace →
  2. Once installed, you can run XState: Open Visual Editor from the command palette to open any machine at your cursor's location.
  3. If you have code lens enabled (this can be enabled using editor.codeLens setting), you'll also see 'Open Visual Editor' floating above each createMachine call.

Features

Visually edit machines

Edit any XState machine with drag-and-drop using the Stately Visual editor.
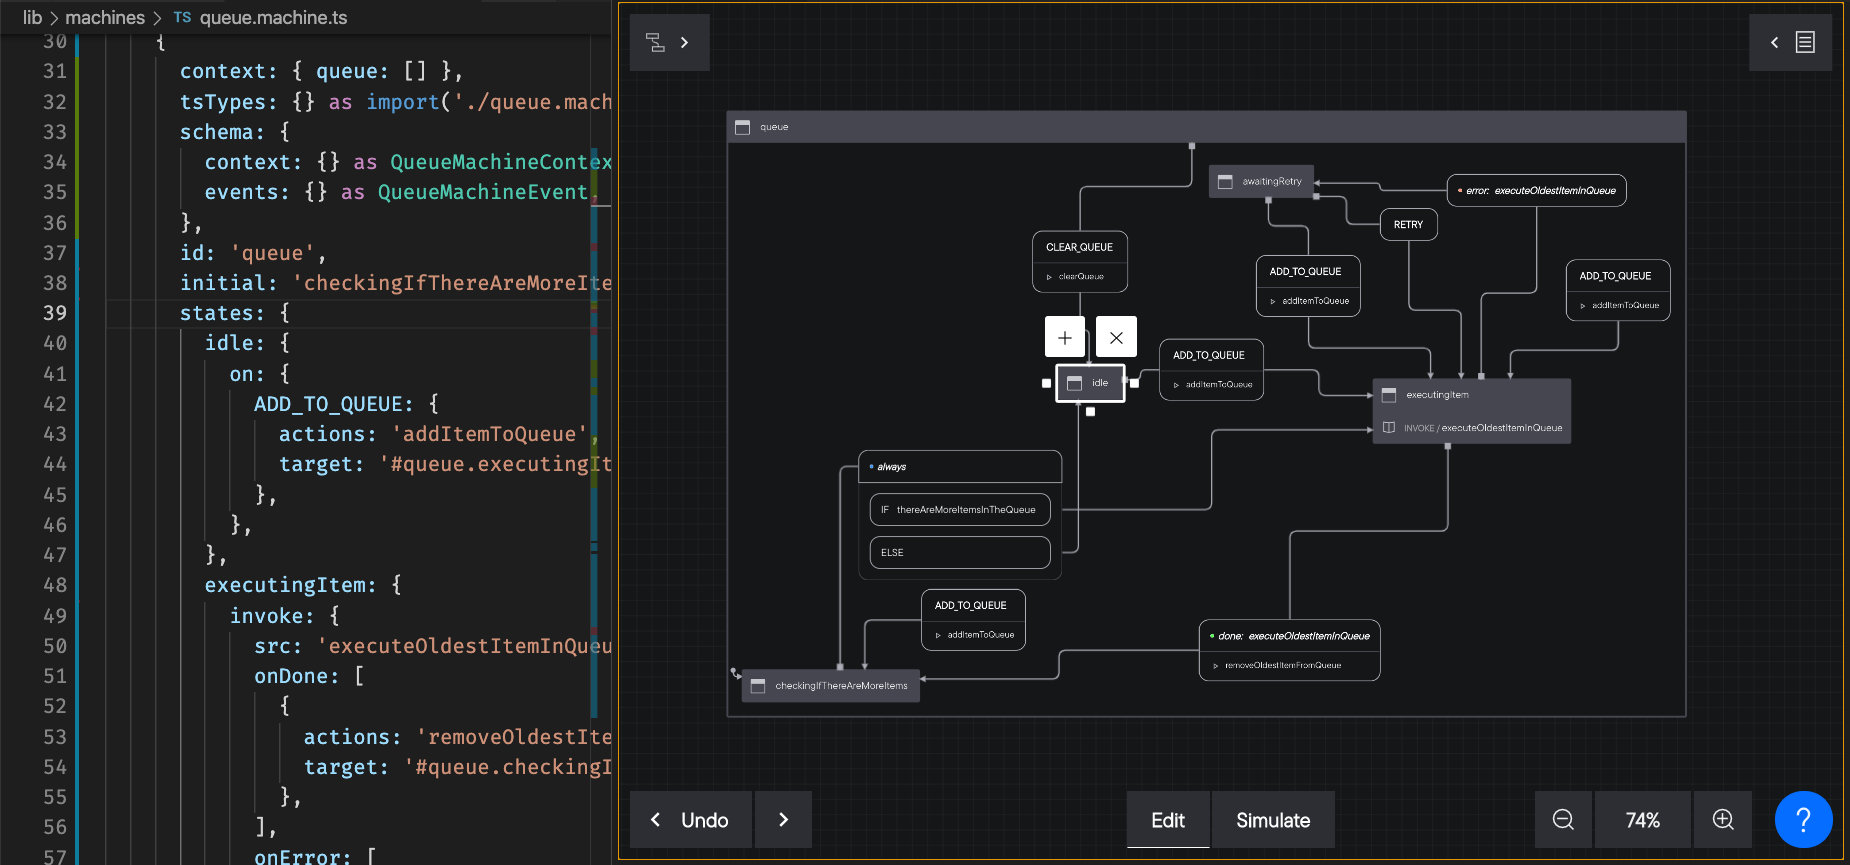
Autocomplete

Intelligent suggestions for transition targets and initial states.
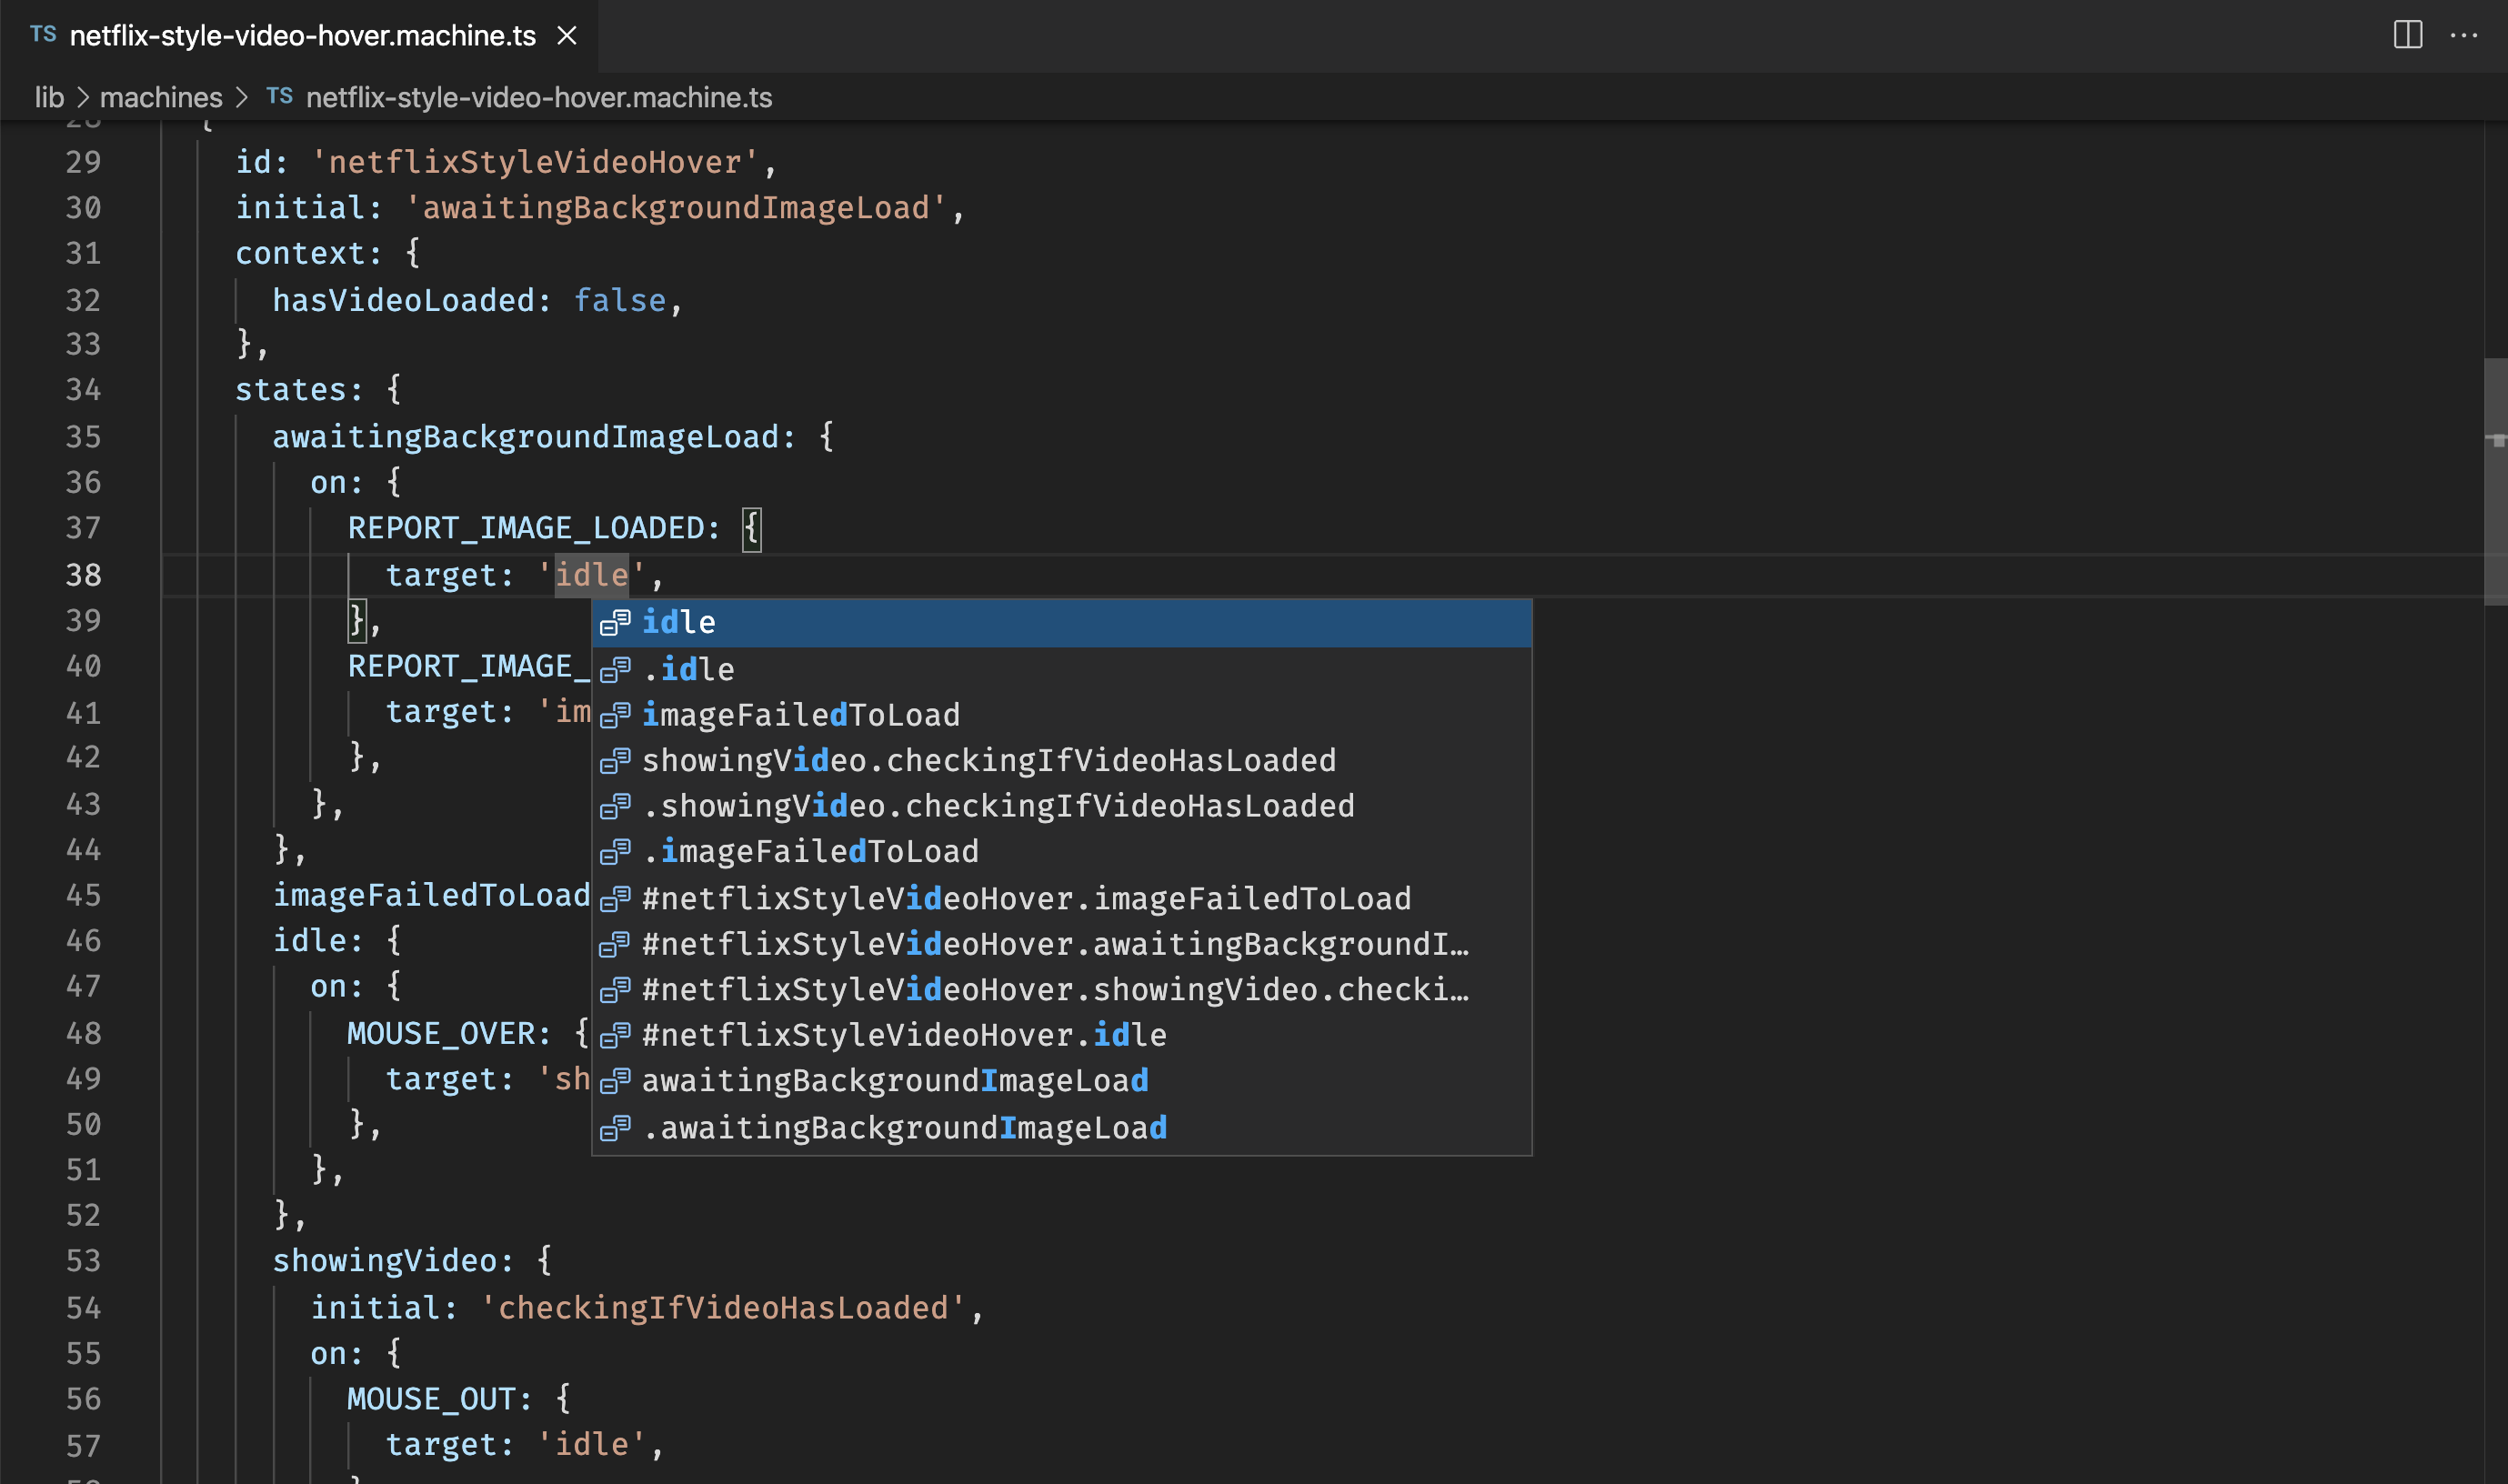
Linting

Highlights errors and potential bugs in your XState machine definitions.
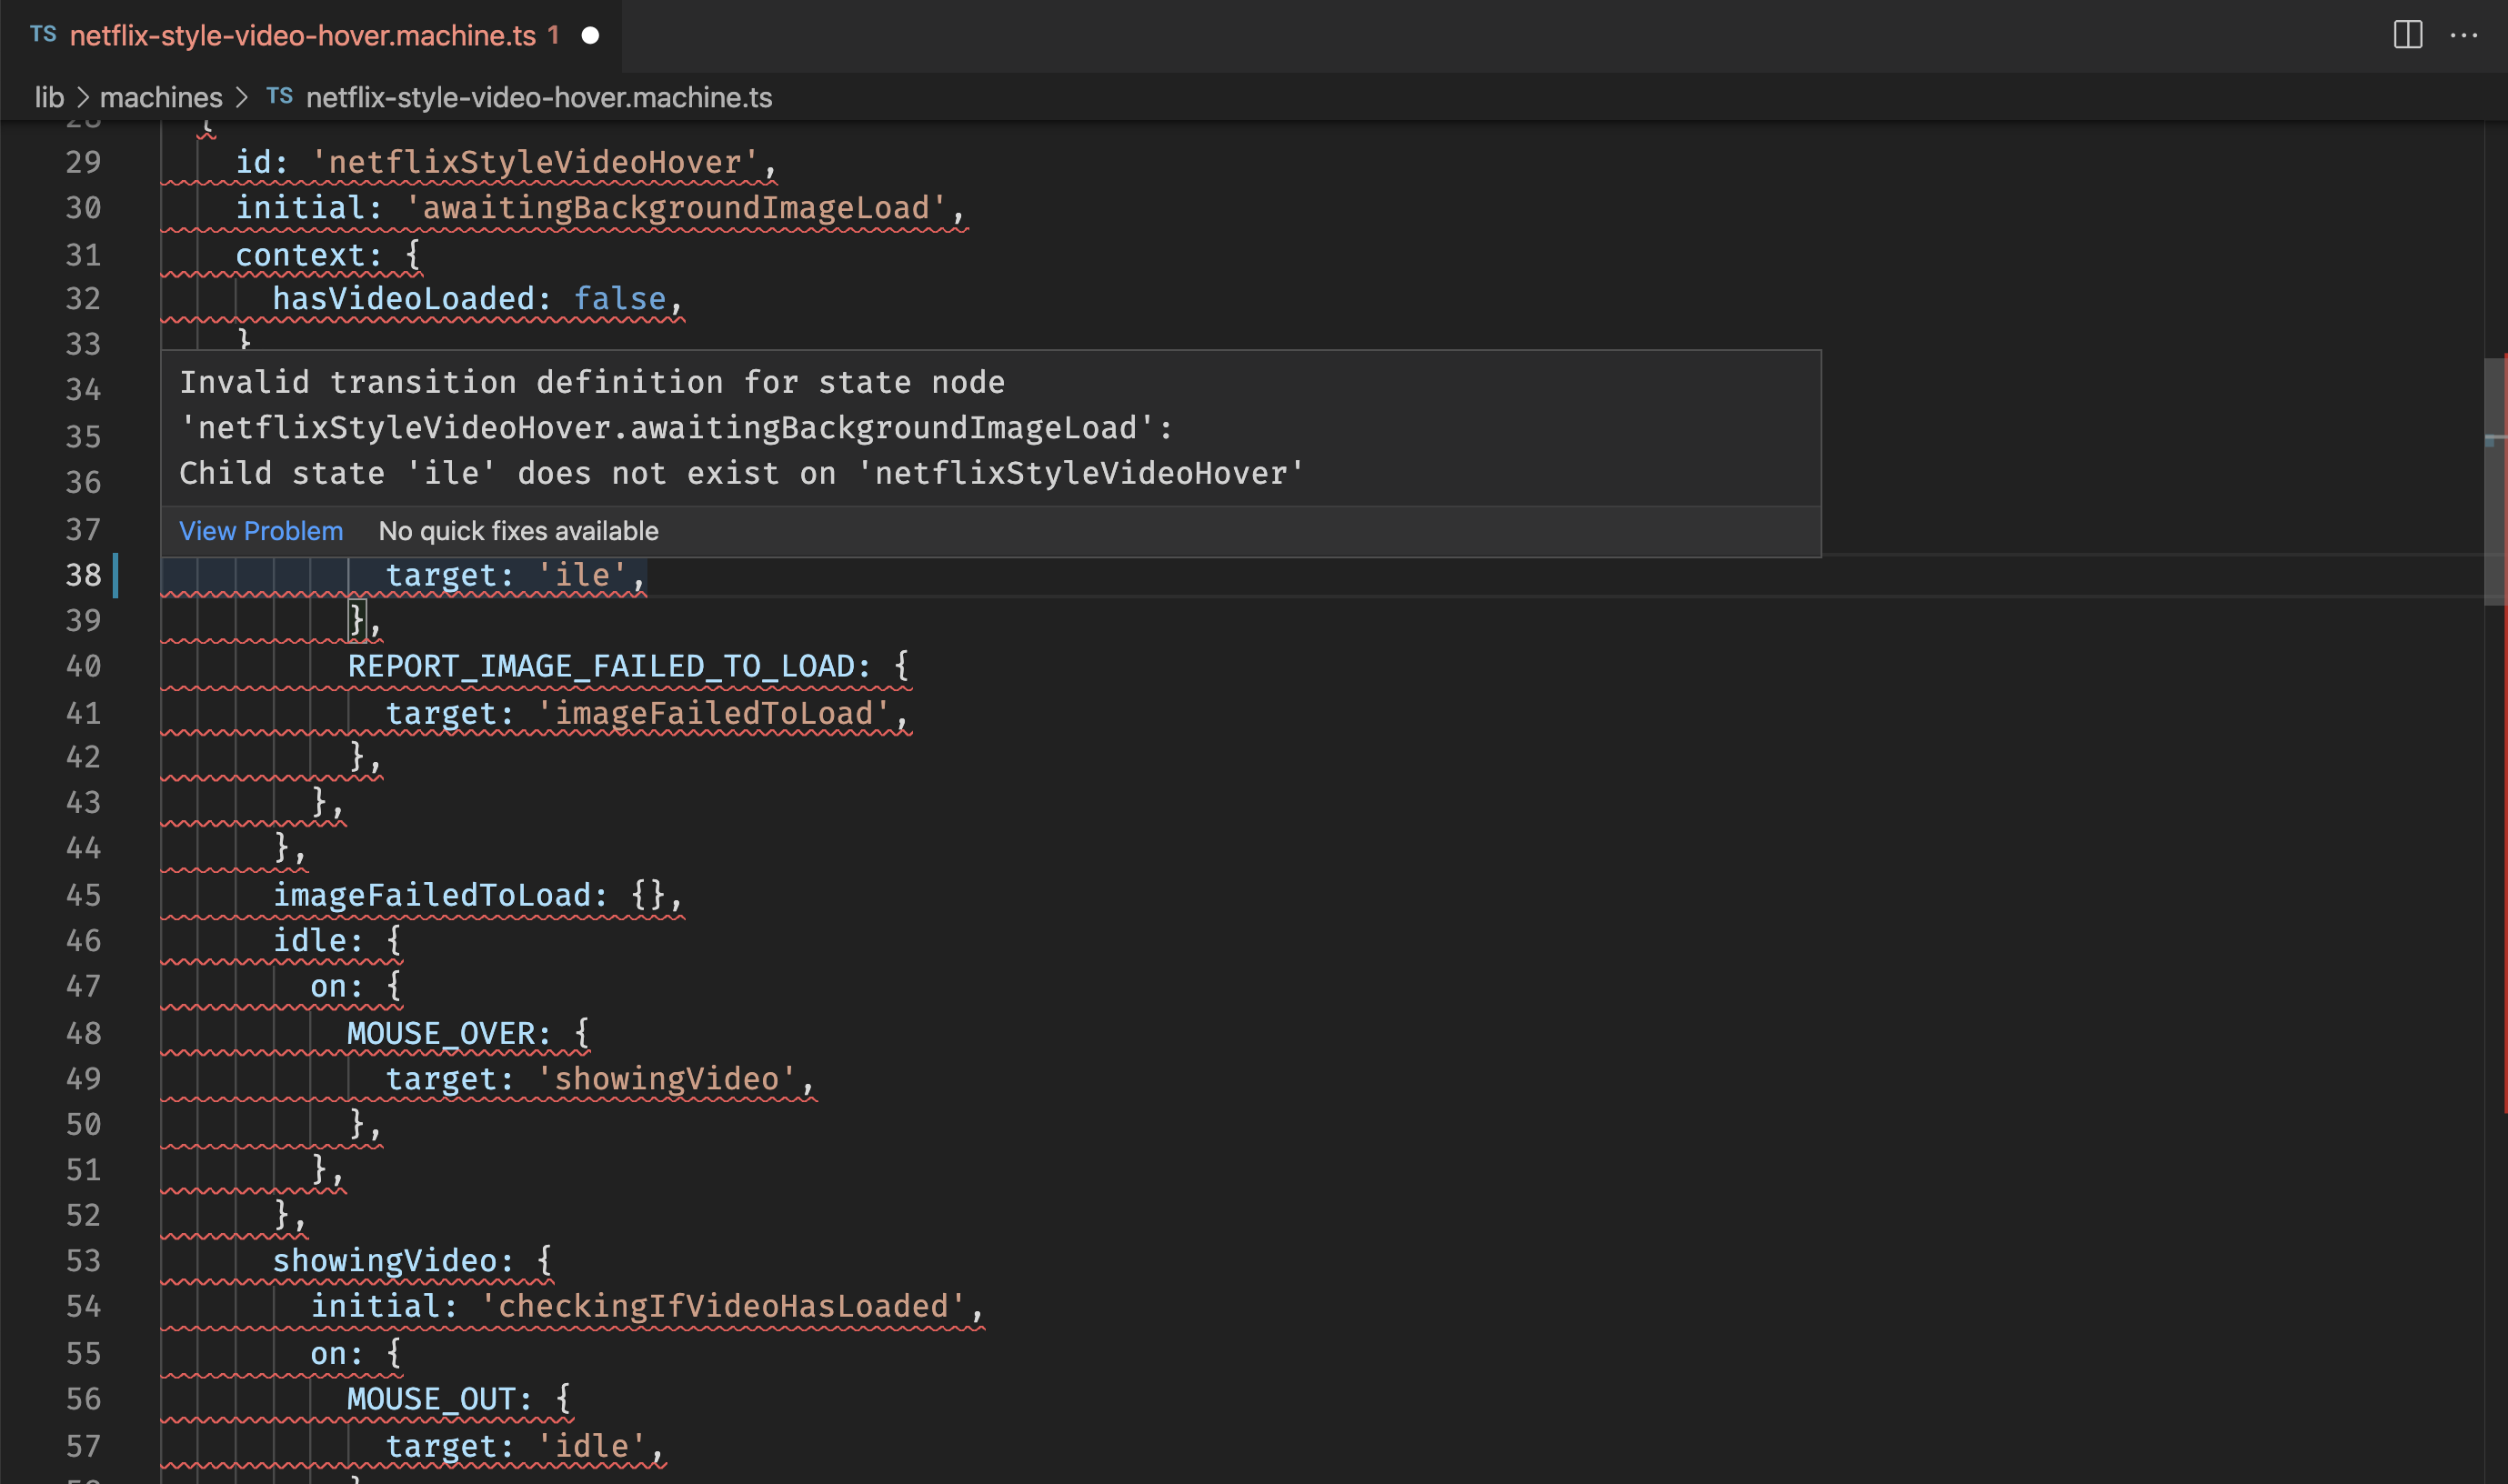
Jump to definition

Navigate around machines easily with jump to definition on targets, actions, guards, services and more.
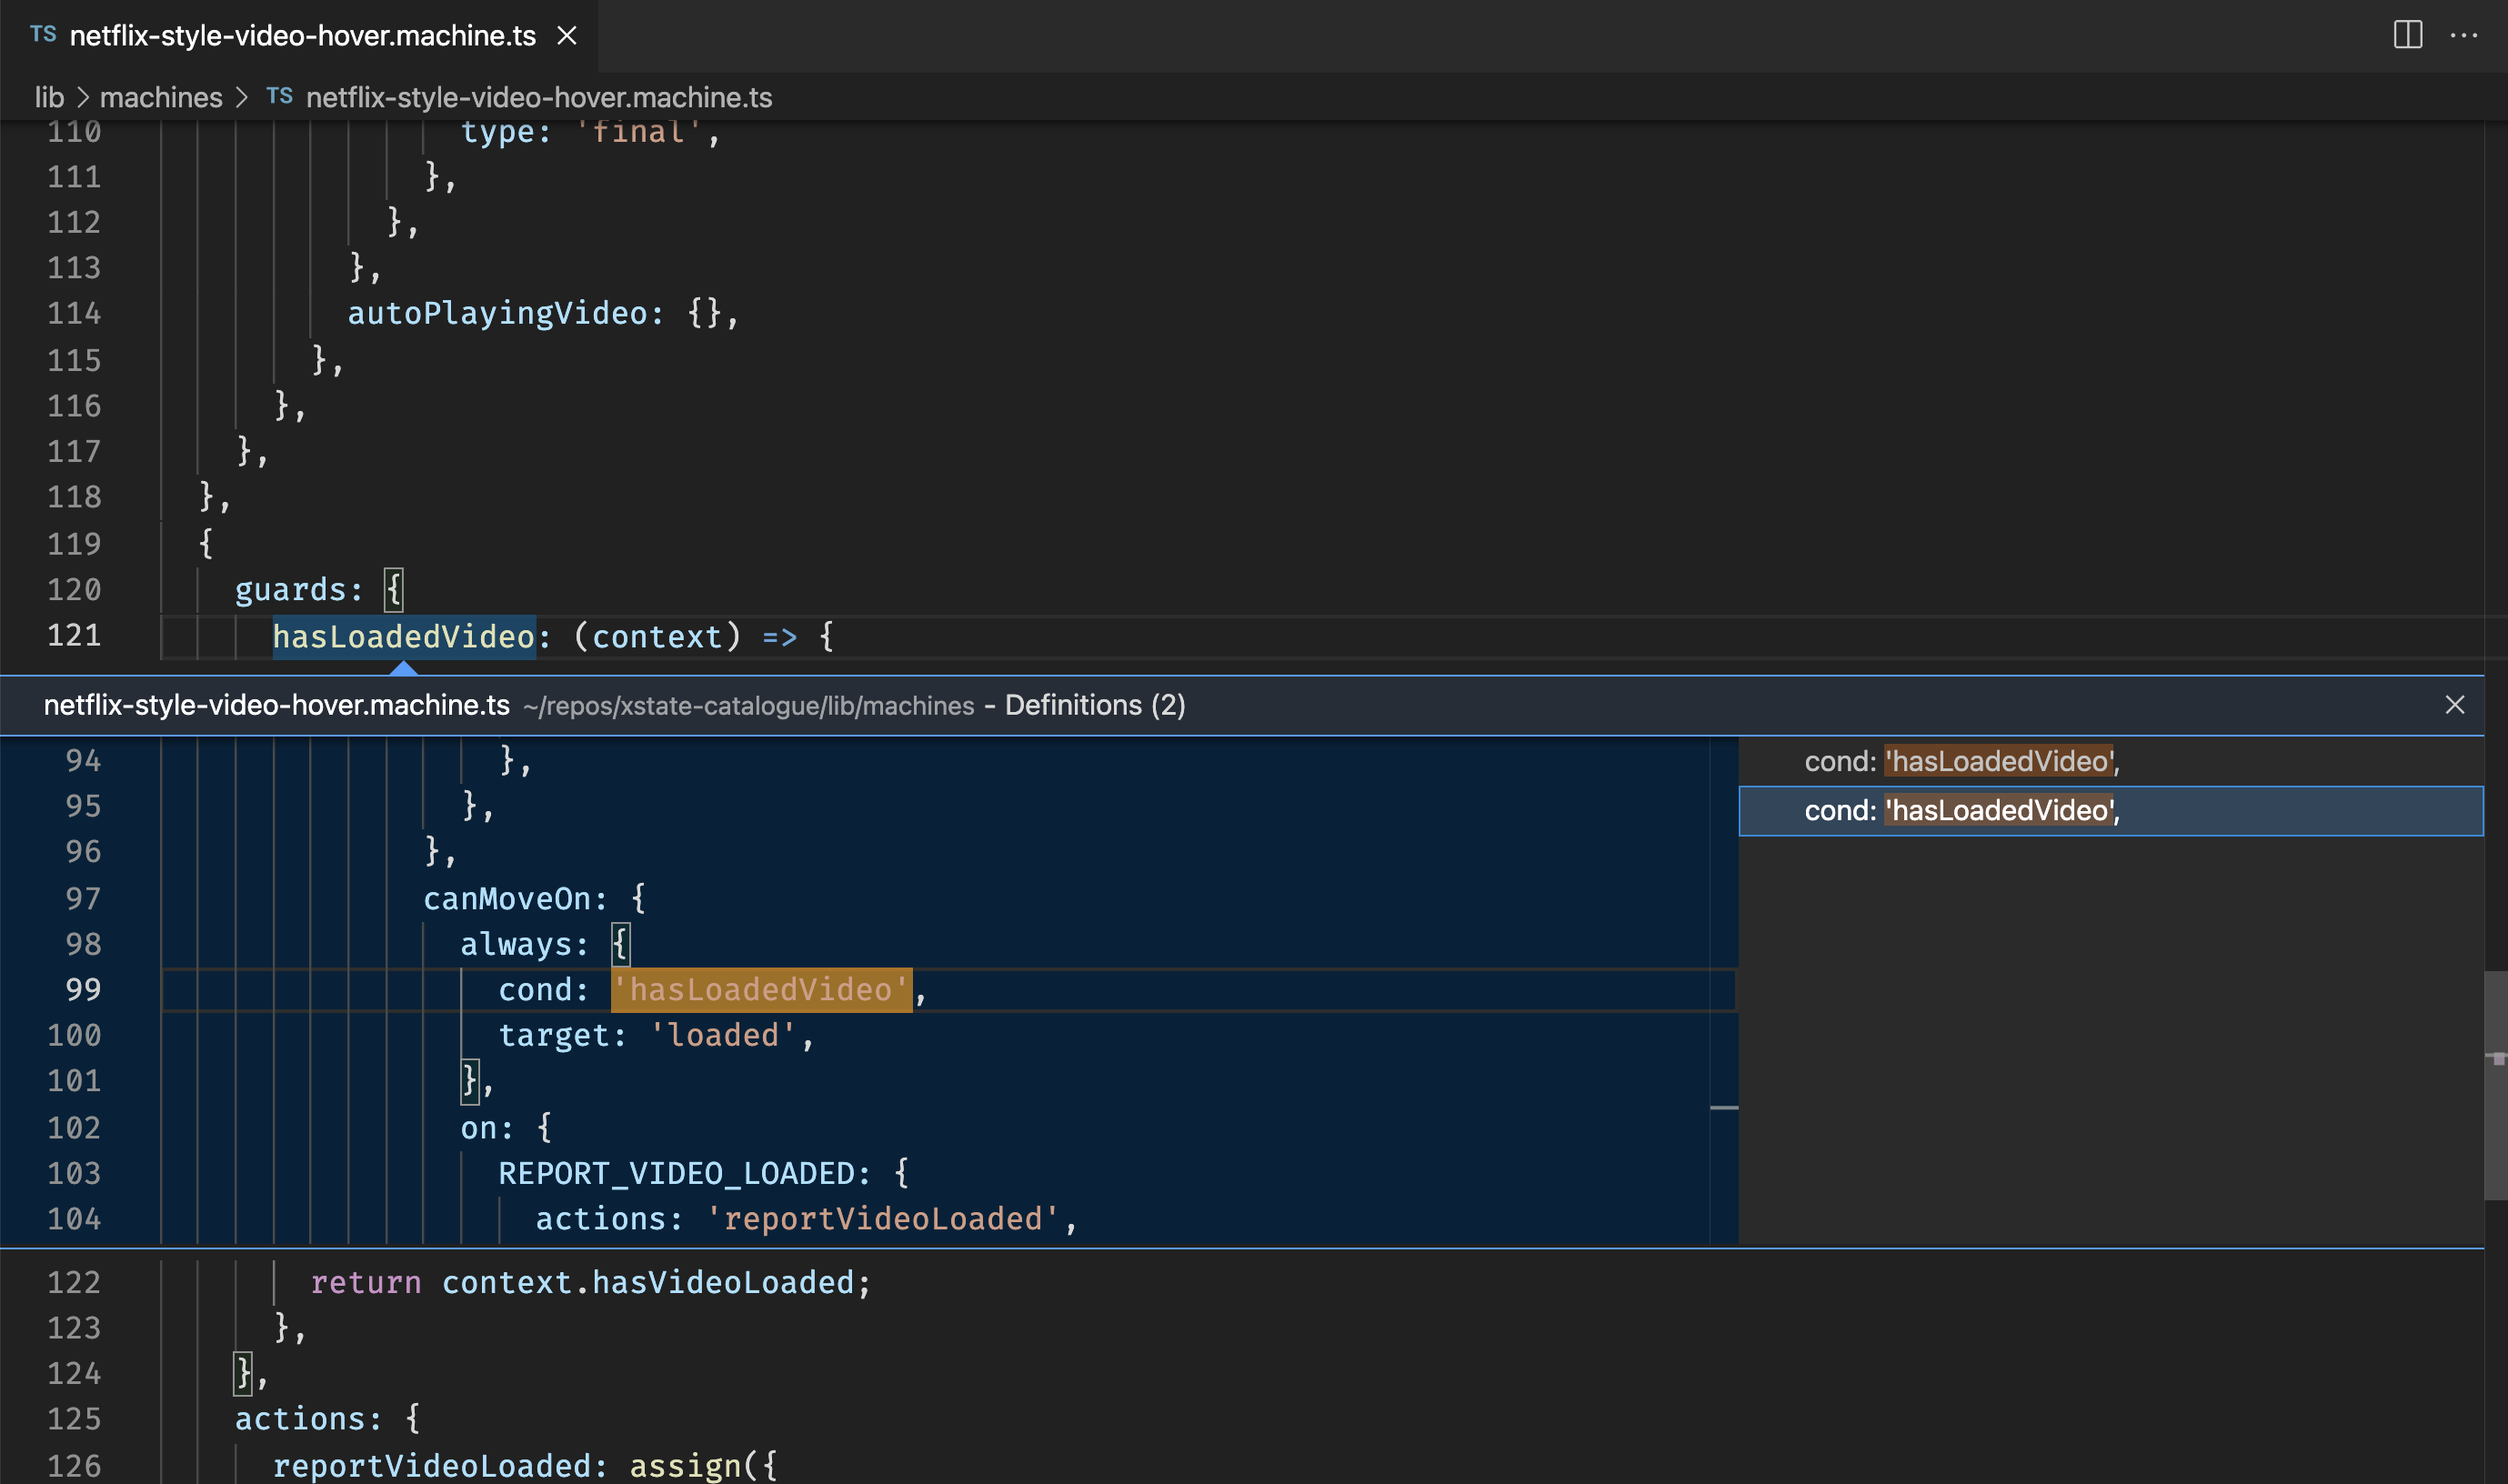
Snippets (BETA)

As an experimental feature, we include a snippet with this extension, xsm, which is short for XStateMachine. Using this snippet, you can get a working machine you can edit using the visual editor in seconds.

You will get an untyped machine if you type xsm and expand in a js or jsx file.

import { createMachine } from 'xstate';
const toggleMachine = createMachine({
  id: 'toggle',
  initial: 'initialState',
  states: {
    initialState: {},
  },
});

https://user-images.githubusercontent.com/167574/171016896-455d7772-cbbd-4b4c-8d77-f96f98383e03.mp4

In a ts or tsx file you will get a machine using typegen:

import { createMachine } from 'xstate';
const demoMachine = createMachine({
  id: 'demo',
  tsTypes: {} as import('./test.typegen').Typegen0,
  schema: {
    context: {} as { value: string },
    events: {} as { type: 'FOO' },
  },
  context: {
    value: '',
  },
  initial: 'idle',
  states: {
    idle: {},
  },
});

https://user-images.githubusercontent.com/167574/171017059-d997a158-c307-4c95-8f66-46210835a56a.mp4

In vue files you'll get both options.

Hints and Tips

Ignoring machines

If you'd like to ignore linting/autocomplete on a machine, add a // xstate-ignore-next-line comment on the line above it:

// xstate-ignore-next-line
createMachine({});

Nesting typegen files

If you're using typegen, you can nest the files in VSCode.

We try to detect if you want to have your typegen files nested. This is set to true by default but can be disabled using the prompt we show in VSCode or by setting xstate.nestTypegenFiles to false.

typegen prompt

If you choose to enable file nesting using the prompt, we will set the file nesting feature in VSCode to true and add a pattern to nest the generated files.

If you choose not to enable it, we will set xstate.nestTypegenFiles to false and won't ask again.

You can read about this in more detail in our blog post: Nesting XState typegen files.

Refactors

Click the lightbulb when hovering an named action, guard or service in a machine to see available refactors.

  • Contact us
  • Jobs
  • Privacy
  • Terms of use
  • Trademarks
© 2023 Microsoft