Skip to content
| Marketplace
Sign in
Visual Studio Code>Other>Context Naming ConsultantNew to Visual Studio Code? Get it now.
Context Naming Consultant

Context Naming Consultant

slow_dreamer

|
2 installs
| (0) | Free
AI-powered naming suggestions based on code context
Installation
Launch VS Code Quick Open (Ctrl+P), paste the following command, and press enter.
Copied to clipboard
More Info

Context Naming Consultant

한국어

Naming things is hard. This extension helps.

Select your code. AI reads the context. You get smart name suggestions.

Demo

How It Works

  1. Select your code
  2. AI analyzes what's before and after
  3. Pick from intelligent suggestions
  4. Done - name is applied automatically

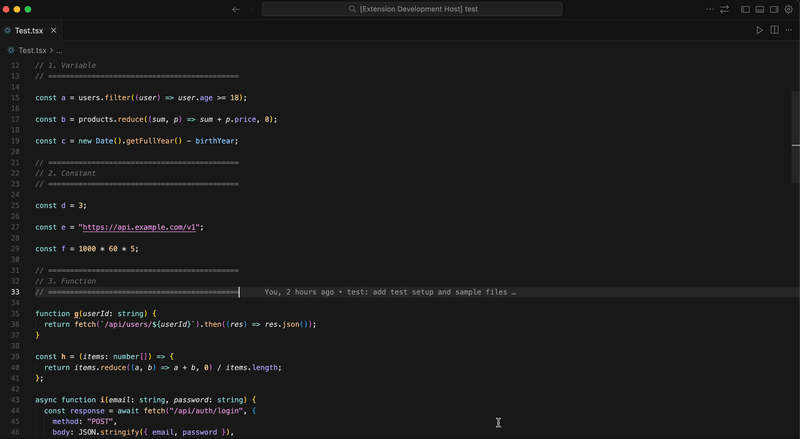
Works with variables, constants, functions, booleans, React components, useState hooks, and event handlers.


Quick Start

1. Install

From VS Code Marketplace:

  1. Open VS Code
  2. Cmd+Shift+X (Extensions)
  3. Search "Context Naming Consultant"
  4. Click Install

Or visit Marketplace page

2. Set Your API Key

Cmd+Shift+P → "Context Naming: Set API Key" → paste your key. Done!

3. Use It

  1. Select code you want to name
  2. Cmd+Shift+P → "Context Naming: Suggest Name"
  3. Choose target type (variable, function, etc.)
  4. Pick a name from suggestions

🌐 Language Settings

This extension supports English and Korean!

By default, it follows your VS Code language. Want to change it?

Cmd+, (Mac) / Ctrl+, (Windows) → search "Context Naming Language" → choose:

  • auto - Follow VS Code language (default)
  • en - English
  • ko - 한국어

Or add to settings.json:

{
  "contextNamingConsultant.language": "ko"
}

Examples

React useState

// Select this line:
const [a, setA] = useState(false);

// Choose "React State", pick "isModalOpen"
// Result:
const [isModalOpen, setIsModalOpen] = useState(false);

Variable

// Select this line:
const data = users.filter(u => u.age > 18);

// Choose "Variable", pick "adultUsers"
// Result:
const adultUsers = users.filter(u => u.age > 18);

API Key Setup

Choose one method. Listed from most to least recommended:

Method 1: Secure Storage (Recommended)

Cmd+Shift+P → "Context Naming: Set API Key" → enter your key

Why is this secure?

Your key is stored in your OS credential manager:

  • macOS: Keychain
  • Windows: Credential Manager
  • Linux: libsecret

The key is encrypted by your OS and never written to any file. No risk of git commits or other apps reading it.

Method 2: Environment Variable (Recommended)

Add to ~/.zshrc or ~/.bashrc:

# Choose based on your provider
export OPENAI_API_KEY="sk-..."
export ANTHROPIC_API_KEY="sk-ant-..."
export GOOGLE_API_KEY="..."
export AZURE_OPENAI_API_KEY="..."

Restart VS Code after adding.

Method 3: Settings (Not Recommended)

Cmd+, → search "Context Naming" → enter in Api Key field

Warning: Key is stored as plain text in settings.json. Could be:

  • Committed to git by accident
  • Read by other programs
  • Synced to cloud

Only use this if other methods don't work for you.

Priority Order

Keys are checked in this order:

  1. Environment variable (highest)
  2. Secret Storage
  3. Settings

AI Providers

Default is OpenAI. To change: Cmd+, → search "Context Naming" → select Provider

Provider Models
OpenAI gpt-4o, gpt-4o-mini, gpt-4-turbo, gpt-4, gpt-3.5-turbo
Claude claude-sonnet-4, claude-3-5-sonnet, claude-3-5-haiku, claude-3-opus
Gemini gemini-2.0-flash, gemini-1.5-pro, gemini-1.5-flash
Azure OpenAI Your deployed models

Supported Naming Types

Type Convention Example
Variable camelCase userData, itemCount
Constant UPPER_SNAKE_CASE MAX_RETRY_COUNT, API_BASE_URL
Function camelCase fetchUserData, calculateTotal
Boolean camelCase isLoading, hasPermission
Component PascalCase UserProfile, NavigationBar
React State camelCase [count, setCount]
Event Handler camelCase handleClick, onSubmit

Team Naming Rules (Optional)

Want consistent naming across your team? Add rule files to your project root.

.naming.json - Auto Filter Rules

AI suggestions that don't match are filtered out:

{
  "booleanPrefixes": ["is", "has", "can", "should"],
  "handlerPrefixes": ["handle", "on"],
  "disallowWords": ["data", "info", "tmp", "temp", "foo", "bar"],
  "allowAbbreviations": ["id", "url", "api", "ui", "db"],
  "preferredCase": "camelCase",
  "maxLength": 30
}

.naming.md - Natural Language Guidelines

Write rules in plain language. AI will follow them:

# Naming Rules

## Variables
- Use meaningful names
- No single-letter names except loop indices

## Booleans
- Use is/has/can/should prefix
- Example: isLoading, hasPermission

## Event Handlers
- Use handle or on prefix
- Example: handleClick, onSubmit

File search order: NAMING_RULES.md → .naming.md → docs/NAMING_RULES.md


All Settings

Setting Default Description
language auto UI language (auto, en, ko)
provider openai AI provider
apiKey - API key (not recommended)
openaiModel gpt-4o OpenAI model
claudeModel claude-sonnet-4-20250514 Claude model
geminiModel gemini-2.0-flash Gemini model
customModel - Override model name
contextLines 10 Context lines before/after selection
azureEndpoint - Azure endpoint URL
azureDeploymentName - Azure deployment name
azureApiVersion 2024-02-01 Azure API version

Commands

Command Description
Context Naming: Suggest Name Get AI name suggestions
Context Naming: Set API Key Store key securely
Context Naming: Clear API Key Remove stored key

Troubleshooting

"API Key is not set" → See API Key Setup

"Could not find declaration, copied to clipboard" → Select code on a line with const, let, var, function, or useState

"AI call failed" → Check your API key and provider settings


Development

For contributors who want to build from source:

git clone https://github.com/2njeong/naming-consultant.git
cd context-naming-consultant
npm install          # Install dependencies
npm run compile      # Build once
npm run watch        # Auto-rebuild on changes
npm run package      # Production build (.vsix)
npm run lint         # Lint code

Press F5 in VS Code to launch Extension Development Host for testing.


Contributing

Bug reports, feature requests, and PRs are welcome!

  1. Fork the repo
  2. Create feature branch (git checkout -b feature/amazing)
  3. Commit changes (git commit -m 'Add amazing feature')
  4. Push (git push origin feature/amazing)
  5. Open a Pull Request

License

MIT

  • Contact us
  • Jobs
  • Privacy
  • Manage cookies
  • Terms of use
  • Trademarks
© 2026 Microsoft