Visual REST Client
A graphical REST client for .rest and .http files inside VS Code. It reads and writes the same text format used by Huachao Mao's REST Client extension, while giving you a visual editor for requests, variables, responses, and collections.

Features
- Visual editor for
.rest and .http files.
- Sidebar with request search, method filters, collections, drag and drop ordering, duplicate, and delete actions.
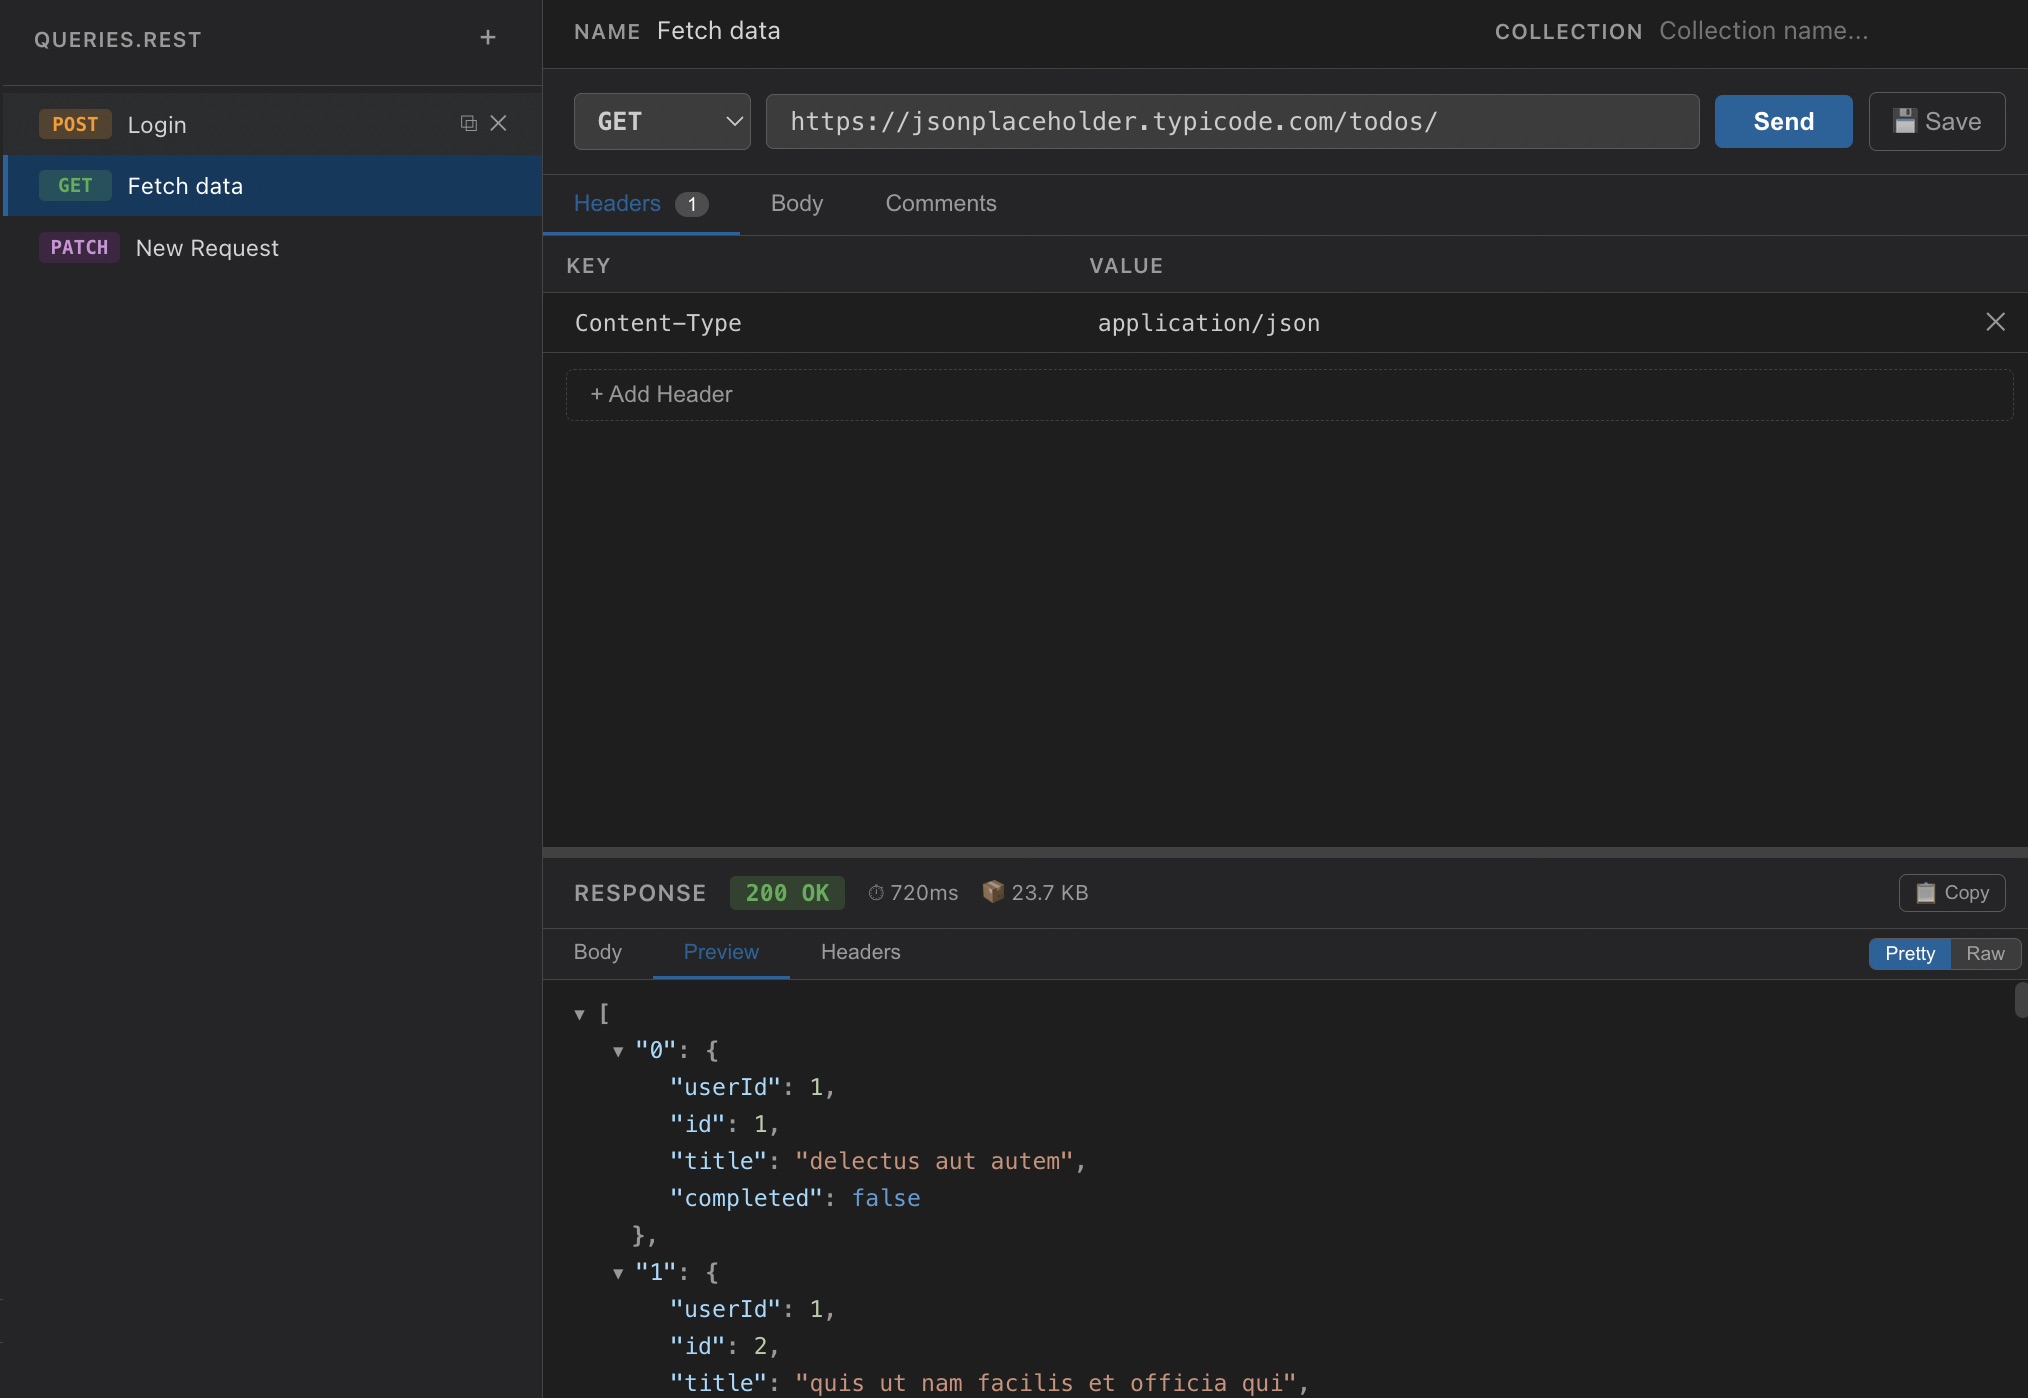
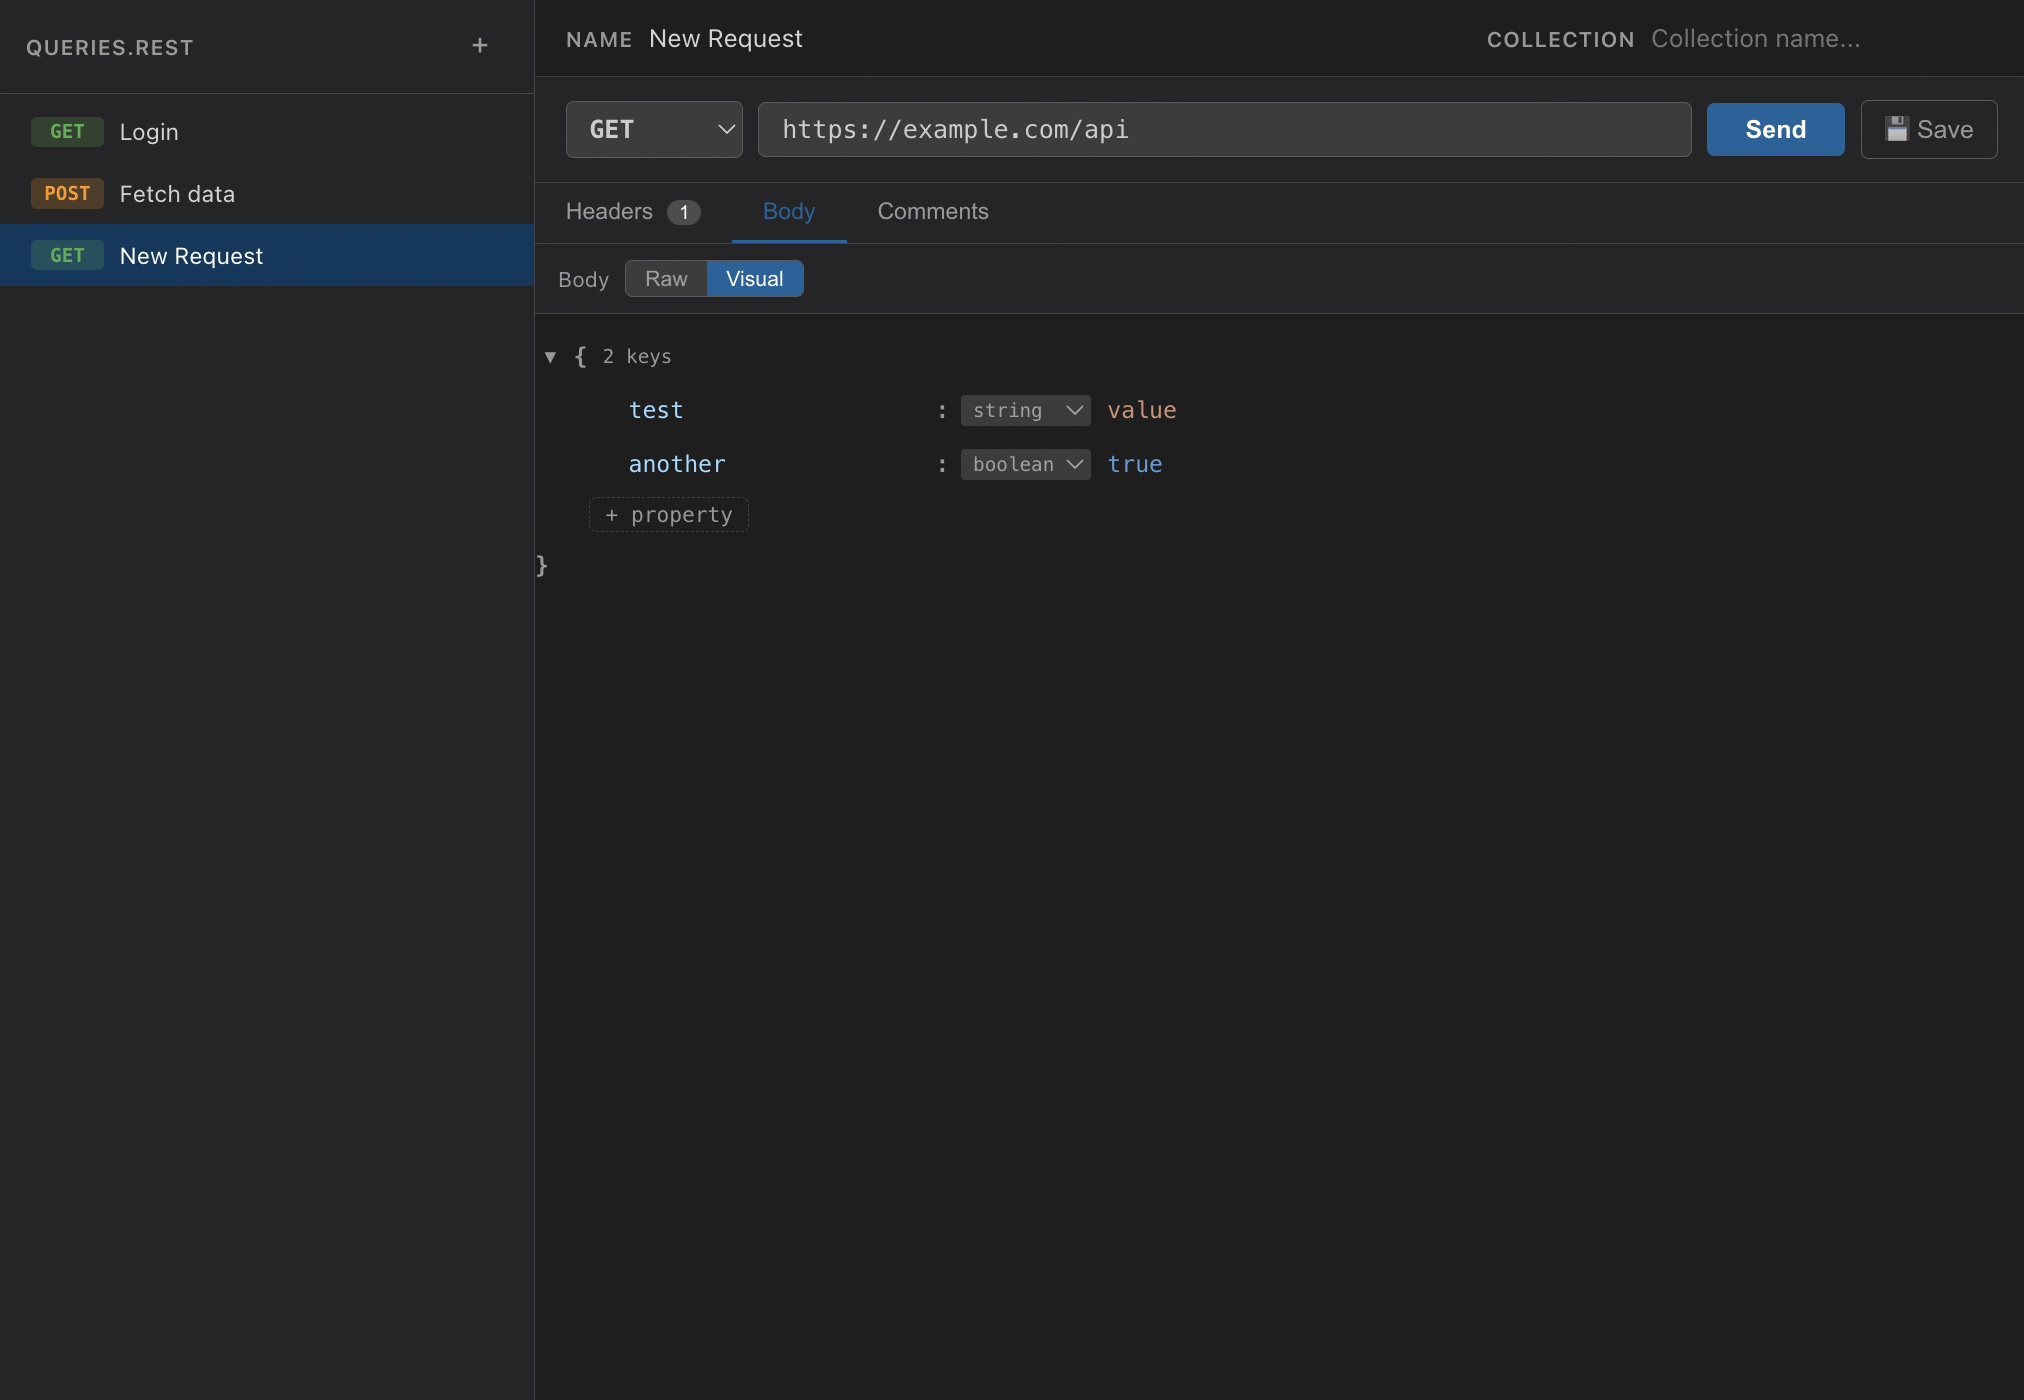
- Request editor with method selector, URL field, headers table, body editor, comments, and JSON visual editing.
- Built-in HTTP sender with response status, timing, size, body, JSON preview, headers, and response history.
- Sent request preview showing the resolved method, URL, headers, and body that were actually sent.
@name = value file variables and {{name}} interpolation in URLs, headers, and bodies.- Named environments for local variable overrides stored in VS Code extension storage.
- Runtime extraction rules for request chaining from JSON paths, response headers, status, or raw body.
- Save response body to a file.
- Copy response body.
- Copy cURL command from the resolved sent request.
- Keyboard shortcuts:
Ctrl+Enter to send the current request, Ctrl+N to create a new request.
- Postman Collection v2.0/v2.1 import.
- Compatible with Huachao Mao's REST Client
.rest / .http file format.
- VS Code Codicons and VS Code font/theme integration.
Opening The Editor
Open a .rest or .http file, then use one of:
| Method |
Action |
| Editor title bar |
Click Open Visual REST Client |
| Explorer context menu |
Right-click the file, then choose Open Visual REST Client |
| Command Palette |
Run Open Visual REST Client |
@host = https://api.example.com

### Login
POST {{host}}/login
Content-Type: application/json

{
  "email": "me@example.com",
  "password": "secret"
}

### Current user
GET {{host}}/me
Authorization: Bearer {{token}}
### starts a request.- Text after
### becomes the request name.
- Headers follow the
METHOD URL line.
- An empty line separates headers from the body.
- File-level variables use
@name = value.
- Variables are referenced as
{{name}}.
Variables
Variables can be used in request URLs, headers, and bodies:
GET {{host}}/users/{{user_id}}
Authorization: Bearer {{token}}
X-Tenant: {{tenant_id}}
Resolution order:
file variables < environment variables < runtime variables
That means runtime variables override environment variables, and environment variables override file variables with the same name.
File Variables
File variables are stored in the .rest or .http file and are shared with the file.
@host = https://dev.example.com
@tenant_id = demo
Use them for portable defaults that should travel with the repo.
Environment Variables
Environment variables are named local overrides stored in VS Code extension storage, not in the request file.
Example:
dev:
host = https://dev.example.com
token = dev-token

prod:
host = https://api.example.com
token = prod-token
Use the Variables panel to create an environment, select it, and add variables. When you send a request, the selected environment overrides matching file variables.
Runtime Variables
Runtime variables are created from responses while the editor is open. Add extraction rules in the Variables panel under Runtime Extractions.
Examples:
token = $.access_token
user_id = $.user.id
first_item = $.items[0].id
request_id = header.x-request-id
status_code = status
raw_body = body
After a request with extraction rules is sent, later requests can use those values:
GET {{host}}/me
Authorization: Bearer {{token}}
Runtime variables are shown read-only in the Variables panel.
Sending Requests
Click Send or press Ctrl+Enter.
The response panel includes:
- Body: formatted response body, with pretty/raw JSON toggle when available.
- Preview: JSON tree preview for JSON responses.
- Headers: response headers.
- Request: the resolved request that was actually sent.
- Response history selector for previous sends of the same request.
Use Copy, Save, or cURL from the response toolbar.
Organising Requests
- Search requests from the sidebar.
- Filter requests by method.
- Drag and drop requests to reorder them.
- Set a collection name to group requests.
- Drag requests onto a collection header to move them into that collection.
- Drop a request on empty sidebar space to remove its collection.
- Duplicate or delete requests from the sidebar row actions.
Postman Import
Import a Postman Collection JSON file from:
| Method |
Action |
| Sidebar toolbar |
Click the import button |
| Command Palette |
Run Visual REST Client: Import Postman Collection |
The importer preserves:
- request names, methods, URLs, headers, and bodies
- nested folders as collections
- collection variables as file variables
- request descriptions as comments
Compatibility
Visual REST Client is compatible with .rest and .http files used by amazing Huachao Mao's REST Client extension. You can switch between the text editor and visual editor at any time.
Changelog
0.1.6 - 2026-06-15
Added
- Added REST Client-style file variables with
@name = value declarations.
- Added
{{variable}} interpolation for request URLs, headers, and bodies.
- Added named environments for local variable overrides stored in VS Code extension storage.
- Added runtime extraction rules in the Variables panel, allowing response values to be saved as runtime variables without editing raw text.
- Added response-derived runtime variables for request chaining, including JSON paths, headers, response status, and raw body extraction.
- Added a Variables panel with usage instructions, precedence rules, and examples for file, environment, and runtime variables.
- Added sidebar search and method filtering.
- Added response history per request, including fixed-format timestamps.
- Added response export to file.
- Added cURL copy support using the resolved request when available.
- Added a Request tab in the response panel showing the resolved request that was sent.
- Added keyboard shortcuts for sending the current request and creating a new request.
- Added VS Code Codicon assets and replaced non-standard emoji/symbol controls with standard VS Code icons.
Changed
- Request sending now resolves variables before execution while preserving placeholders in the source file.
- Postman collection variables are imported as real REST variables instead of plain comments.
- Environment creation and deletion now use VS Code-native input and confirmation dialogs.
- The webview follows VS Code font settings more closely, including configured UI and editor font settings.
- Saved-query rows reserve action-button space to avoid layout shifting on hover.
- Build scripts now match the current monolithic webview implementation instead of referencing missing
src/webview build output.
Fixed
- Fixed environment add behavior in the webview by moving creation to the extension host.
- Fixed request-history timestamp formatting.
- Fixed generated webview script escaping for runtime extraction parsing.
Notes
- Variable resolution order is: file variables, then environment variables, then runtime variables.
- Runtime extraction examples:
token = $.access_tokenuser_id = $.user.idrequest_id = header.x-request-idstatus_code = statusraw_body = body
License
MIT