Skip to content
| Marketplace
Sign in
Visual Studio Code>Other>OX SecurityNew to Visual Studio Code? Get it now.
OX Security

OX Security

ox.security

|
749 installs
| (3) | Free
Find and fix security issues in your code
Installation
Launch VS Code Quick Open (Ctrl+P), paste the following command, and press enter.
Copied to clipboard
More Info

OX IDE Extension

The OX IDE extension provides scanning code changes locally within Visual Studio Code (VS Code) and similar environments, such as Cursor, Windsurf, VSCodium. It integrates with the OX Security platform and is intended for developers.

This option is not a replacement for full repository scans, but a complementary tool for early-stage, local validation.

The repository you scan must exist in your organization and be known to OX.

Currently the following issue categories are supported: Open Source Security, Code Security, SBOM, IaC, Secret/PII.

The main goal is to let you scan code locally before pushing changes to a remote repository, as follows:
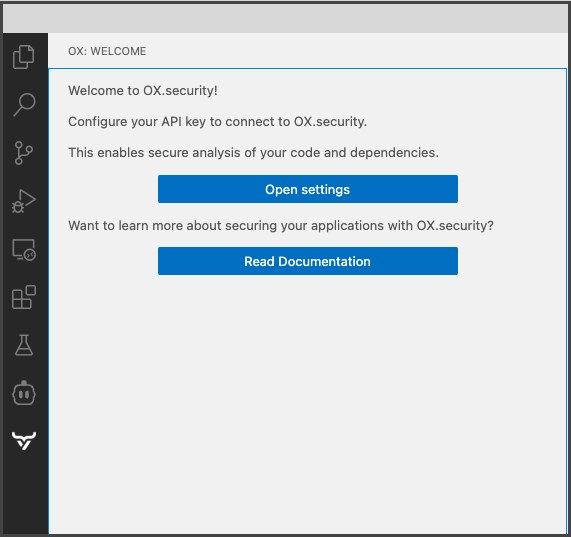
  • Detect vulnerabilities and secrets before they are exposed.
  • Prevent pushing malicious code to shared environments.
  • Fixing security issues early in the development process.

For more information about OX.security and its features, visit OX.security Documentation.

How it works

After you install the IDE Extension, it appears in the side toolbar with the OX icon, and starts monitoring changes to files in your workspace.

You can initiate a scan directly from the IDE, which compresses your local changes and sends them to the OX backend for analysis. Scan results, such as vulnerable dependencies and hard-coded secrets are displayed in a dedicated sidebar, with each issue linked to the exact line of code and accompanied by a recommended fix.

You can group these findings by severity or category, filtering the view to focus on critical issues or to see all results at once. Throughout the process, the UI keeps you informed of scan status and messages (for example, Scan is cancelled).

After a scan completes, the IDE extension displays the detected issues in the left sidebar of your development environment. To help you review and prioritize results more efficiently, the extension supports grouping and filtering options.

Requirements
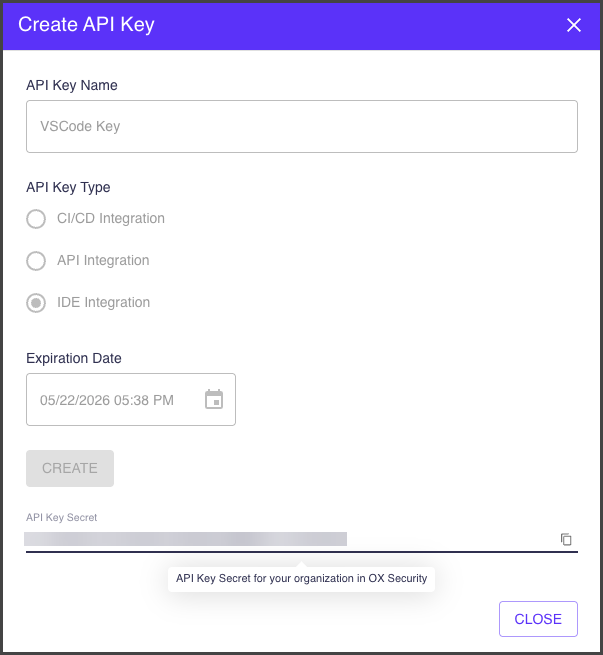
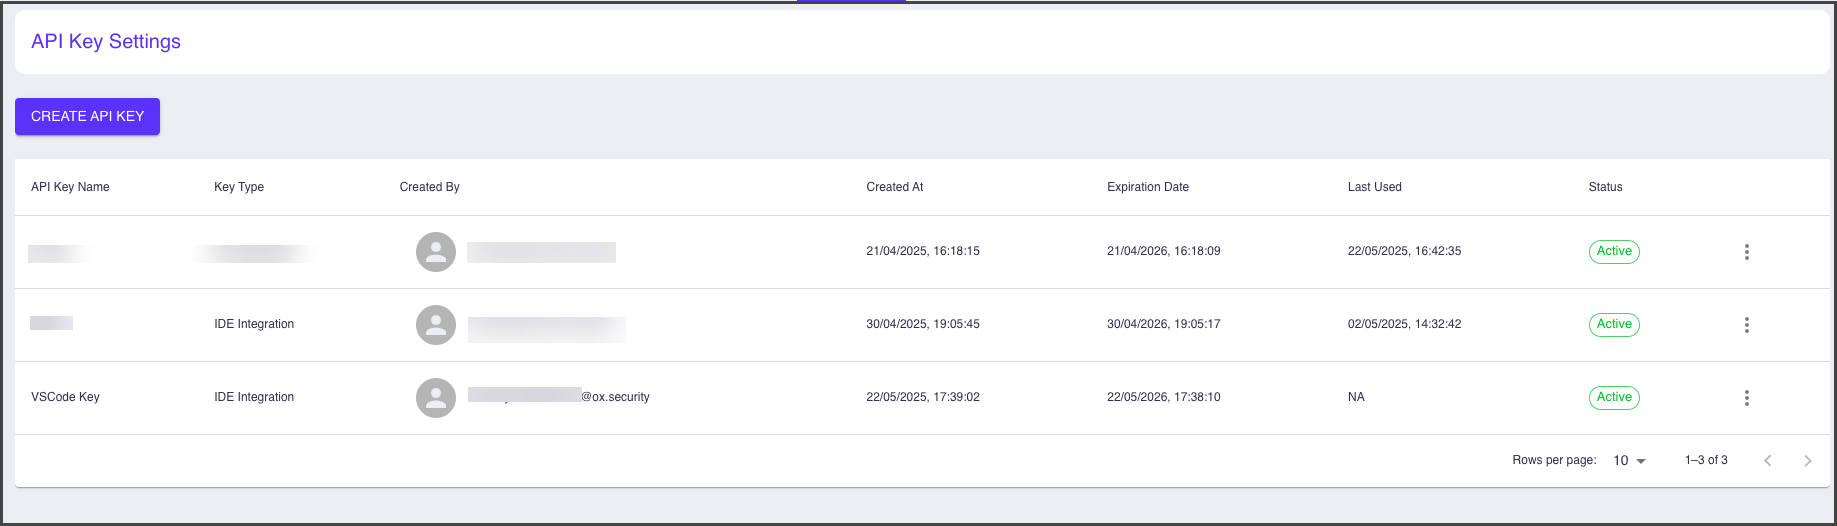
  • Visual Studio Code ^1.96.0
  • Git extension for VS Code
  • An OX.security account with API access

Generating IDE/CLI Integration key

Before you install the extension, you need to generate an API key.

To generate an API key:
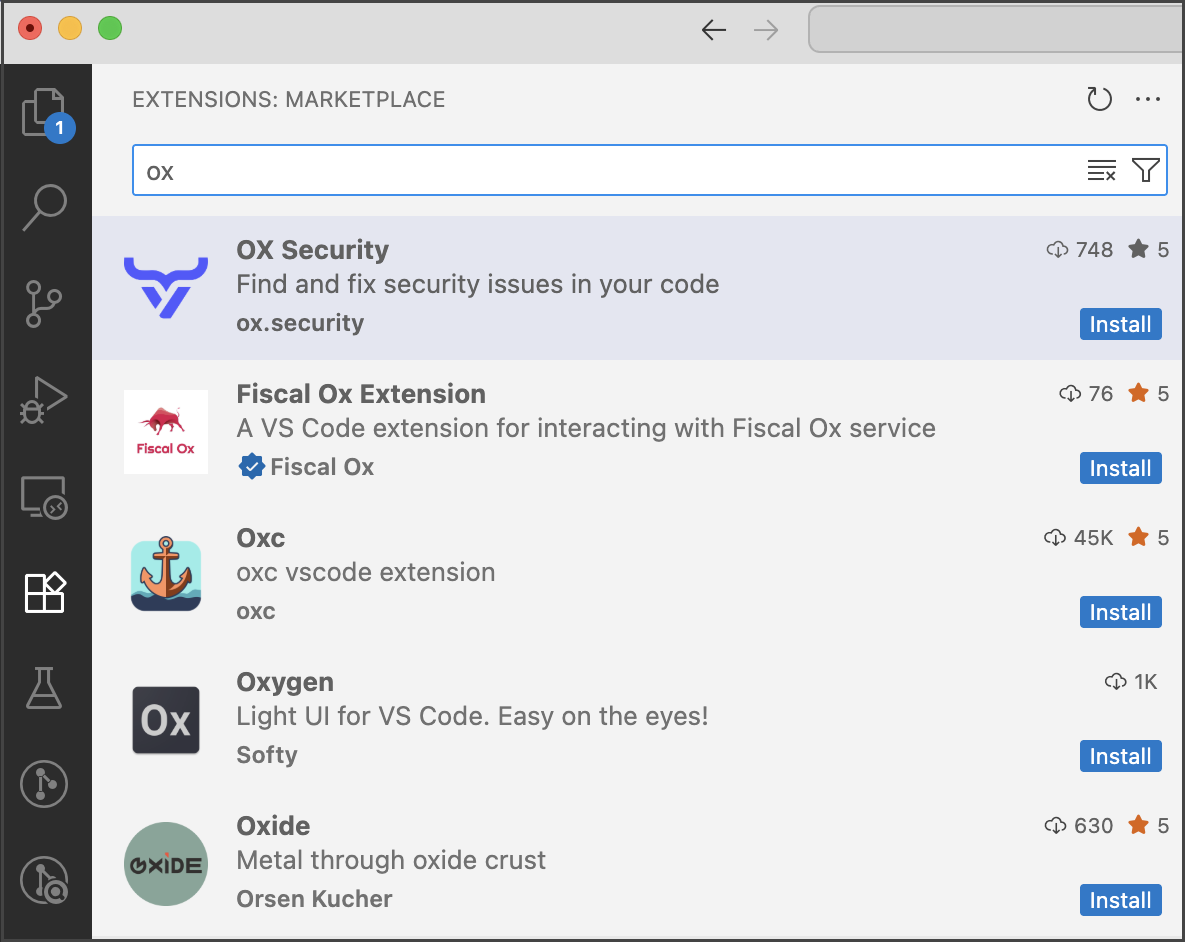
  1. From the left pane of OX Security platform, select Settings > API Key Settings.

  2. In the API Key Settings window, select CREATE API KEY.

  3. In the Create API Key dialog, set the following:

    API key settings

API Key Name Add a meaningful name that is easy to identify. It is good practice to include the key's intended purpose in the name.
API Key Type Select IDE Integration.
Expiration Date Until when you can use this key.
  1. Select CREATE. The key appears.

    API key settings with the key

  2. Copy and save the API Key Secret to be used when connecting to APIs. This is the only time when you can see and copy the key.

  3. Select CLOSE. The new key appears in the API Key Settings page.

    API key in the OX Settings page

Installing the OX IDE Extension

You can install the OX IDE Extension from your IDE marketplace. If your environment blocks marketplace access, for example, offline or restricted networks, use the following manual installation procedure.

To manually install the IDE extension and run a security scan:

  1. In the VS Code, go to Settings and click the three dots in the top left part of the screen.

    Extention install1

  2. From the drop-down menu, select Install from VSIX.... The file search dialog appears.

  3. Locate the installation file and select Install. The OX icon appears in the left bar and a wellcome page appears.

    Extention install2

  4. Alternatively, install the extension from the CLI:

    a. From the releases page, download the .vsix file.
    b. Run: code --install-extension ox-ide-0.0.1.vsix

  5. In the Welcome to OX Security page, select Open settings. The Settings tab opens on the right.

    Extention install3

  6. Add the API key that you generated in the OX Security platform. The message No issues detected yet appears on the left and the OX icon appears on the side bar.

    extention inslall4

The following commands are now available from the side bar:

Open Settings Opens the OX extension settings panel.
Report an Issue Opens a template to report bugs to the OX GitHub repository.
Upload Logs Sends logs to telemetry (Datadog).
Focus on Found Issues Highlights issues in the sidebar.

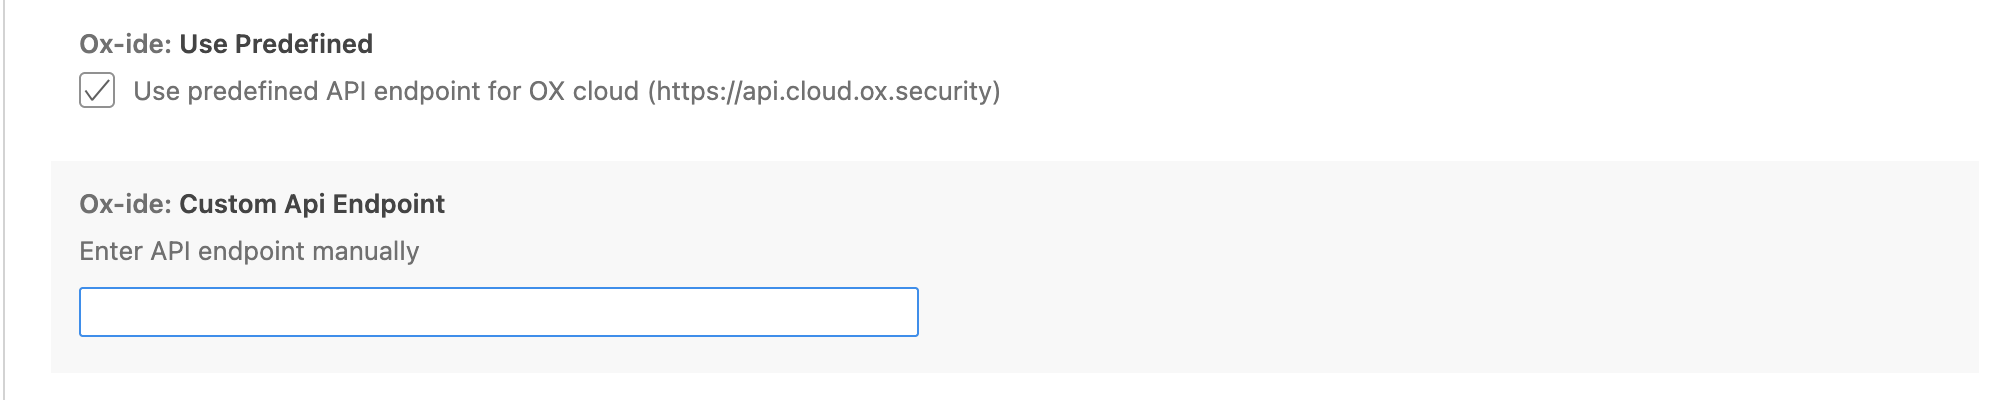
Setting API endpoints for OX cloud sevices

By default OX IDE extension operates on cloud using settings predefined by OX Security. In addition, you can manually switch to the custom API endpoint.

To define API endpoints:

  1. In the top part of the OX IDE extension, click the gear icon next to the scan button and select Settings.
  2. To work on-prem or other scenarios, clear Use predefined API endpoints for OX cloud, and then in the Custom API Endpoints text box, type your local deployment URL.

Settings Endpoints

Sending logs/events to datalog

To support compliance and regulatory opt-out requirements, OX IDE extention can send logs/events to datalog. This option is enabled by default and you can disable it.

To disable sending logs/events to datalog:

  1. In the top part of the OX IDE extention, click the gear icon next to the scan button and select Settings.

Disable Telemetry

  1. Clear the Enable telemetry for your VS Code extention checkbox.

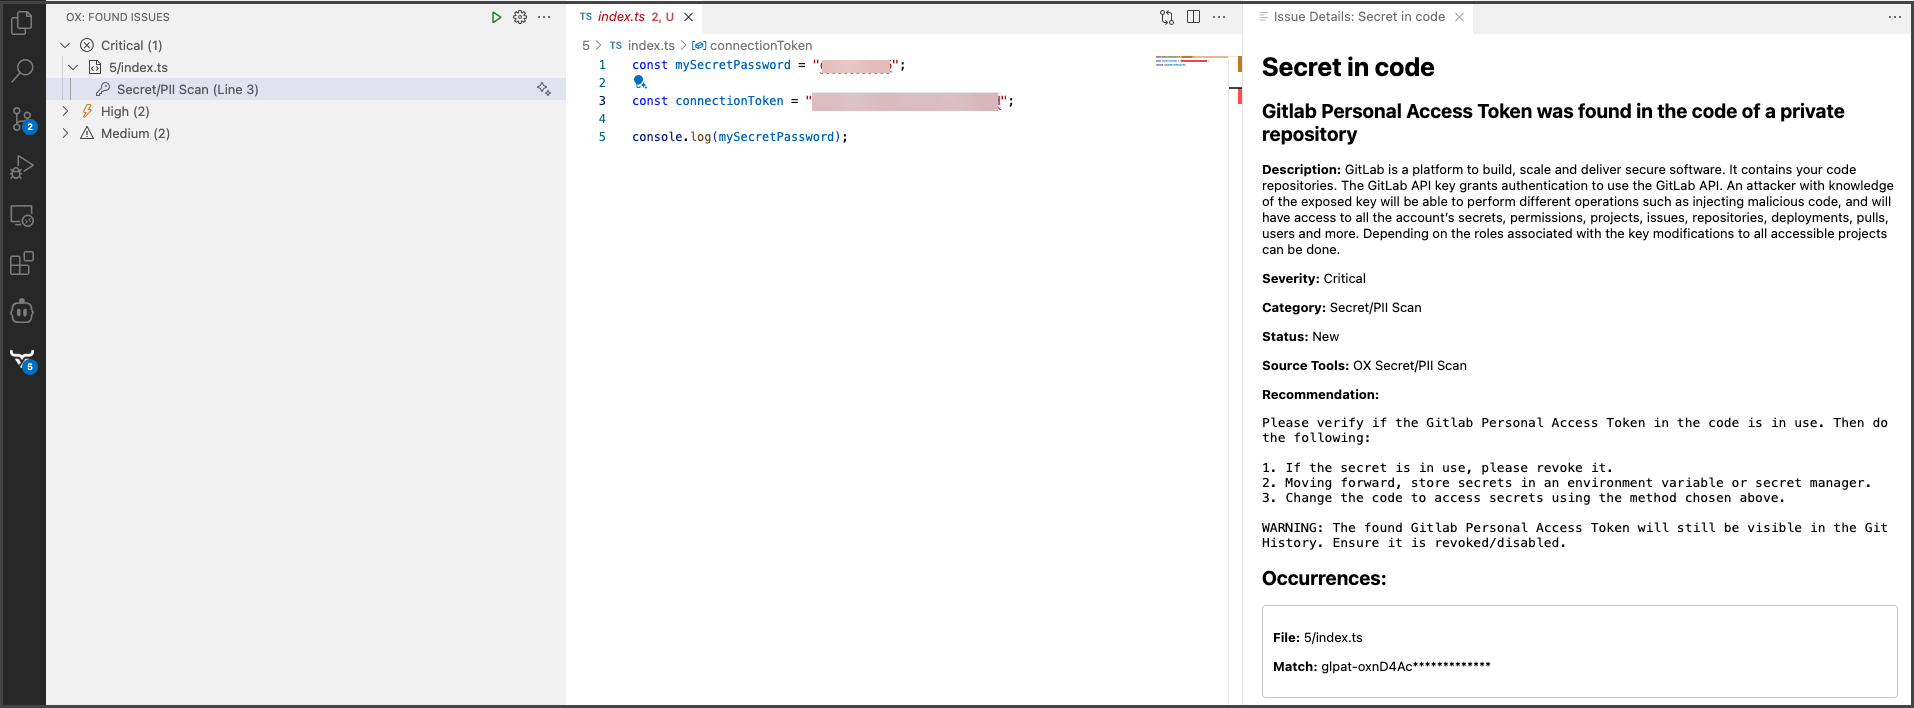
Running a scan and analyzing the results

After installing the OX IDE extension and setting it up, you can start running security scans.

When viewing scan results, you can select an issue to navigate directly to the relevant line in the code. This allows you to understand and resolve issues without leaving the OX IDE extension.

To run a scan:
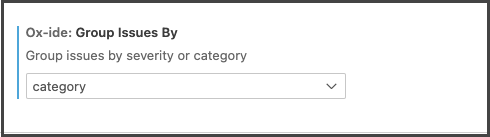
  • Click the triangle button on the top. The scan runs and then the results appear with the direct link to the specific location in the code that contains a security risk and remediation recommendations.

    Scan results

    Each issue in the list includes the following:

    • Severity label
    • Short description
    • Category
    • Status
    • Reference to the affected code line
    • Suggested fix

Grouping issues

You can organize issues into logical sets for better navigation, as follows:

  • By severity: Displays issues in the following order: Critical, High, Medium, and Low. Use this option to focus on the most urgent issues first. OR,
  • By category: Displays issues based on their type, such as Open Source Security, Code Security, SBOM, IaC, Secret/PII. Use this option to address similar types of issues across your codebase.

Each group is collapsible and expandable.

To group security issues:
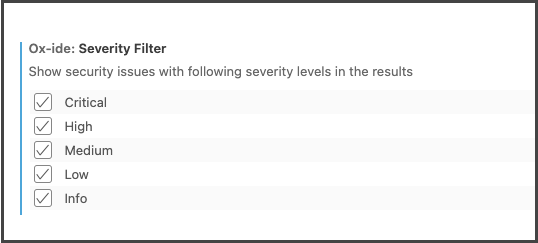
  • In the top part of the OX IDE extention, click the gear icon next to the scan button and select Settings.

Grouping

Filtering issues

You can use filtering to reduce visual noise and concentrate on the issues that matter most.

You can filter which issues to display, based on the severity levels. The Appoxalypse severity level issues are always presented by default and you cannot set the extention not to display them.

To filter security issues:

  • In the top part of the OX IDE extention, click the gear icon next to the scan button and select Settings.

Filtering

You’re now ready to start using the OX IDE VS Code extension.

  • Contact us
  • Jobs
  • Privacy
  • Manage cookies
  • Terms of use
  • Trademarks
© 2025 Microsoft