NightVision Visual Studio Code Extension

Leverage NightVision to document APIs, run DAST scans, and uncover vulnerabilities in both known and unknown endpoints!


Getting Started
In order to use this extension you must have a NightVision account. Additionally, it will be required to install the NightVision CLI, that can be done either through this extension or manually. It is available for all platforms: Windows, Linux and MacOS.
Main page
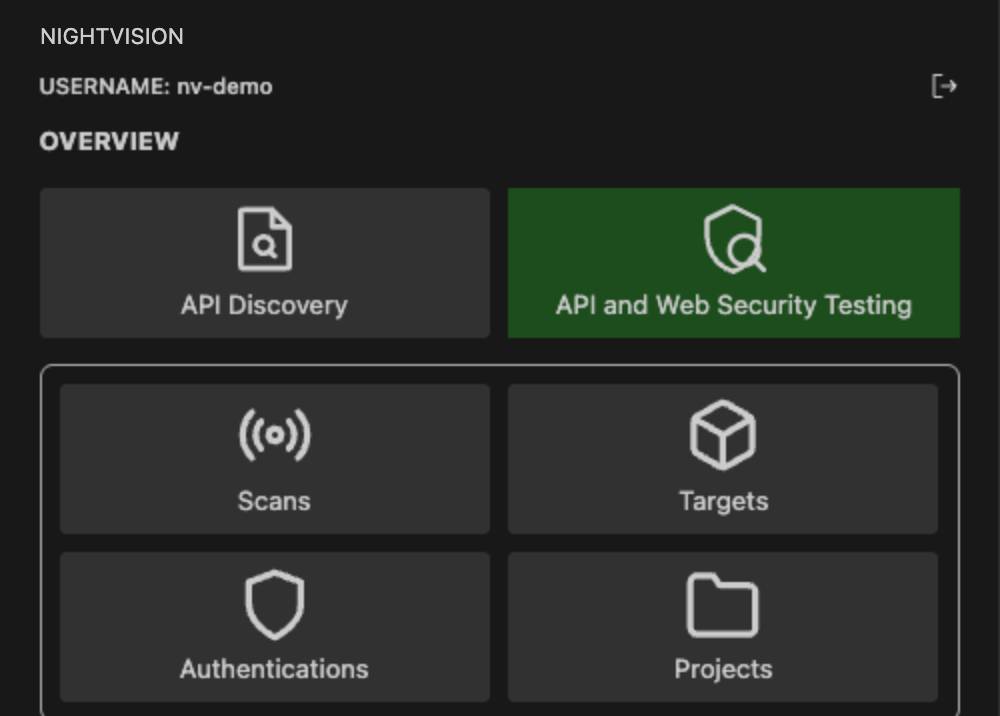
If you have installed the NightVision CLI and logged in, you'll arrive at the main page, where you'll be presented with these options:
- API Discovery
- API and Web Security Testing
API Discovery
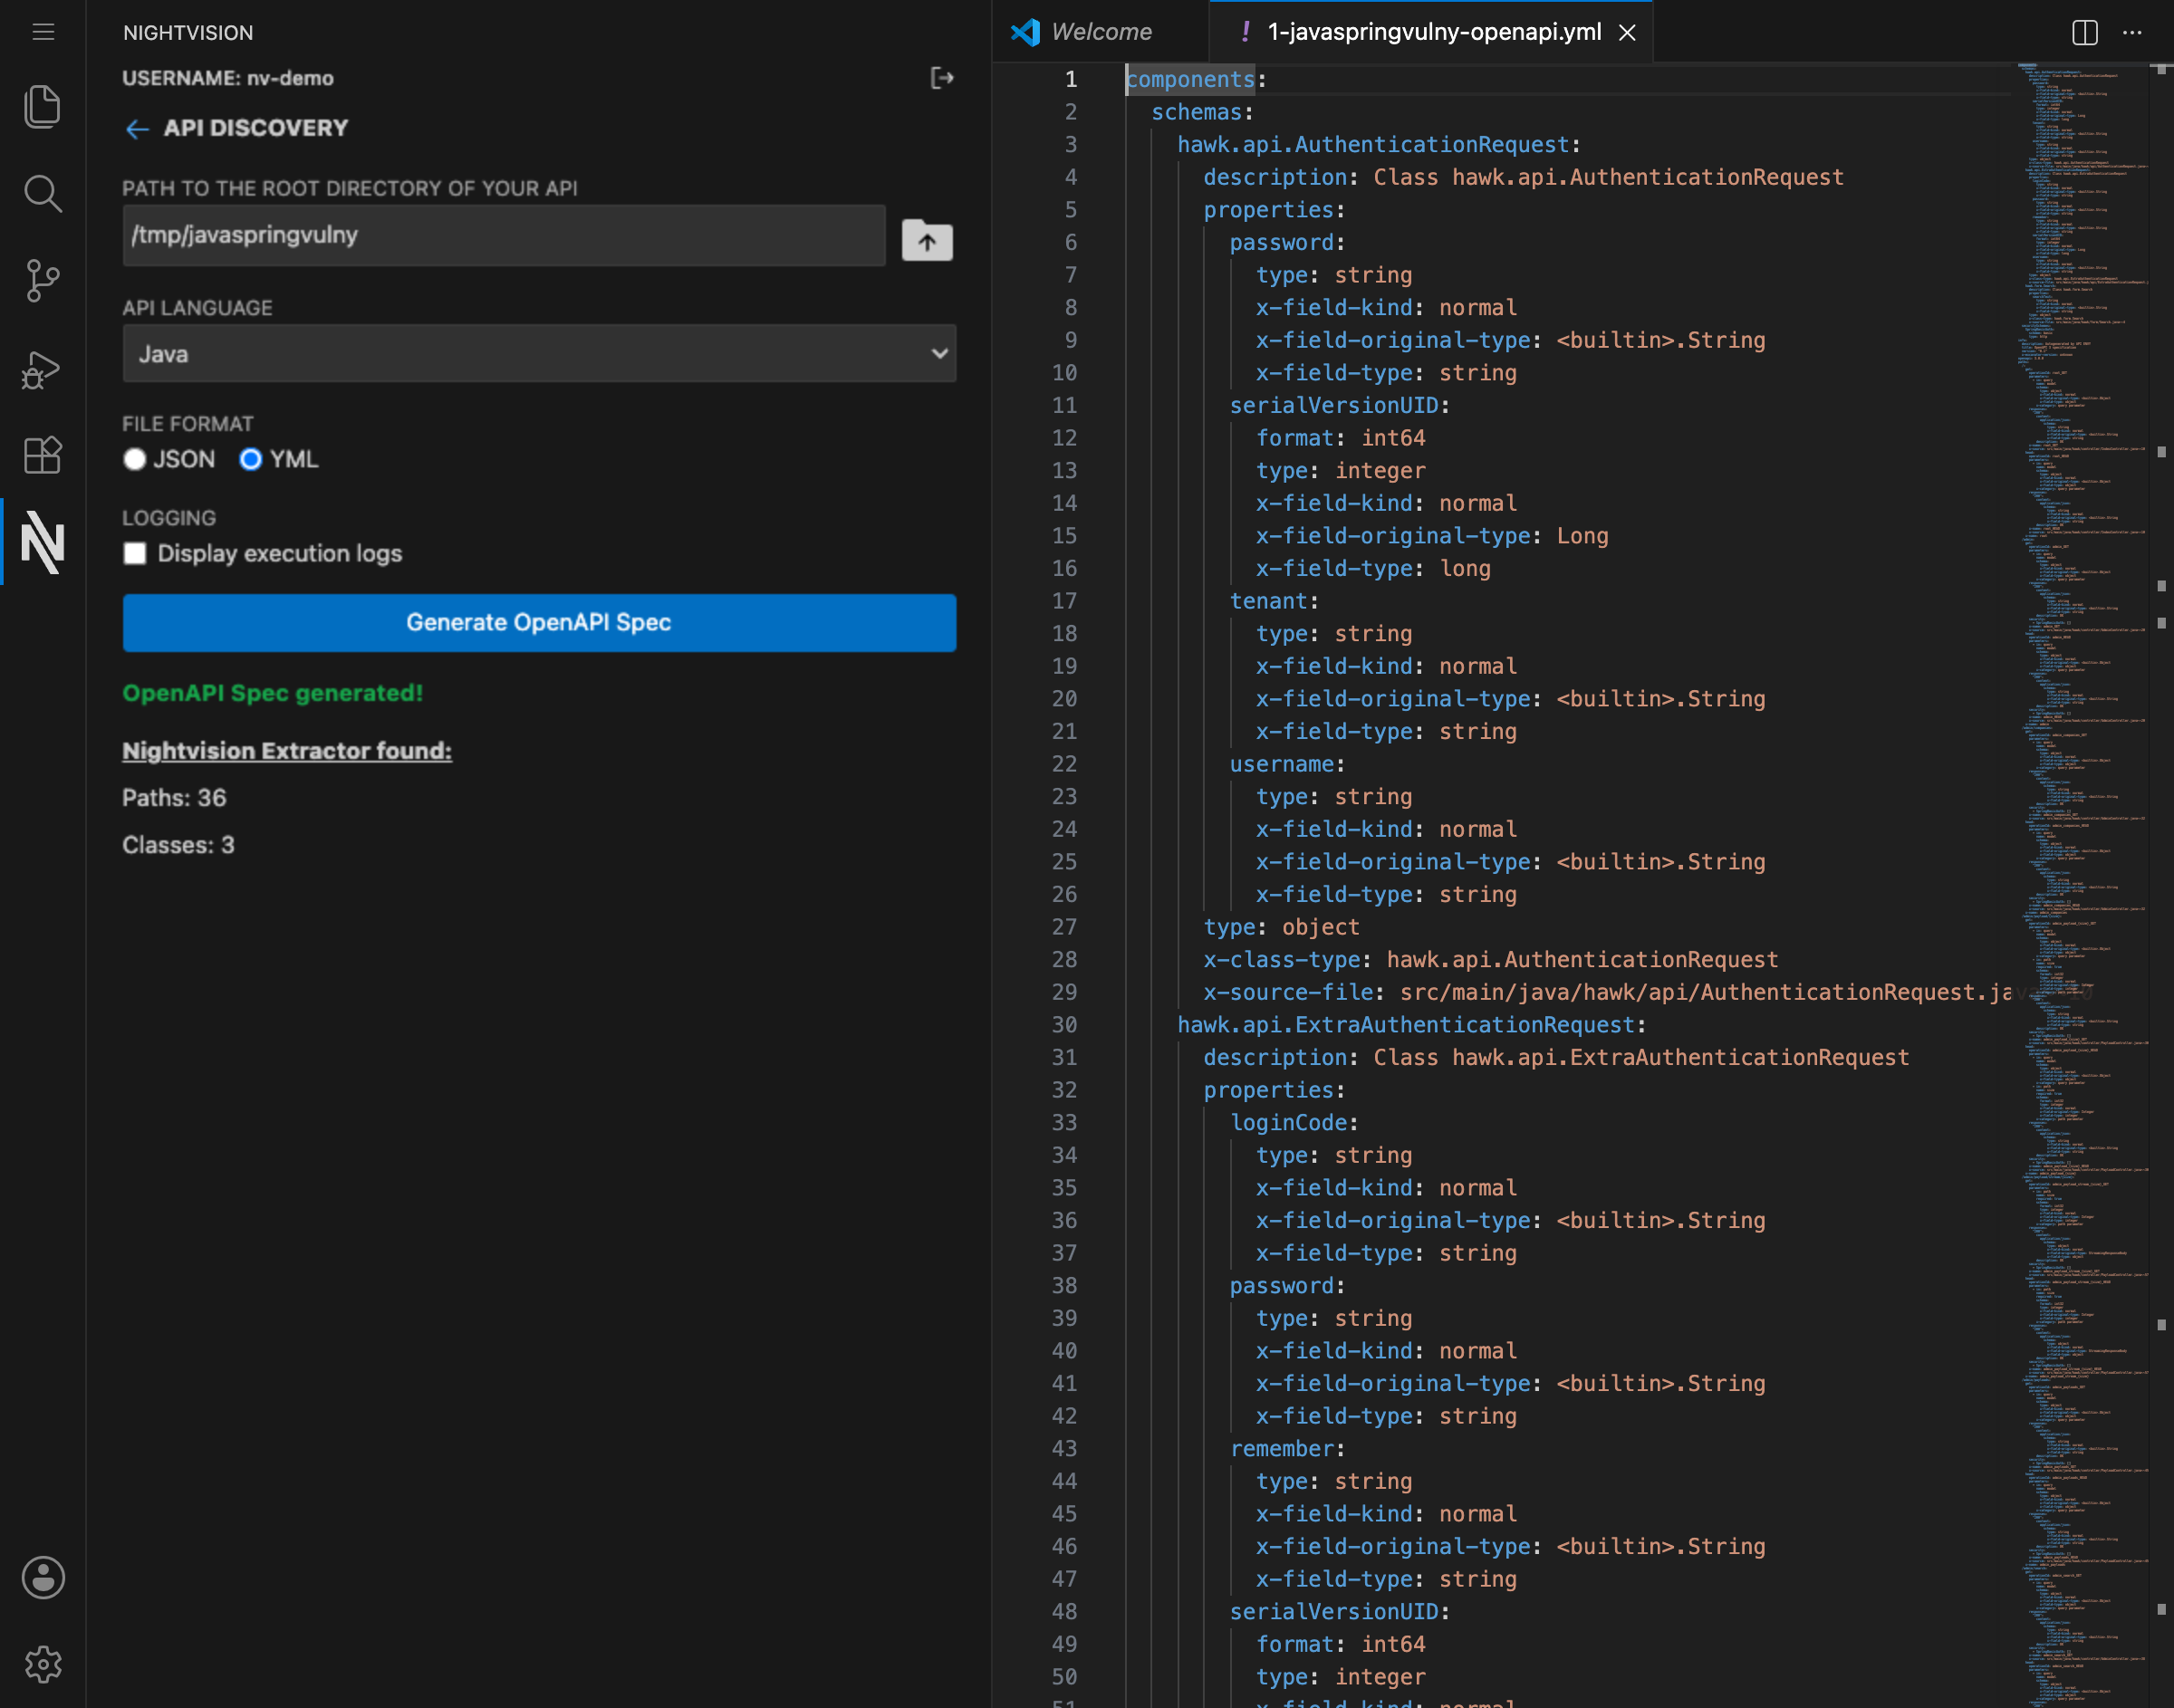
The API Discovery helps you document and discover hidden endpoints in your APIs for a set of different languages such as C# (.net), Go, Java, JavaScript/TypeScript, PHP, Python and Ruby.
The process is straightforward:
- Provide the filepath to the root directory of your project to be scanned (it defaults to the workspace you have open);
- Choose the language in which your API is written, or keep All languages to discover endpoints across every supported language;
- Choose the output file format (YAML or JSON);
- Press Generate OpenAPI Spec to generate the OpenAPI specification for your project.
If successful, a new window in your VSCode will open with your API information and you can save it at your convenience.
As an example, we can use the javaspringvulny repository:
- Clone the repo:
git clone https://github.com/vulnerable-apps/javaspringvulny.git
- Copy the filepath or select the parent folder;
- Select Java as the API language.
When generating the OpenAPI specification, you should see something similar to the image below:
API and Web Security Testing
Here you'll be able to configure and run DAST scans, discovering vulnerabilities in your system.
In order to execute a DAST scan, we must first have in place a project and a target. If you have authentication in your system, you may have to configure an authentication method as well.
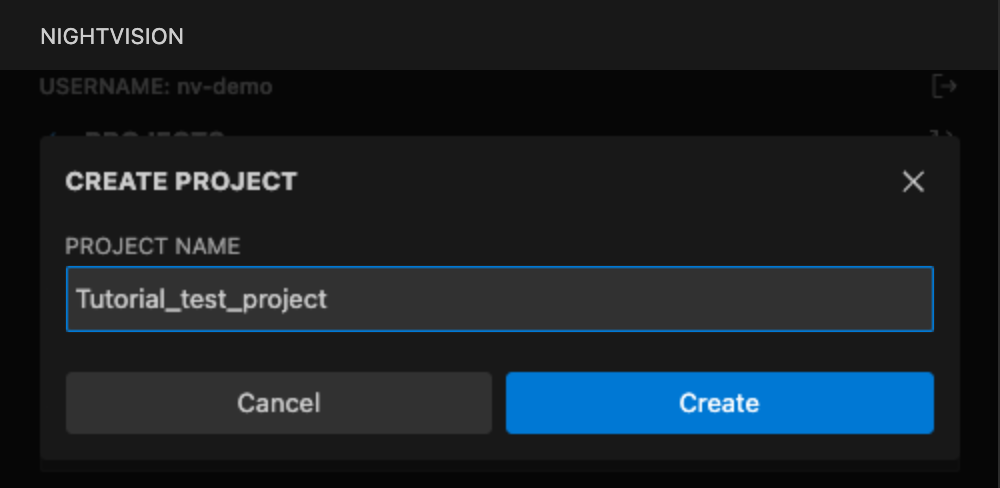
Configuring a project
Click on Create Project:
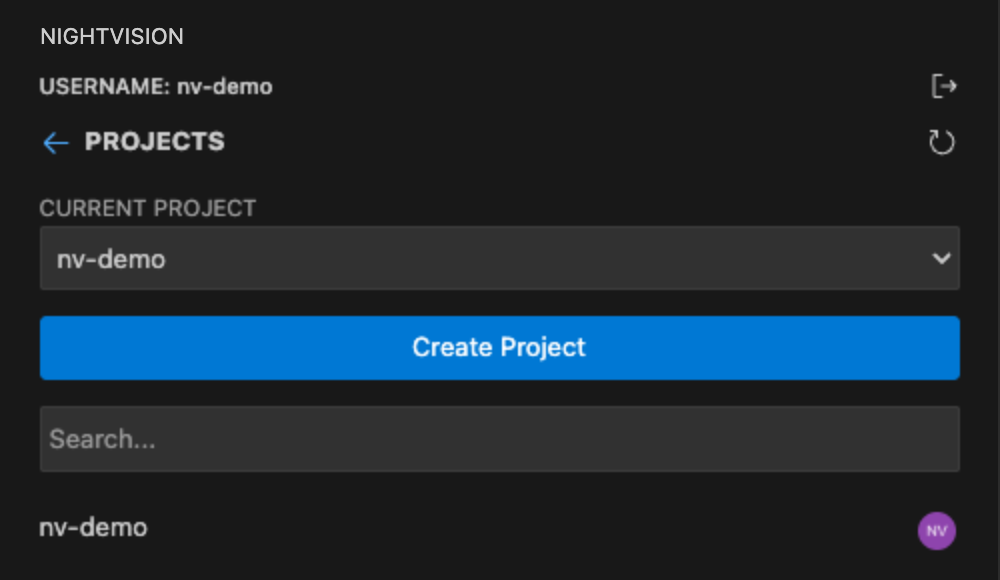
Type your project name, e.g. Tutorial_test_project
Select the project.
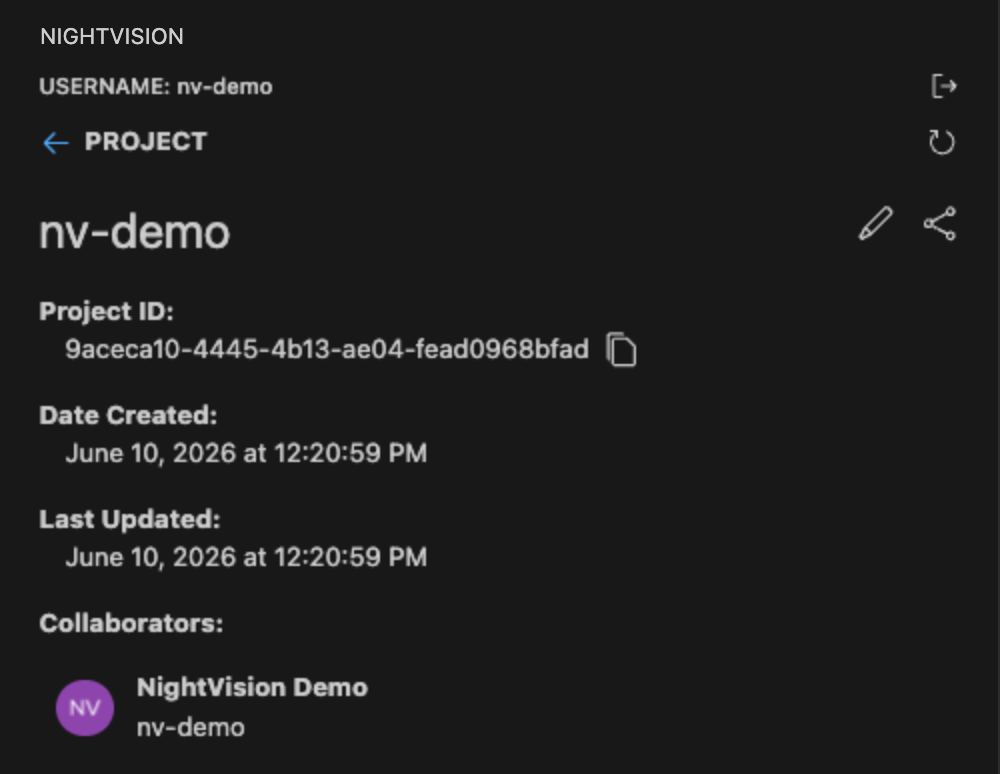
(Optional) Select your project from the list to see its information and see options to edit, delete or share your project with other users:
Configuring a target
Let's use the javaspringvulny repository for this example. The application can be started through Docker: docker-compose up -d; sleep 10. The screenshots below use NightVision's hosted instance of the same app at https://javaspringvulny.nvtest.io:9000/; when following along locally, use https://localhost:9000 instead.
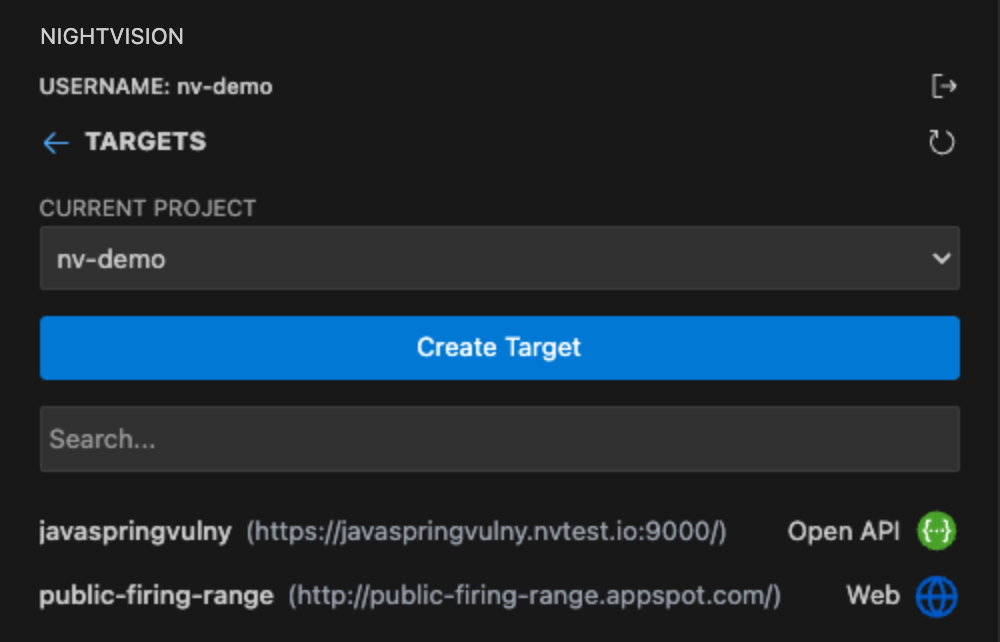
Now, let's create our target.
Click on Create Target:
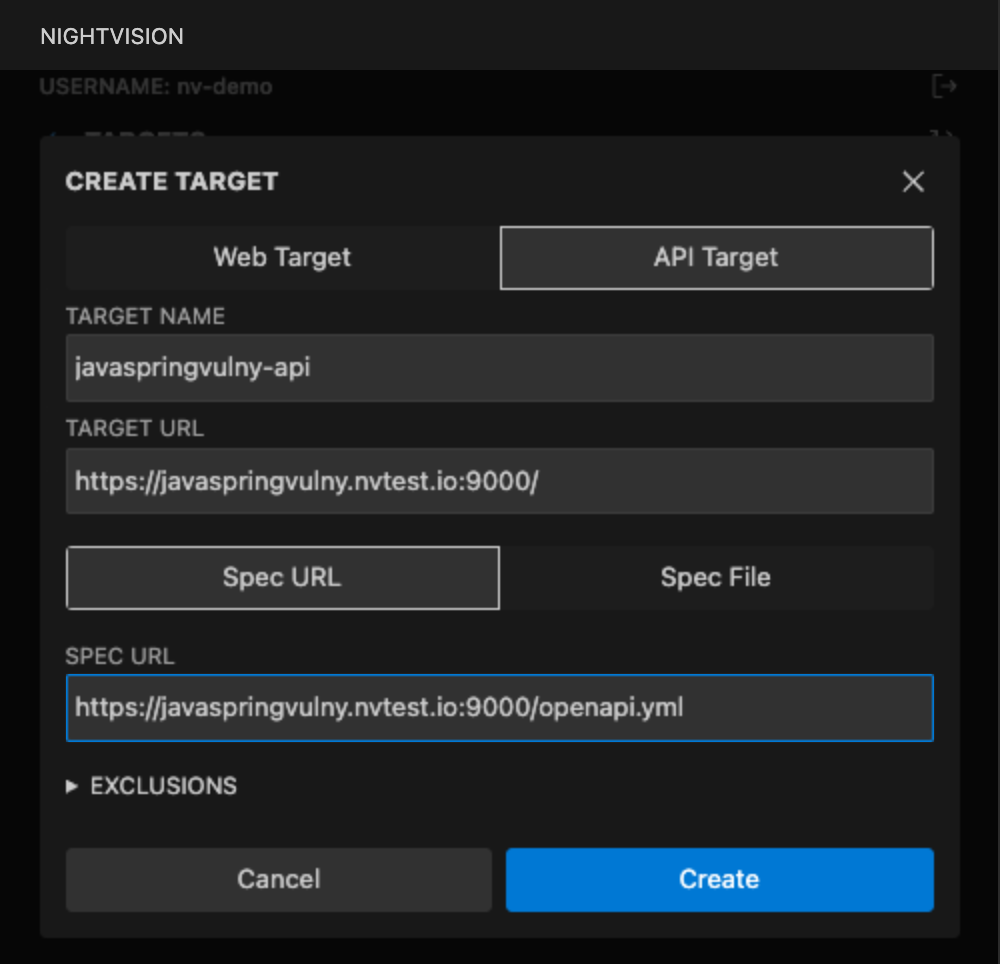
Choose the target type: a Web Target needs just a name and the URL of the website to scan, while an API Target also takes an API specification, provided either as a Spec URL or a Spec File (a Swagger/OpenAPI file or Postman Collection, such as the one produced in the API Discovery section). Select API Target, fill in the data and press the Create button:
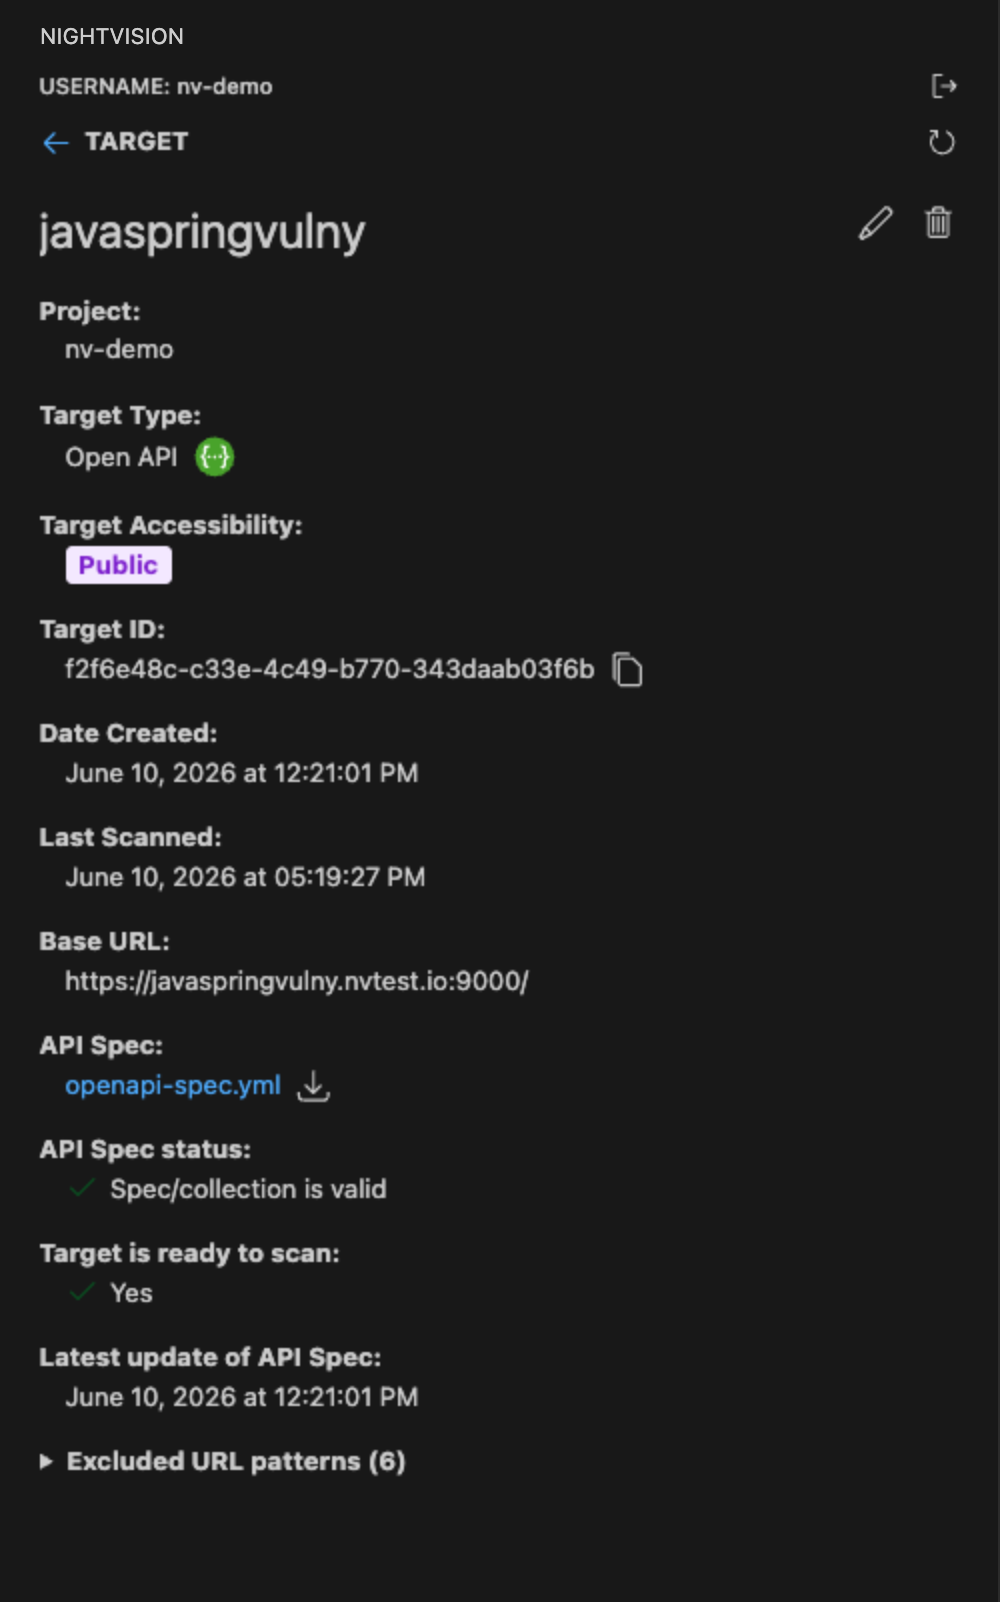
Once created, you may see it in the list of targets. You can click on a target to see its details.
You can see the target details. By default, if no excluded URL patterns are provided, some default ones are applied:
Configuring an authentication
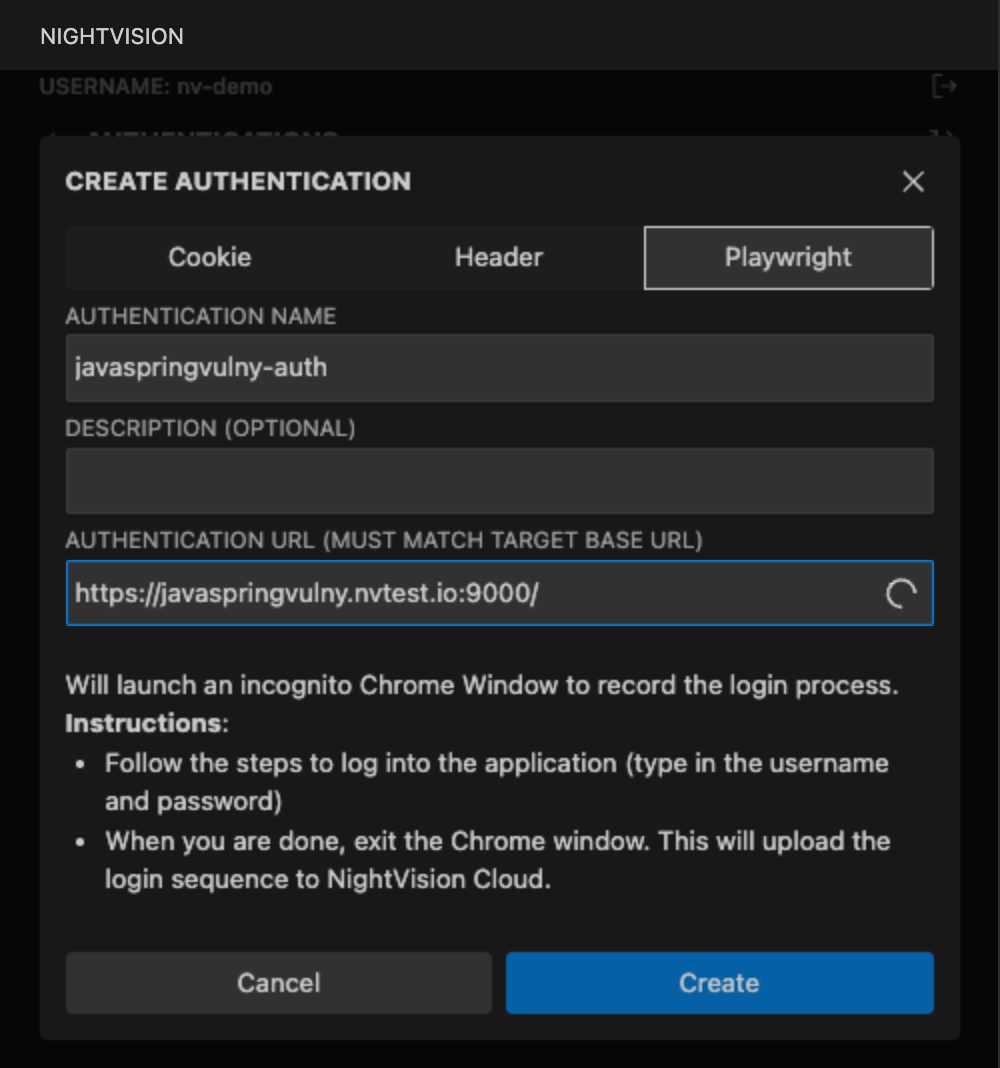
If your website or API is protected by an authentication, we can configure it so the security scan is able to access and reveal issues behind protected endpoints. Three authentication types are available: Cookie, Header and Playwright (recorded by performing the login in a browser). This example uses Playwright.
Click on Create Authentication.
Select Playwright authentication and fill in the information as shown below. Make sure your app is running in the provided URL and press Create:
The browser and Playwright Inspector will show up. In the browser we perform actions, and Playwright will take notes of them to record our authentication. In the main page that shows up, let's click in Form Auth.
Provide the user user and the password password, and then click Submit.
After submitting, you'll see our authentication has been recorded.
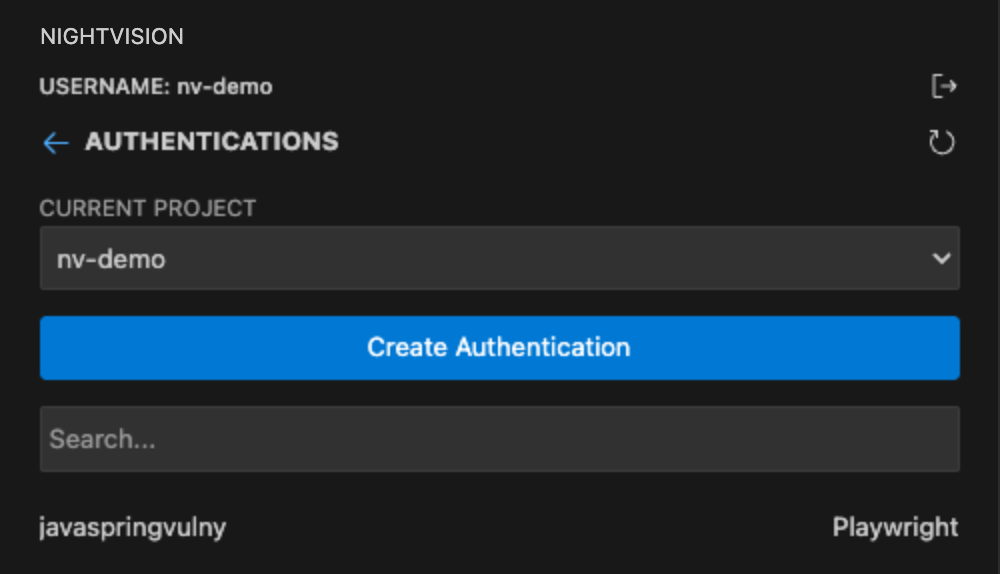
Close the browser where the application is running to save the recordings. You should be able to see your new authentication being listed:
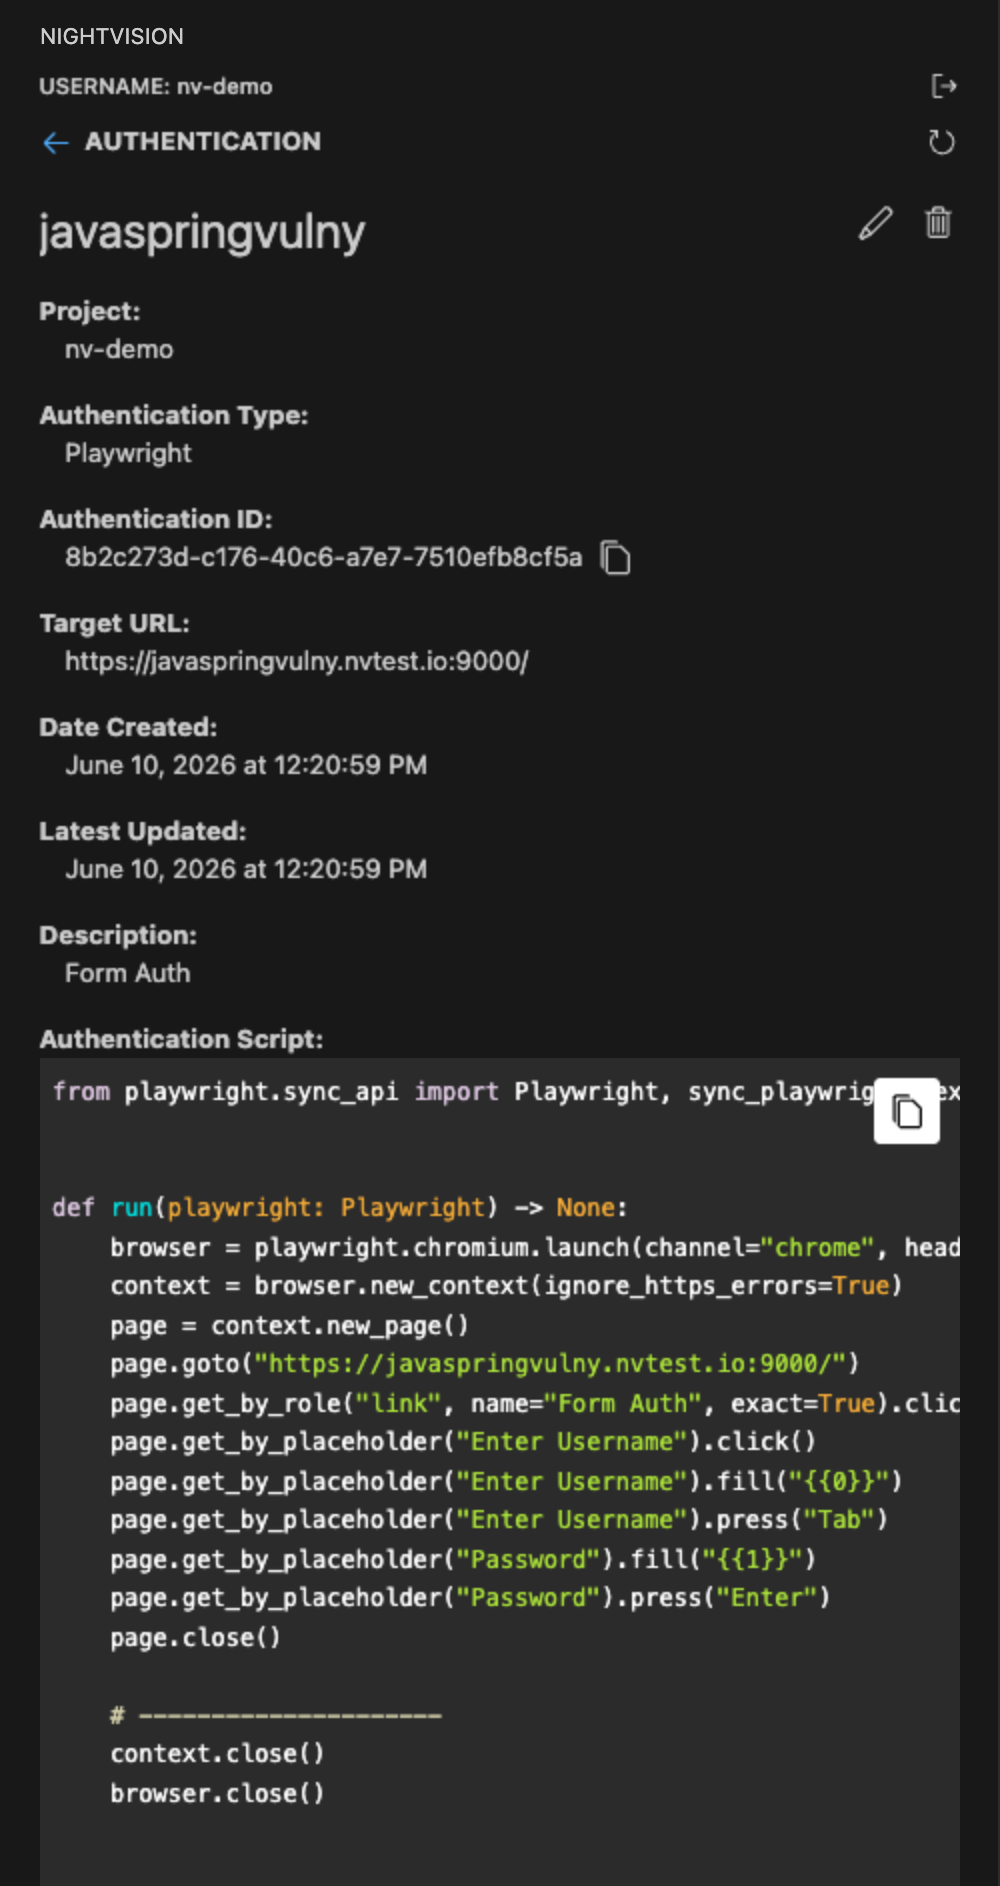
By clicking on it you can check its information:
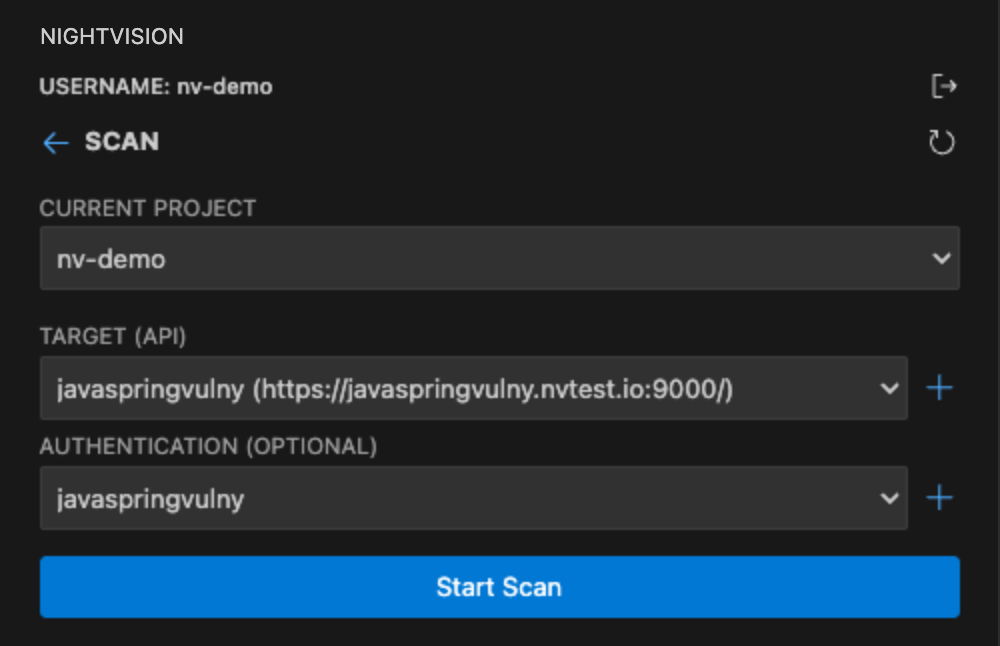
Configuring a scan
Click on Scan APIs to scan an API Target, or Scan Web Applications to scan a Web Target. Our example target is an API, so click on Scan APIs:

Configure your scan by selecting the project, target and authentication we created before, and press Start Scan:
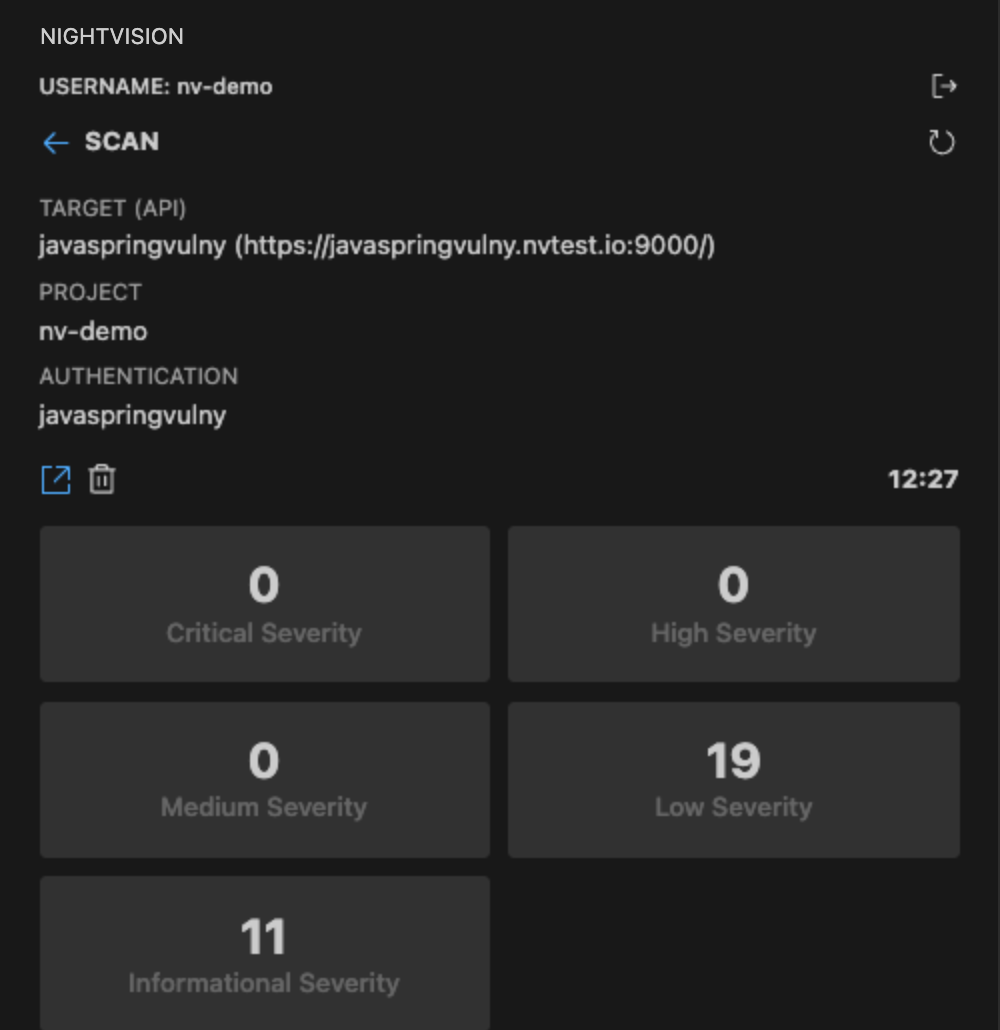
Your scan will start and it may take a few minutes to start showing discovered vulnerabilities.
You can also check the existing scans' statuses in the main Scans page:
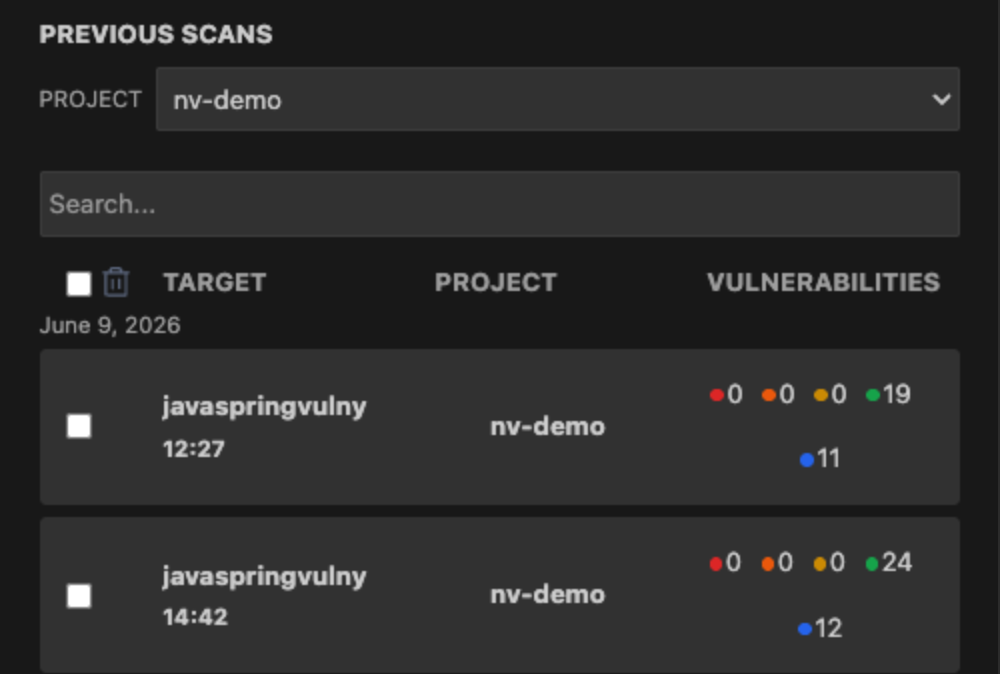
Once it is done, you may check the discovered vulnerabilities: