Only Files 📂💗
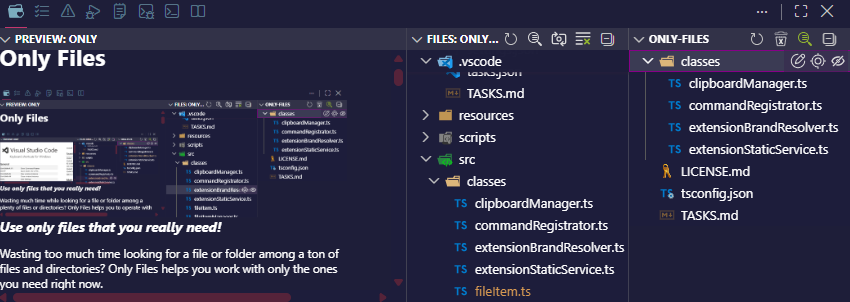
Use only files that you really need!
  
Wasting too much time looking for a file or folder among a ton of files and directories? Only Files helps you work with only the ones you need right now.
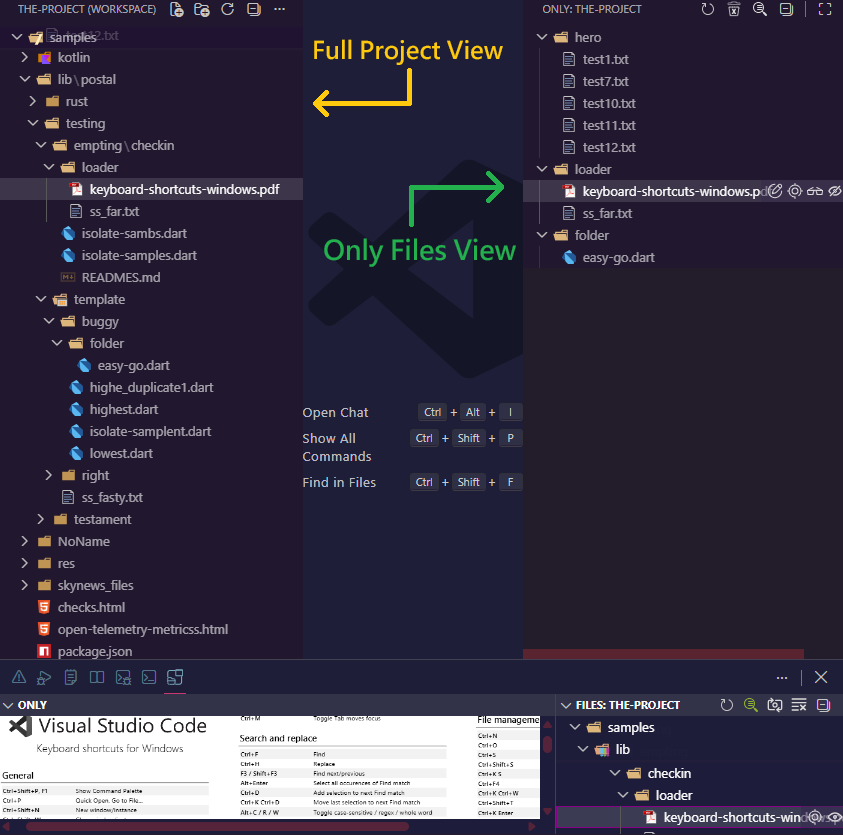
Only Files keeps your focus strictly on the files and folders you add to the view while preserving their original hierarchy. It automatically updates when you change the structure or manipulate files and it fully supports drag-n-drop.
🎯 It is the perfect choice if you want a clean productive environment that saves valuable screen space in VS Code.
What the extension can do?
Only Files - 3 views you can manage:
Folder View: this treeview replicates the standard Explorer view but adds enhanced capabilities and a streamlined short context menu, also making project navigation much easier.
-
Preview View: a webview that lets you load and preview HTML, PDF, TXT, LOG and MD files. It fully supports zooming and drag-n-drop.
✨Key Features
Folder View (FILES)
|
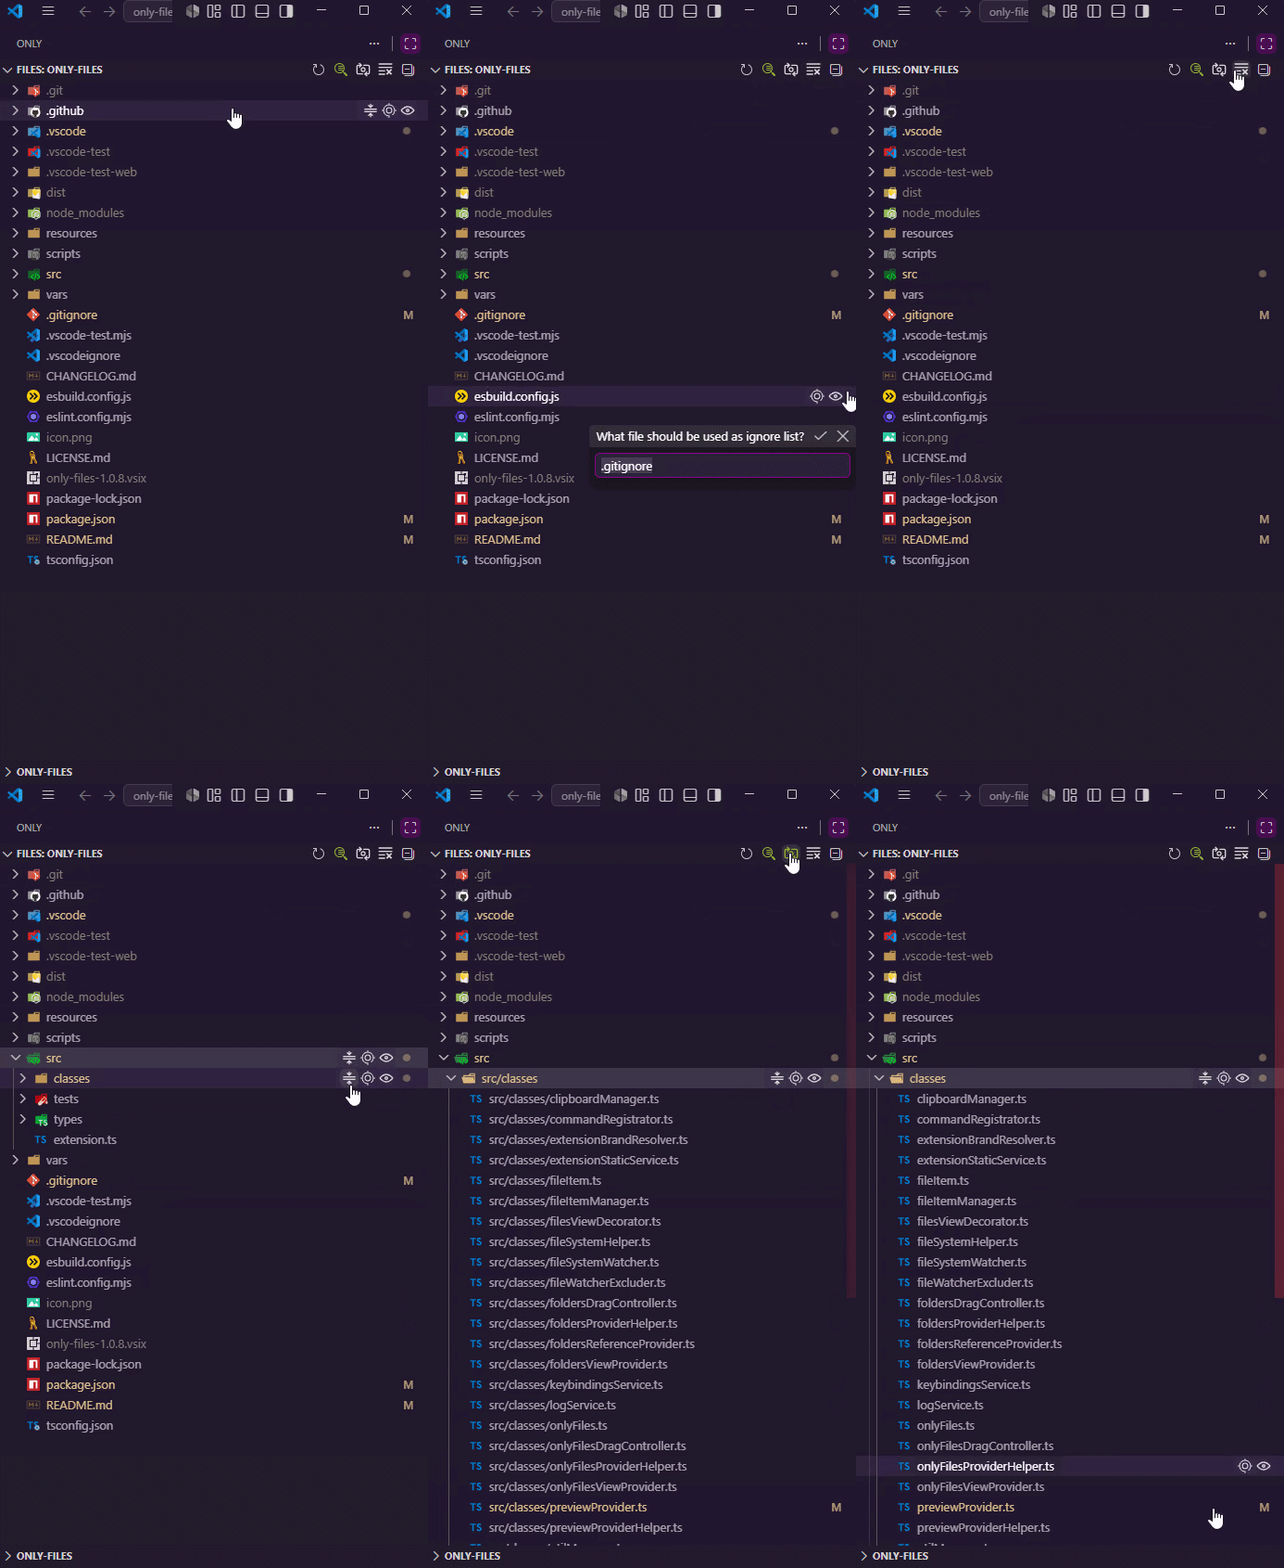
🔸Switching ON use ignore-files hides the folders and files listed in your chosen ignore-file.
|
|
|
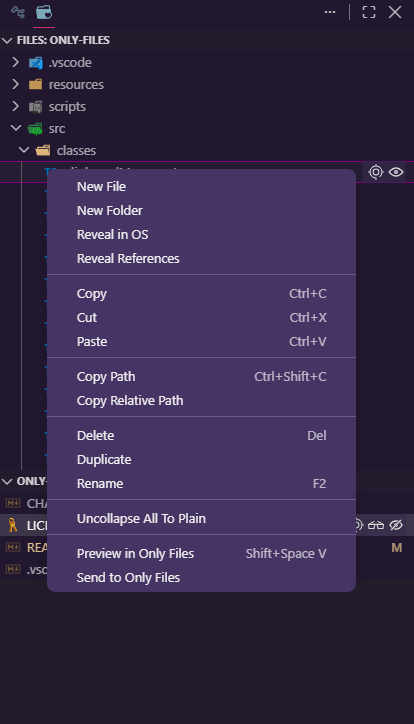
🔸Switching ON plain view shows all folder and file names as paths relative to the workspace folder. Once ON you can uncollapse any folder.
|
|
🔸Uncollapsing all to plain view switches ON plain view, displaying all files decoupled from their folders.
|
Only Files View (ONLY)
|
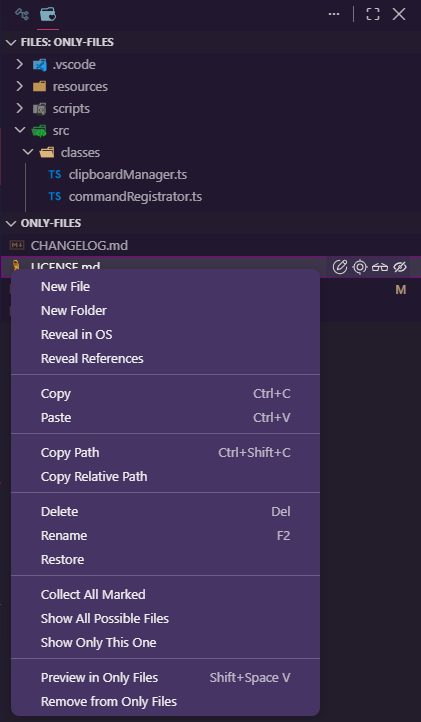
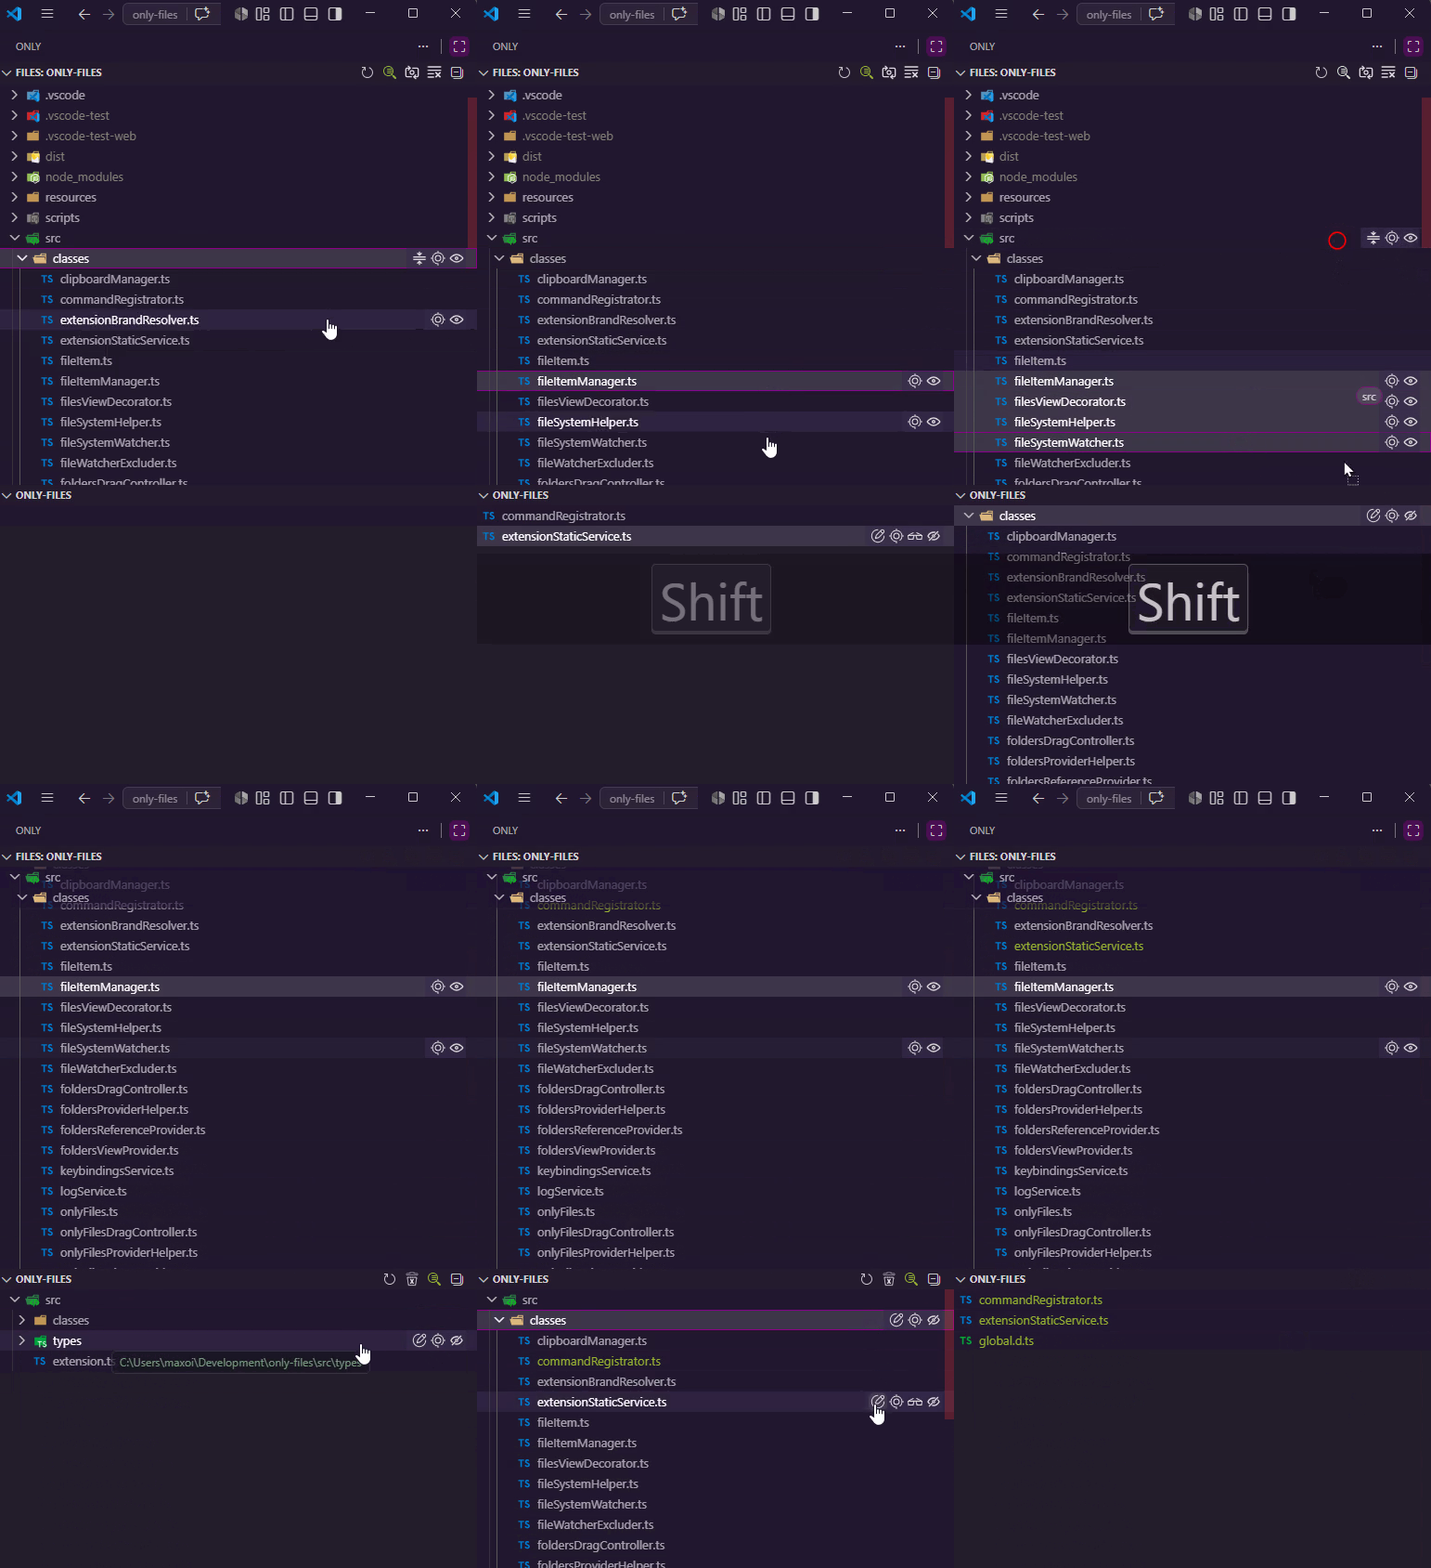
🔹Drag-n-drop or inline Send to Only Files sends an item or selected items with its content to this view from anywhere.
|
|
|
🔹Drag-n-drop from this view or inline Remove from Only Files removes the item with its content from the view.
|
|
🔹Marked items can be used anytime you want to collect them here.
|
Preview View
|
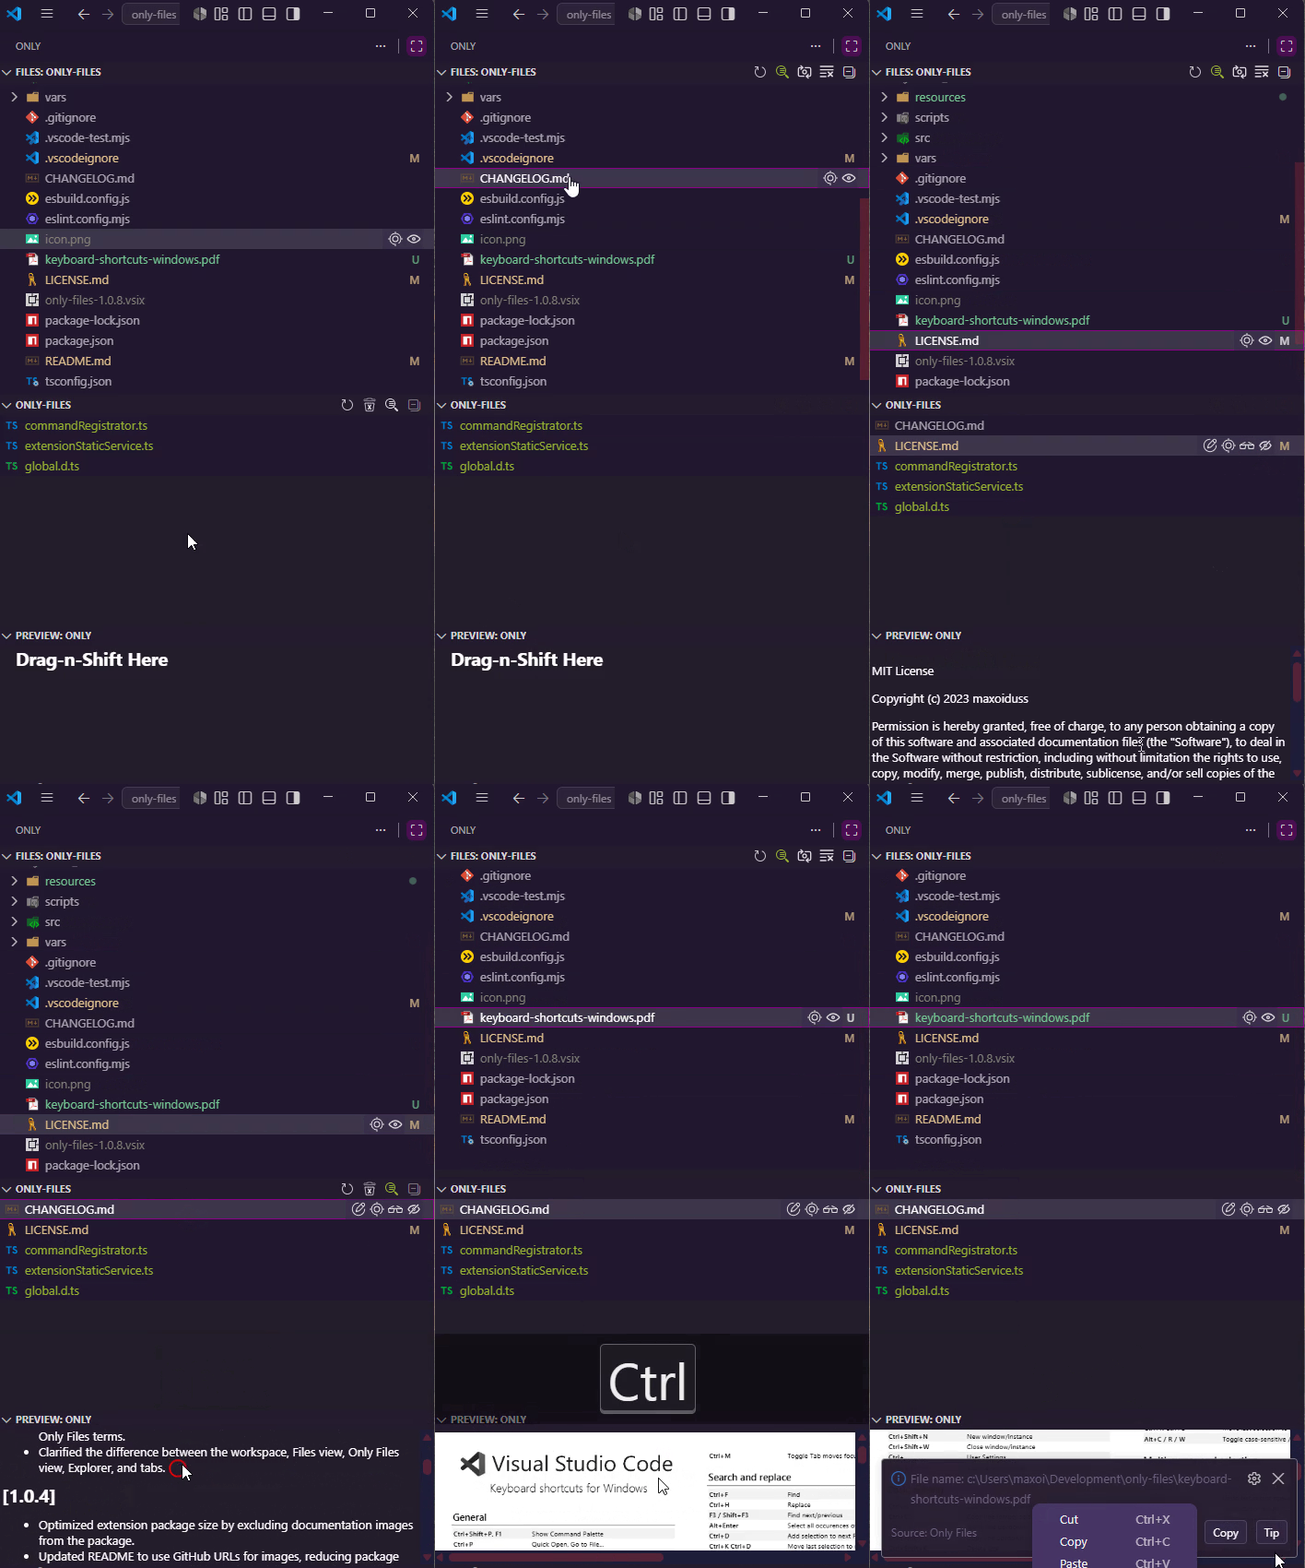
⬥ Drag-n-drop-with-Shift or inline Preivew in Only Files sends an item from Only Files View to be previewed.
|
|
|
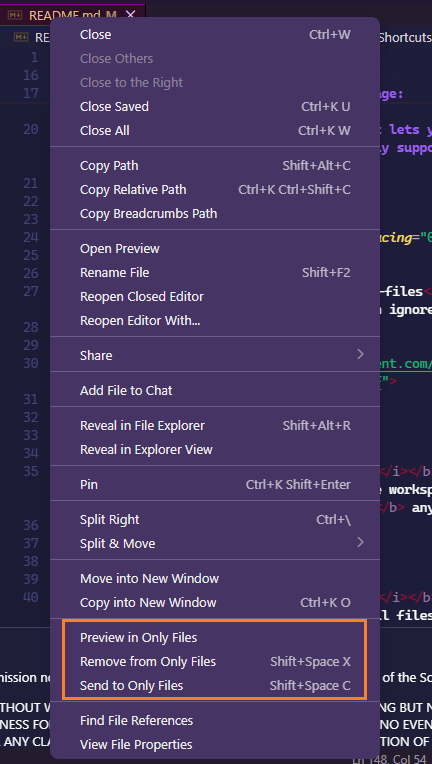
⬥ Preivew in Only Files context menu item does the same from anywhere. The view preserves its state.
|
|
⬥ Holding Ctrl by using scroll changes zoom, holding Shift - scrolls horizontally. Context menu shows file name and options.
|
Specs
All Built-in Explorer-like feautures, e.g. rename, copy, delete, cut, paste are supported in both treeviews.
All changes made in your workspace are reflected in the Folder and Only Files views in real time.
Rename file from the opened tab is supported.
The item changes its label color during renaming.
-
-
Tip suggests to open hot keys and all commands.
-
- Rename file/folder:
F2
- Rename opened file:
Shift+F2
- Send/Add from the Explorer, an editor tab, or a selected tree item:
Shift+Space, then C (macOS: Shift+Space, then C)
- Remove from an editor tab or selected tree item:
Shift+Space, then X (macOS: Shift+Space, then X)
- Preview the selected file or active editor:
Shift+Space, then V
- Refresh the
Files view: Shift+Space, then A
- Refresh the
Only Files view: Shift+Space, then Z
- Switch between classic and plain views:
Shift+Space twice
📽️Demo
How to use
Workflow
flowchart TD
  Start([Install Only Files]) --> Workspace[Open one or more workspace folders]
  Workspace --> Explorer[Open the Only Files Explorer]
  Explorer --> FilesView[Files view<br/>Browse workspace folders and files]
  Explorer --> OnlyView[Only Files view<br/>Browse selected items]
  Explorer --> PreviewView[Preview view<br/>View supported files]

  FilesView --> Select[Select a file or folder]
  Select --> Add[Add to Only Files]
  Tab[Open editor tab] --> AddFromTab[Add active tab to Only Files]
  Command[Run Add shortcut<br/>Shift+Space, C] --> Add
  AddFromTab --> Add
  Add --> OnlyView

  OnlyView --> Open[Open a selected file]
  Open --> Edit[Edit in the VS Code editor]
  Open --> Preview[Show preview]
  Preview --> PreviewView

  OnlyView --> Remove[Remove from Only Files]
  Remove --> Keep[File remains on disk]

  Workspace --> Changes[Workspace changes]
  Changes --> Sync[Files and Only Files refresh automatically]
  Sync --> FilesView
  Sync --> OnlyView
All in one
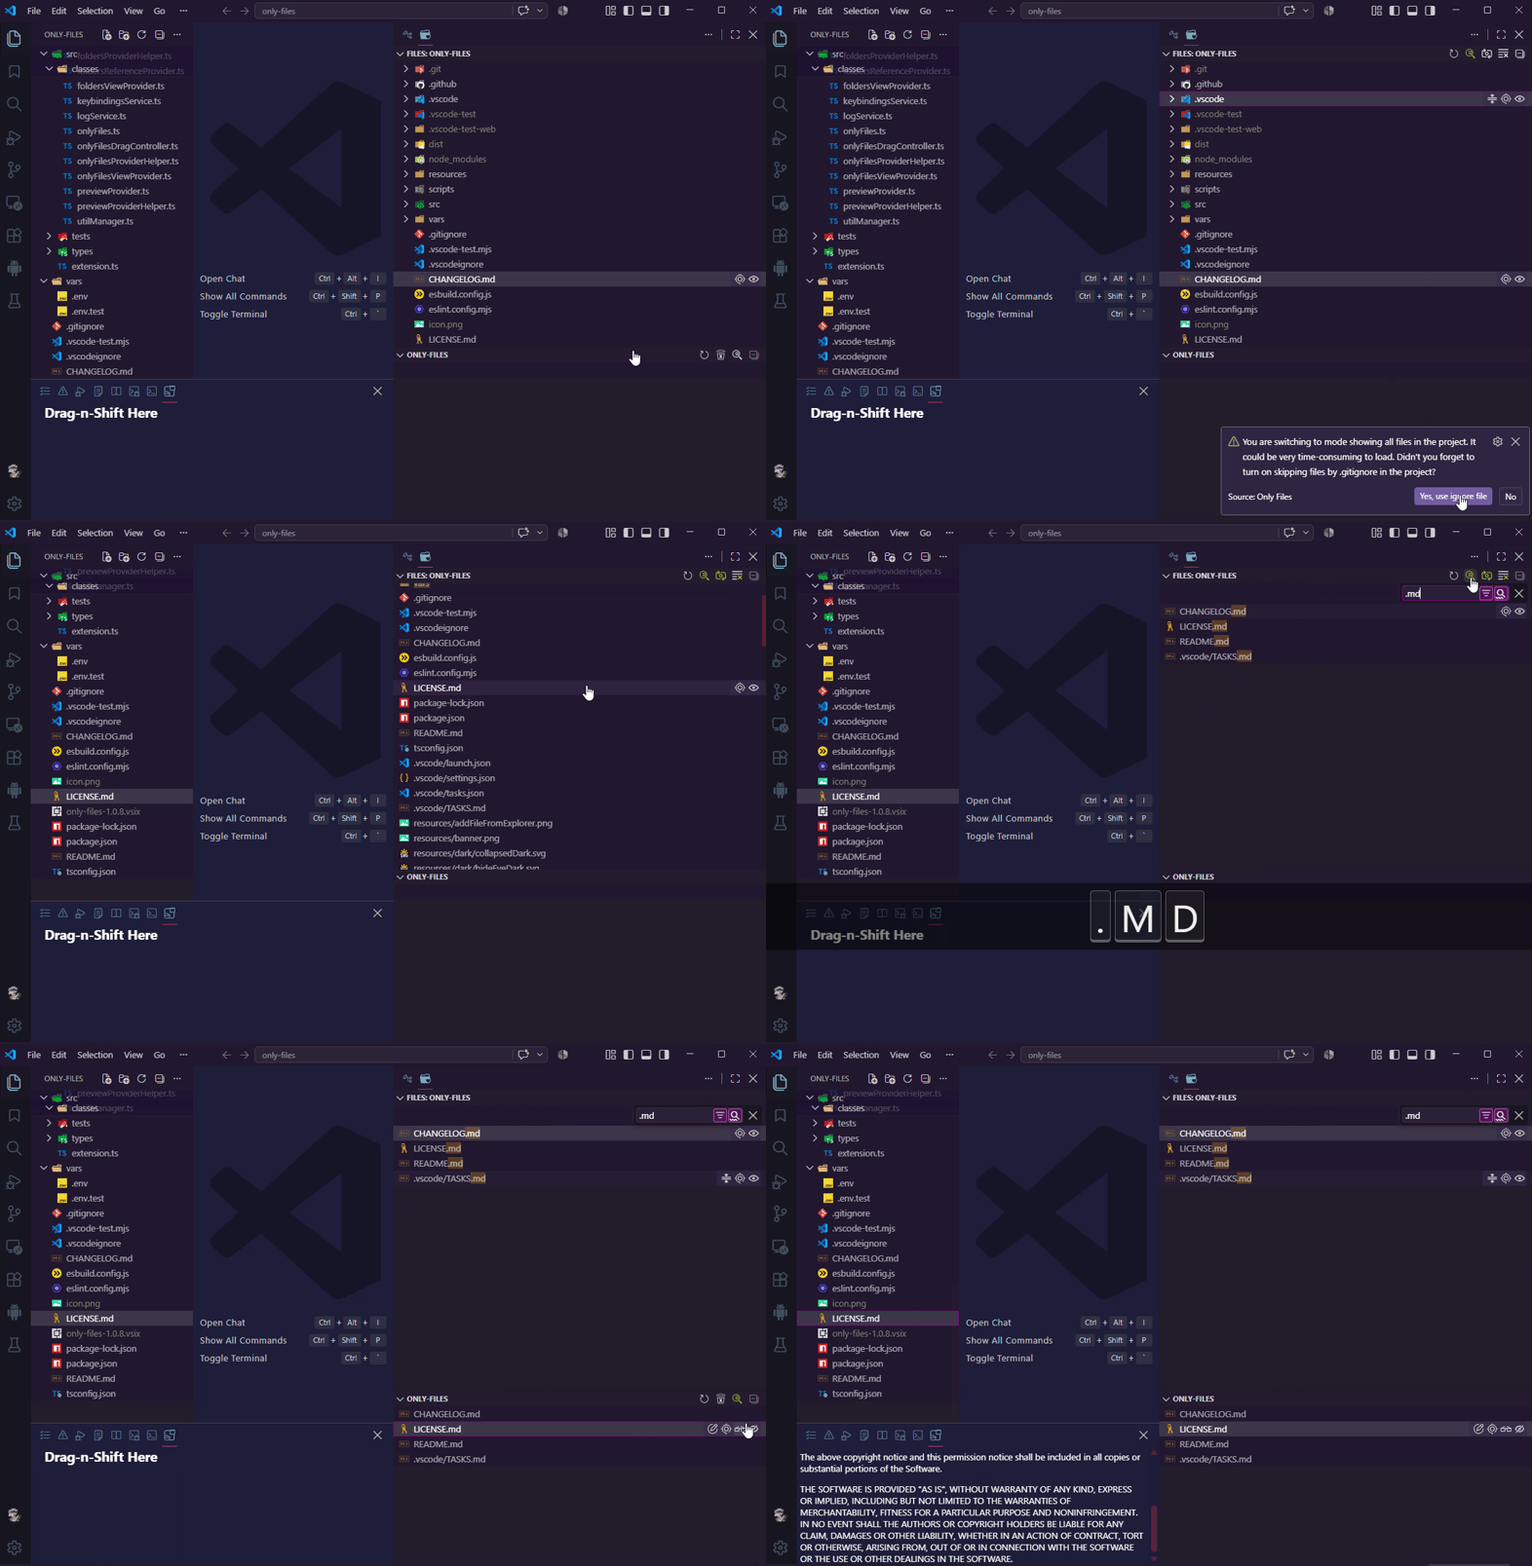
Notes
⚡Keyboard Shortcuts
Be sure to explore all the commands and shortcuts available to you!
The extension uses the following default shortcuts.
Ctrl is mapped to Cmd on macOS. Send(Add)/Remove chords intentionally use Shift+Space on both platforms.
| Action |
Windows/Linux |
macOS |
| Rename selected item |
F2 |
F2 |
| Rename active tab |
Shift+F2 |
Shift+F2 |
| Delete selected item |
Delete |
Delete |
| Permanently delete selected item |
Shift+Delete |
Shift+Delete |
| Copy selected item |
Ctrl+C |
Cmd+C |
| Cut selected item |
Ctrl+X |
Cmd+X |
| Paste into a view |
Ctrl+V |
Cmd+V |
| Copy file path |
Ctrl+Shift+C |
Cmd+Shift+C |
| Send item |
Shift+Space, then C |
Shift+Space, then C |
| Remove item |
Shift+Space, then X |
Shift+Space, then X |
| Preview item |
Shift+Space, then V |
Shift+Space, then V |
Refresh Files |
Shift+Space, then A |
Shift+Space, then A |
Refresh Only |
Shift+Space, then Z |
Shift+Space, then Z |
| Switch classic/plain mode |
Shift+Space twice |
Shift+Space twice |
Contribution
Contributions are welcome! 🙏 Feel free to take part in the extension evolving, ask question, open issue and discuss.
Whether you are fixing a bug, adding a feature, or improving documentation, here is how you can get involved:
1. Reporting Bugs & Feature Requests
- Check the Issues tab to see if your topic is already being discussed.
- If not, open a new issue. Please include clear steps to reproduce bugs, or a detailed description for new features.
2. Making Changes
- Fork the repository.
- Create a new branch for your feature or fix:
git checkout -b feature/your-feature-name.
- Make your changes and commit them with clear messages.
- Ensure your code follows the existing project style and that all tests pass if possible.
3. Submitting a Pull Request
- Open a Pull Request (PR) against the
main branch.
- Describe your changes clearly in the PR description.
- Wait for review! I will look over your code and suggest changes if needed.
Thank you for helping make this project better!
Misc
Changelog
LOG
License
MIT
| |