Varro: OpenCode Workbench


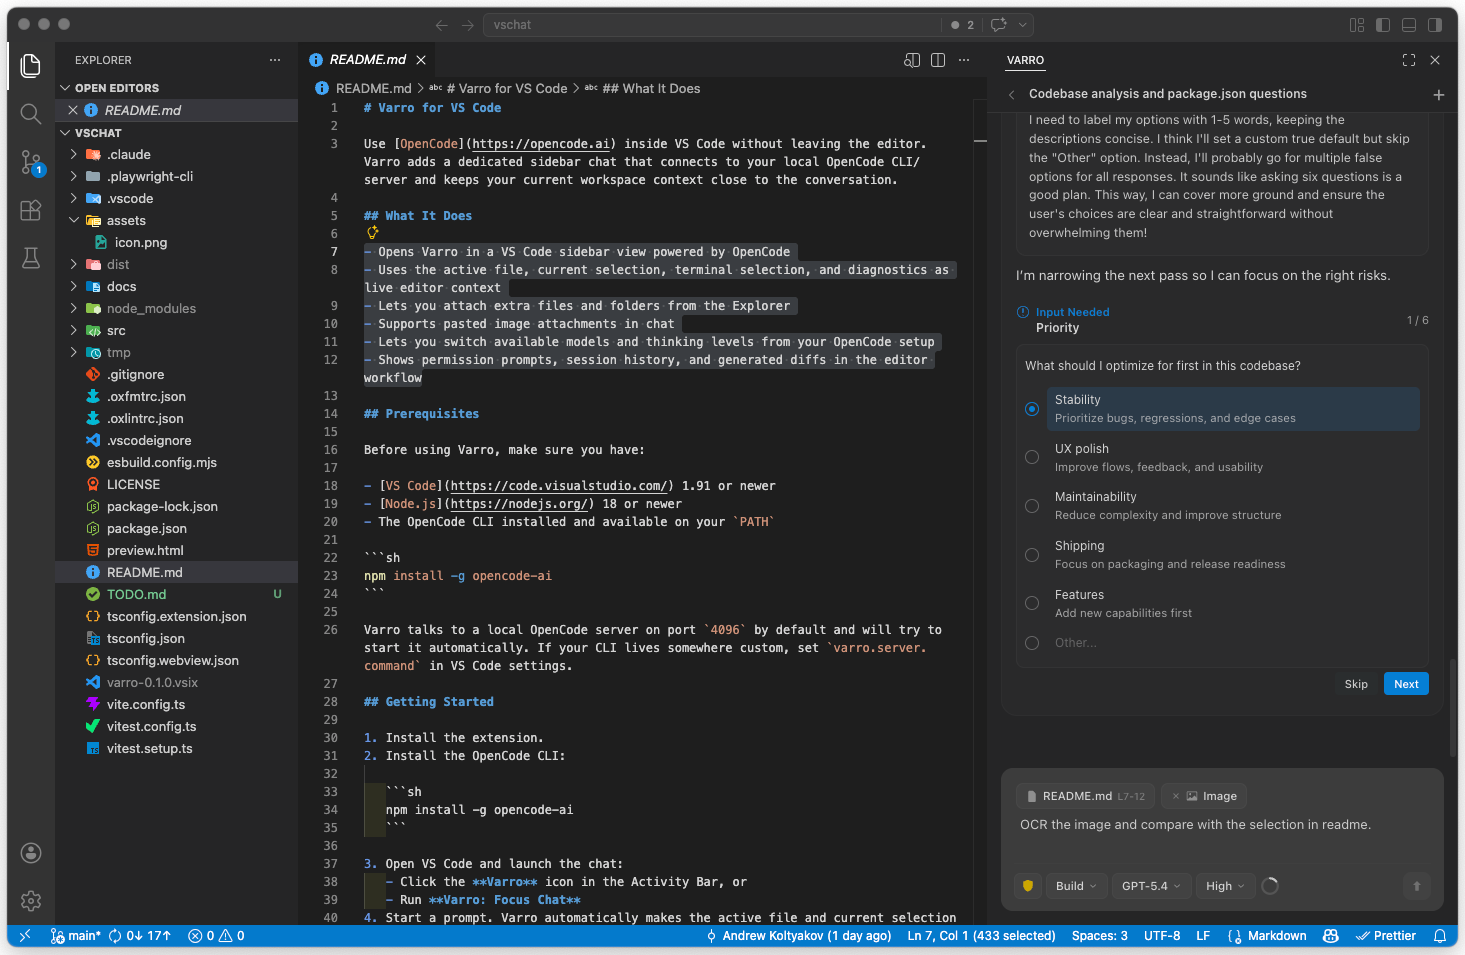
Varro runs OpenCode inside VS Code. It adds project-aware chat, parallel sessions, plan and change review, model and permission controls, commit-message generation, and usage reports.
Supports OpenCode v2 and v1. Varro automatically detects the connected API and uses the same workbench for either version. OpenCode v2 is recommended for new installations.
OpenCode remains responsible for agents, providers, models, commands, skills, MCP servers, and their configuration. Varro reads that configuration and provides a VS Code interface for it.
Quick start
- Install Varro.
- Install OpenCode v2. On macOS, Linux, or WSL, run
npm install -g @opencode/cli. On native Windows, download the standalone CLI.
- Connect a provider with
opencode auth login or /connect in Varro.
- Open a folder, select
Varro in the Activity Bar, and start a session. Varro handles the server connection.
Install OpenCode where Varro runs: the Windows CLI for native Windows, or inside WSL for a WSL window. Add it to PATH or set varro.server.command to its executable path.
Already using v1? Keep it, or see choosing and updating OpenCode to switch versions. After switching, let active work finish and run Varro: Restart Server. Check the status bar for the connected version; see recovery steps if it still shows v1.
VS Code and VSCodium are supported. Other forks have limited support.
Why Varro
Varro puts a simple, straightforward UI first, with continuous attention to usability. It integrates deeply with VS Code and supported forks through editor tabs, commands, themes, diagnostics, and Source Control.
- Keep your OpenCode setup: the same models, agents, skills, and MCP servers in VS Code and the TUI.
- Run sessions side by side. Queue the next task or steer one already running.
- Send editor context without copy-paste: selections, diagnostics, terminal output, and references to other sessions.
- See failures and approvals without expanding routine tool chatter. Child-session requests appear in the parent chat.
- Choose permissions per session, review plans and diffs, and draft commit messages without auto-committing.
- Track tokens, provider quotas, and cross-project usage with
/stats.
- Get desktop notifications for permissions, questions, completed replies, and plans ready for review.
A mobile companion PWA is coming. It is currently experimental and available by invitation only.
OpenCode feature coverage
Varro provides UI for sessions, chat, tools, queues, permissions, models, MCP connections, plans, and todos. Agents, commands, skills, compaction, and tool execution use OpenCode configuration. You can also continue sessions in the OpenCode TUI.
OpenCode has discontinued session sharing. Existing v1 share links can be cleared from the session menu. The v2 API has no OpenCode LSP service. VS Code Problems can still be attached as context, and Varro stores v2 session annotations locally. See version differences and history import.
Sessions
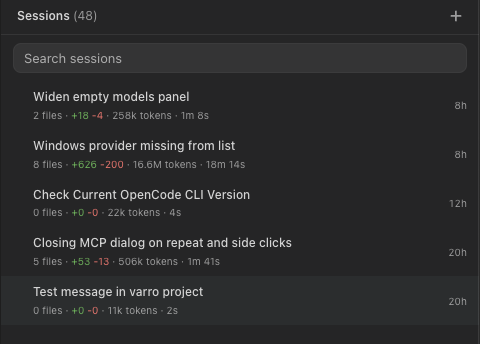
Browse workspace sessions in Recent, Archive, and Recycle Bin. Search history, filter by status, and open sessions in the sidebar, editor tabs, or OpenCode TUI. Rows show activity, changes, token use, and duration; child sessions stay linked to their parent.
Chat indicators and the status bar link to running sessions, requests needing attention, and completed work. When Varro is hidden, VS Code notifications report plans, failures, permissions, and questions. See the sessions guide.
Desktop notifications
Enable banners with varro.notifications.native and sounds with varro.notifications.sound. Both are off by default. Alerts cover permissions, questions, replies, and plans; clicking opens the project window. macOS suppresses alerts while a window from that VS Code instance is visible; other platforms use focus.
Requires a local desktop host, not SSH, WSL, or containers. On macOS 11+, allow the bundled Varro helper in System Settings > Notifications. Linux needs notify-send for banners and paplay, aplay, or canberra-gtk-play for sound. OS notification settings apply.
The optional companion app shows active sessions, pending requests, and unread completions across local VS Code windows. Clicking a row opens its project window. Requires macOS 13+; run make build and make install in native/macos-tray/.
Chat and context
The composer includes the active file and selection by default; use its context chip to disable this per session. Add context with Varro: Add to Context, Cmd+Shift+K / Ctrl+Shift+K, drag-and-drop, or pasted images. Type @ for files and agents, or & for recent root sessions. Unsent drafts and explicit file or folder attachments survive reloads.
PDF attachments require advertised PDF input support and are limited to 20 MiB in total. Varro does not silently substitute file references or convert pages. Provider delivery is not universally verified; see PDF compatibility and tested versions.
Remote images default to ask, with Load image and Load all controls. Load all applies to the current response. Set varro.chat.remoteImages to on in user settings to load nearby images automatically, or off to show only alt text. Downloads accept bounded public HTTPS raster images and send no cookies or authorization headers, but disclose the requested URL and extension host's IP to the image server. Workspace settings cannot enable automatic loading.
Queue follow-ups, steer a run, or stop it and send a replacement. Queued prompts can be reordered, paused, edited, retried, or removed. The transcript keeps failures, questions, approvals, edits, and final responses visible while grouping routine work into expandable summaries.
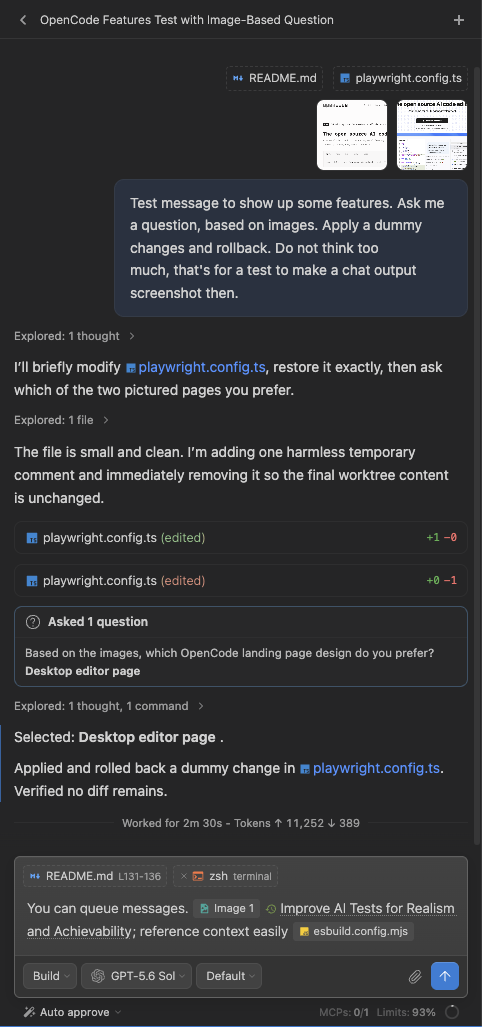
Use slash commands for reviews, compaction, exports, stats, skills, diagnostics, forks, and Ralph loops. Ralph uses Full access.
On v2, /pause interrupts the run and pauses its queue in the current view. Resume from the transcript divider or send a message. It preserves the conversation, not an in-flight operation for exact resumption. Paused time does not count toward work duration or usage statistics.
Handy dictation
Install and configure Handy to enable the microphone button. Click to start or stop dictation; right-click to cancel. Disable Handy's Auto Submit to review text before sending. Set varro.dictation.handyPath if detection fails. Requires Handy's CLI remote-control support and a local desktop host, not SSH, WSL, or containers.
Permissions
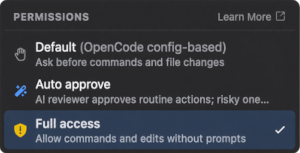
Answer requests with Reject, Once, or Always. Choose a permission mode per session:
Default follows OpenCode and agent permission rules.Auto uses local rules and an optional model, leaving undecided requests for manual approval.Full access allows the session to act without confirmation.
Varro starts in Auto unless overridden by varro.chat.defaultPermissionMode or a saved selection. Child sessions inherit the nearest selected mode; their manual requests appear in the parent chat. See the permissions guide for rules and automatic review.
Models, providers, and MCP
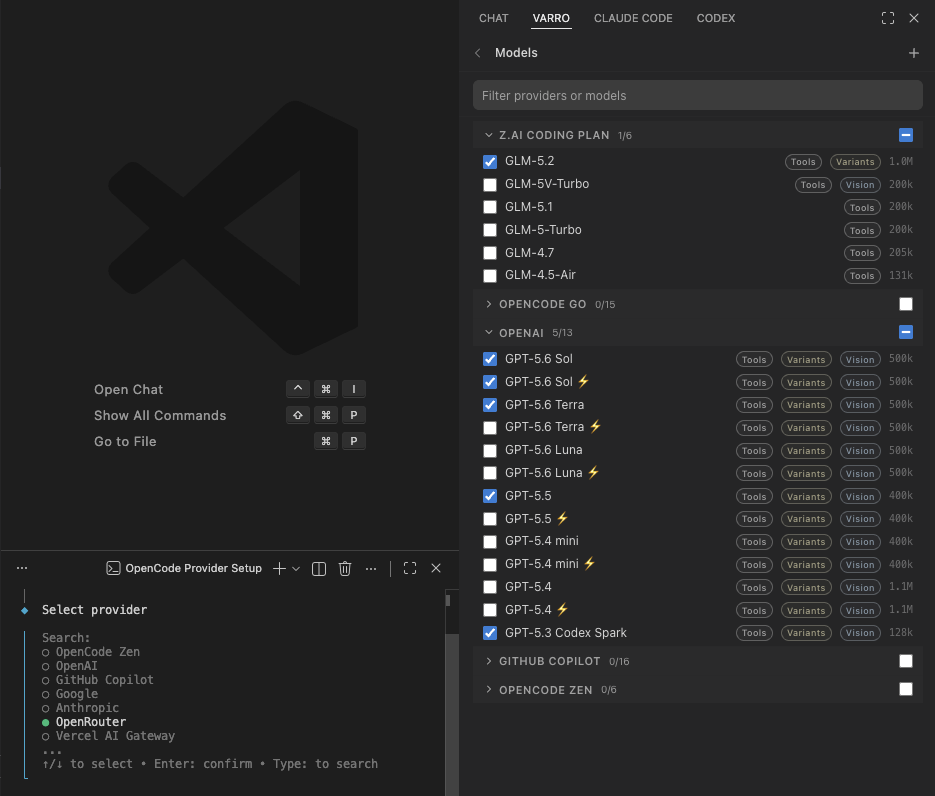
Connect or reauthenticate supported API-key and OAuth providers in the Models view. The picker shows known model capabilities and lets you pin, hide, or rename models locally. MCP servers come from OpenCode configuration and can be toggled per session.
Inline prompt completion is off by default and requires v2 with a supported direct API-key connection. Right-click an eligible model and choose Use for prompt completion, or set varro.chat.promptCompletionModel. After a typing pause, Varro sends the draft, up to ten recent user prompts, and the latest agent reply from that chat directly to the model. Credentials stay in the extension host. Tab accepts a suggestion; Escape dismisses it; Enter sends only typed or accepted text. Choose Don't use for prompt completion to disable it. Test prompt completion makes a sample API call that may consume usage but sends no conversation history.
For image analysis with a text-only model, configure an image-capable vision agent and mention @vision. For read-only investigation, configure an ask agent with read and search permissions. See vision setup and primary agents.
Usage and limits
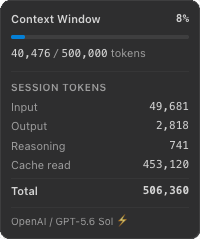
The composer shows context-window fill; its popup breaks down tokens and reported cost. Run /stats or Varro: Usage Stats for cross-project token and duration reports covering today, 7 days, and 30 days. Use /stats all for all retained history.
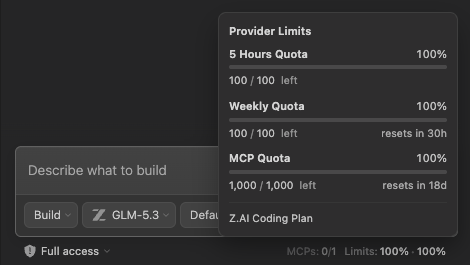
Supported providers expose quota windows and reset times. After a limit error, stop retries or switch providers. On v2, the opencode-claude plugin also supplies Claude Code limits through an authenticated local endpoint without Varro reading Claude credentials; this is unavailable in attach-only mode.
Commit messages
Select the Source Control wand or run Varro: Generate Commit Message. Varro drafts from staged changes, or unstaged changes if nothing is staged, and fills the commit input for review. It never stages or commits files and asks before replacing a draft. On native Windows, untracked files contribute paths only, not contents.
Server and updates
Varro remembers a local port with varro.server.port: "auto" and reuses verified servers across reloads and updates. New managed servers require credentials. Set a fixed port to use a specific endpoint; explicit ports never silently fall back. For manual management, also disable varro.server.autoStart and run opencode serve --port 4096 with the matching port.
Unknown server ownership or a different OS user requires confirmation before loading sessions. This prevents accidental attachment, not unauthorized access to an unauthenticated server. See server ownership.
The status bar shows the connected version and updates. varro.server.autoUpdate updates within the installed CLI family; it does not migrate v1 to v2. Native Windows v1 prompts for updates. Stop separately managed servers before a prompted Windows update.
Global configuration reloads when OpenCode is idle. Project changes may need Varro: Restart Server, which waits for active work and only restarts Varro-managed servers. Restart manually launched servers in their terminal.
Requirements
- VS Code or VSCodium 1.107 or newer
- Node.js 22.22.2+ on Node 22, or Node 24.15.0+
- OpenCode v2 CLI 2.0.5+ recommended, or v1 CLI 1.16.0+, on
PATH or configured through varro.server.command. Tested with v2 2.0.32 and v1 1.19.3
- A trusted, non-virtual workspace. Remote workspaces run Varro and OpenCode on the remote extension host
Documentation
License
MIT

