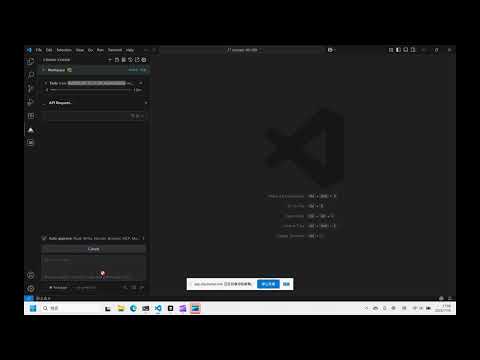
IcemarkAI agent for Product Managers. Installation Launch VS Code Quick Open ( Ctrl+P), paste the following command, and press enter.Copied to clipboard |

Icemark English DocumentationNavigation:
Icemark
Icemark, AI Agent for Product Managers 📋 Product OverviewIcemark is an AI Agent for Product Managers, providing not only specialized capabilities like market research, PRD writing, and prototype design, but also general assistance capabilities to help product managers handle various daily work challenges. 
⭐ Main FeaturesIcemark provides four core working modes, each deeply optimized for specific work scenarios of product managers: 1️⃣ General Assistant Icemark ModeThis is a versatile AI assistant with comprehensive capabilities including planning, analysis, execution, problem-solving, and research. Through the intelligent Task Manifest document management system, it can handle complex multi-step projects, support task interruption and resumption, ensuring work continuity and controllability. Whether for daily work assistance or complex project management, it provides professional support. 2️⃣ Market Analysis Market ModeAn elite-level analysis assistant specifically designed for market research and competitive analysis. Utilizing professional analysis frameworks such as SWOT analysis, PESTEL analysis, Porter's Five Forces model, and market segmentation strategies, combined with real-time data search and deep content extraction capabilities, it generates structured multi-dimensional market analysis reports. Helps product managers deeply understand market environments and seize business opportunities. 3️⃣ PRD Writing PRD ModeA professional requirements analysis assistant based on user stories, JTBD (Jobs-to-be-Done) theory, and the three-question method. Through systematic requirement mining methods, it deeply understands users' real needs, analyzes the four driving forces of user behavior (push, pull, anxiety, habits), and creates clear and complete product requirement documents, ensuring product design truly meets user needs. 4️⃣ Rapid Prototype Generation Prototype ModeA professional product prototype creation assistant that can quickly generate HTML-format interactive prototypes based on product requirements. Supports multi-platform prototype design for Web, mobile, and desktop, providing modern UI interfaces and user-friendly interactive experiences, helping product managers quickly validate product concepts and showcase design ideas. ✨ Core Advantages: Icemark provides numerous basic tools, such as:
With Icemark, you no longer need other similar paid MCP services, providing one-stop solutions for common problems. 🎞️ Demo VideoTurn Hand-Drawn Sketches into Interactive PrototypesIntegrated with Excalidraw to support hand-drawn wireframes and generate interactive prototypes. https://www.youtube.com/watch?v=gAQMNN-qMpk
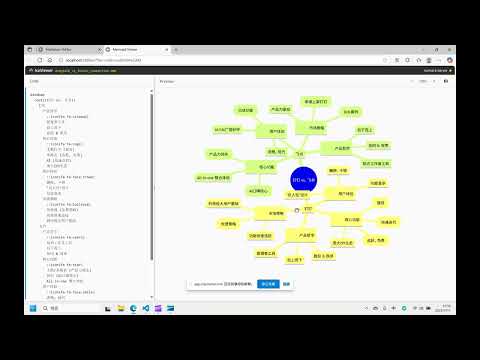
Product AnalysisBuilt-in Xiaohongshu browsing feature, enables comparison and analysis of different products based on Xiaohongshu content, generating visual reports with text and images. https://www.youtube.com/watch?v=LRmbJNd4Np4
📥 Download & Installation
💻 Main Interface
Icemark is a Visual Studio Code extension, with the simplest installation method being direct installation through the extension interface.
After installing VSCode, there are three ways to install Icemark: 🔍 Method 1: Direct Search
🌐 Method 2: Marketplace Installation
📦 Method 3: Install via VSIX

After installation is complete, click the Icemark icon in the left sidebar.
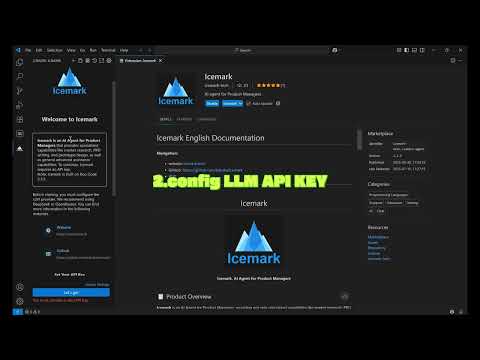
⚙️ Initial ConfigurationIcemark supports multiple LLM providers, which can be configured according to your preferences. 🔑 Configure API KeysWhen Icemark starts, you will see relevant prompts. Simply follow the instructions to configure. For Chinese users, we recommend using DeepSeek: https://www.deepseek.com/

For providers like Alibaba Cloud, ByteDance's Volcano Engine, etc., you can choose Required configuration parameters:

You can add other providers or adjust existing configurations later.
Install and config videohttps://www.youtube.com/watch?v=rH7K5lilpV4
🎯 Getting StartedAfter completing the initial configuration, you can use Icemark's various capabilities. We recommend starting with Icemark mode. 
Now, you should be able to handle many tasks through Icemark. If you're already familiar with Icemark, we recommend trying the advanced features. 🚀 Advanced UsageIcemark provides custom modes to help you further improve work efficiency: 🛠️ Custom ModesCustom modes allow you to extend Icemark's capabilities or customize working mechanisms that better match your work. It's definitely worth trying. 📖 Reference Documentation: 🛠️ Technical FoundationIcemark is built on RooCode 3.15.5. 📬 Contact UsIf you have any questions or suggestions, feel free to contact us at icemark.tech@gmail.com ⚖️ DisclaimerPlease note that Icemark, Inc does not make any representations or warranties regarding any code, models, or other tools provided or made available in connection with Icemark, any associated third-party tools, or any resulting outputs. You assume all risks associated with the use of any such tools or outputs; such tools are provided on an "AS IS" and "AS AVAILABLE" basis. Such risks may include, without limitation, intellectual property infringement, cyber vulnerabilities or attacks, bias, inaccuracies, errors, defects, viruses, downtime, property loss or damage, and/or personal injury. You are solely responsible for your use of any such tools or outputs (including, without limitation, the legality, appropriateness, and results thereof). |