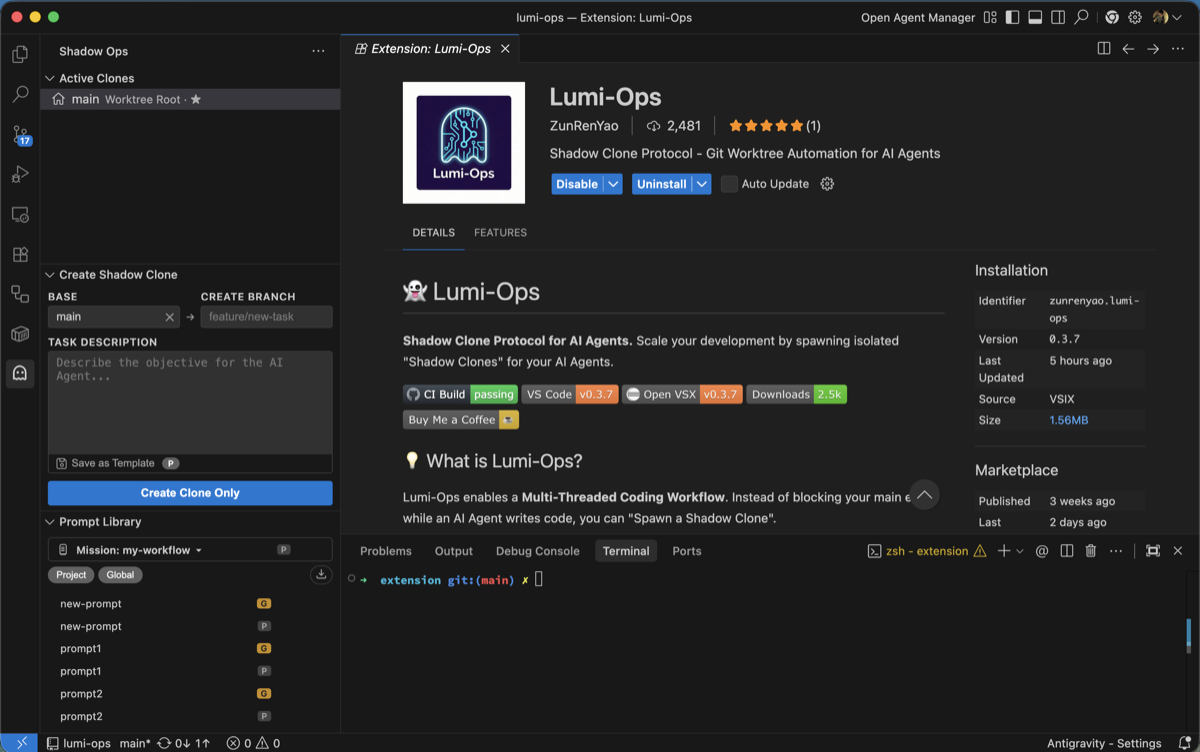
👻 Lumi-Ops
The workflow protocol for AI-assisted parallel development.
Equip your AI agent with a protocol for parallel development. Spawn isolated tasks, track state transitions, and enforce structured reviews before merging.
Built on Git Worktrees. Works with Antigravity, Cursor, GitHub Copilot, and any MCP-compatible AI.


🆕 What's New in v0.5
- Multi-Root Workspace Support — Extension now detects and aggregates clones across all workspace folders, with clones grouped by repo in the sidebar.
- Auto-Close Clone Window — Clone VS Code windows automatically close when the worktree is killed, keeping your workspace tidy.
- Beta CI Pipeline —
develop branch builds and uploads .vsix artifacts for manual testing before stable release.
💡 What is Lumi-Ops?
While physical workspace isolation is becoming standard in AI IDEs, managing multiple agents across these workspaces remains chaotic. You end up constantly switching windows, losing context, and manually checking if an agent has finished its task.
Lumi-Ops provides the rails.
It is not an AI agent. It is a workflow protocol that equips your existing IDE agents with the Shadow Clone Protocol — a standardized lifecycle for delegating, tracking, and reviewing parallel AI tasks.
The Core Protocol
- Spawn & Assign — Create an isolated Git Worktree ("Shadow Clone") and hand off a structured
MISSION.md template.
- Execute — Your AI agent works independently in the clone window. Your main workspace context remains completely untouched.
- Review & Revise (The Loop) — When the agent finishes, it writes a
MISSION_COMPLETE.md and sets its status to needsReview. You (or your root agent via MCP) can review the diff. If issues remain, issue a request_revision with feedback to send it back to work.
- Merge — Once approved, execute a clean squash-merge directly from the UI or via MCP.
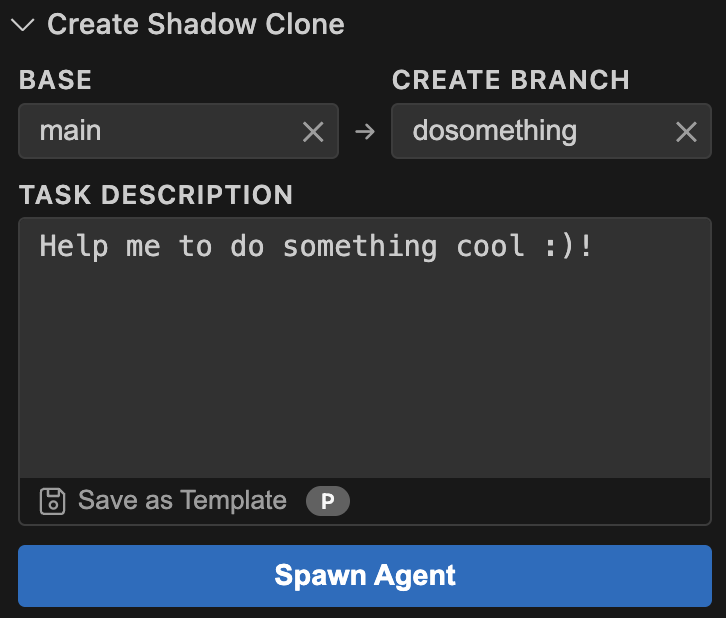
🚀 Quick Start
1. Spawn — Fill in a branch name and task description, then click Spawn Agent.
2. Work — Open the clone in a new window. Tag @MISSION.md in your AI chat to give the agent its instructions.
3. Review — When the agent finishes, it sets the clone status to needsReview. Review the diff and MISSION_COMPLETE.md, then approve or request revision.
4. Merge — Right-click the clone → Squash & Merge → select target branch. Done.
Tip: Leave the description empty and click Create Clone Only to create a worktree without MISSION.md — useful when you just need an isolated workspace.
✨ Key Features
- 🔄 Formalized Review Protocol — Stop guessing if an agent is done. Rely on explicit state transitions (
inProgress → needsReview → needsRevision → done).
- 🔌 Universal MCP Integration —
npx @lumi-ops/mcp-server exposes 15 tools for the entire lifecycle. All branch-targeting tools require a repo parameter for cross-repo operations. Use describe_clone for detailed clone inspection.
- 📄 Mission Templates & Prompt Library — Standardize how tasks are assigned to reduce agent hallucinations and enforce project-specific rules.
- 🪟 Multi-Root Workspace — Works with VS Code multi-root workspaces — clones from all workspace folders are detected and grouped by repo in the sidebar tree.
- 🚪 Auto-Close Clone Window — Clone windows automatically close when the worktree is killed, so you don't accumulate stale windows.
- 👻 Git Worktree Isolation — Physical directory separation ensures parallel agents never overwrite each other's files or break your local build.
⚡ Spawn in Seconds
- No Stashing — Keep your current work as-is.
- Base Branch Selection — Pick any local or remote branch as the base, defaulting to your current branch.
- Existing Branch Support — Select an existing branch or type a new name to create a fresh branch.
- Copy on Spawn — Configure folders/files to auto-copy from root to clone via
lumi-ops.copyOnSpawn setting.
🤖 MCP Server
Let your agent do the work. With the MCP Server, your AI agent can spawn clones, review diffs, request revisions, and merge — all without you touching the UI. Just describe what you want, and the agent handles the rest.
npx @lumi-ops/mcp-server
Try telling your agent:
- "Spawn a clone for this bug fix and write the implementation"
- "Review the clone on branch feat/auth and merge it if it looks good"
- "List all active clones and kill the ones that are done"
The MCP server exposes 15 tools (all requiring a repo parameter for cross-repo support), 6 Resources (read-only context like clone missions, reports, and config), and 4 Prompt templates (guided workflows for review, spawn, strategy planning, and conflict resolution). Use describe_clone after list_clones to drill into specific clone details.
Works with Antigravity, VS Code (Copilot), Cursor, Windsurf, and Claude Desktop. See the MCP Server README for per-IDE configuration.
🔄 Review Workflow
A structured review cycle keeps humans in the loop:
- Clone finishes work — The agent writes
.lumi/MISSION_COMPLETE.md and sets the clone status to needsReview.
- Review — You (or a root agent) review the diff and completion report. Right-click the clone in the sidebar for review actions.
- Approve or Revise — Approve and squash merge, or send feedback via Request Revision. The agent receives
.lumi/REVIEW_FEEDBACK.md, makes fixes, and re-submits for review.
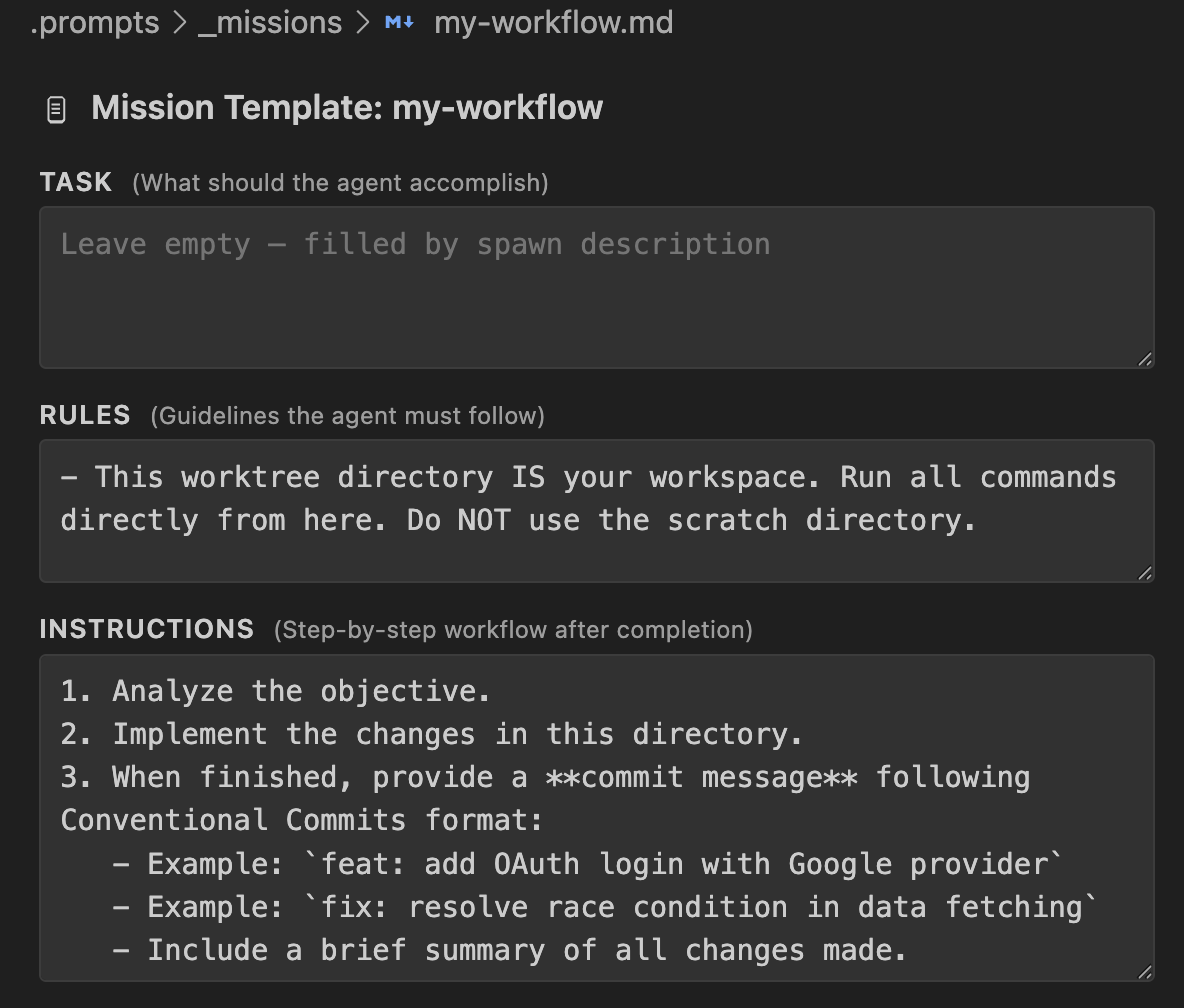
📄 Mission Templates
Define reusable MISSION.md templates with Task / Rules / Instructions fields. Templates support dual-scope (Global + Project), and open in a built-in form editor.
📚 Prompt Library
Save and reuse task descriptions as prompt templates. Click a prompt to load it into the spawn form. Manage templates with per-item copy, edit, and delete actions.
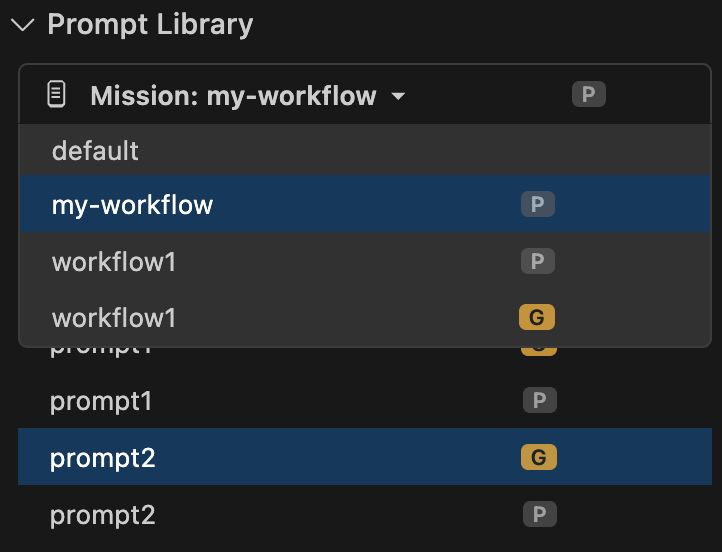
- Dual-Scope — Global (
~/.lumi-ops/.prompts/) + Project (<repoRoot>/.prompts/). Each prompt shows a [G] or [P] badge.
- Cross-Window Sync — Prompts sync in real-time across Root and Clone windows.
- Mission Dropdown — Switch mission templates directly from the Prompt Library panel.
📋 Review Status Tracking
Click a clone in the sidebar to cycle through statuses. The review statuses (needsReview, needsRevision) are settable via MCP or right-click context menu.
| Icon |
Status |
Description |
| ⚪ |
Todo |
Default state for new clones |
| 🔄 |
In Progress |
Auto-set when the clone workspace opens |
| 🔍 |
Needs Review |
Agent finished — waiting for review |
| ✏️ |
Needs Revision |
Reviewer sent feedback — agent fixing |
| ✅ |
Done |
Work approved / completed |
| ⛔ |
Won't Do |
Cancelled or abandoned |
| ⚠️ |
Conflict |
Unresolved merge conflicts detected |
🔀 Squash & Merge
- Target Branch Selection — Choose which branch to merge into. Base branch is marked
← recommended.
- Conflict Detection — Clones with unresolved conflicts show ⚠️ in the sidebar.
- Clean Merges — Automatically excludes
.lumi/ artifacts and IDE ephemeral files from the squash.
🧠 Agent Rules
- Root Agent Mode (
lumi-ops.rootAgentMode) — Injects strategist rules for the main workspace, instructing AI agents to plan and delegate rather than implement directly.
- Clone Agent Rules (
lumi-ops.cloneAgentRules) — Injects executor rules into clone workspaces, instructing agents to write MISSION_COMPLETE.md and set their status via MCP when done.
👻 Shadow Mode
When opened inside a Shadow Clone, the UI is fully unified with Root Mode — all operations available, current clone marked with ★. Click 🏠 to return to root.
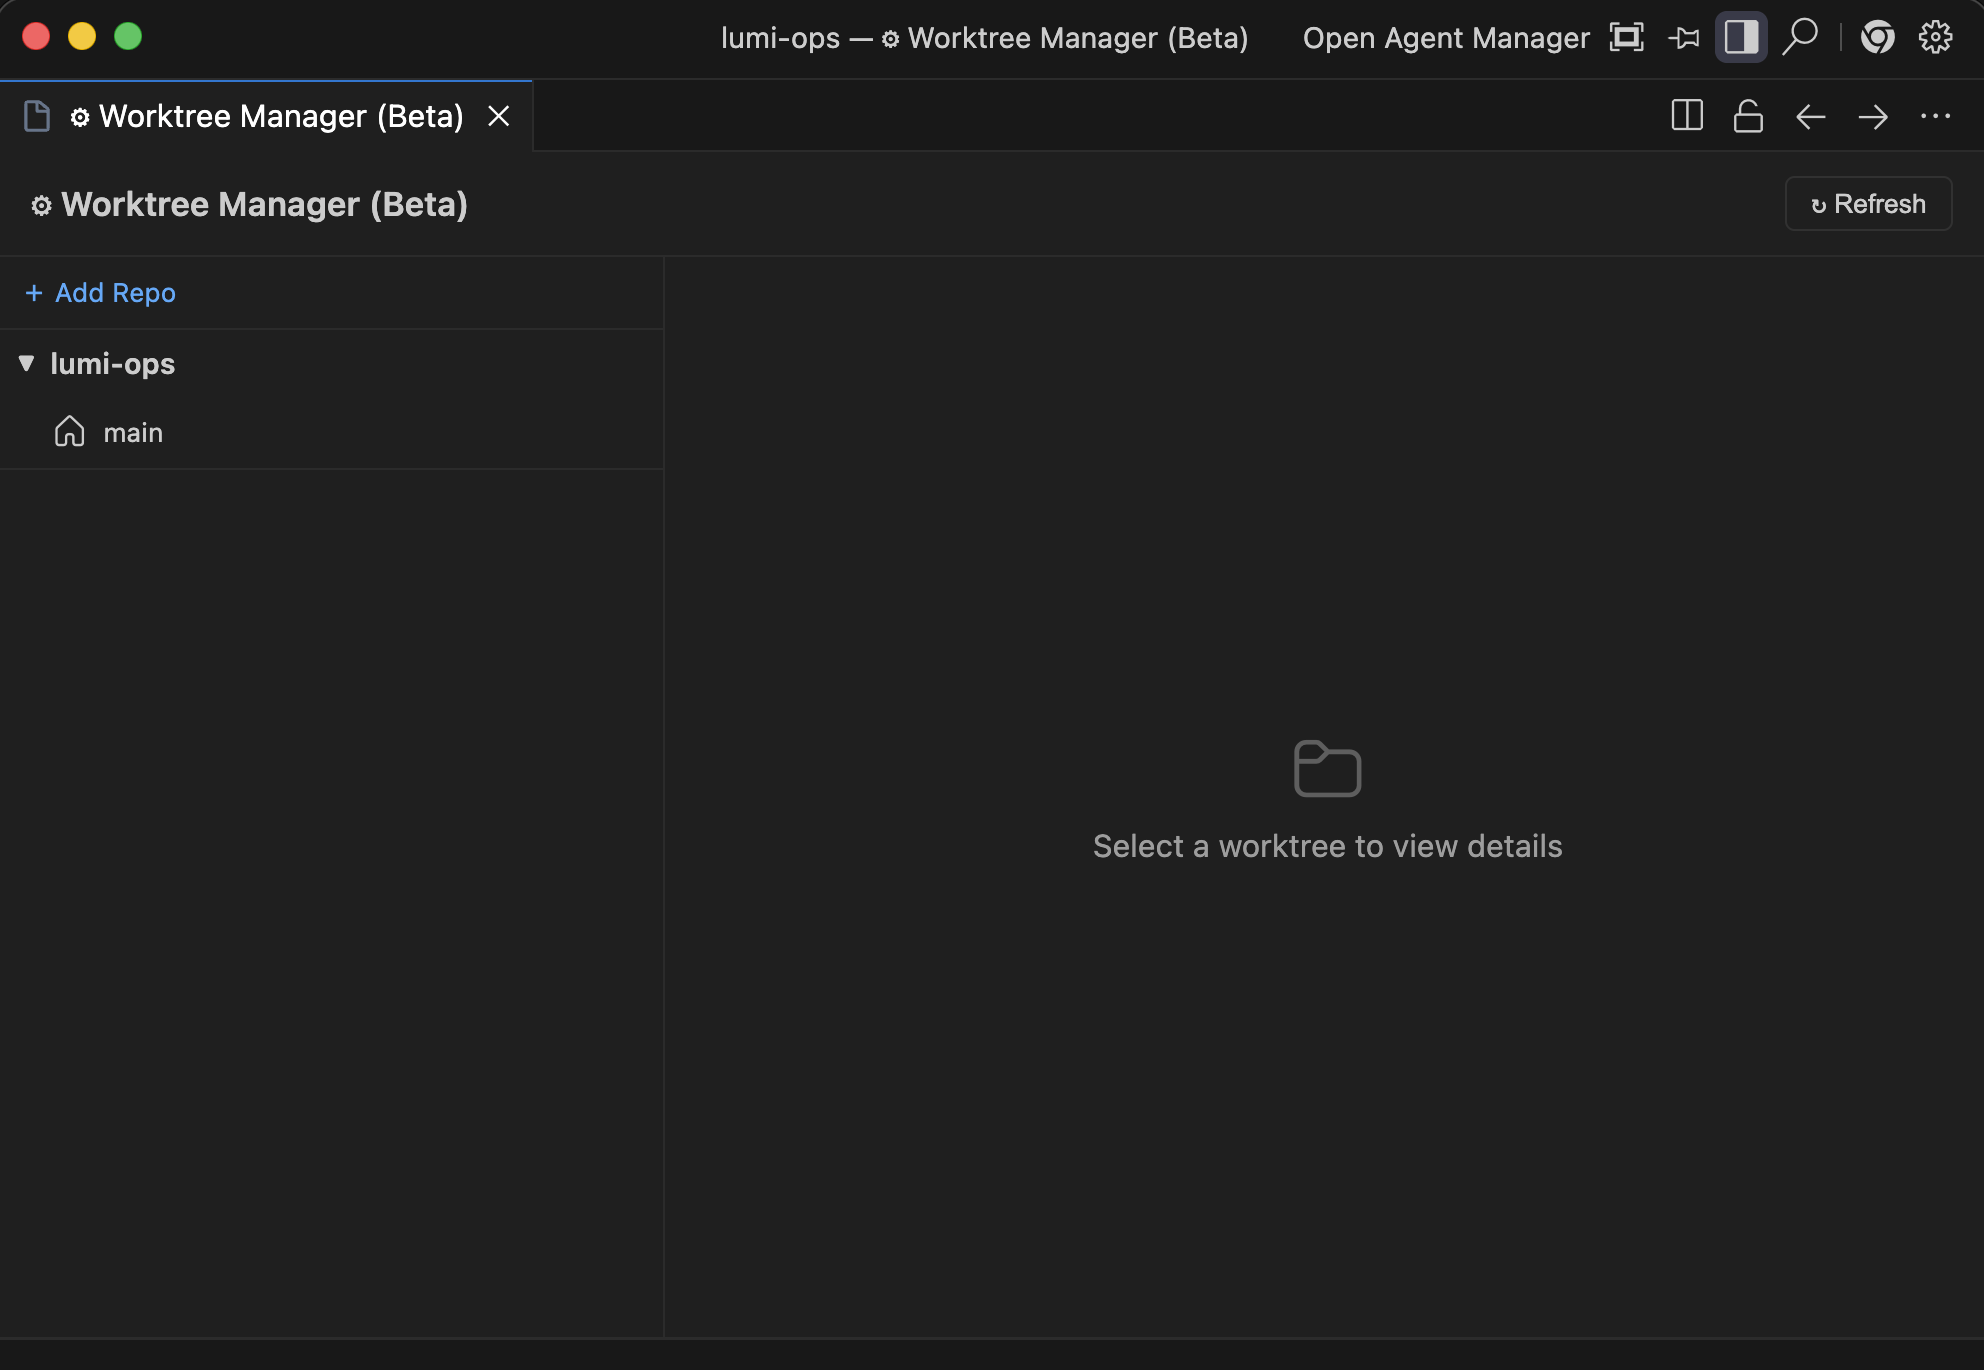
🗂️ Worktree Manager (Beta)
A multi-repo dashboard to monitor all your worktrees from a single panel.
🔍 Other Features
- Auto-Close Window — Clone windows auto-close when the worktree is killed via filesystem watcher.
- Dropdown Search — Branch inputs filter in real-time as you type.
- Copy Branch Name — Right-click any clone to copy its branch name.
- Current Branch Protection — Your active branch cannot be accidentally killed.
- Flexible Kill — Choose to keep or delete the branch when removing a clone.
- Rebase with Conflict UX — Rebase a clone onto its base branch. If conflicts arise, resolve them manually; the sidebar shows a
🔀 rebasing indicator until resolved.
⚙️ Requirements
- Git installed and available in your PATH.
- An AI-enabled IDE (Antigravity, Cursor, Windsurf, VS Code) for best results.
🔗 Links
Give your agents structure. 👻