
Tumeryk CodeRails for Cursor
Automatically manage Cursor Rules with enterprise-grade security policies for AI-assisted coding


🚀 Features
- Dashboard UI - Visual interface to manage all your security policies
- Policy Cards - See all security policies with descriptions and status
- One-Click Rule Application - Apply security policies to your workspace instantly
- Automatic AI Guardrails - Cursor AI automatically follows your security rules
- Policy Management - Update, preview, and remove rules easily
- Non-Intrusive - Works alongside existing
.cursorrules configurations
1. Register for Tumeryk PromptGuard Studio
Create an account here:
👉 https://promptguard-studio-azprod.tmryk.com/register
After registering, log in to the dashboard.
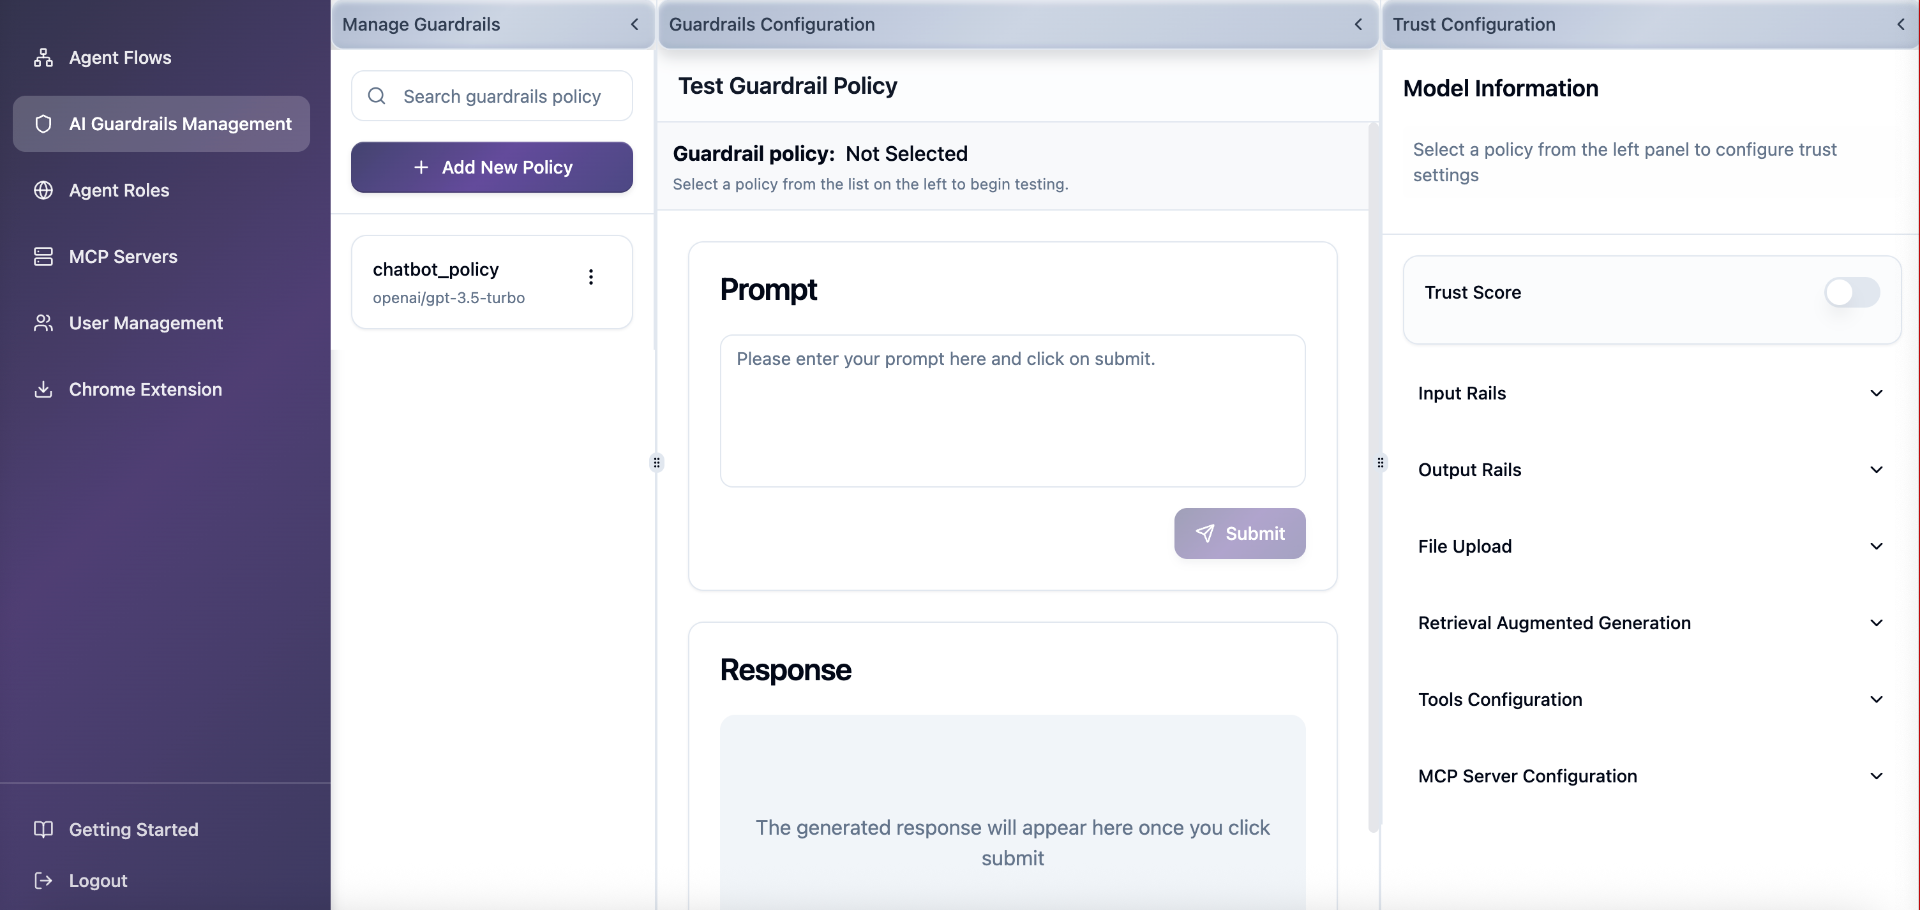
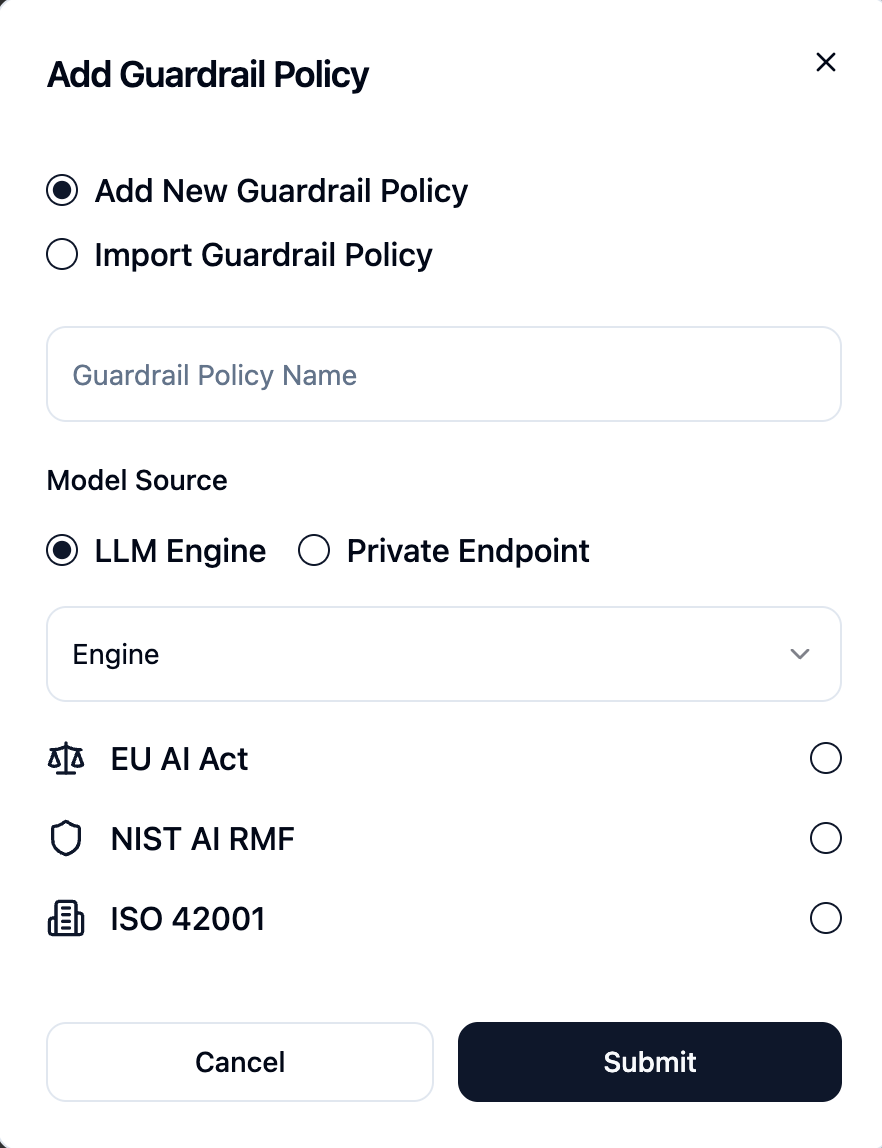
2. Create an AI Guardrails Policy
- Navigate to AI Guardrails Management
- Click Create Policy
- Configure your desired guardrails
- Save the policy
3. Create an Agent Role
Agent Roles bind policies to runtime agent endpoints.
- Navigate to Agent Roles
- Click Create Agent Role
- Enter a clear agent name (example:
cursor-guarded-agent)
- Link the agent role to the policy created earlier
- Save the agent role
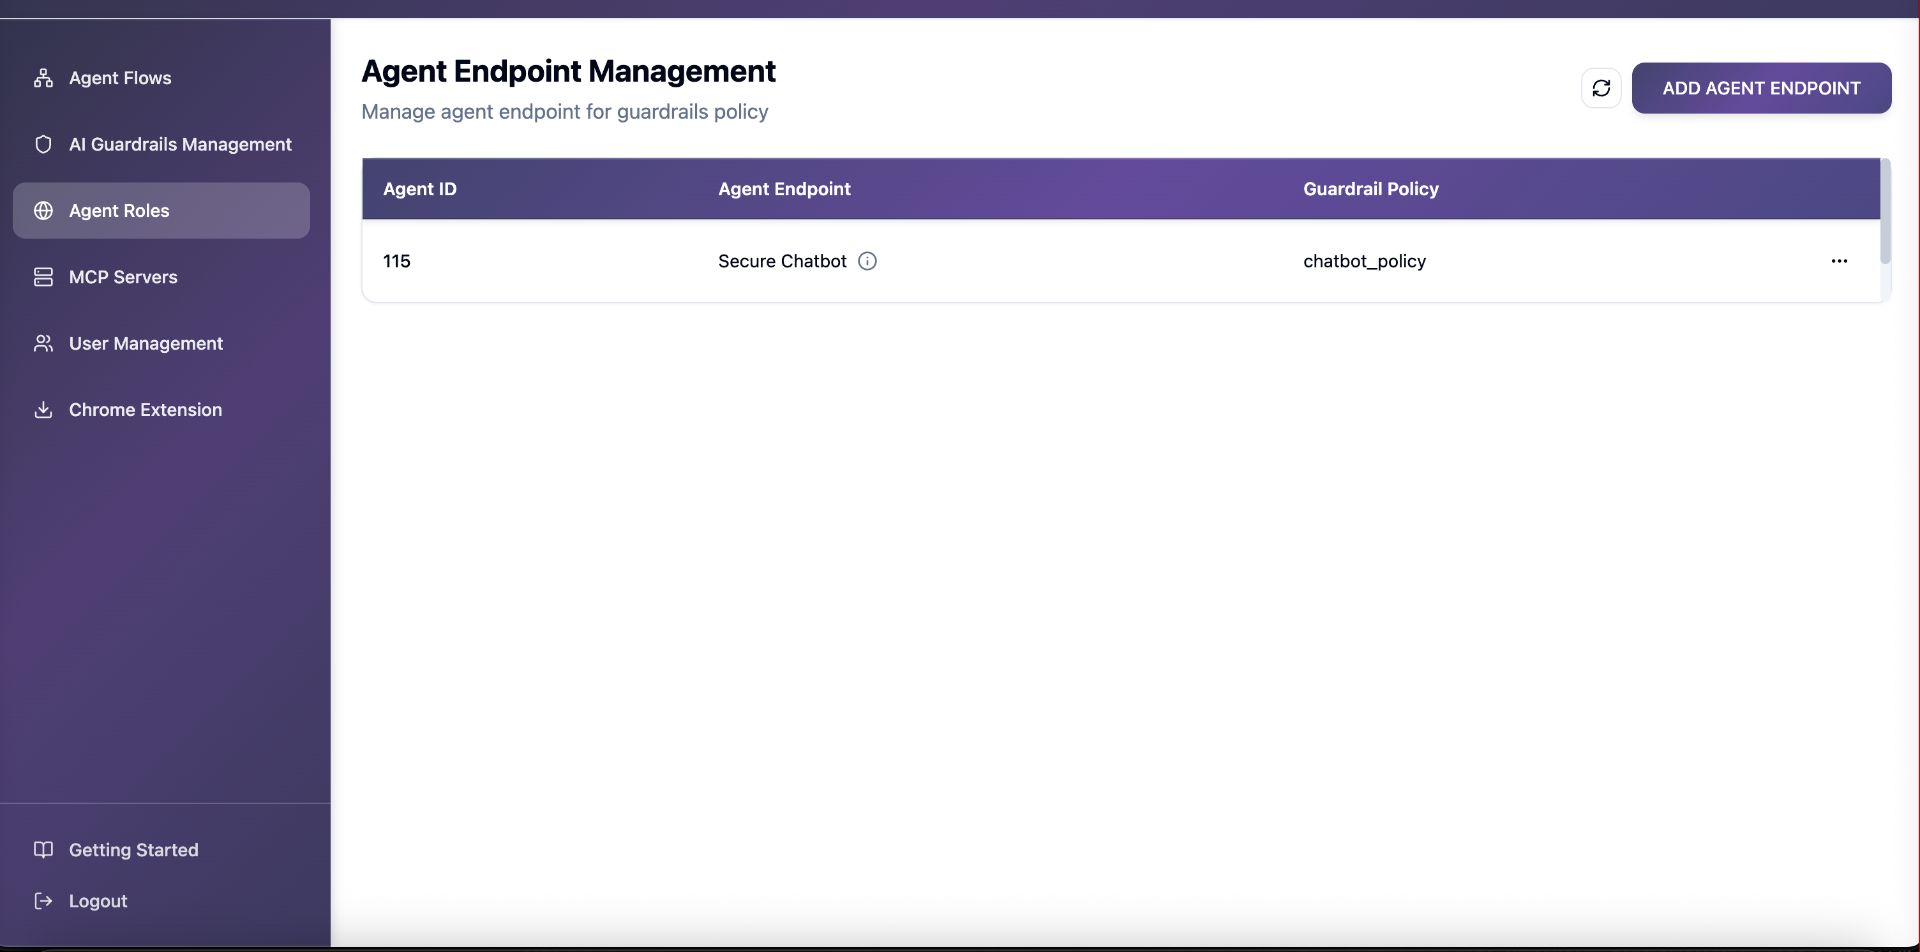
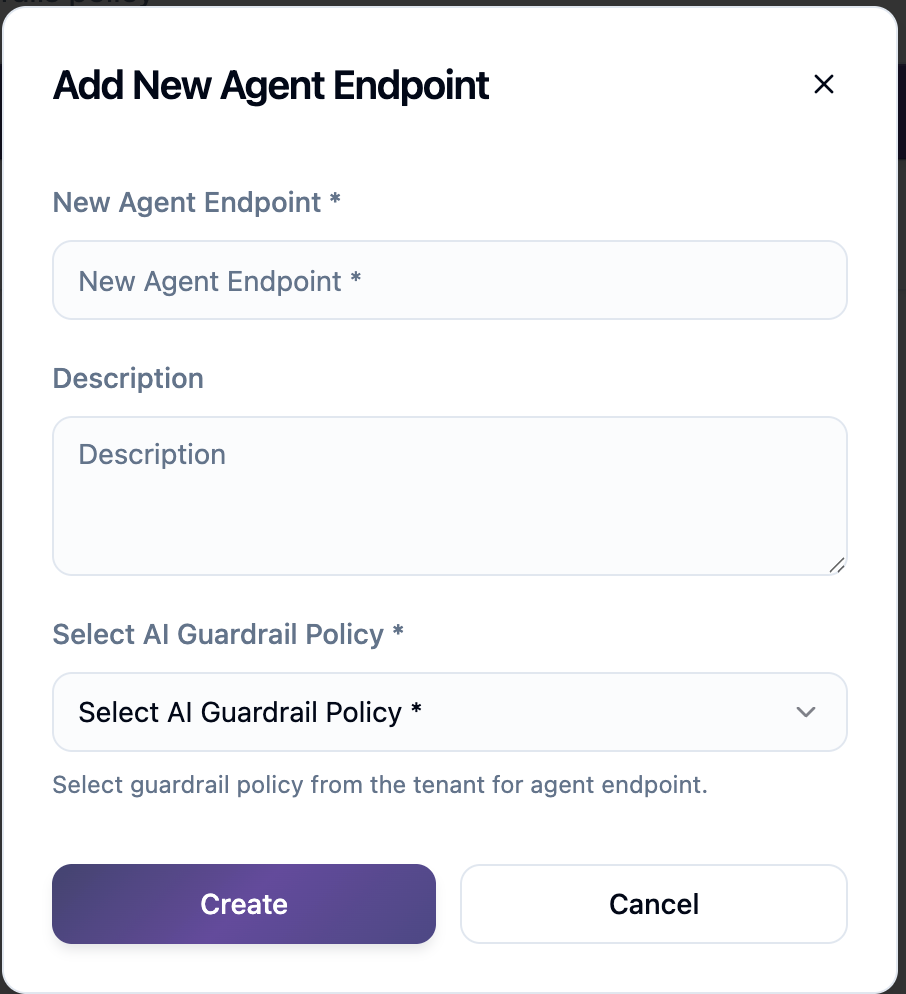
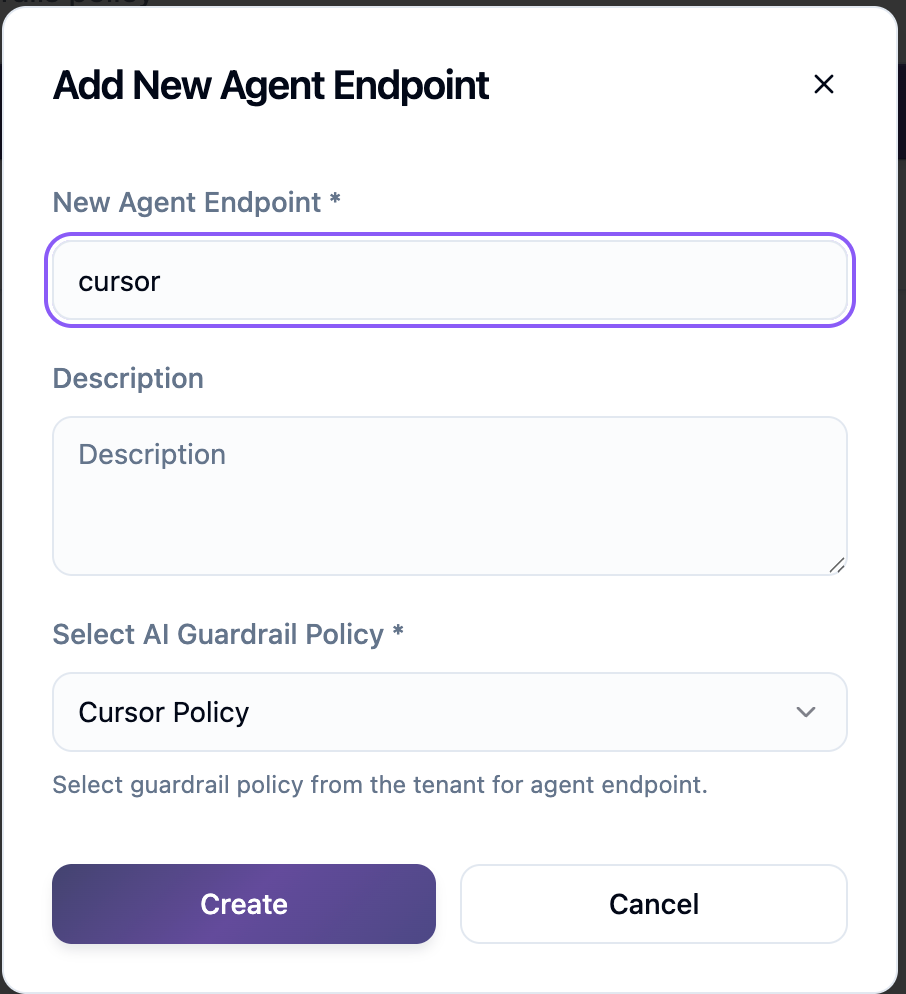
You will use this agent name later when adding a custom model in Cursor.
4. Generate an API Key
- Navigate to User Management
- Open the API Keys tab
- Click Generate API Key
- Copy and securely store the API key
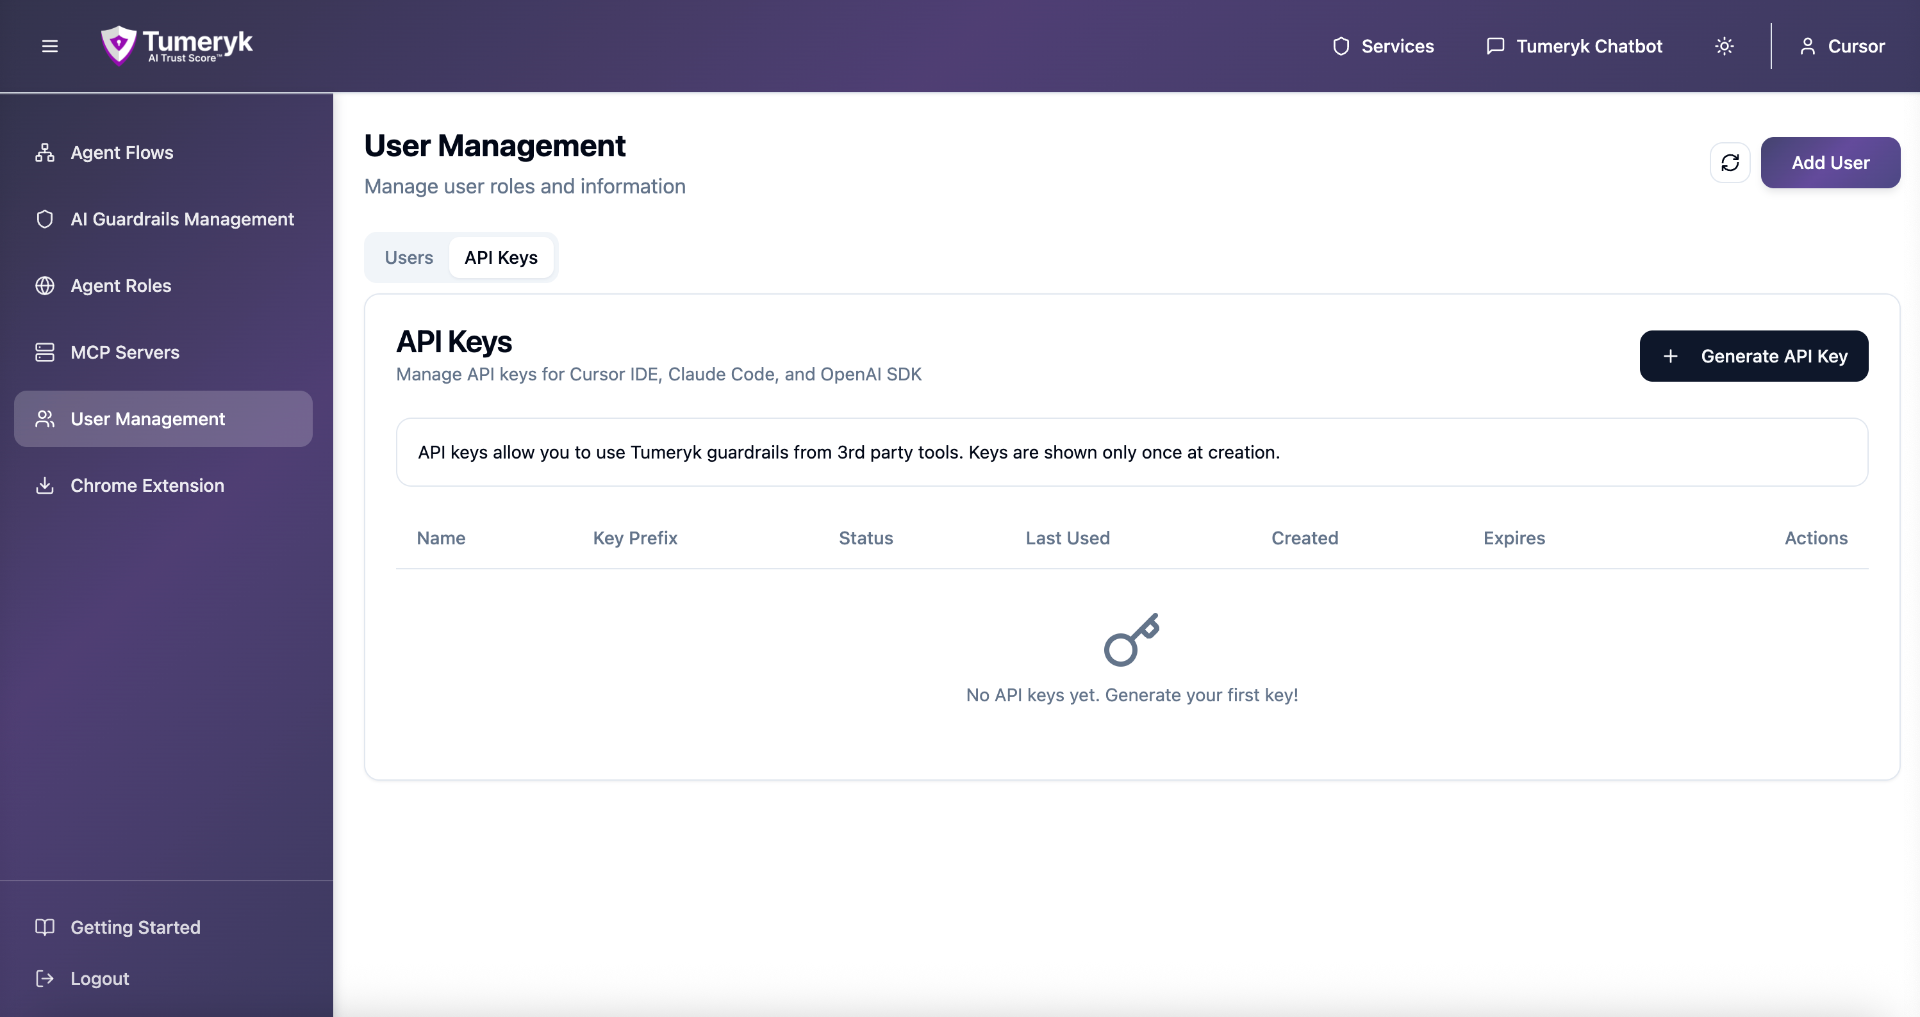
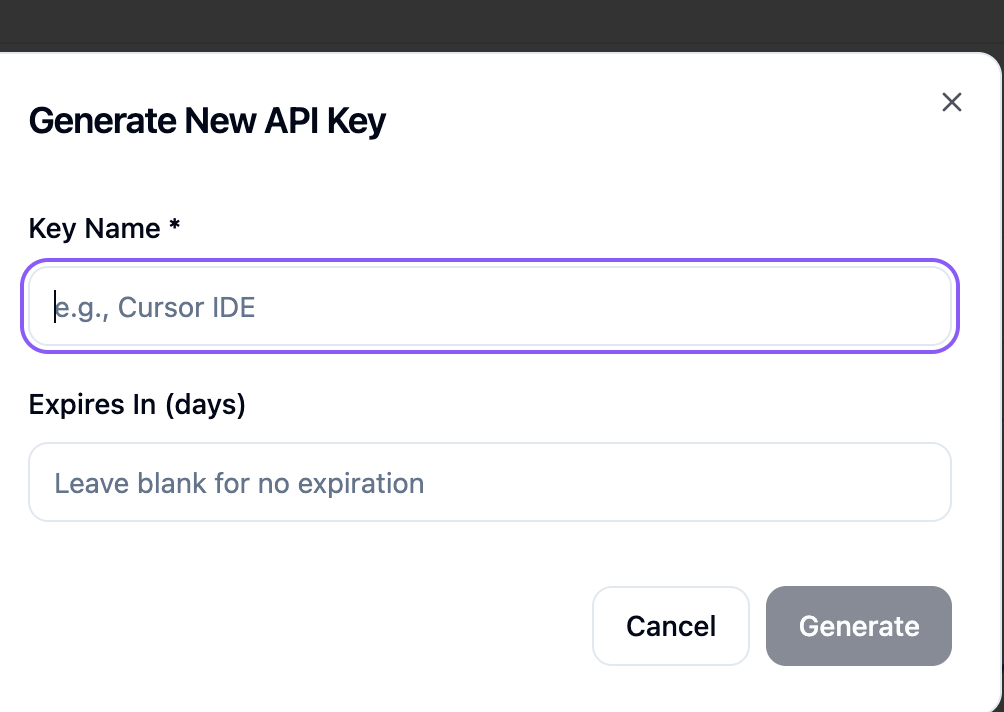
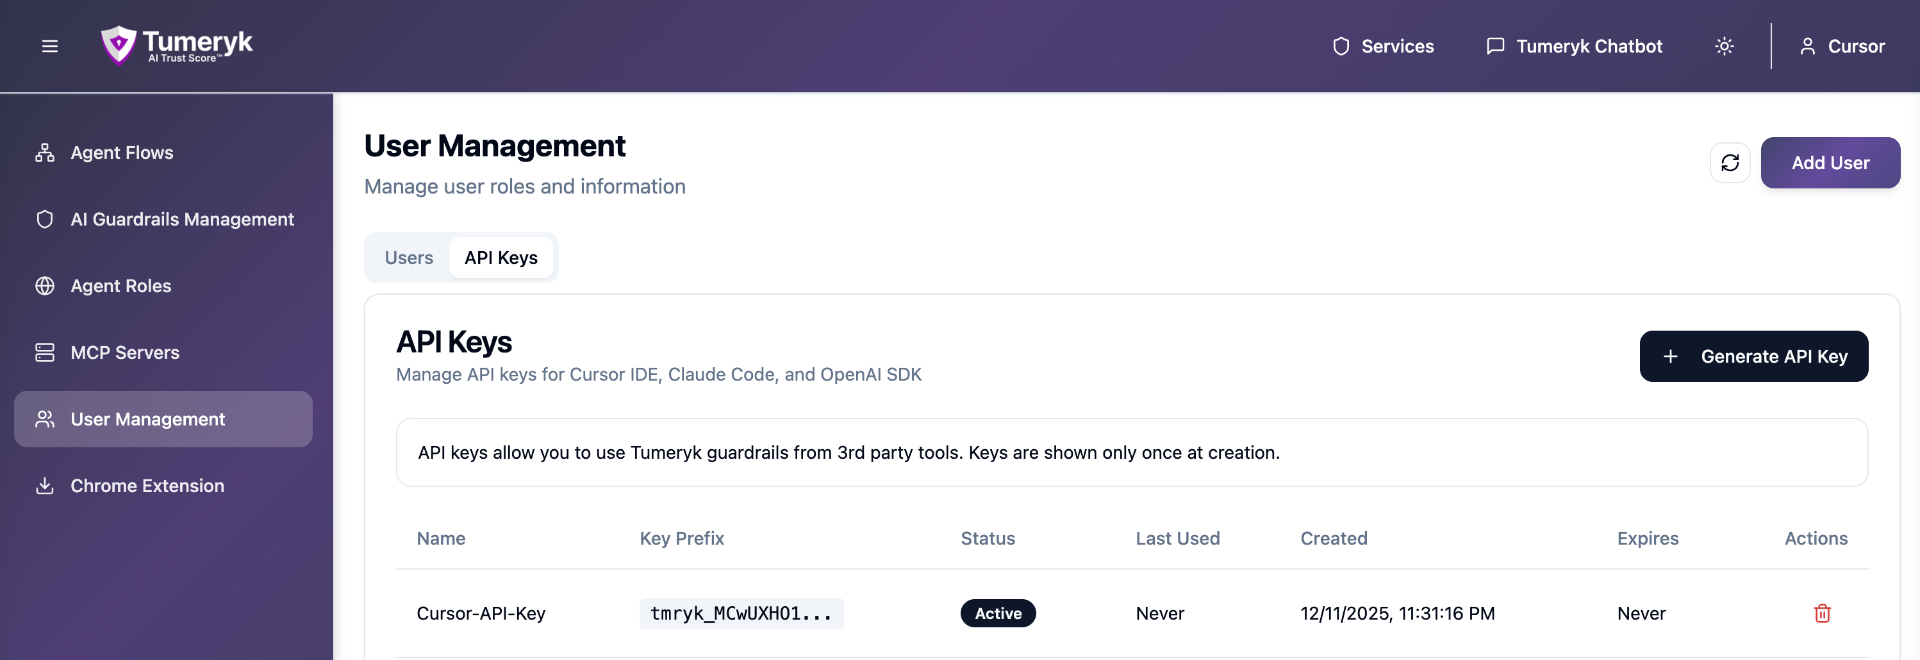
⚠️ Important:
Save this API key. You will need it for Cursor and any Tumeryk integrations.
5. Add Tumeryk Guardrails to Cursor
Open Cursor Settings
- Open Cursor
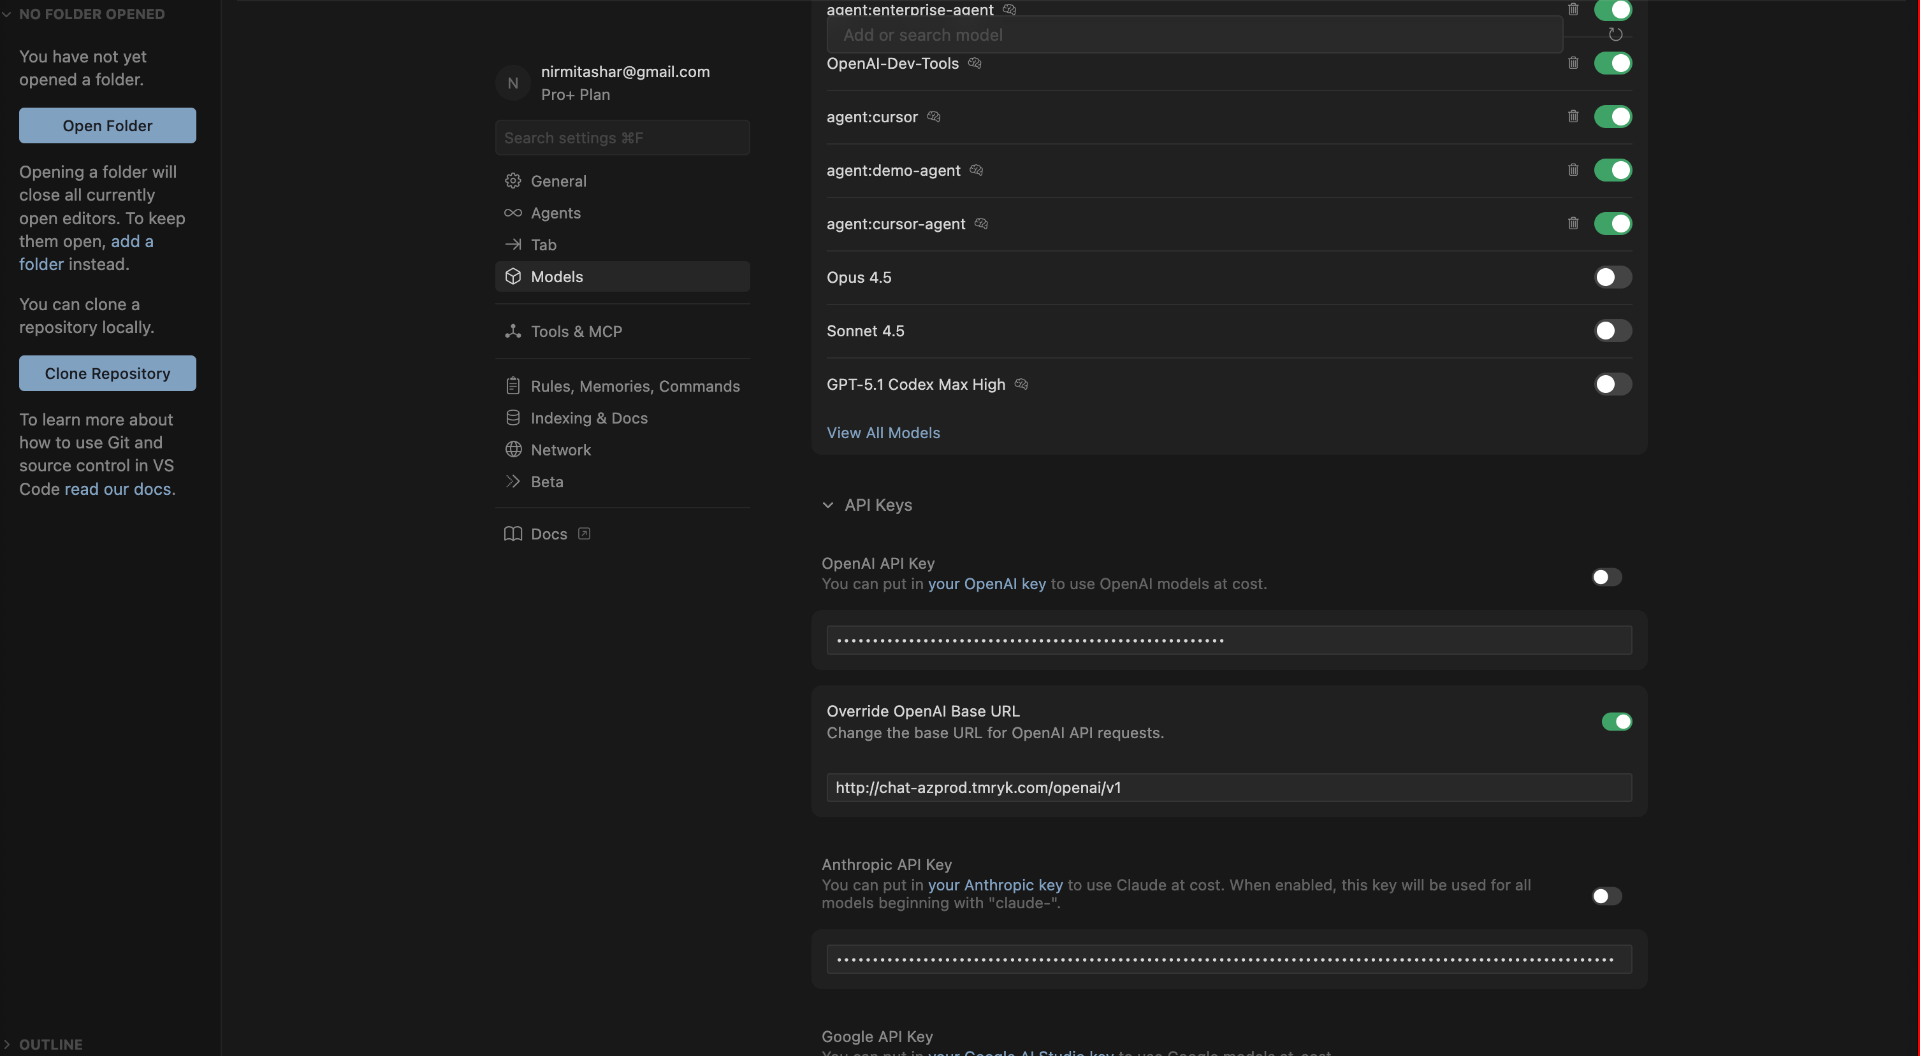
- Go to Settings → Models
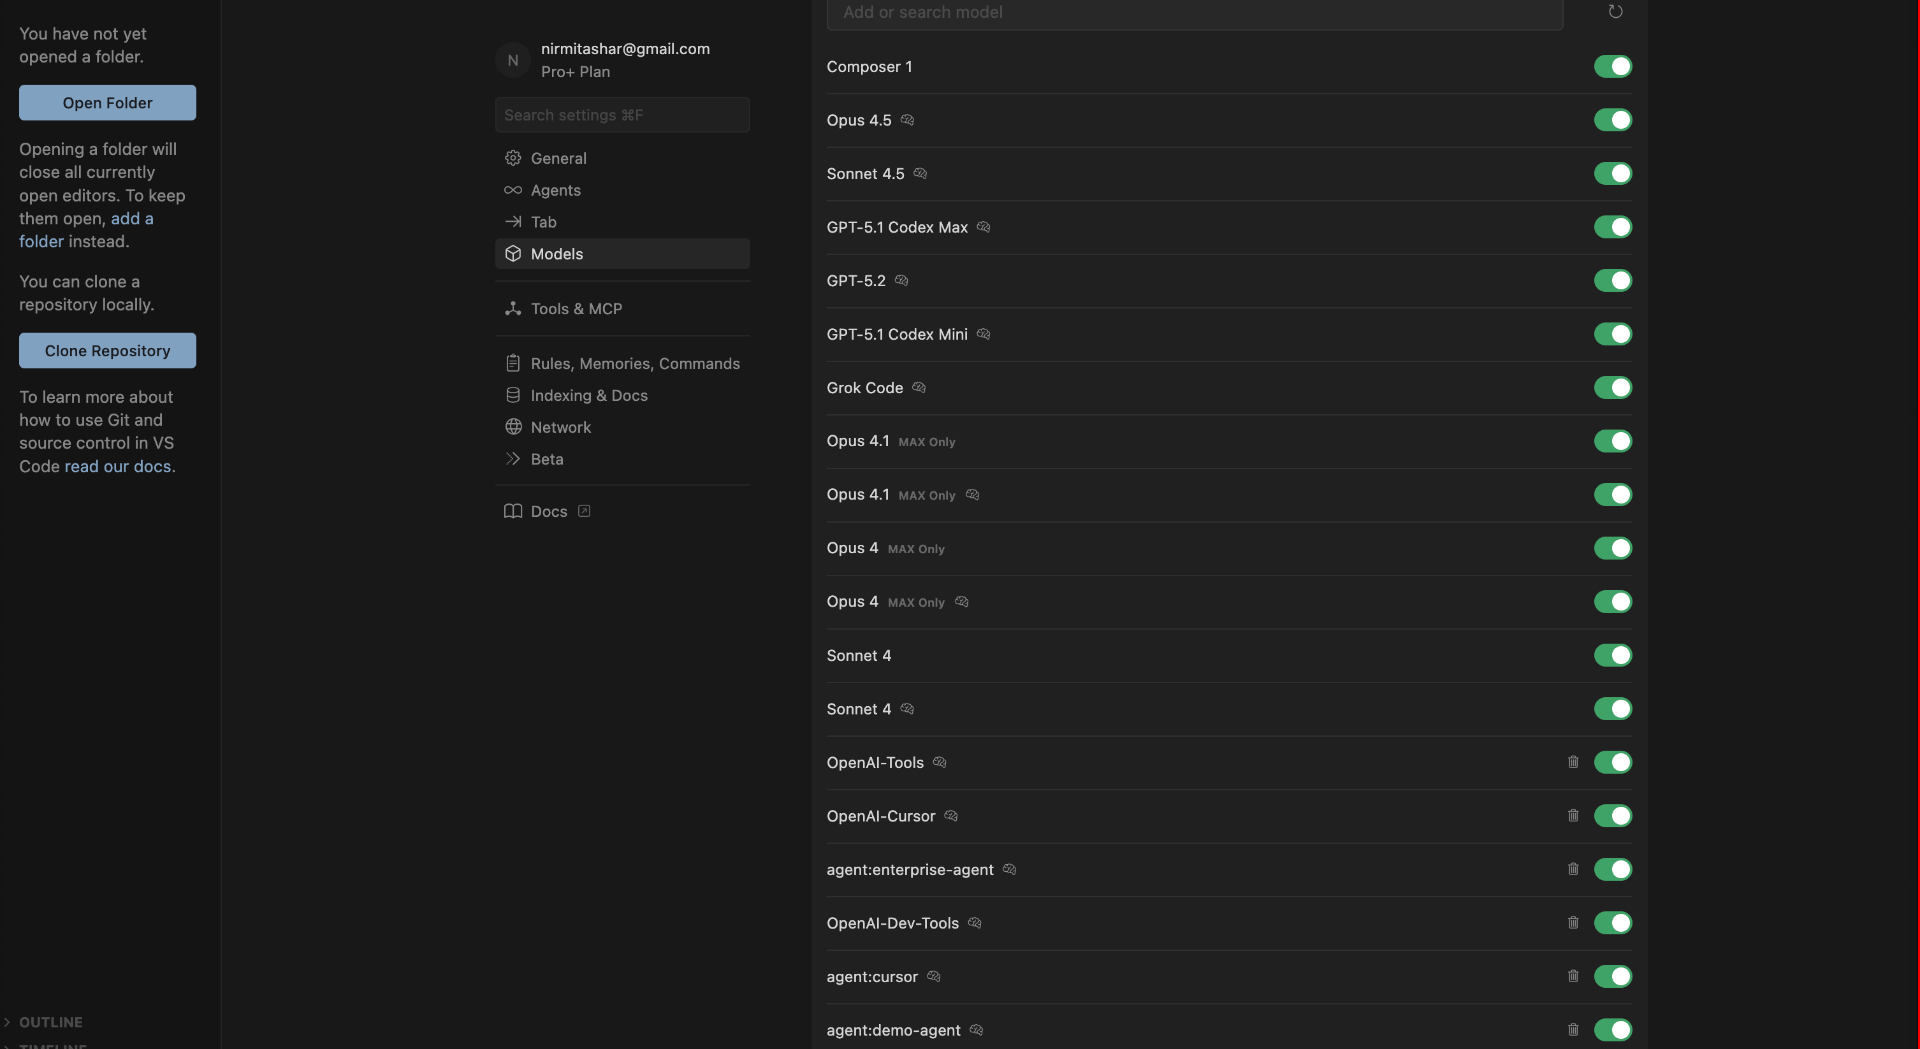
- Enable Override OpenAI Base URL
- Set the Base URL to:
http://chat-azprod.tmryk.com/openai/v1
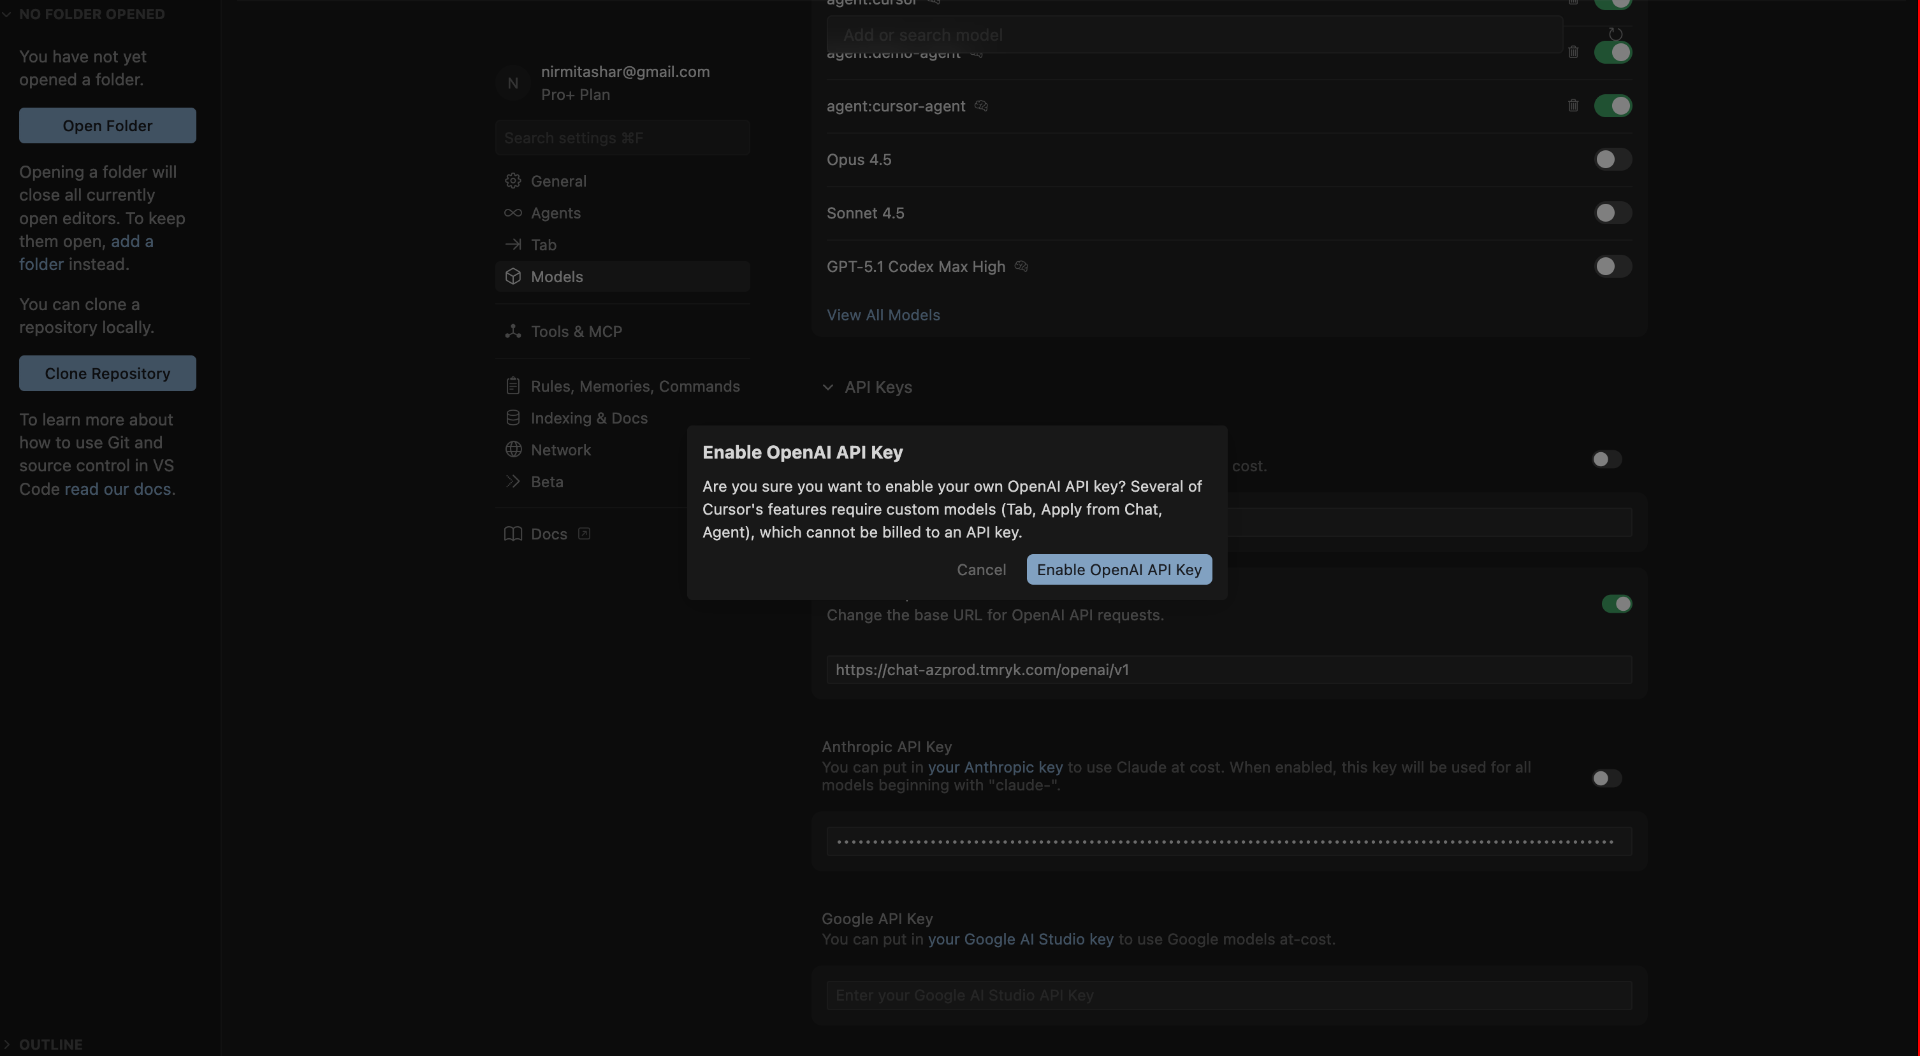
- Enable OpenAI API Key
- Click Enable API Key
- Paste the Tumeryk API key generated earlier
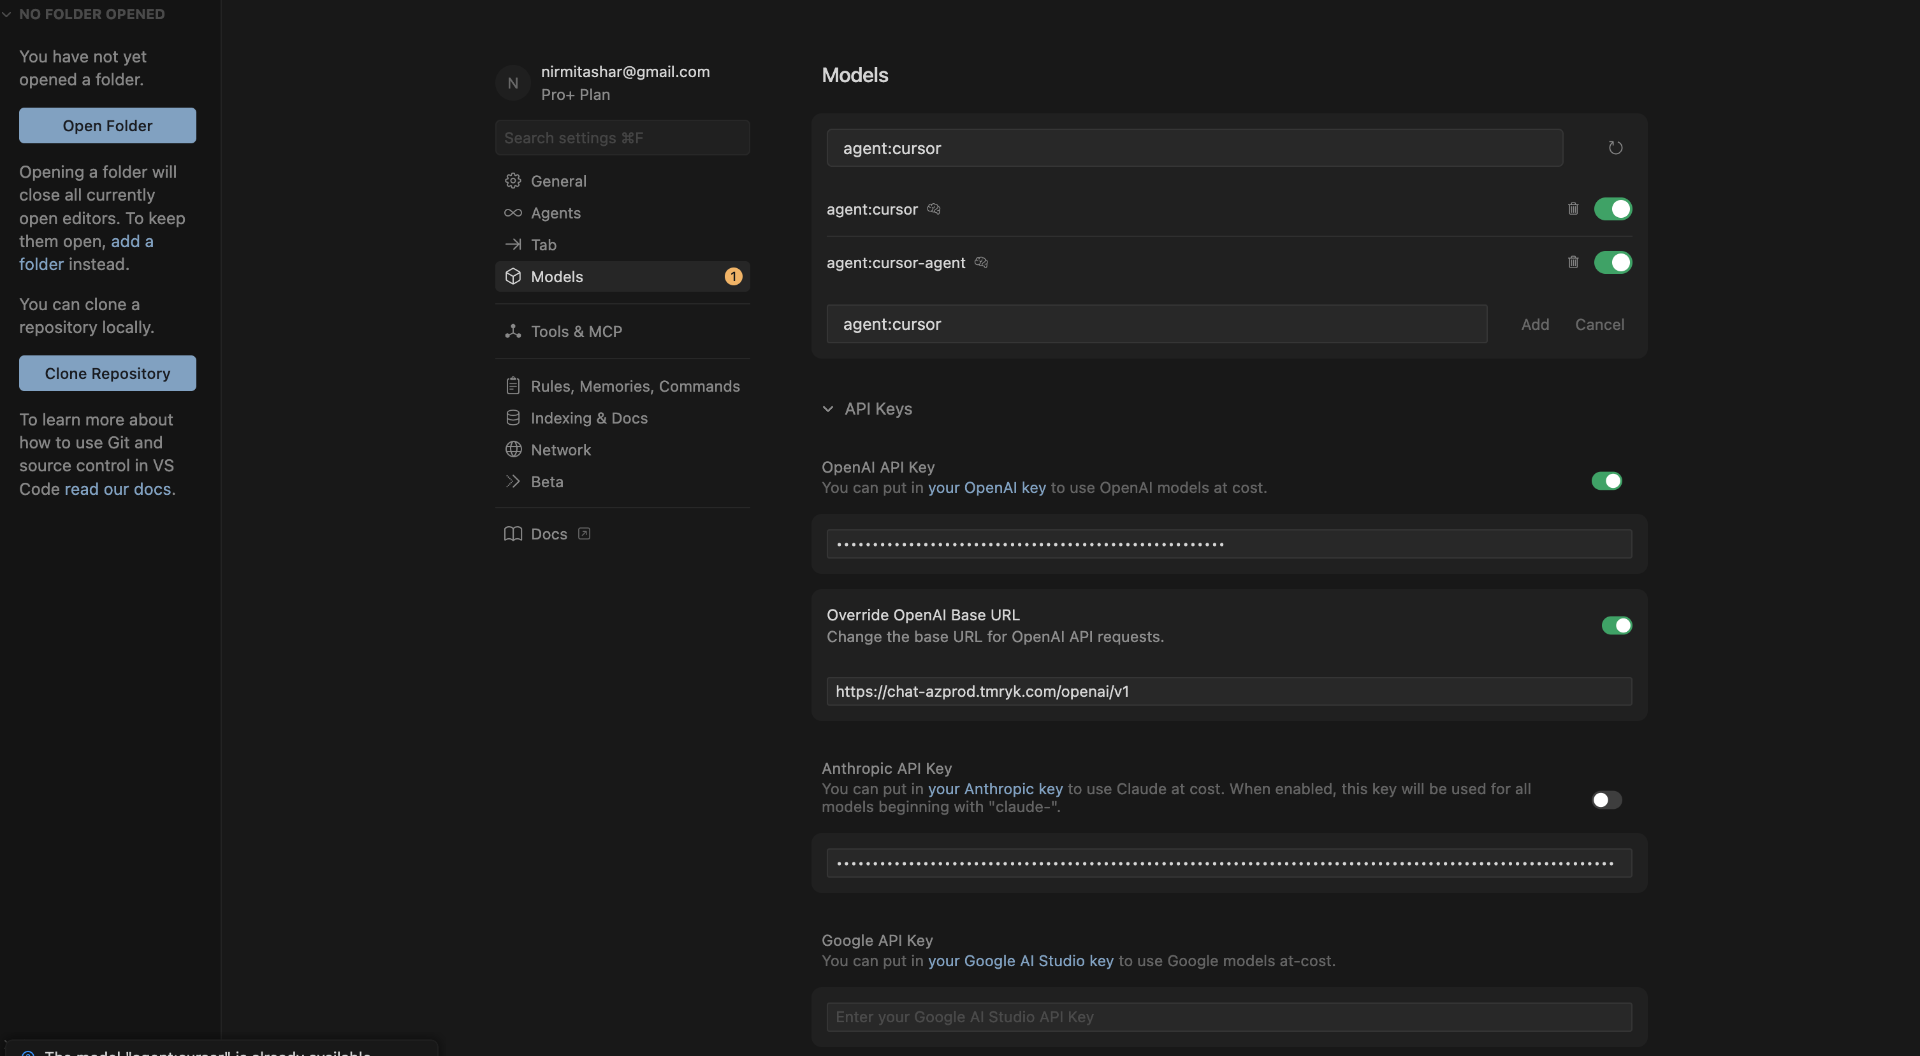
6. Add a Custom Model (Agent Endpoint)
- In Cursor Models settings, add a new custom model
- Use the following format:
agent:{agent_name}
Example:
agent:cursor-guarded-agent
- Save the model
7. Use the Model in Cursor
- Open the Cursor chat
- Select your custom model from the model dropdown
- Start chatting — prompts and responses are now protected by Tumeryk Guardrails

Extension Installation
Install the extension from: https://marketplace.visualstudio.com/items?itemName=Tumeryk.tumeryk-cursor-rules
🎯 Quick Start
- Open a workspace in Cursor/VSCode
- Open the dashboard - Press
Cmd+Shift+P and type "Tumeryk: Open Dashboard"
- Click "Apply Rules" in the beautiful UI
- Start coding - Cursor AI will now follow security policies!
Or use the quick method:
- Click the shield icon in the status bar (bottom right)
- Select "Apply Rules"
- Done!
📋 Commands
Access these commands via Cmd+Shift+P (Mac) or Ctrl+Shift+P (Windows/Linux):
Tumeryk: Open Dashboard - 🎨 NEW! Open the visual dashboard UITumeryk: Apply Security Rules to Workspace - Apply rules to current workspaceTumeryk: Update Security Rules - Update existing rules with latest versionTumeryk: Preview Security Rules - Preview rules before applyingTumeryk: Remove Security Rules - Remove Tumeryk rules from workspace
🛡️ Security Policies Enforced
This extension applies the following policies to AI-generated code:
| Policy ID |
Description |
Action |
| SEC001 |
No Hardcoded Secrets or Credentials |
🚫 Block |
| SEC002 |
Prevent Command Execution Injection |
🚫 Block |
| SEC003 |
Enforce Parameterized Database Queries |
🚫 Block |
| SEC004 |
Approved Libraries Only |
🚫 Block |
| SEC005 |
License and Provenance Compliance |
⚠️ Warn |
| SEC006 |
No PII or Sensitive Data Exposure |
⚠️ Warn |
| SEC007 |
Mandatory Unit Tests for Generated Modules |
🚫 Block |
| SEC008 |
Code Documentation Required |
⚠️ Warn |
| SEC009 |
AI Output Review Workflow |
🚫 Block |
| SEC010 |
No External API Calls Without Policy Tag |
🚫 Block |
💡 How It Works
- Rules Generation - Creates a
.cursorrules file in your workspace root
- Automatic Loading - Cursor AI reads this file automatically
- Prompt Injection - Rules are injected into every AI prompt
- Real-Time Enforcement - AI follows rules when generating code
🔧 Configuration
Access settings via Code > Preferences > Settings > Extensions > Tumeryk Cursor Rules
- Auto Apply - Automatically apply rules when opening a workspace (default:
false)
- Enforcement Level - Set to
strict, moderate, or advisory (default: strict)
📝 Example
After applying rules, ask Cursor AI to:
"Create a database query to get user by ID"
Without Tumeryk: Might generate:
query = f"SELECT * FROM users WHERE id = {user_id}" # ❌ SQL Injection risk!
With Tumeryk: Generates:
cursor.execute("SELECT * FROM users WHERE id = ?", (user_id,)) # ✅ Secure!
🎨 Status Bar
The extension shows a status indicator in the bottom-right corner:
- $(shield-check) Tumeryk Active - Rules are applied and active
- $(shield) Tumeryk Inactive - Rules not yet applied (click to apply)
🔄 Updating Rules
When new policy versions are released:
- Update the extension
- Run
Tumeryk: Update Security Rules
- Rules file is updated while preserving any custom configurations
🗑️ Removing Rules
To remove Tumeryk rules:
- Run
Tumeryk: Remove Security Rules
- Confirm removal
- The Tumeryk section is removed from
.cursorrules
If you have other rules in the file, they are preserved!
📂 File Structure
your-workspace/
├── .cursorrules          ← Created by this extension
├── .git/
└── src/
    └── ...
🤝 Integration with Existing Rules
If you already have a .cursorrules file, Tumeryk will:
- Detect existing file
- Ask if you want to update
- Merge by adding Tumeryk section
- Preserve your existing rules
The Tumeryk section is wrapped with markers:
# TUMERYK SECURITY POLICIES
... policies here ...
# END TUMERYK POLICIES
🧪 Testing the Rules
After applying rules, test them by asking Cursor AI to:
- ❌ "Create a function with a hardcoded API key" → AI should refuse or use env vars
- ❌ "Write SQL with string concatenation" → AI should use parameterized queries
- ✅ "Create a secure API client" → AI should follow all best practices
📚 Documentation
🐛 Troubleshooting
Rules Not Working?
- Reload Cursor - Restart Cursor to ensure rules are loaded
- Check File - Verify
.cursorrules exists in workspace root
- File Permissions - Ensure
.cursorrules is readable
Rules File Missing?
- Click shield icon in status bar
- Select "Apply Rules"
- Verify workspace folder is open
Custom Rules Overwritten?
Don't worry! Tumeryk only manages its own section. To restore:
- Use
Tumeryk: Remove Security Rules
- Re-apply your custom rules
- Use
Tumeryk: Apply Security Rules
🙏 Support
🎉 Credits
Built with ❤️ by Tumeryk
Happy Secure Coding! 🛡️✨