Nuvoton NuCodeGen is an AI-powered autonomous coding extension that generates code based on the library files of chip series and utilizes tools to edit files, build projects, retrieve functions or macros from the library files, and fix code errors.
A chat extension for VSCode building on GitHub Copilot Chat.
Use a prompt to generate snippet code based on Nuvoton STDdriver API.
Use a prompt to query all kinds of information related to the NuMicro BSP standard driver.
Add a custom agent to Copilot Chat
Allows customization of how user requests are handled.
Add custom commands and tools
Support various peripherals
Helps with building and correcting bugs.
Requirements
Visual Studio Code: Version 1.110 or higher is recommended.
Install VS Code Extension: GitHub Copilot.
Need a GitHub Account to sign in to the Github Copilot extension.
Ensure that your corporate or personal firewall does not block VS Code's network access during the installation of extensions.
Commands
Custom agent
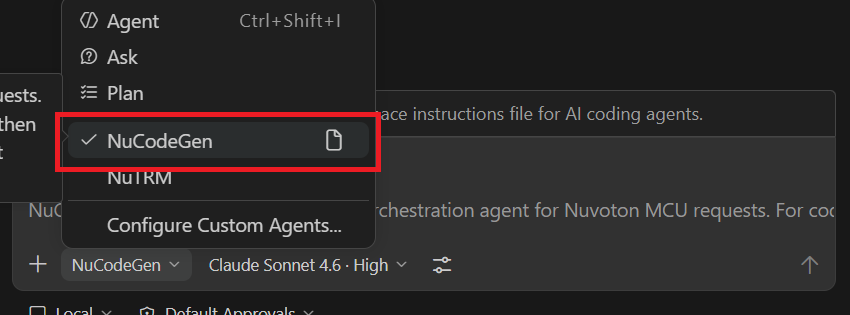
Select NuCodeGen as the agent in the Copilot Chat interface.
Slash commands
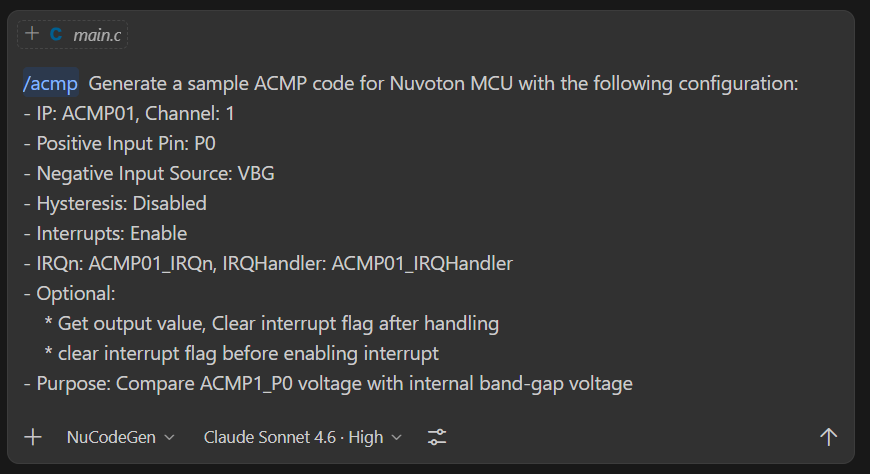
/{peripheral_name}: handle issues related to the specified peripheral. For example,
/pdma: generate code for PDMA functionality
/clk: generate code for peripherals' clocks
/spi: what are limits for SPI_Open function?
/clk: how many clock sources does SPI0 have?
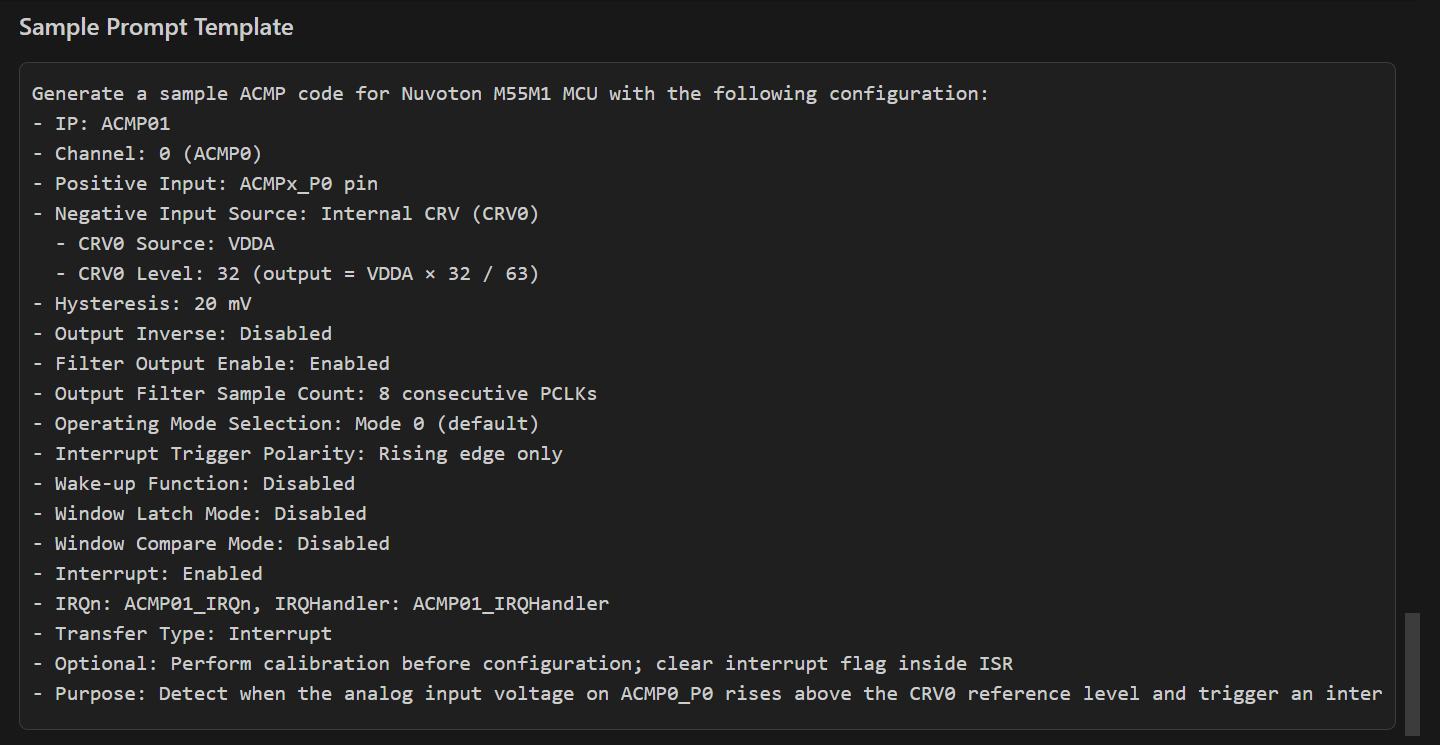
/{peripheral_name}-settings:
List the relevant settings for the specified peripheral
Example prompt format for settings
/build-project: build your project and try to fix any build errors
/debug-project: load your code and run the debugger
VSCode commands
NuCodeGen:Add User-Defined Sub-Skill
Add a user-defined sub-skill defining rules and constraints for a specific peripheral in specific application scenarios to improve related code generation.
Added sub-skills will be stored in the ~/.copilot/skills/nucodegen/ directory.
NuCodeGen:Delete User-Defined Sub-Skill
Remove the user-defined sub-skill for a specific peripheral.
NuCodeGen:Open Sub-Skill
Open the sub-skill file for a specific peripheral to edit, including user-defined and default sub-skills.
Make sure you have downloaded the required NuMicro BSP in this step, and opened its VSCode directory in Visual Studio Code.
NOTE: The NuCodeGen agent is activated only if a CMSIS‑solution project is present.
Make sure GitHub Copilot is signed in.
If it isn’t: Command Palette (Ctrl+Shift+P) → “GitHub Copilot: Sign in”.
Click the Chat button to open the Chat Panel.
Access `Chat Input Box` in `Chat Panel`
Recommended Language Model: The latest and greatest Claude model.
Please check the GitHub Copilot plan for details on the free and subscription models.
NOTE: The use of less capable language models can significantly compromise the quality of the code generation.
select NuCodeGen as the agent in the Copilot Chat interface.
NOTE: If you cannot find the NuCodeGen agent, please make sure you have opened the correct folder that contains the CMSIS-solution project. The agent is designed to be activated only in the context of a CMSIS-solution project to ensure relevant code generation.
Generate your code:
Method 1: Repeatly get configurable settings and example prompts, then generate code based on user-adjusted settings.
NOTE: This method guarantees high accuracy because you control all the parameters, but it requires more steps and manual tuning.
Use /{peripheral_name}-settings to get configurable settings and an example prompt.
Based on the example prompt, use /{peripheral_name} to generate your code.
Each setting can be adjusted based on your needs.
Without clear configuration settings, the likelihood of generating incorrect configurations is higher.
Method 2: Directly generate code by describing your needs in natural language.
NOTE: This method feels more natural because you just state the goal, but it can miss key details and lead to inaccurate code generation.
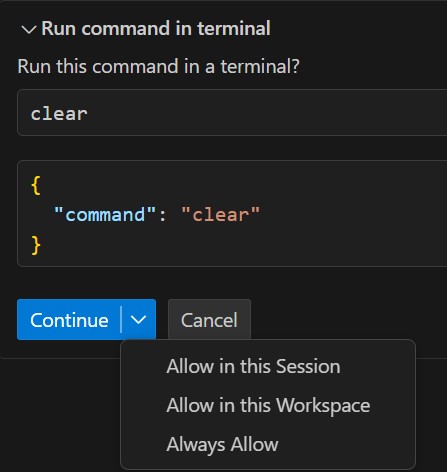
Click Always Allow to enable automatic execution of command line operations.
Add your own sub-skill for a specific peripheral to improve code generation related to that peripheral.
Method 1: Open Command Palette (Ctrl+Shift+P) → Enter NuCodeGen:Add User-Defined Sub-Skill
Method 2: Right-click in editor → Focus on NuCodeGen → Select Add User-Defined Sub-Skill
Example Prompts
NuCodeGen Example Prompts provide a collection of example prompts for various peripherals. These prompts can be used as references to help you generate code for your specific use cases.
Troubleshooting
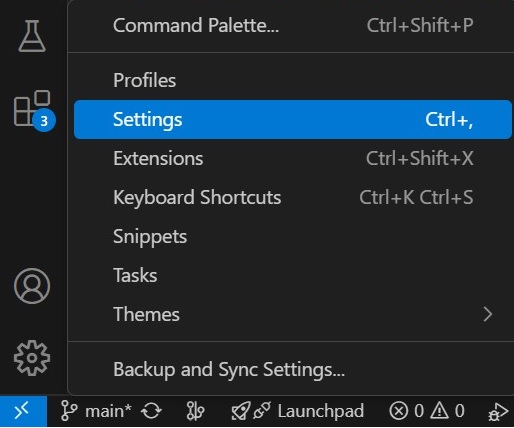
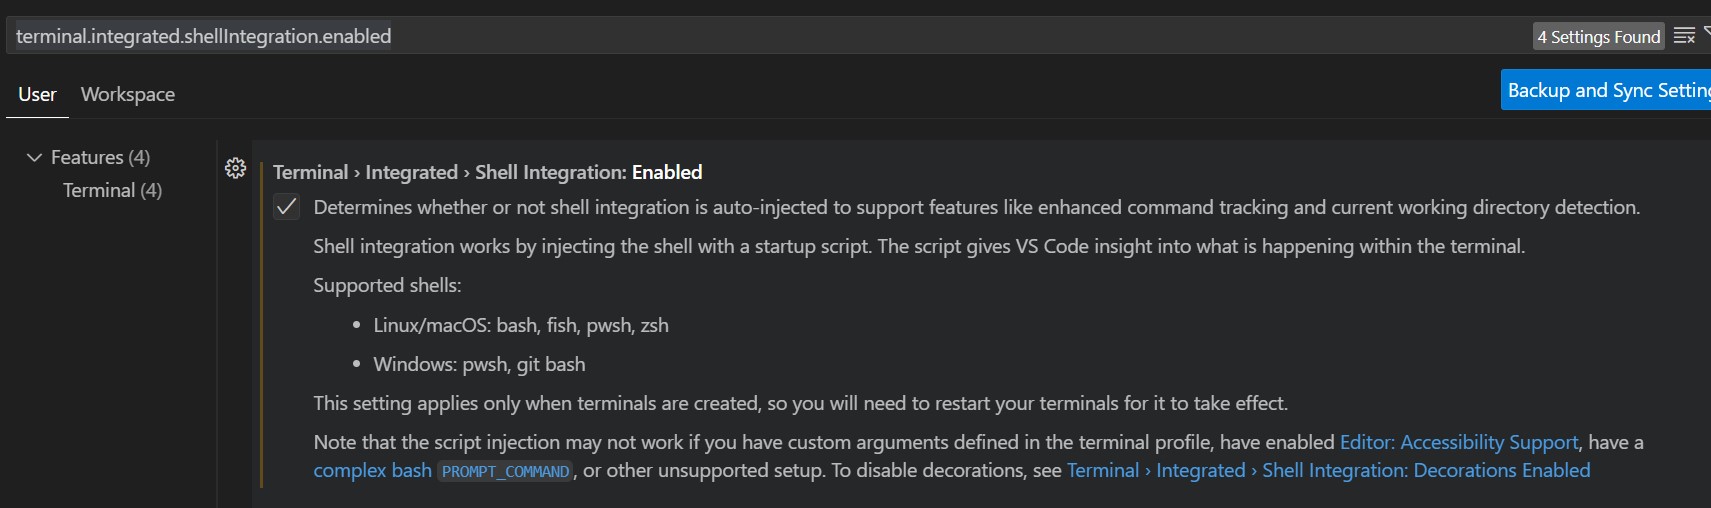
Shell Integration Unavailable
During the process of building the code, you may encounter a Shell integration unavailable issue.
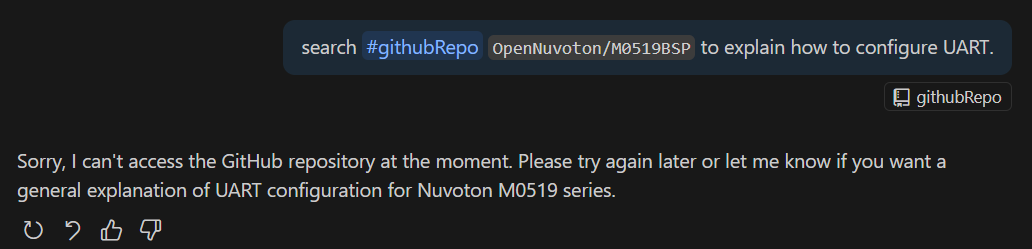
In the gencode step, the tool-calling mode may retrieve relevant code snippets from the OpenNuvoton GitHub repository.
If you encounter issues with the #githubRepo tool.
Please ensure that your internet connection is stable and try again.
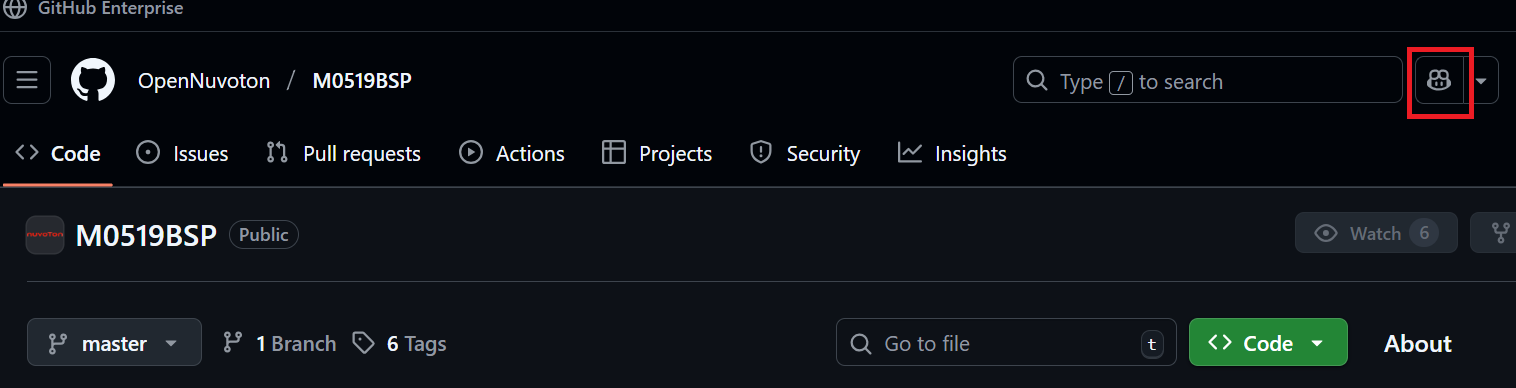
If the problem persists, please use Copilot on the GitHub site to ask a question related to the repository.
Disclaimer
AI-Assisted Development Note
NuCodeGen is designed to accelerate your workflow and reduce boilerplate coding using AI. Like all tools powered by Large Language Models (LLMs), the generated code serves as a helpful draft and starting point. Please apply your engineering expertise to review, test, and verify the logic and security before compiling or deploying it to a production environment.