Pi Code Gui


A native VS Code editor experience for the Pi coding agent. Runs Pi inside VS Code — not in a terminal — with full access to your editor state, diagnostics, symbols, and more.
Quick Start
- Install Pi:
npm install -g @earendil-works/pi-coding-agent
- Set an API key: Run PiGui: Set Up API Key / Login from the command palette (
Ctrl+Shift+P), or set ANTHROPIC_API_KEY / OPENAI_API_KEY in your environment.
- Open the chat: Click the Pi icon in the activity bar, or run PiGui: Code Agent from the command palette.
- Start prompting: The agent can see your editor, check diagnostics, read files, and make edits.
Why Pi Code Gui?
The Pi coding agent is a powerful AI pair programmer, with an exceptional terminal (TUI) implementation.
For people who prefer a GUI experience, this extension embeds Pi directly in VS Code's native UI:
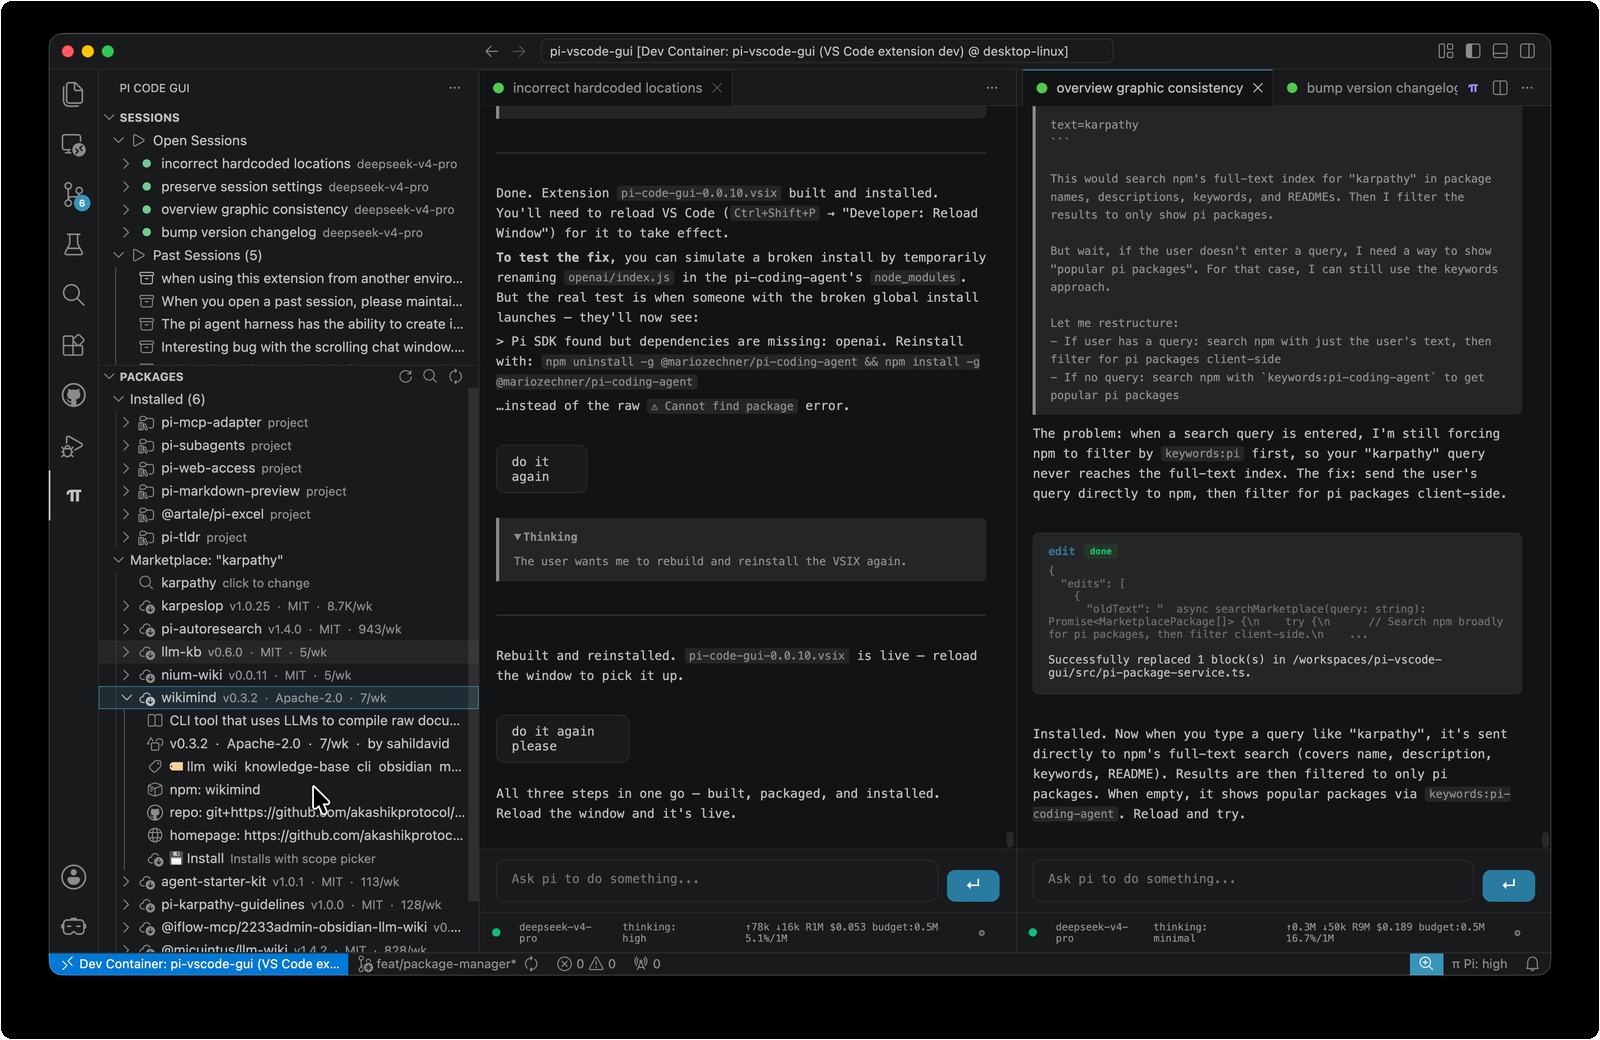
- In-editor chat — streaming responses, thinking blocks, and tool execution results rendered in a webview panel, not a terminal buffer.
- Native VS Code bridge — 16 tools that call VS Code APIs directly. The agent can inspect your active editor, check diagnostics, find symbols, look up types, apply edits, and format code, all through the same APIs VS Code uses.
- Session persistence — conversation history survives VS Code restarts. Sessions are stored in Pi's standard
.jsonl format alongside your project.
- Multi-session support — multiple chat sessions in separate panels, each with independent model and thinking level settings.
Features
| Feature |
Description |
| 💬 Chat panel |
Streaming text, collapsible thinking blocks, tool call/result rendering, markdown with syntax-highlighted code blocks |
| 🧰 Editor bridge |
Agent reads open editors, checks diagnostics, inspects symbols/types, applies edits, formats code — all through VS Code APIs |
| 🔄 Session history |
Auto-saved conversations can be resumed or deleted. Find with text search |
| 🪟 Multi-session |
Multiple independent chat panels, each with its own model, thinking level, and conversation tree |
| 🔐 Flexible auth |
Runtime API key overrides via VS Code settings, env vars, or the built-in auth config |
| 🔧 Settings |
Toggle auto-compaction, auto-retry, skills loading, context files, and prompt templates from the UI |
| 📋 Custom Messages |
Extensions can render inline interactive cards with buttons, clickable rows, and live polling updates — see § Custom Messages |
| 🛠️ Tool control |
/tools command opens a grouped checkbox picker to select which built-in, bridge, or extension tools are active per session. Persisted to session file, restored on resume |
Gotchas
- Not all TUI behaviours map well into VSCode's UX. For instance, having new UI widgets spawned by extension packages. I did a best effort implementation, but there is definitely room for improvement.
Custom Messages — Minimal Working Example
Custom messages render inline in the conversation stream with interactive
elements (buttons, clickable rows, status indicators). This is the
webview equivalent of Pi's TUI MessageRenderer.
1. Register a renderer (Pi Code GUI extension host)
Pi extensions call globalThis.__piRegisterMessageRenderer(customType, sourceCode).
The second argument is JavaScript source code as a string — it runs in the
webview DOM and receives (data, containerEl, escapeHtml).
// In your Pi extension's entry point (e.g. index.ts):

export default function (pi: ExtensionAPI) {
  // Register renderer at load time. Defer to session_start if the
  // hook may not be available at file evaluation time.
  function registerRenderer() {
    const reg = (globalThis as any).__piRegisterMessageRenderer;
    if (typeof reg !== "function") return;

    reg("my-extension", `
// This code runs in the webview DOM. Variables declared here are scoped
// to this renderer invocation and won't leak to other cards or the global
// scope (Pi Code GUI wraps renderers in an IIFE or <script> tag).

// data: the full custom message payload from pi.sendMessage()
var items = (data.details && data.details.items) || [];
if (!items.length) {
  containerEl.innerHTML = "<p>No items.</p>";
  return;
}

var h = '<div class="my-card">';
for (var i = 0; i < items.length; i++) {
  var it = items[i];
  // escapeHtml() is provided by Pi Code GUI — use it for any
  // user-supplied text to prevent XSS.
  h += '<div class="my-item"' +
    // data-command attributes automatically execute the slash command
    // when clicked. The leading / is added by the framework — omit it.
    ' data-command="my_action ' + escapeHtml(it.id) + '"' +
    ' style="display:block;border:1px solid var(--vscode-panel-border,#333);margin:4px 0;padding:6px;border-radius:4px;cursor:pointer">';
  h += '<strong>' + escapeHtml(it.label) + '</strong>';
  h += ' <span style="color:#888">' + escapeHtml(it.status) + '</span>';
  h += ' <button data-command="my_approve ' + escapeHtml(it.id) + '"' +
    ' style="margin-left:8px">Approve</button>';
  h += '</div>';
}
h += '</div>';
containerEl.innerHTML = h;
`);
  }

  // Try immediately (hook may already exist), and on session_start.
  registerRenderer();
  pi.on("session_start", () => registerRenderer());
}
2. Send the message (anywhere in your Pi extension)
// From a slash command, tool, or event handler:

pi.sendMessage({
  customType: "my-extension",   // must match the registered customType
  display: true,                // true = inline card, false/undefined = notification
  content: "Fallback markdown if no renderer registered",  // graceful fallback
  details: {                    // passed to your renderer as data.details
    items: [
      { id: "abc123", label: "Fix login bug",      status: "awaiting" },
      { id: "def456", label: "Add dark mode toggle", status: "in-progress" },
    ]
  }
}, { triggerTurn: false });     // false = don't wake the LLM
When the message arrives in the webview:
- If a renderer is registered for
my-extension: the renderer runs,
containerEl is populated with your HTML, and the card appears inline.
- If no renderer is registered: the
content string is rendered as
markdown inside a bordered card (graceful fallback).
Buttons with data-command attributes automatically execute the slash
command when clicked. Pi Code GUI prepends / — so data-command="my_action abc"
becomes the slash command /my_action abc.
<button data-command="my_attach abc123">Attach</button>
<button data-command="my_approve abc123">Approve</button>
Clickable rows: put data-command on any element, not just <button>:
<div data-command="nimble_attach abc123" style="cursor:pointer">
  Click this entire row
</div>
4. Polling / live updates
To refresh a card with new data, call pi.sendMessage() again with the
same customType and updated details. The webview finds the existing
card and re-runs the renderer in-place:
setInterval(async () => {
  const items = await fetchWorkItems();
  pi.sendMessage({
    customType: "my-extension",
    display: true,
    content: "Items updated",
    details: { items }
  }, { triggerTurn: false });
}, 5000);
Unique cards: If you want each invocation to create a new card
(instead of replacing the old one), use a unique customType per
invocation (e.g. my-extension-1, my-extension-2). Register a renderer
for each unique type.
5. Complete file structure (Pi extension directory)
.pi/extensions/my-extension/
  index.ts          # Pi extension entry point (registration + sending)
  renderer.js       # (optional) Renderer logic in a separate file
Using a separate renderer file: Instead of embedding the renderer as
a string literal, read it from disk at load time:
import { readFileSync } from "node:fs";
import { join } from "node:path";

const src = readFileSync(join(__dirname, "renderer.js"), "utf-8");
reg("my-extension", src);
This avoids TypeScript string-escaping issues and lets you test the
renderer independently in a browser console.
Architecture
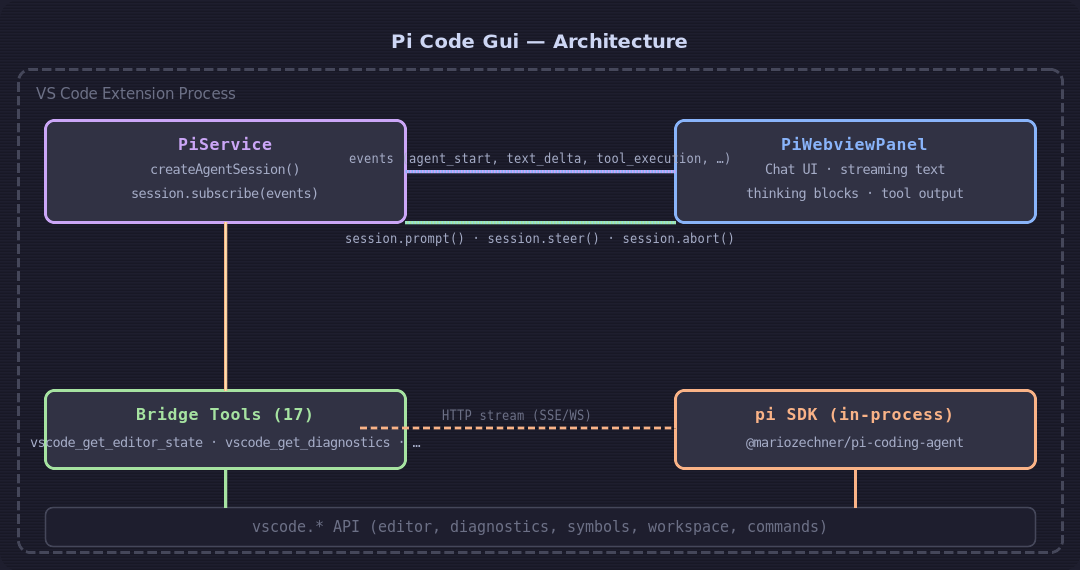
Pi Code Gui loads the @earendil-works/pi-coding-agent SDK at runtime from your global npm install. This means pi update --self picks up new SDK versions without an extension update.
- PiService manages the agent lifecycle: creates the SDK session, subscribes to events, translates them into chat UI messages, handles model/thinking/settings changes, and tracks usage stats.
- PiWebviewPanel renders a webview chat UI. It subscribes to PiService events and re-renders streaming text, thinking blocks, tool execution, bash output, compaction summaries, and custom messages in real time.
- Bridge tools are registered as SDK
customTools constructed with defineTool() and Typebox schemas, the same way the SDK's own built-in tools are defined.
Extension Settings
| Setting |
Type |
Default |
Description |
pi-code-gui.promptToInstall |
boolean |
true |
Prompt to install Pi if not found |
pi-code-gui.anthropicApiKey |
string |
"" |
Runtime Anthropic API key (overrides env var, not persisted to disk) |
pi-code-gui.openaiApiKey |
string |
"" |
Runtime OpenAI API key (overrides env var, not persisted to disk) |
pi-code-gui.systemPromptAppend |
string |
"" |
Additional instructions appended to the system prompt |
pi-code-gui.enableSkills |
boolean |
true |
Load project and global pi skills |
pi-code-gui.enableContextFiles |
boolean |
true |
Inject project context files |
pi-code-gui.enablePromptTemplates |
boolean |
true |
Register custom slash commands |
pi-code-gui.defaultModelProvider |
string |
"" |
Default model provider (e.g. anthropic). Empty = auto-detect |
pi-code-gui.defaultModelId |
string |
"" |
Default model ID (e.g. claude-sonnet-4-5). Requires provider set |
pi-code-gui.defaultThinkingLevel |
string |
"off" |
Default thinking level for new sessions |
pi-code-gui.contextBudget |
number |
0 |
Per-session token budget. 0 = model default |
pi-code-gui.sessionDir |
string |
"" |
Custom directory for session .jsonl files. Empty = pi SDK default (~/.pi/agent/sessions/) |
Requirements
- VS Code 1.118+
- No manual Pi install required — the extension prompts you to install
@earendil-works/pi-coding-agent automatically on first launch
- At least one API key (Anthropic, OpenAI, DeepSeek, Gemini, etc.) — run PiGui: Set Up API Key / Login or see the Pi quickstart
Development
pnpm install          # Install dev dependencies
pnpm run compile      # Type-check, lint, and build with esbuild
pnpm run watch        # Watch mode for development
Press F5 in VS Code to launch the Extension Development Host.
To package a .vsix:
pnpm run vsix # Creates pi-code-gui-x.x.x.vsix
License
MIT — see LICENSE for details.
