NiiVueView NIfTI images (and a lot of other medical imaging formats) Installation Launch VS Code Quick Open ( Ctrl+P), paste the following command, and press enter.Copied to clipboard |

NiiVue for VS CodeWebGL 2.0 medical image viewer for Visual Studio Code A VS Code extension that uses NiiVue to display neuroimaging files directly in VS Code. View NIfTI files, meshes, tractography, and DICOM images with an interactive, hardware-accelerated viewer. Works seamlessly in remote sessions (SSH, WSL, containers) - especially useful for analyzing data on clusters and servers. InstallationInstall from the VS Code Marketplace:
Or install from the command line: UsageOpening Files
Remote DevelopmentNiiVue works with VS Code's remote development features:
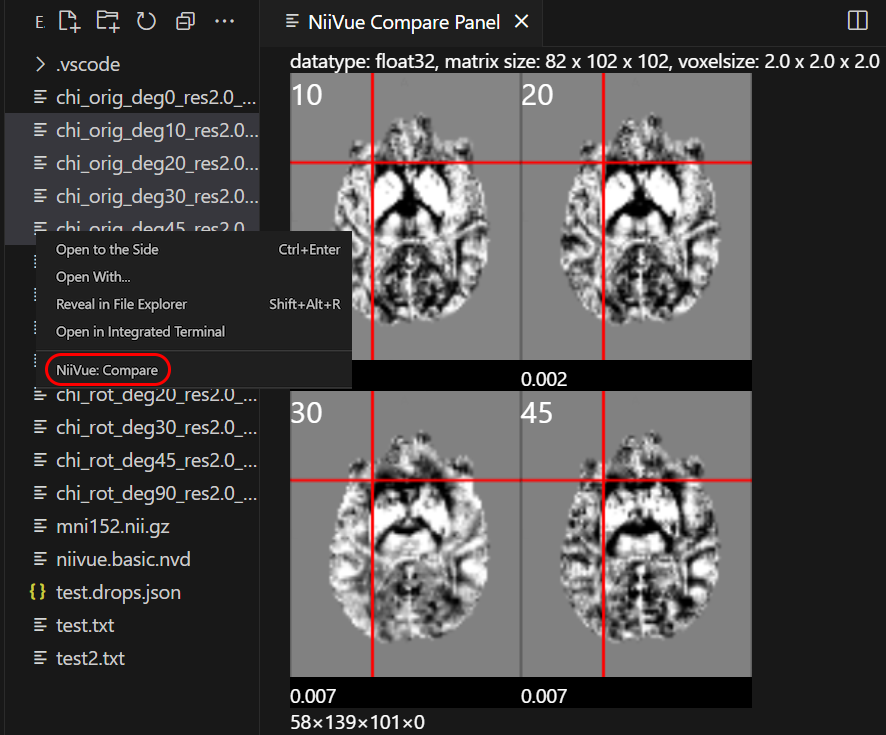
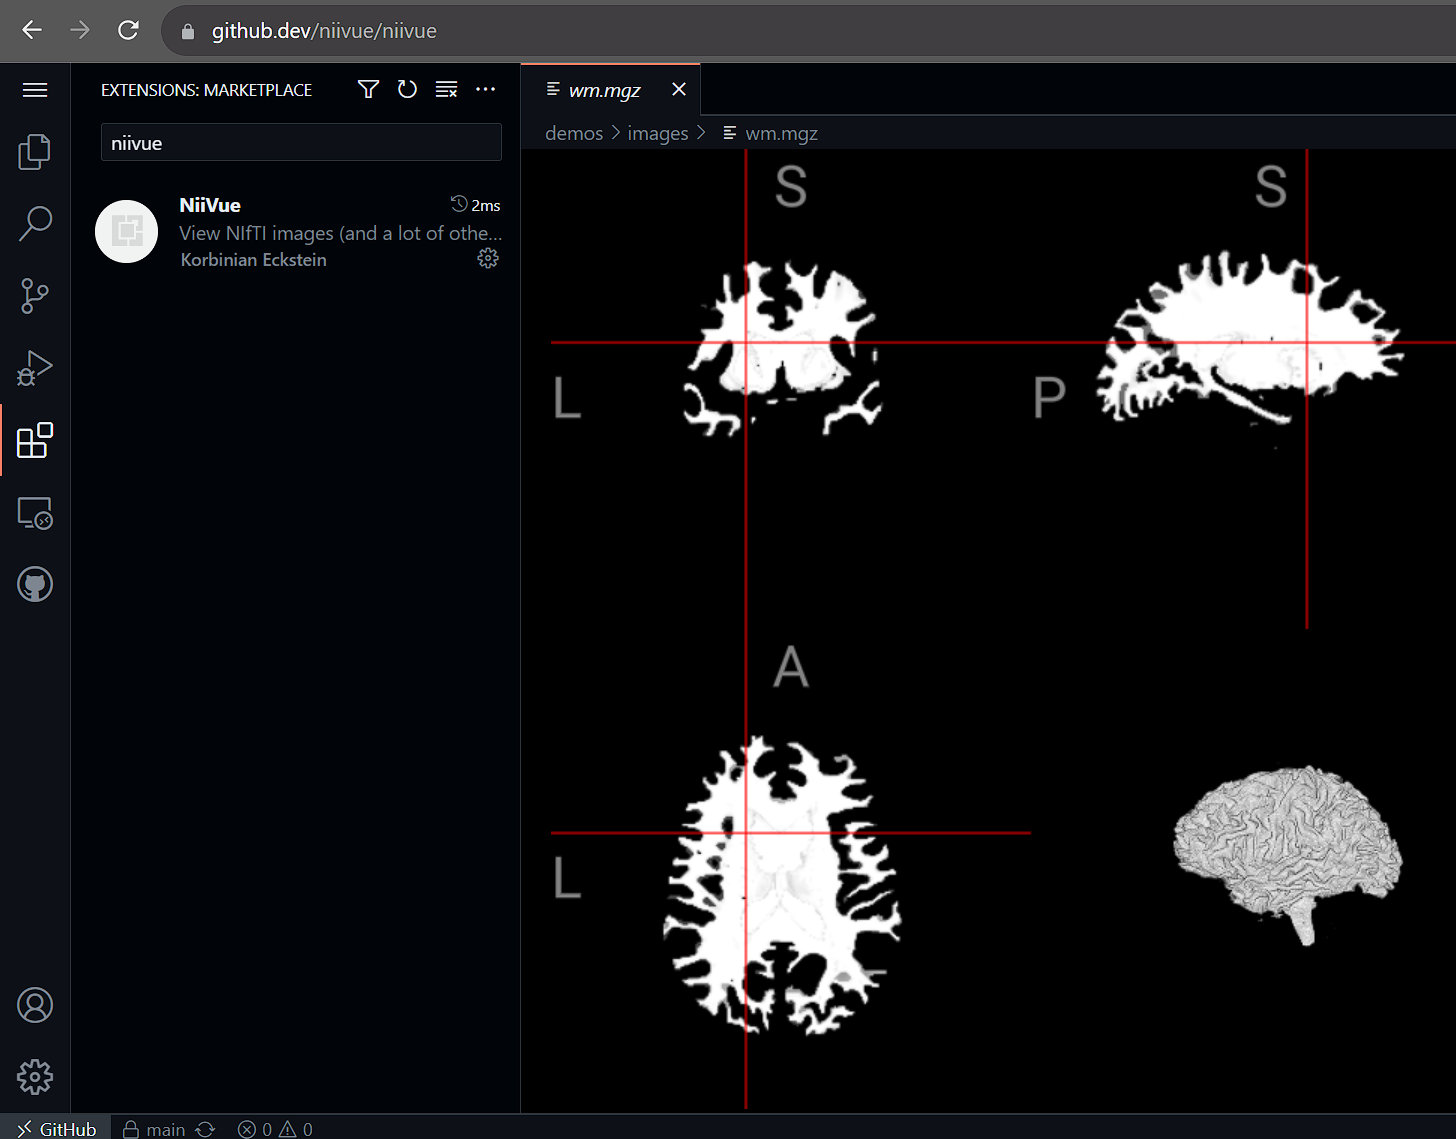
Screenshots
Keyboard ShortcutsAll keyboard shortcuts are displayed in menus and button tooltips throughout the interface. Hover over any button or menu item to see its shortcut. Mouse Controls
Core NiiVue Shortcuts (Built-in)These shortcuts are handled by the niivue.js library and cannot be customized: Navigation:
Crosshair Movement:
UI Shortcuts (Customizable)These shortcuts can be customized in VS Code's Keyboard Shortcuts editor (File → Preferences → Keyboard Shortcuts, search for "NiiVue"): View Modes:
Display Toggles:
Actions:
Supported Formats
Web VersionA standalone web version is also available that can be installed as a Progressive Web App with file associations (Chrome/Edge only). Troubleshooting"Failed to load image: unable to get WebGL context" (Linux)This viewer needs a WebGL2 context. If the editor cannot create one you will see "unable to get WebGL context. Maybe the browser doesn't support WebGL2." This is an environment / GPU issue, not a problem with the file, and it is most common on Linux. Cause. Recent Chromium versions (the engine inside VS Code; WebGL context creation starts failing from around Chromium 144) no longer fall back to software WebGL automatically. When the webview has no working hardware WebGL2 - common with the snap build of VS Code, missing or blocklisted GPU drivers, or some Wayland setups - WebGL2 becomes unavailable. The same extension version works on Windows because Windows has a separate software fallback (Direct3D WARP) that is not affected. Recommended fix (restore hardware acceleration).
Temporary workaround (software rendering). Re-enable Chromium's software renderer. Open the Command Palette, run Preferences: Configure Runtime Arguments, add the following to This renders in software: it works, but 3D is slower. Note that this Chromium flag is officially temporary and may be removed in a future release, so prefer the hardware-acceleration fix where possible. For details and to report your environment, see [issue #236](https://github.com/niivue/niivue-vscode/issues/236). DevelopmentThis extension is part of the niivue-vscode monorepo. Contributions are welcome! For development instructions, see DEVELOPMENT.md. If you encounter issues or have feature requests, please open an issue on GitHub. Support This ProjectIf you find this extension useful, please consider supporting its development: 
LicenseBSD-2-Clause Credits
Related Projects
|