📡 BLE Virtual Device & Wokwi Bridge
By CodeHorizon
An innovative VS Code extension that allows you to design, configure, and simulate a local Bluetooth Low Energy (GATT Server) peripheral. Designed for IoT developers and engineering students, this extension creates a real-time communication bridge between your computer and IoT simulators (like Wokwi) via WebSocket.
Ideal for mobile application development (Flutter, React Native, iOS, Android) requiring an interactive BLE peripheral without needing physical hardware!
✨ Key Features
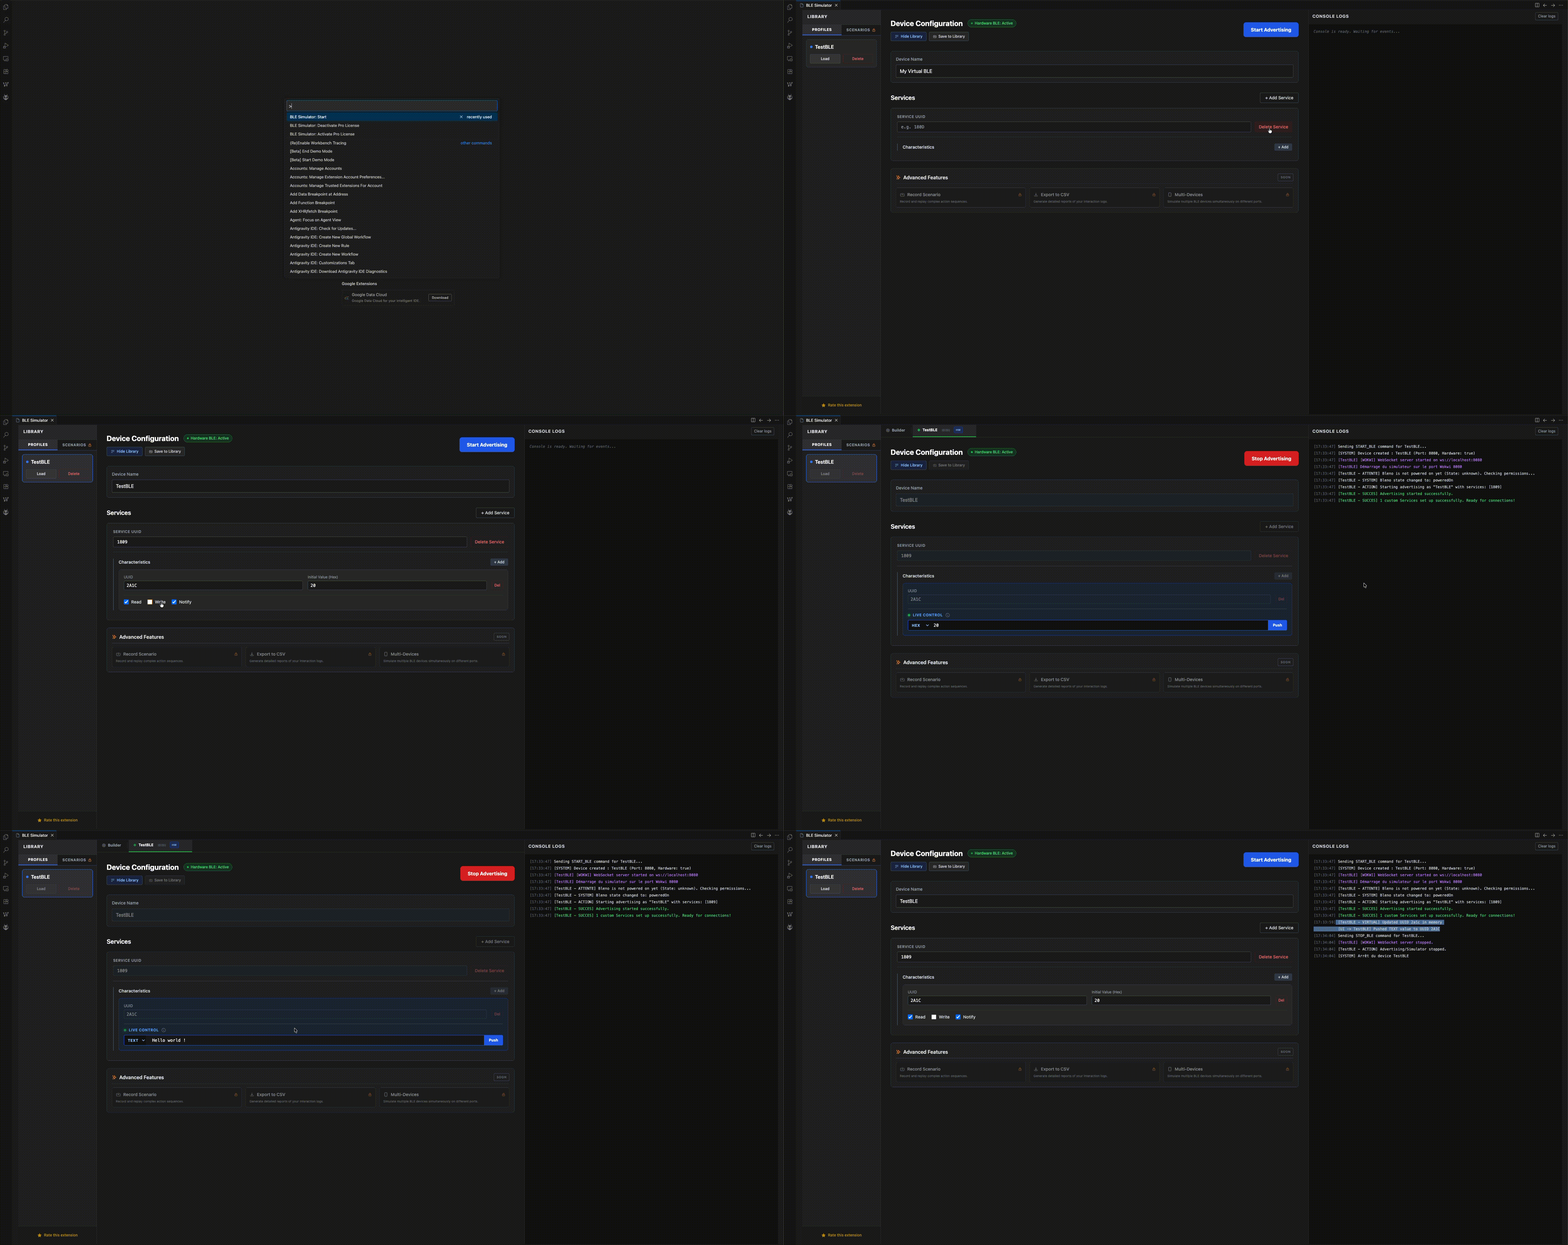
- 🎛️ Live Control Panel: View and modify your BLE characteristic values in real-time.
- 🔌 Wokwi WebSocket Bridge: Instant bidirectional synchronization on port
8080.
- 💾 Profile Management: Build your Service/Characteristic tree and save it to your local library to load it with a single click.
- 🔠 Smart Encoding: Modify payloads via an intuitive interface supporting Hexadecimal (
HEX), plain text (TEXT / UTF-8), and dynamic integers (INT).
- 🛡️ Graceful Degradation: If your hardware doesn't support radio transmission, the extension safely falls back to a "Pure Simulator" mode via WebSocket without crashing.
🖥️ OS Compatibility & Requirements
The ability to emit actual Bluetooth signals (Broadcasting) depends on your operating system.
- 🍏 macOS: 100% Plug & Play. Native radio broadcasting works out of the box.
- 🐧 Linux: Full support via the BlueZ stack.
💡 Auto-Configuration: If your permissions are insufficient, the extension will detect the error and provide an auto-configuration button that generates the necessary commands (apt-get and setcap) directly in your VS Code terminal.
- 🪟 Windows: "Wokwi Simulator" mode only. Because the OS restricts direct access to BLE chips, the extension disables local radio broadcasting, but the WebSocket bridge (Wokwi) remains 100% operational!
A badge at the top of the interface constantly indicates your hardware status: 🟢 Active or 🟠 Disabled (Sim Only).
📖 User Guide
- Open the interface from the VS Code command palette (
Cmd/Ctrl + Shift + P > BLE Simulator: Start).
- Edit the device name (
Device Name).
- Add a Service by specifying its UUID (e.g.,
180D for Heart Rate).
- Add one or more Characteristics to this service (e.g.,
2A37). Configure the permissions for each characteristic (Read, Write, Notify).
- Click Start Advertising.
- Use the Live Control Panel that appears under each characteristic to
Push live data to the network and to Wokwi.
🔌 Wokwi API (WebSocket Documentation)
To link the extension to your ESP32 simulator on Wokwi, the bridge is exposed on the local network port: ws://127.0.0.1:8080 (or ws://localhost:8080).
⚠️ Important (Wokwi): If you are using the Wokwi for VS Code client, remember to allow port forwarding for port 8080 in your wokwi.toml file:
[wokwi]
version = 1
[[net.forward]]
port = 8080
📥 What the ESP32 (Wokwi) receives from the extension:
When you modify a value in the VS Code Live Control Panel, the ESP32 will receive a JSON string:
{
"action": "write",
"uuid": "2a37",
"valueHex": "32342e35",
"valueText": "24.5"
}
📤 What the ESP32 (Wokwi) must send to the extension:
To update a characteristic's value from the ESP32 code, send this JSON to the WebSocket server:
{
"action": "update",
"uuid": "2a37",
"value": "24.5",
"format": "text"
}
(The format can be "text", "int", or "hex". If omitted, it defaults to "hex").
👨💻 Integration Example (ESP32 C++)
Here is an example snippet for ESP32 using the ArduinoWebsockets library (by Gil Maimon) to send a text value to the VS Code extension:
#include <WiFi.h>
#include <ArduinoWebsockets.h>
const char* ssid = "Wokwi-GUEST";
const char* password = "";
const char* websockets_server = "ws://10.0.2.2:8080"; // 10.0.2.2 targets the host PC's localhost in the simulator
using namespace websockets;
WebsocketsClient client;
void setup() {
Serial.begin(115200);
WiFi.begin(ssid, password);
while(WiFi.status() != WL_CONNECTED) {
delay(500);
Serial.print(".");
}
// Connect to the VS Code extension bridge
if(client.connect(websockets_server)) {
Serial.println("Connected to the BLE Simulator Bridge!");
// Example: Updating a temperature value
String jsonPayload = "{\"action\": \"update\", \"uuid\": \"2a1c\", \"value\": \"24.5\", \"format\": \"text\"}";
client.send(jsonPayload);
}
}
void loop() {
client.poll();
}
📱 Mobile Integration Examples (BLE Client)
Your mobile application can connect directly to the VS Code extension (if your OS supports local radio broadcasting) exactly as if it were a real physical sensor.
Using the standard flutter_blue_plus package:
import 'package:flutter_blue_plus/flutter_blue_plus.dart';
void connectToVirtualDevice() async {
// Replace "TestBLE" with the device name configured in the extension
FlutterBluePlus.startScan(withNames: ["TestBLE"], timeout: const Duration(seconds: 5));
FlutterBluePlus.scanResults.listen((results) async {
if (results.isNotEmpty) {
BluetoothDevice device = results.first.device;
await device.connect();
print("Connected to the VS Code simulator!");
// Discover services and subscribe (Notify)
List<BluetoothService> services = await device.discoverServices();
// Logic to find the characteristic and call setNotifyValue(true)
}
});
}
2. Native iOS: Swift (CoreBluetooth)
import CoreBluetooth
class BLEManager: NSObject, CBCentralManagerDelegate {
var centralManager: CBCentralManager!
override init() {
super.init()
centralManager = CBCentralManager(delegate: self, queue: nil)
}
func centralManagerDidUpdateState(_ central: CBCentralManager) {
if central.state == .poweredOn {
// Replace 1809 with your configured service UUID
let serviceUUID = CBUUID(string: "1809")
centralManager.scanForPeripherals(withServices: [serviceUUID], options: nil)
}
}
// Implement didDiscover to finalize the connection
}
import com.juul.kable.Scanner
import kotlinx.coroutines.flow.first
suspend fun findAndConnect() {
val scanner = Scanner {
filters { name = "TestBLE" }
}
// Retrieve the first matching peripheral
val advertisement = scanner.advertisements.first()
val peripheral = advertisement.peripheral()
peripheral.connect()
println("Connected to the VS Code simulator!");
// Observe the characteristic
}
Developed with ❤️ by CodeHorizon.