Zalo Mini App
The official extension by the Zalo Mini App team.
Phiên bản tiếng Việt của tài liệu này có sẵn trên mini.zalo.me.
Create a new project
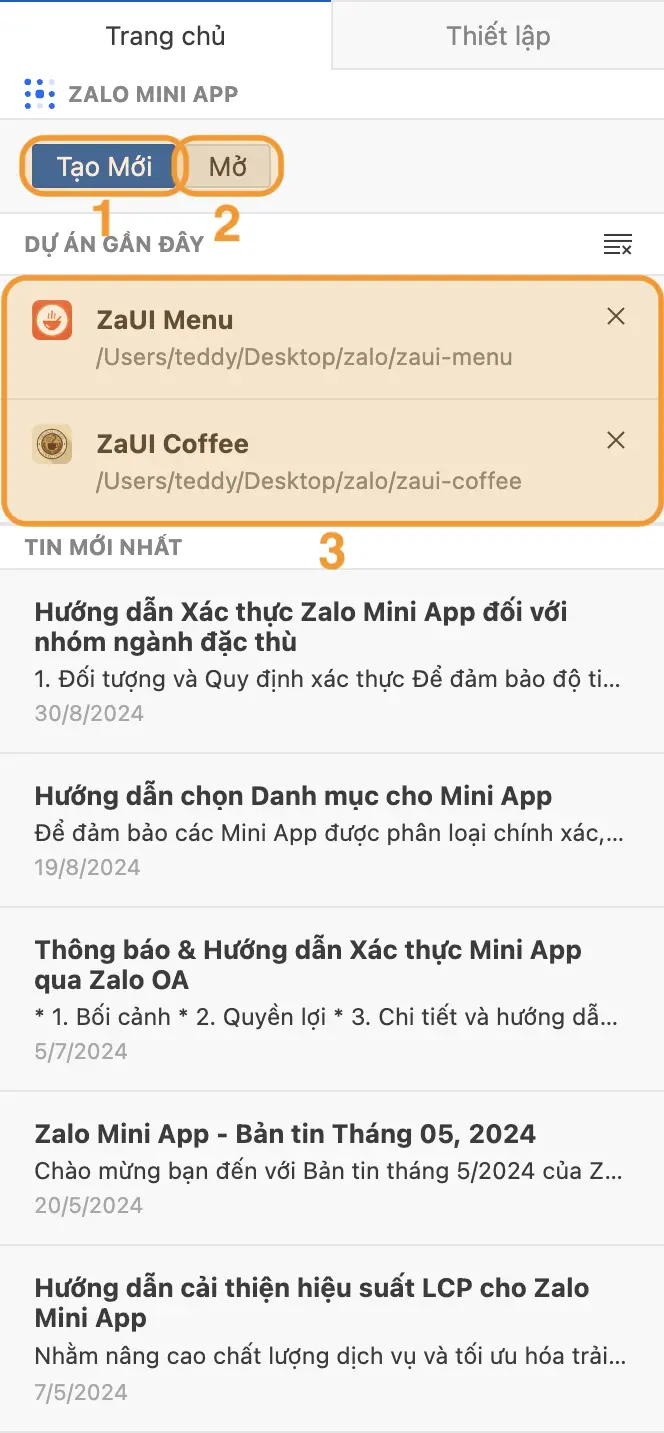
On the Extension's main screen, click the Create Project button (1).
You will be asked to provide the following information:
Template: The project framework to initialize your application. If you want to develop a Mini App from scratch, you can choose the blank template with Vite 2 or Vite 5 options, JavaScript or TypeScript. You can also choose templates provided by the Zalo Mini App platform as a template for your project. These templates use ZaUI and are designed according to the Design Guideline standard to provide the best user experience.
Location: The location to store the project on your computer.
Project name: The name of the project, which will also be the name of the directory containing the project's source code after creation. Since a directory with this name will be created inside the selected Location (ii) to contain the project's source code, please make sure that this name does not conflict with the names of other directories inside.
After providing the necessary information, the Extension will initialize the source code for your project in a few minutes. The new project will automatically open in a Visual Studio Code window after the initialization process is complete.
Open existing projects
You can open projects that were previously created using Zalo Mini App CLI or Zalo Mini App Studio inside the Zalo Mini App Extension. Simply click the Open Project button (2) and select the directory containing the project's source code.
You can also use the Recent Projects list (3) to quickly reopen previously closed Zalo Mini App projects.
Before you start
After initializing the source code, you can start developing your application. However, in order to package and publish the application to users, you need to link to a valid Zalo Mini App ID. Click the Config button (1) and enter the Zalo Mini App ID you want to link.
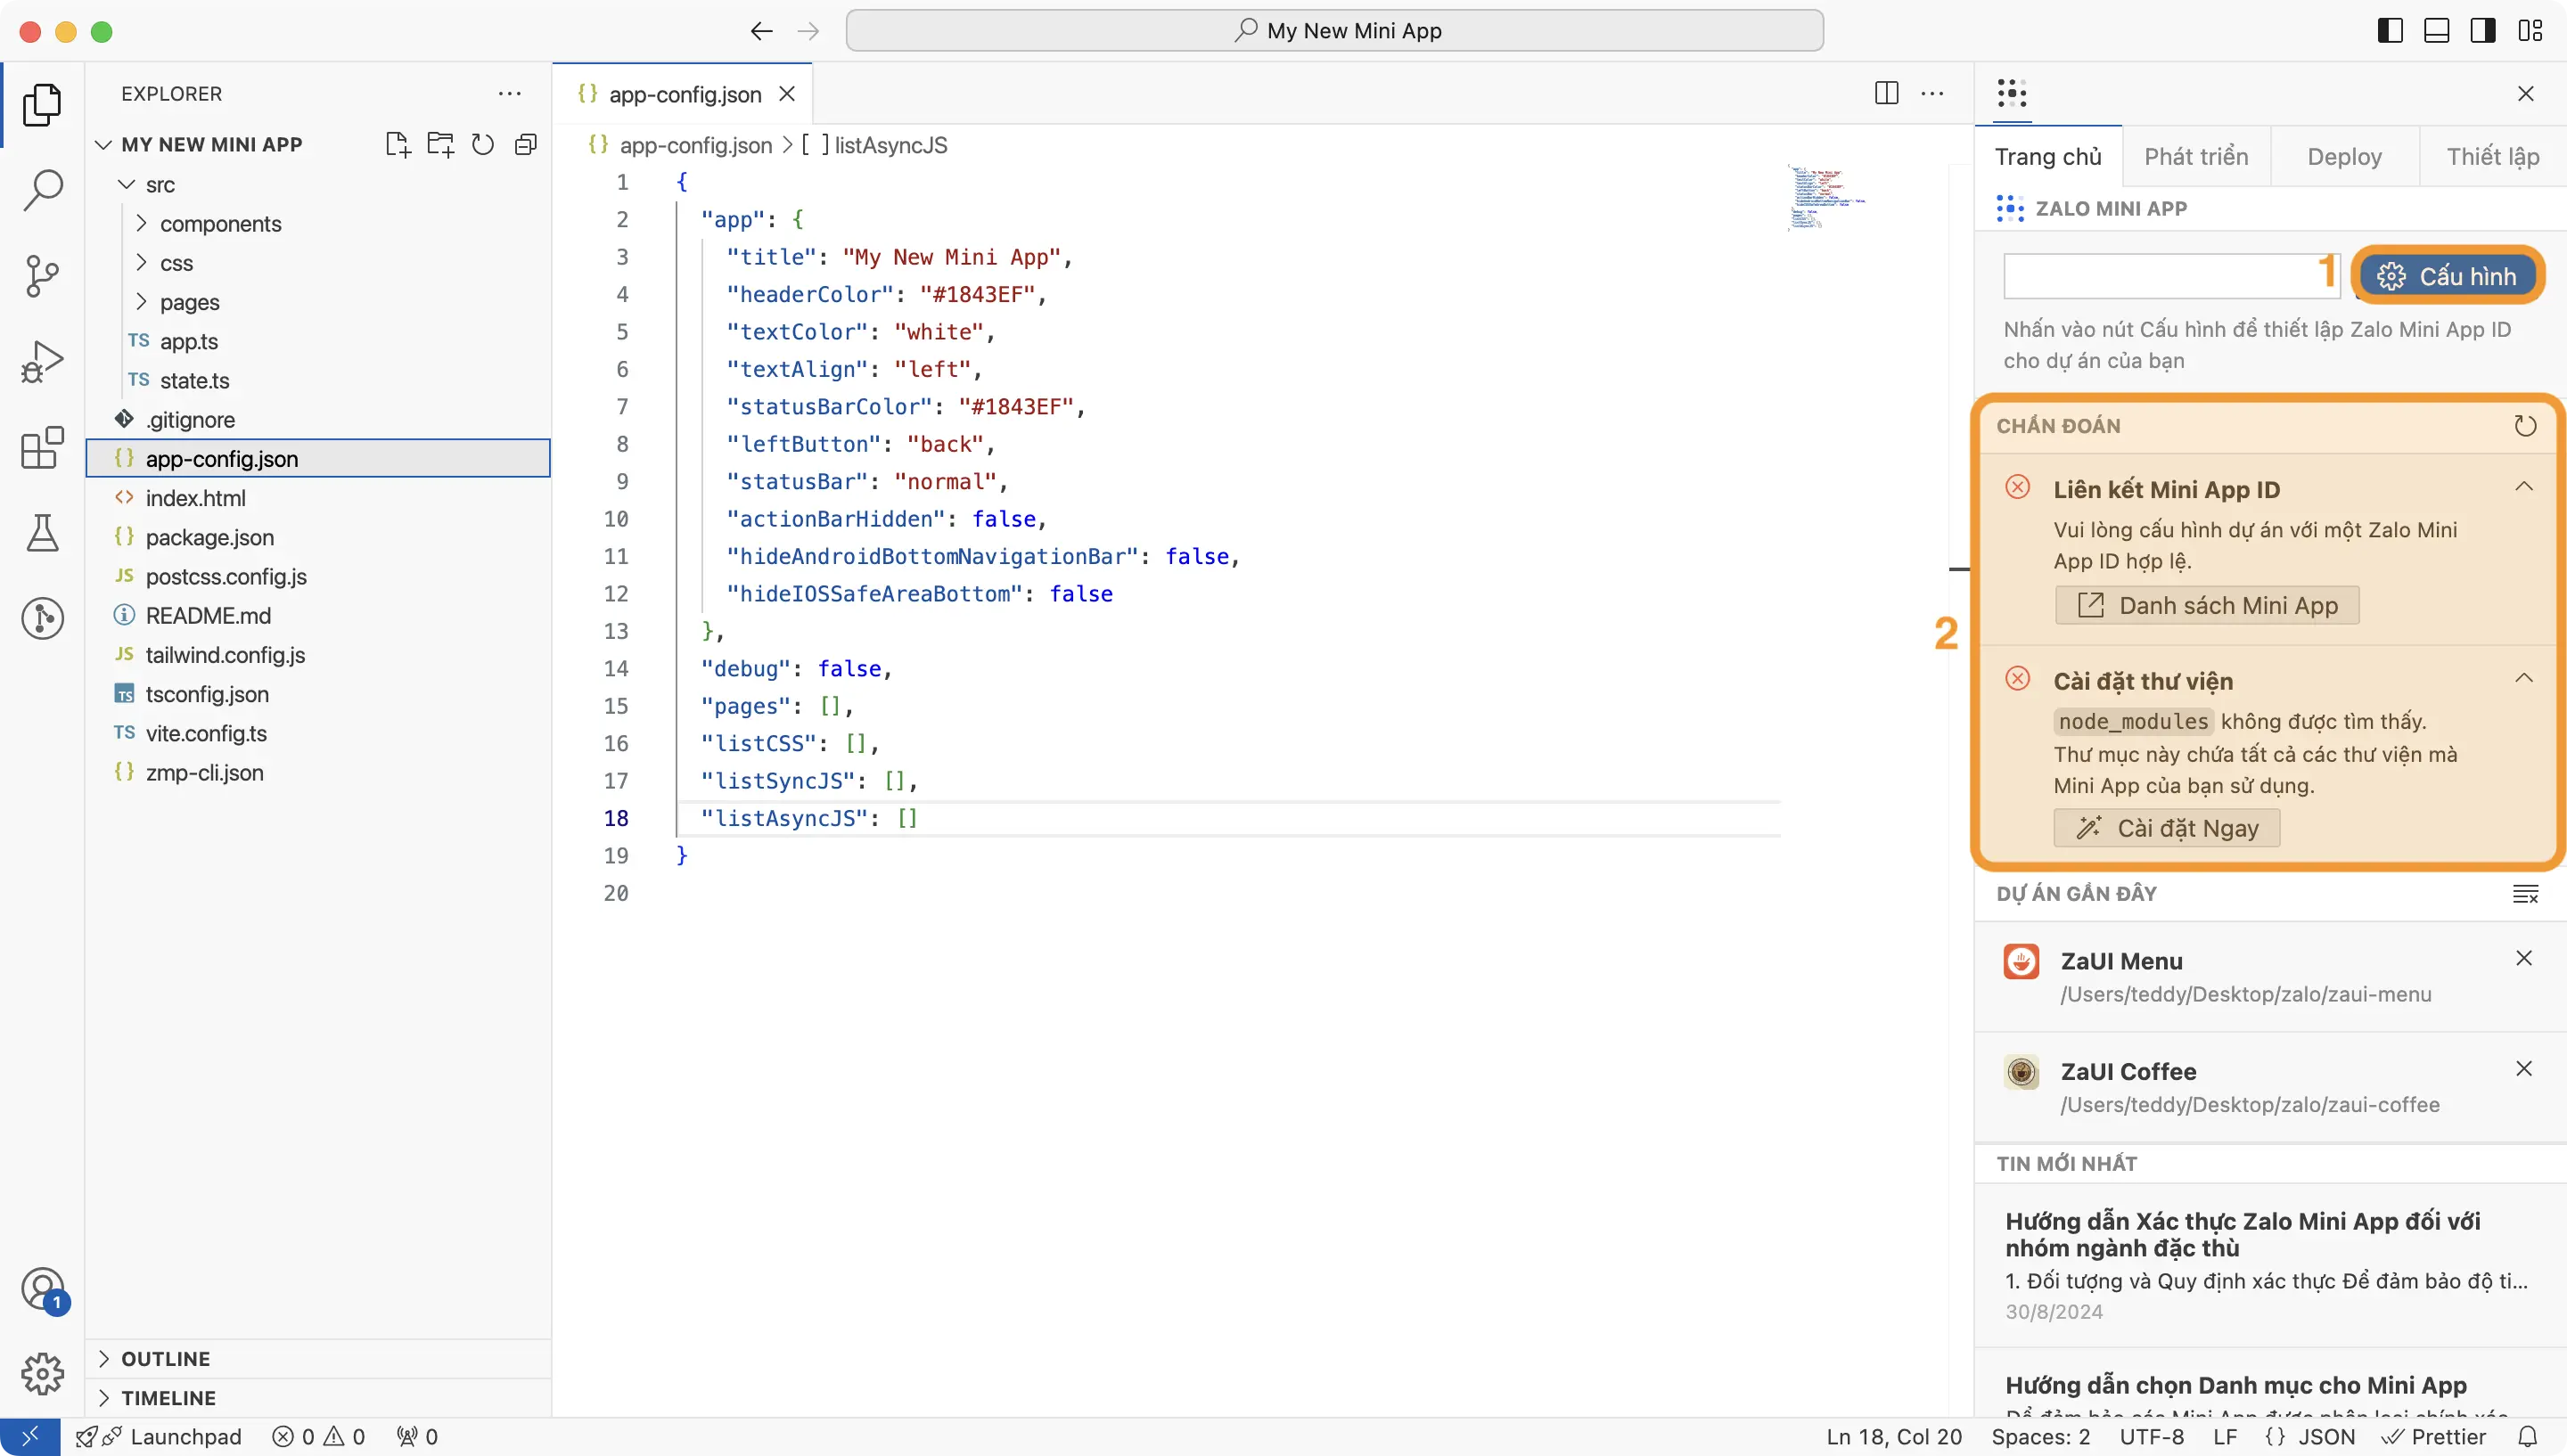
The Diagnostics list (2) contains important information related to your project, along with suggested
Preview your Zalo Mini App
You can use the Zalo Mini App Extension to preview your Mini App during the development process. Changes to the source code will take effect immediately (through the hot reload mechanism). Access the Run menu to start the application:
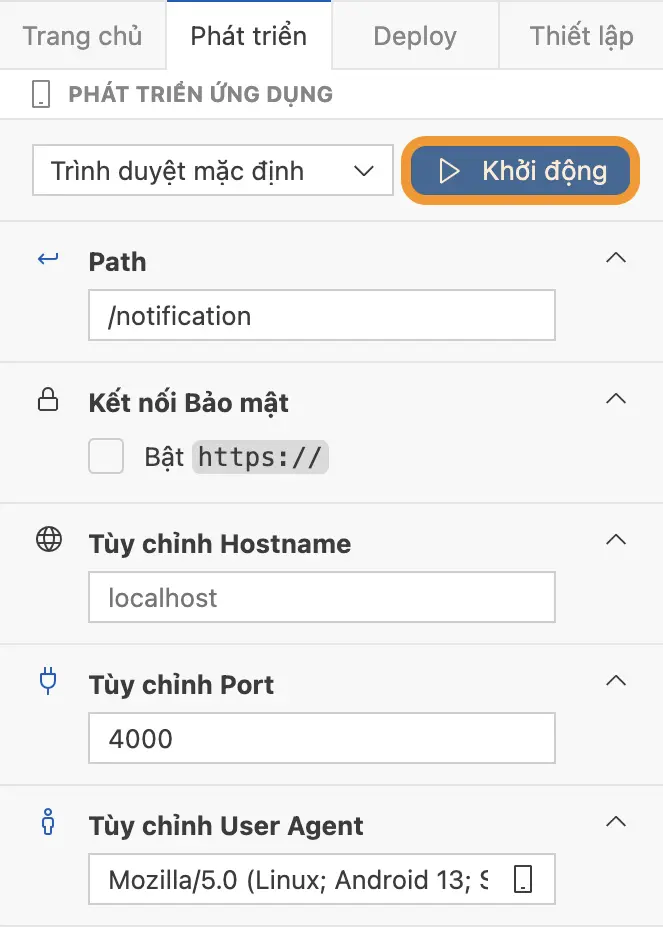
The startup settings include:
- Launcher: This setting allows you to choose the application/device to use to preview the Mini App. Specifically:
- Device: You will use the Zalo application on a real phone to run your application, where you can use Zalo-related functions (such as
getUserInfo, getPhoneNumber, followOA, openShareSheet, ...) just like when you have published the application to the system. Your phone does not need to be connected to the same network as your computer to use this mode.
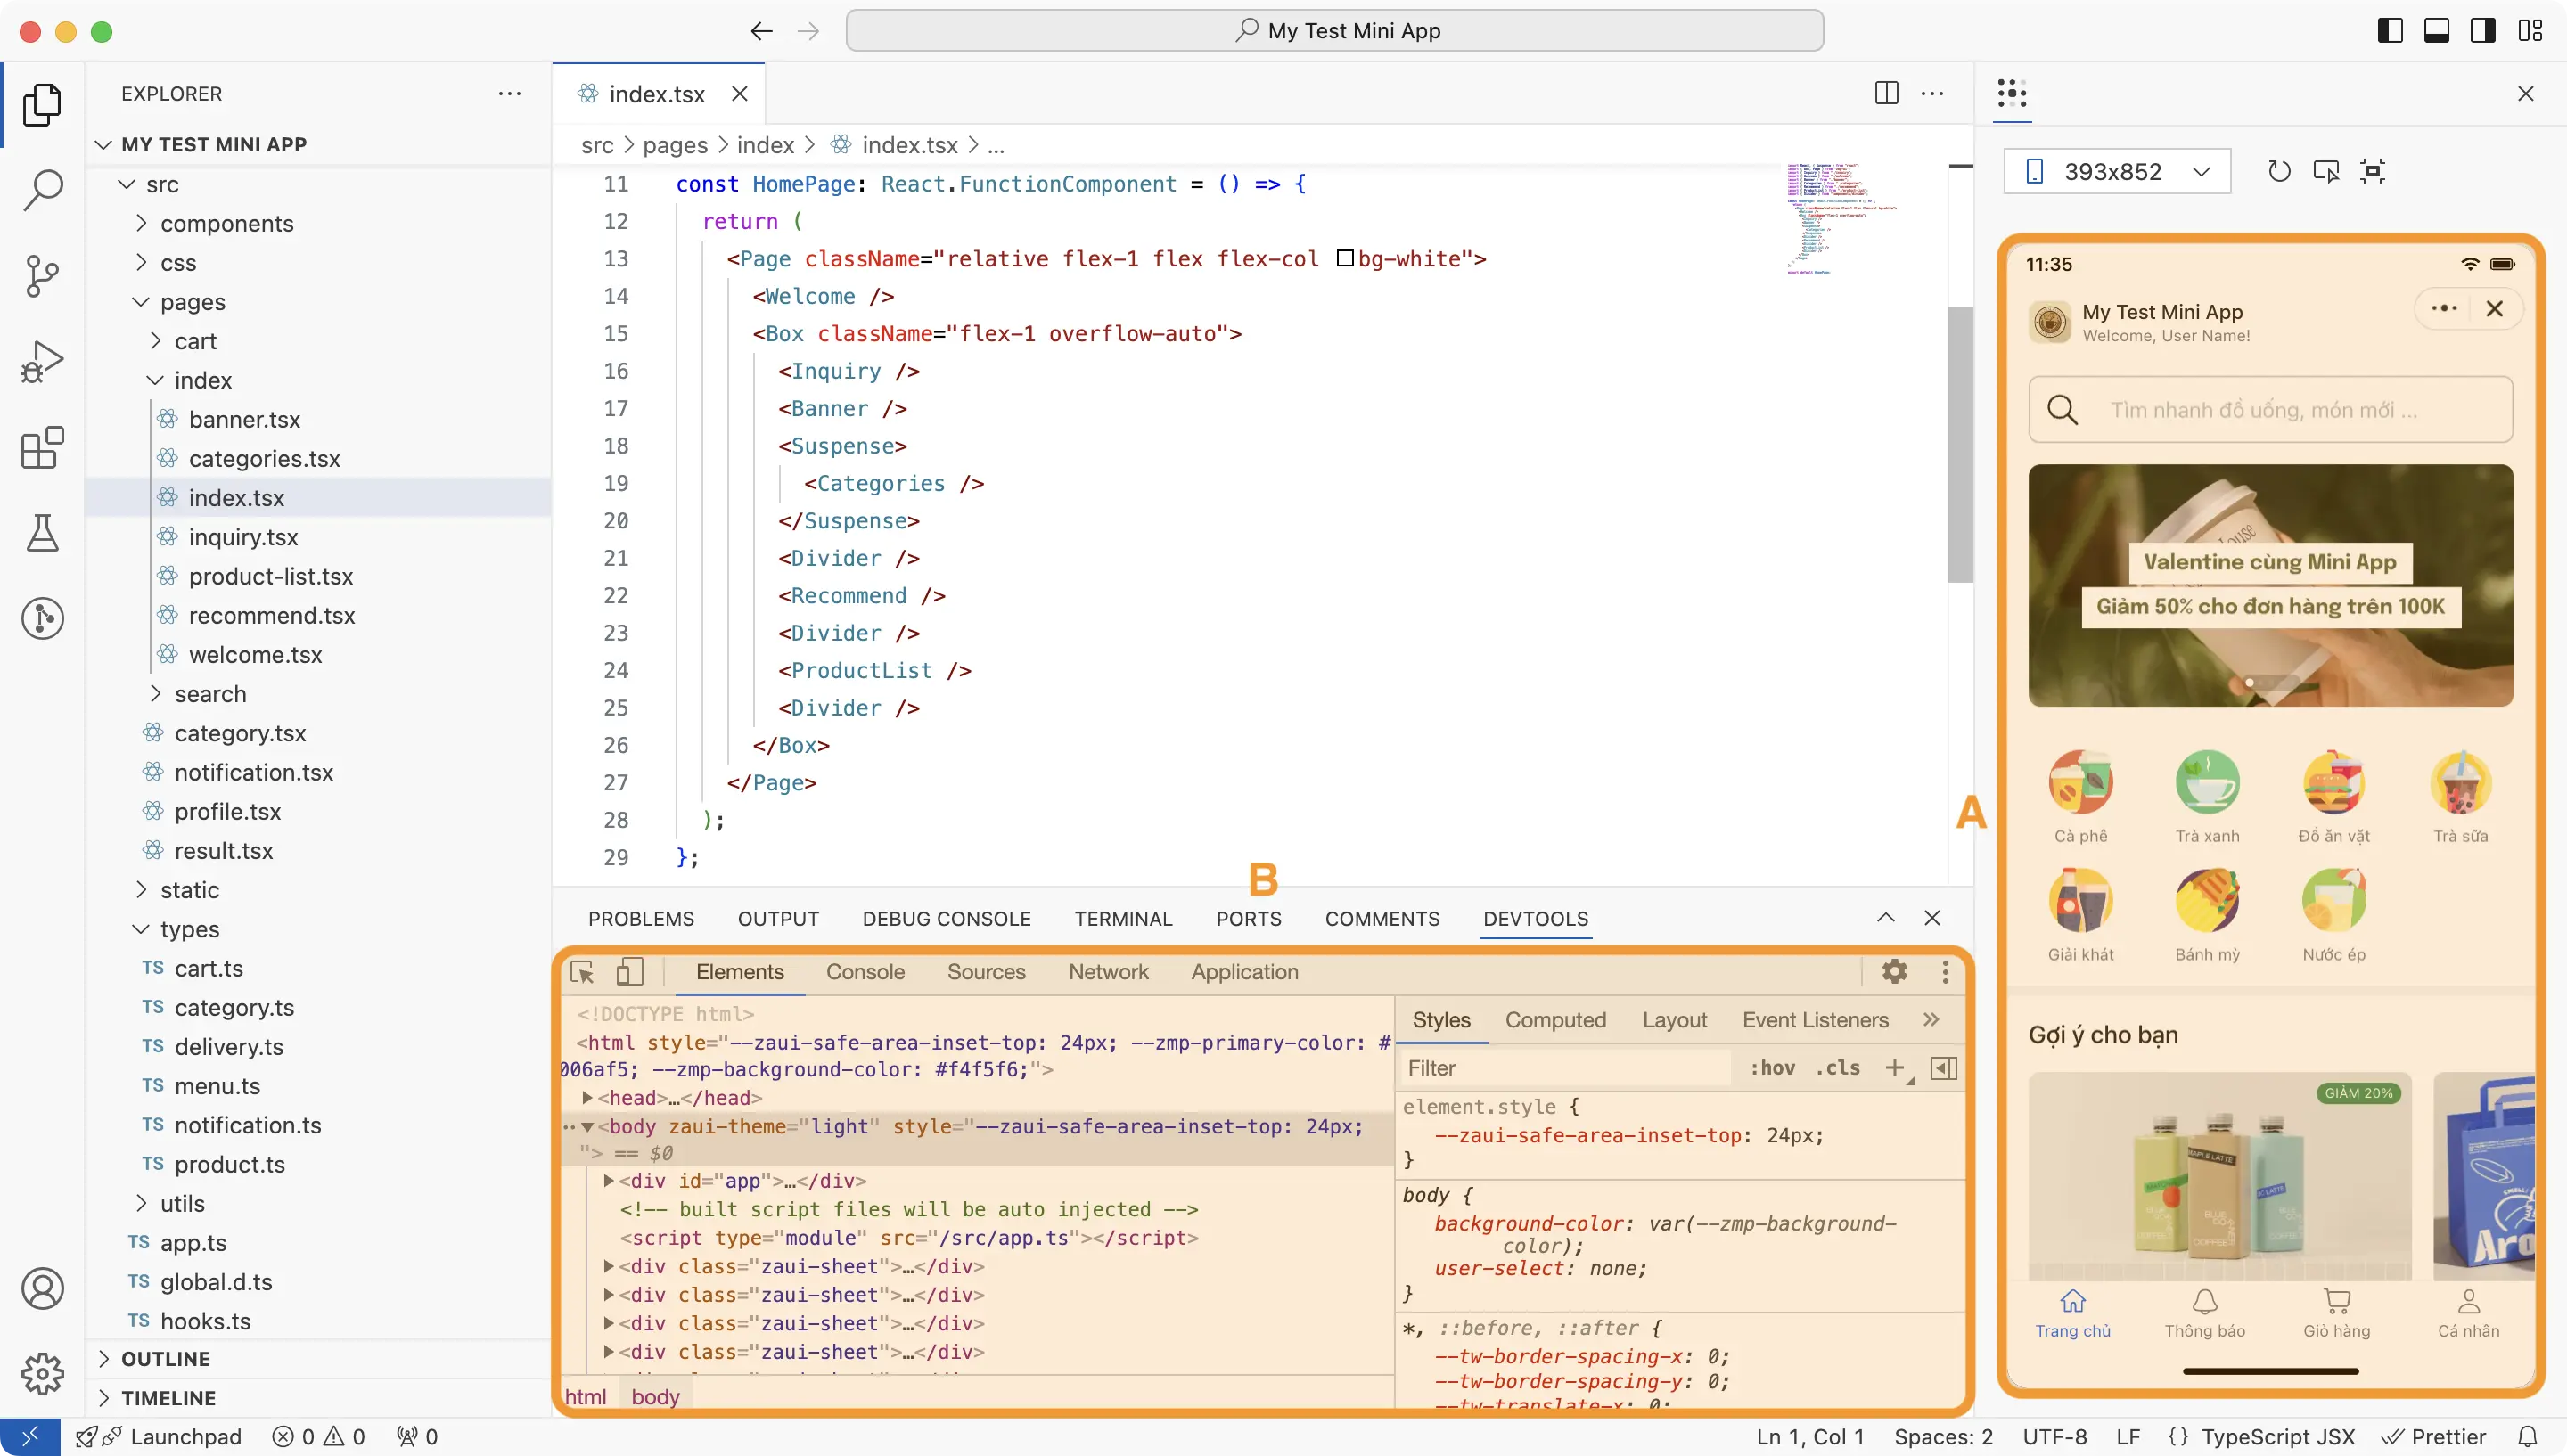
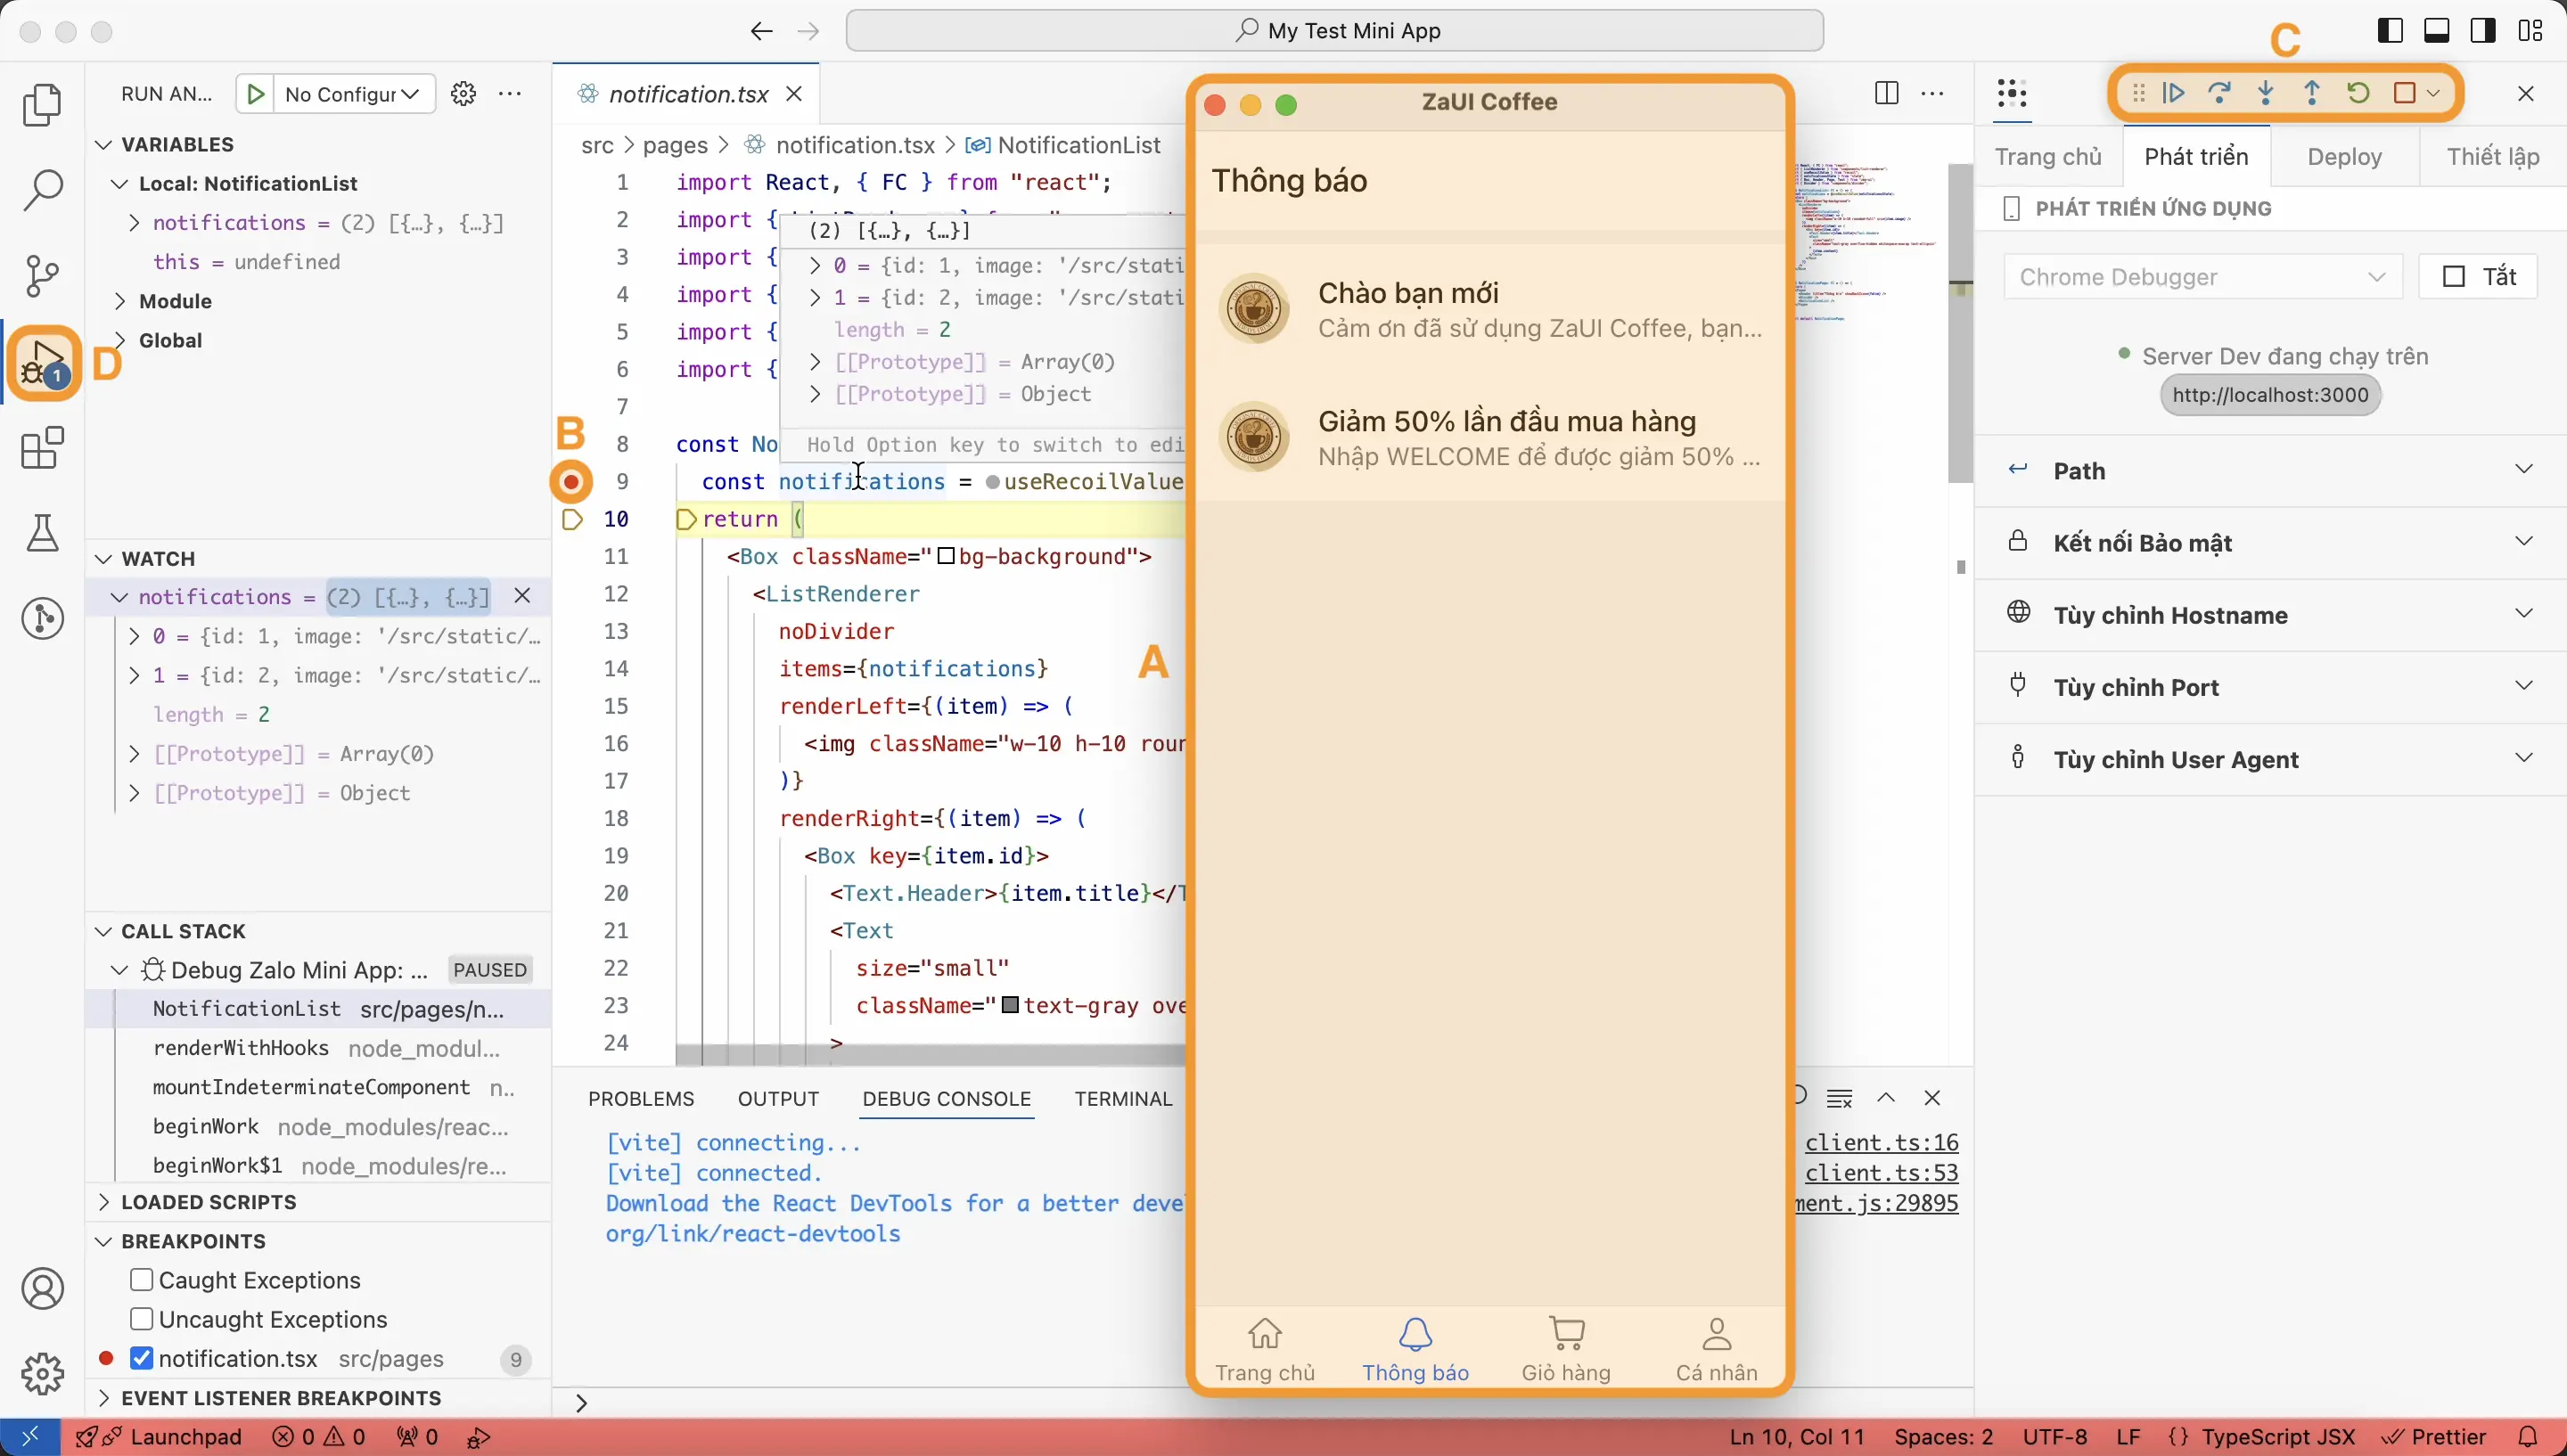
- Simulator: The Extension will provide you with a dialog box that simulates the interface of your Mini App right on Visual Studio Code. This mode allows you to edit the source code (Editor), view the interface (Simulator) (A) and use the development tools (DevTools) (B) in the same window.
- Chrome/Edge Debugger: The Extension will use Visual Studio Code's built-in debugging tools to preview your Mini App inside a Chrome/Edge debug session (A). You can then use advanced debugging features such as Breakpoints (B), Step Over, Step Into, Step Out (C), and other useful tools within the
Run and Debug menu (D). Note: you will need to install Google Chrome or Microsoft Edge on your computer to use this mode.
- Default Browser: The Extension will open your default web browser to preview the Mini App interface.
- None: The Extension will only start the hot reload server, you will decide how you want to preview your Mini App.
Depending on the Launcher used, one or more of the settings below will be available or not.
Path: This setting allows you to directly access a specific path within the Mini App, instead of opening the application at / by default. This setting is useful when you need to integrate flows related to opening the Mini App from messages or processing payment results.
Secure Connection: Use https:// to preview the Mini App. Note that when you enable this setting, you will need to set up plugins like @vitejs/plugin-basic-ssl for Vite to avoid certification errors. This setting is useful when you need to integrate APIs that only work in secure contexts. Mini Apps running on real devices always use secure contexts.
Custom Hostname: This setting allows you to change the default hostname from localhost to another hostname. When you enable this setting, you will need to map that hostname to the loopback address 127.0.0.1 in your computer's hosts file.
Custom Port: Specify the port you want to use to start the Mini App. By default, the Extension will use any available port closest to port 3000 to start. However, when using this setting, the Mini App will not start if the specified port is already in use by another service.
Custom User Agent: This setting allows you to change the Simulator’s User Agent. You can either input a custom User Agent string or select the User Agent corresponding to the simulated device (Android/iOS) you’re using.
Login
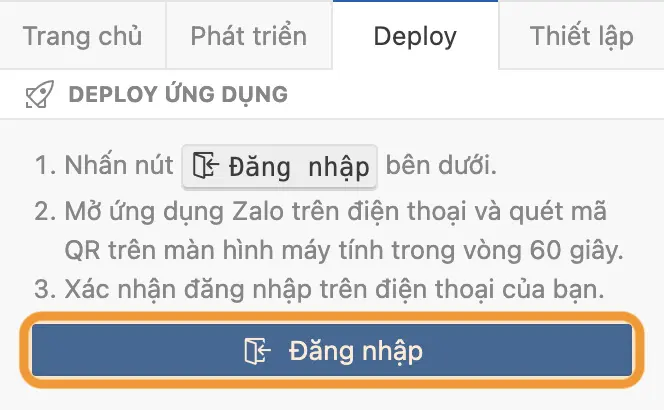
To be able to package and publish your Zalo Mini App, you must first:
- Link to a valid Zalo Mini App ID.
- Verify your rights to that Zalo Mini App ID. Simply click the
Login button, use the Zalo app logged in with a Mini App Admin or Developer account, and scan the QR code displayed on the Extension's login interface.
Publish
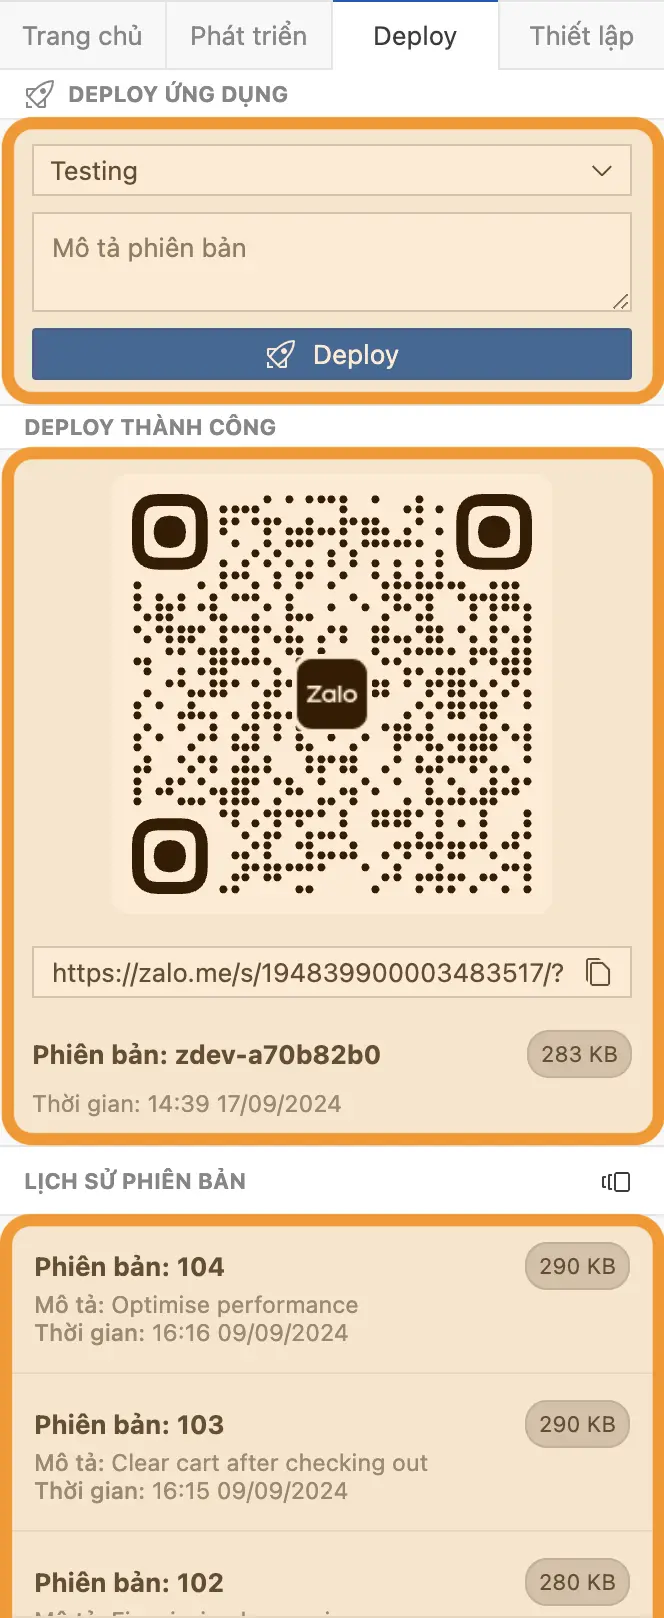
To publish (deploy) your application to the Zalo Mini App platform, you can use the deploy dialog (A) and provide the following information:
- Version type:
- Development: Not displayed in the mini app's version management section and will be overwritten by a new development version each time it is deployed. This is convenient for quick testing on Zalo while the application is still under development.
- Testing: All test versions are numbered and stored in the version management section. You can send the test version for review and release the reviewed version for Zalo users to use.
- Version description (for Testing version type): This version description can help you quickly distinguish between versions in the version list (C).
- For the Testing version, you need to provide a description for it. The version name should accurately reflect the important changes of this version compared to the previous version, so that you can easily roll back to the previous version when necessary.
Click the Deploy button and wait for the packaging (build) and publishing (deploy) process to complete.
Version History
Once the packaging and publishing process is complete, you will receive a Deploy Result (B) report containing the entry point to open the Mini App (in the form of QR Code and Deep Link). In addition, you can also review all past packaged and published versions using the Version History list (C).
Layout Configuration (Optional)
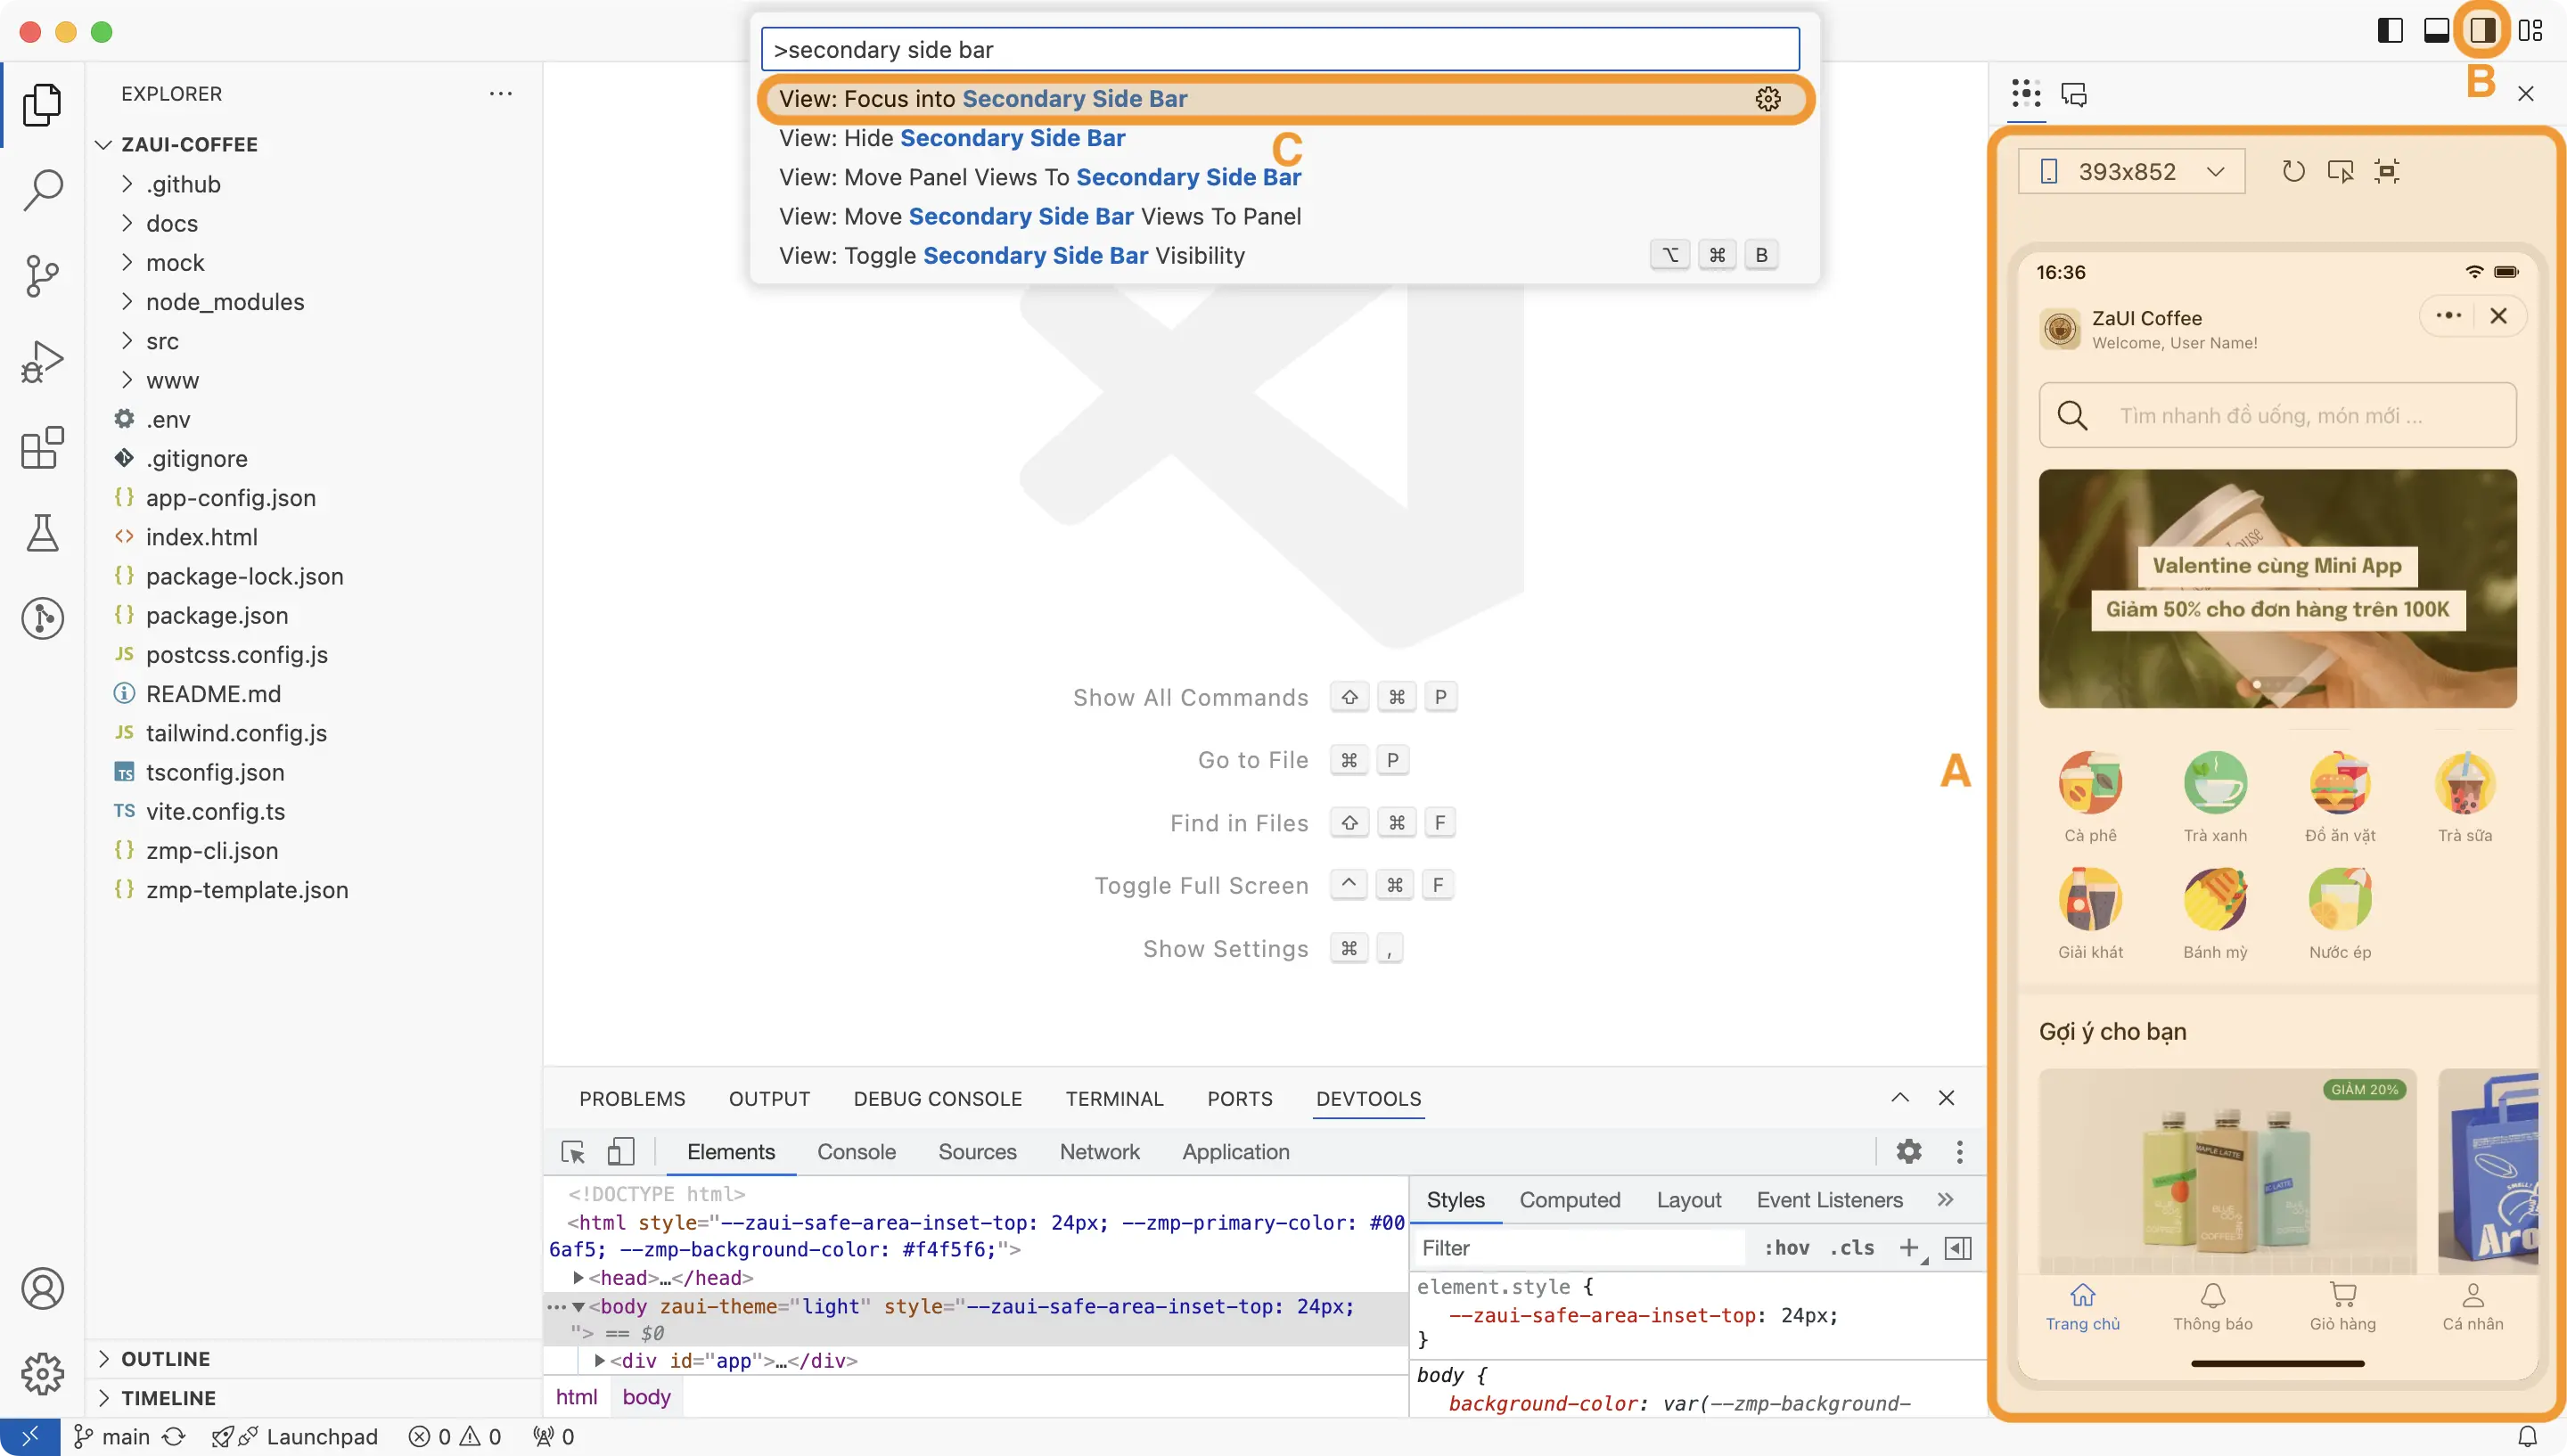
After installation, the Zalo Mini App Extension will be displayed in the left panel (primary sidebar). Most of the time, developers will want to use other tools here (such as Explorer, Search, Run and Debug, ...). You can follow the 3-step instructions below to move the Zalo Mini App Extension to the right panel (secondary sidebar), or skip this step if it does not affect you.
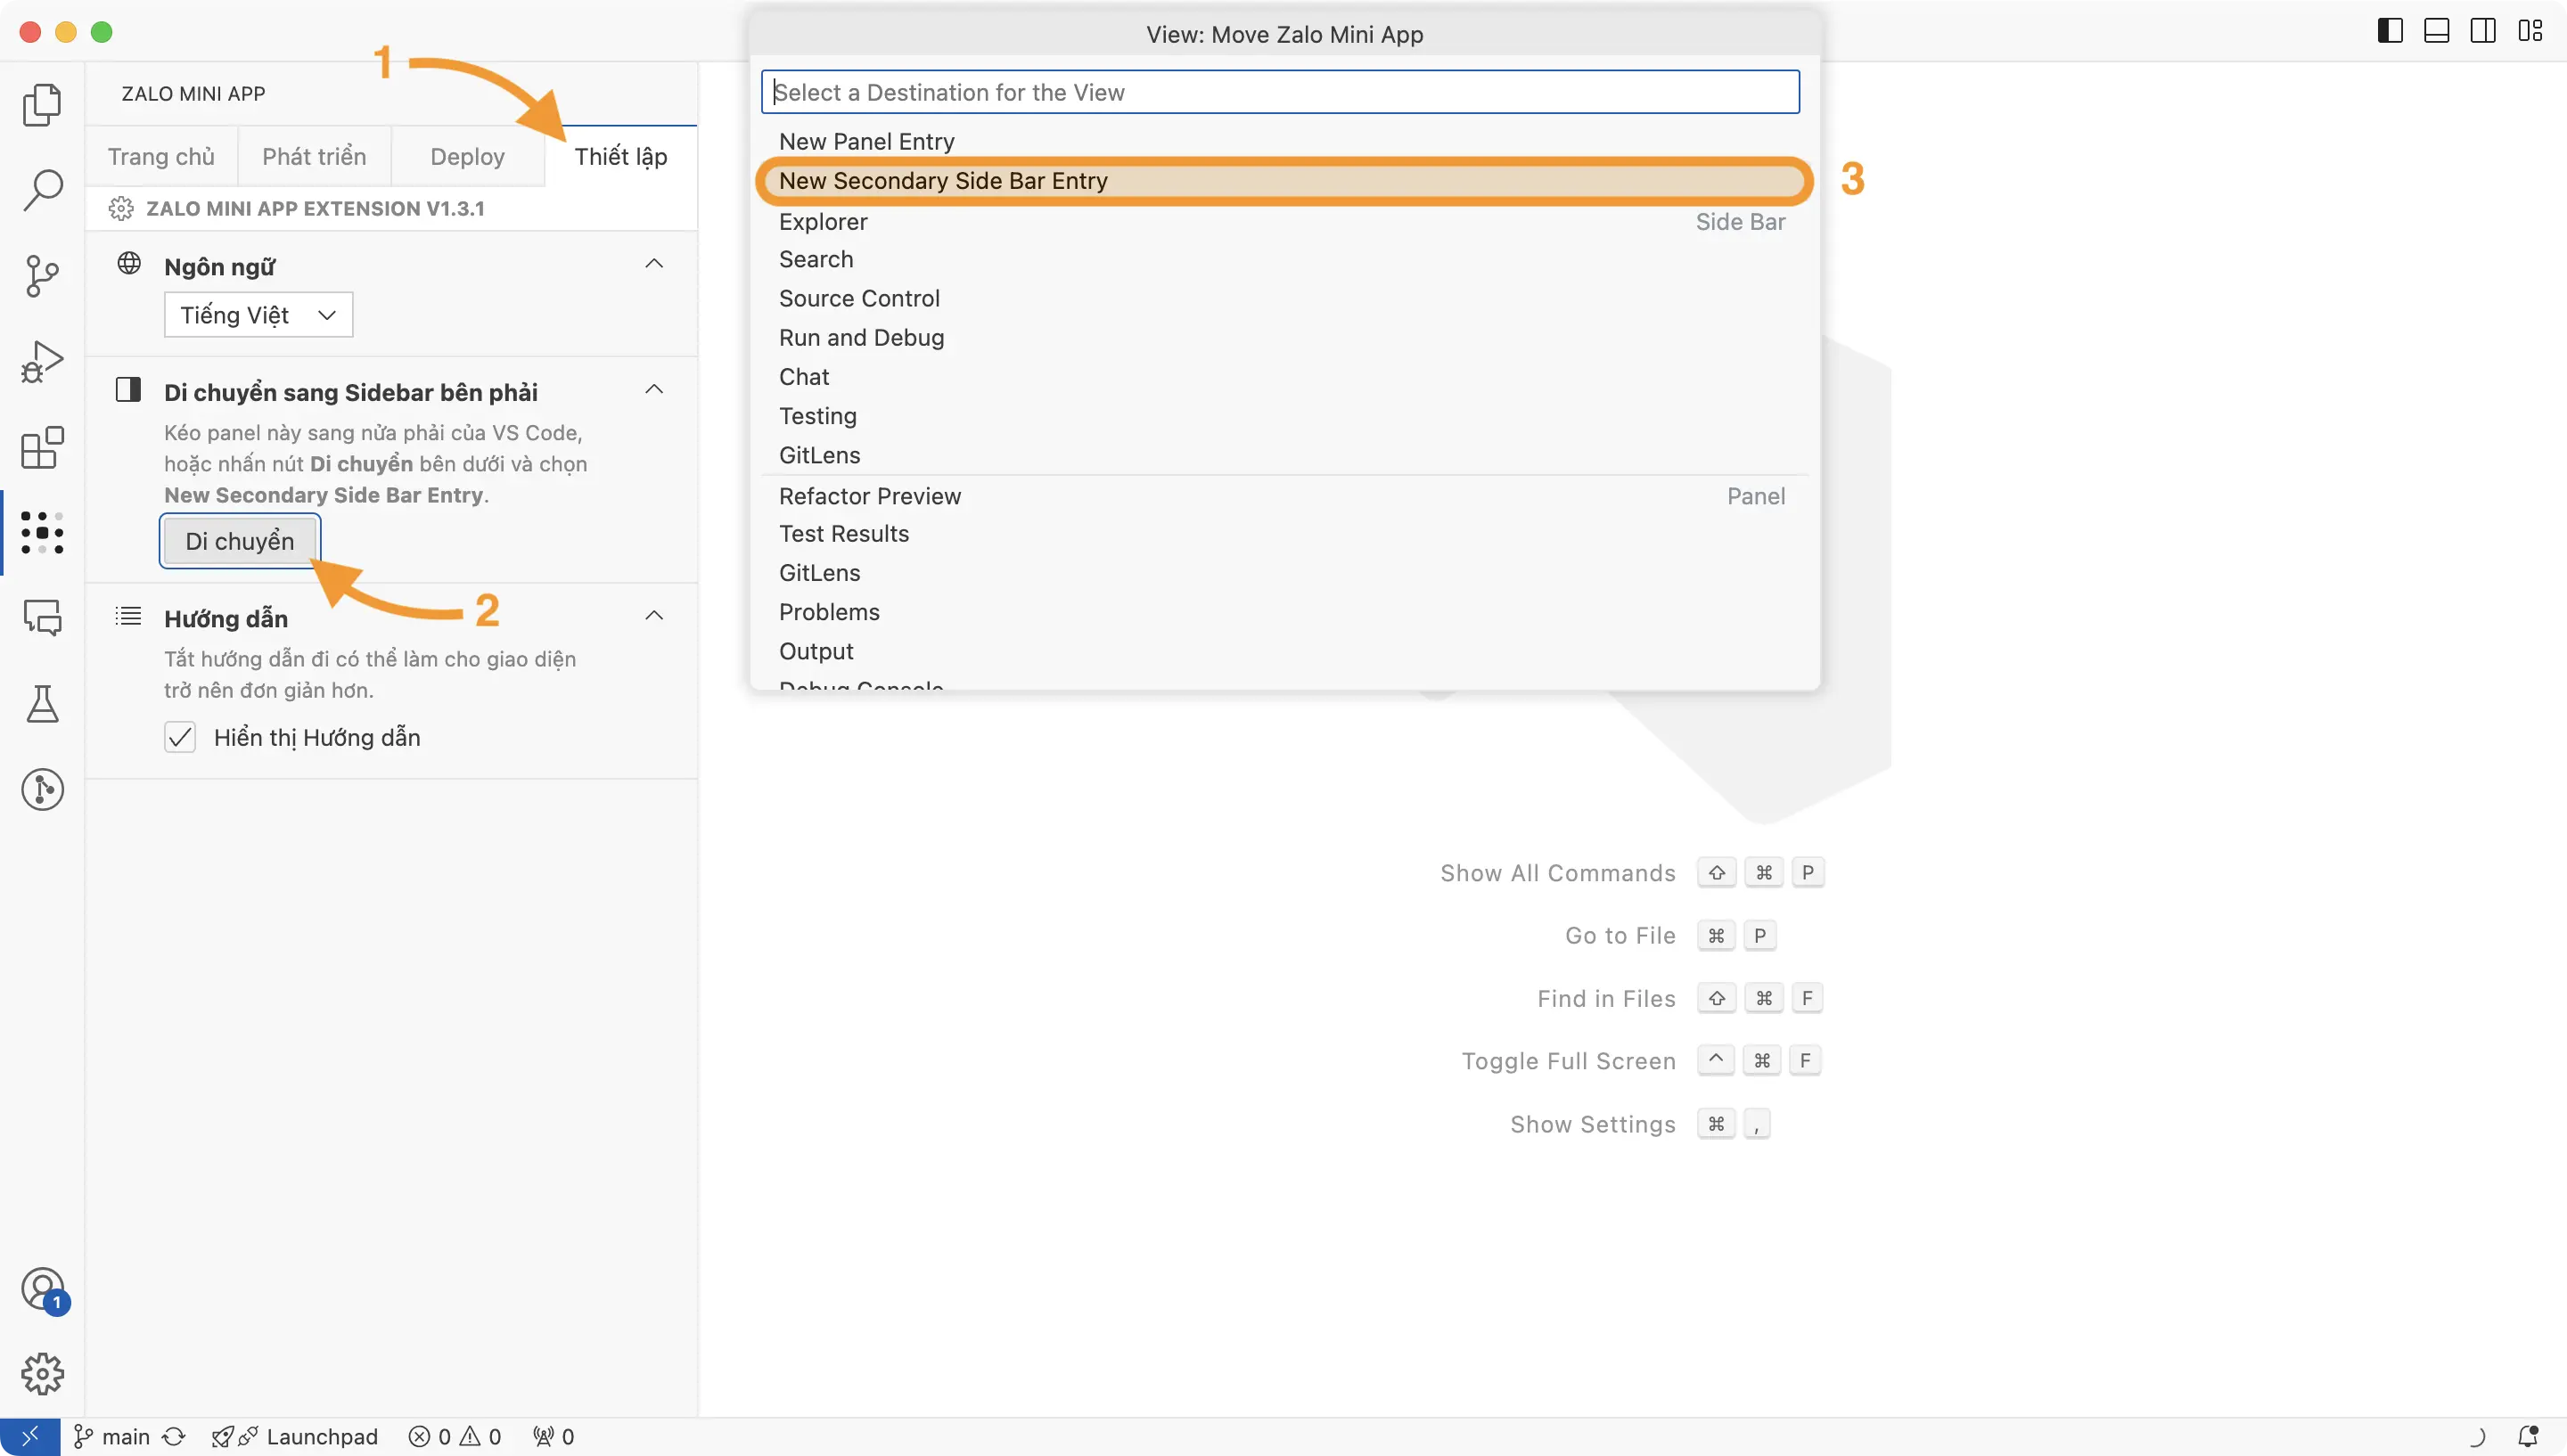
Tip: When the right panel (A) is hidden, you can redisplay it by clicking the Toggle Secondary Side Bar button (B) or using the View: Focus into Secondary Side Bar command (C).
License
This project is closed source and all rights are reserved.
Portions of this codebase utilize code from an open-source project under the MIT License.
While we cannot share the source code for this project, we acknowledge the use of the following open-source components:
We are grateful to the contributors of these projects.
For any questions or feedback, please reach out to us via the Zalo Mini App Community.


