Resx ControllerEdit related resx files for different languages in one view Installation Launch VS Code Quick Open ( Ctrl+P), paste the following command, and press enter.Copied to clipboard |


Resx ManagerWith the Resx Manager you can maintain several .resx-Files at once. It helps you to keep track of different translations by showing all of them in one view. Feel free to open a issue if you encounter problems or miss any features. 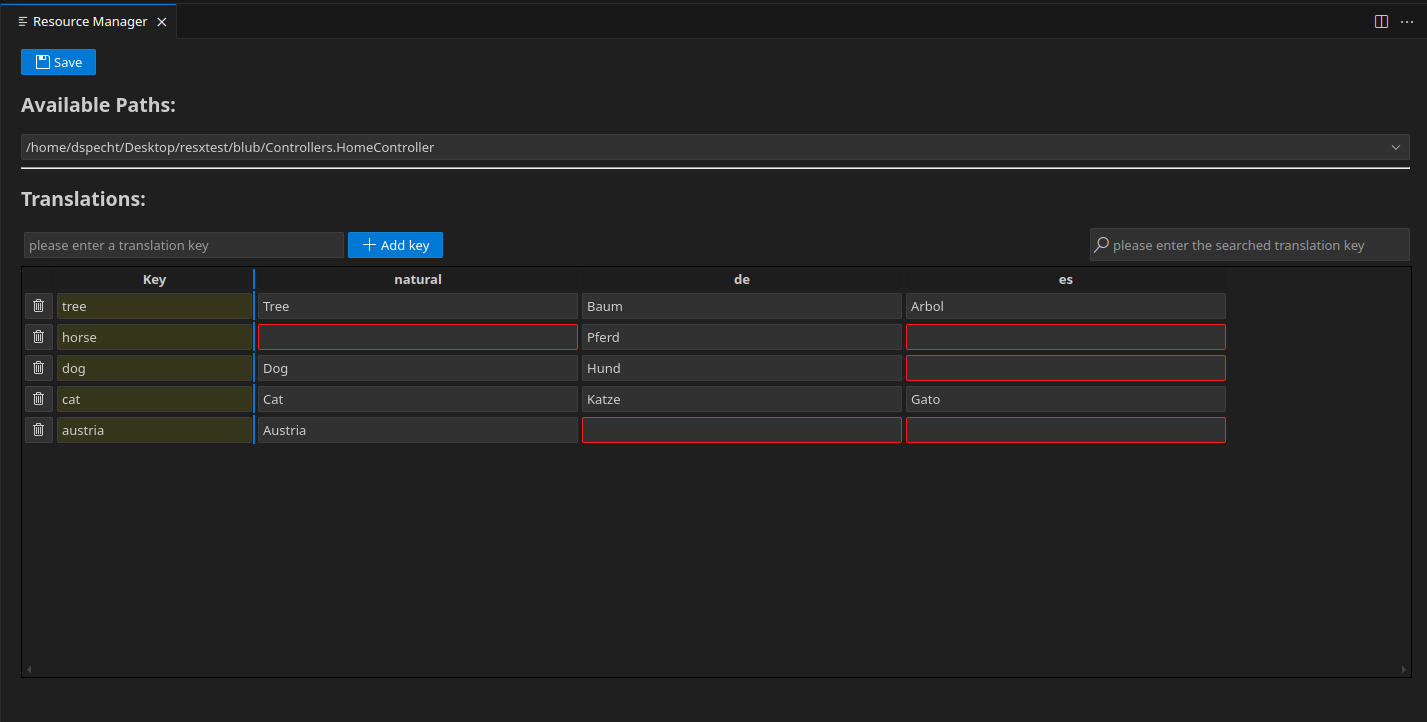
Featuresmanage several resx files in one viewTo open the extension press The extension searches for all files with the ending To be able to find the correct language-codes, only standard language-codes which consist of two characters for the language and two characters for the culture separated by a minus ("de-de" or "en-uk") are taken into account. If you want to use special language codes please add them in the user or workspace settings. When you select a path, a table with all the keys and corresponding translations is shown. When the Save-Button is pressed, the current data is saved to the corresponding .resx-files. If you want to add a new key, enter the key-value in the input-field under the table and press the Add-Button. The new key will be added at the top of the table. If you want to search for keys, just type the key you are searching for in the "Key Search" field. add a single translationTo add a single translation you can press You then need to enter the key of the translation. The value will be filled out automatically if you have marked a text before pressing executing the |