Semantic VisionCodebase observability for AI-assisted coding, in VS Code. Impact analysis, an interactive call graph, execution flowcharts, seven-signal Code Health, AI-generated docs, and code-to-data lineage for Python, JS, TS, and Java. 100% local. Installation Launch VS Code Quick Open ( Ctrl+P), paste the following command, and press enter.Copied to clipboard |

Semantic VisionAI can write your code in seconds. Understand it just as quickly — right inside VS Code. Semantic Vision is a codebase observability layer for AI-assisted coding: a map of the codebase that you and your AI agents can both use. Impact analysis, an interactive call graph, execution flowcharts, seven-signal Code Health, AI-generated documentation, and code-to-data lineage — the same engine as the Semantic Vision web app, as a panel next to your code instead of a separate browser tab.
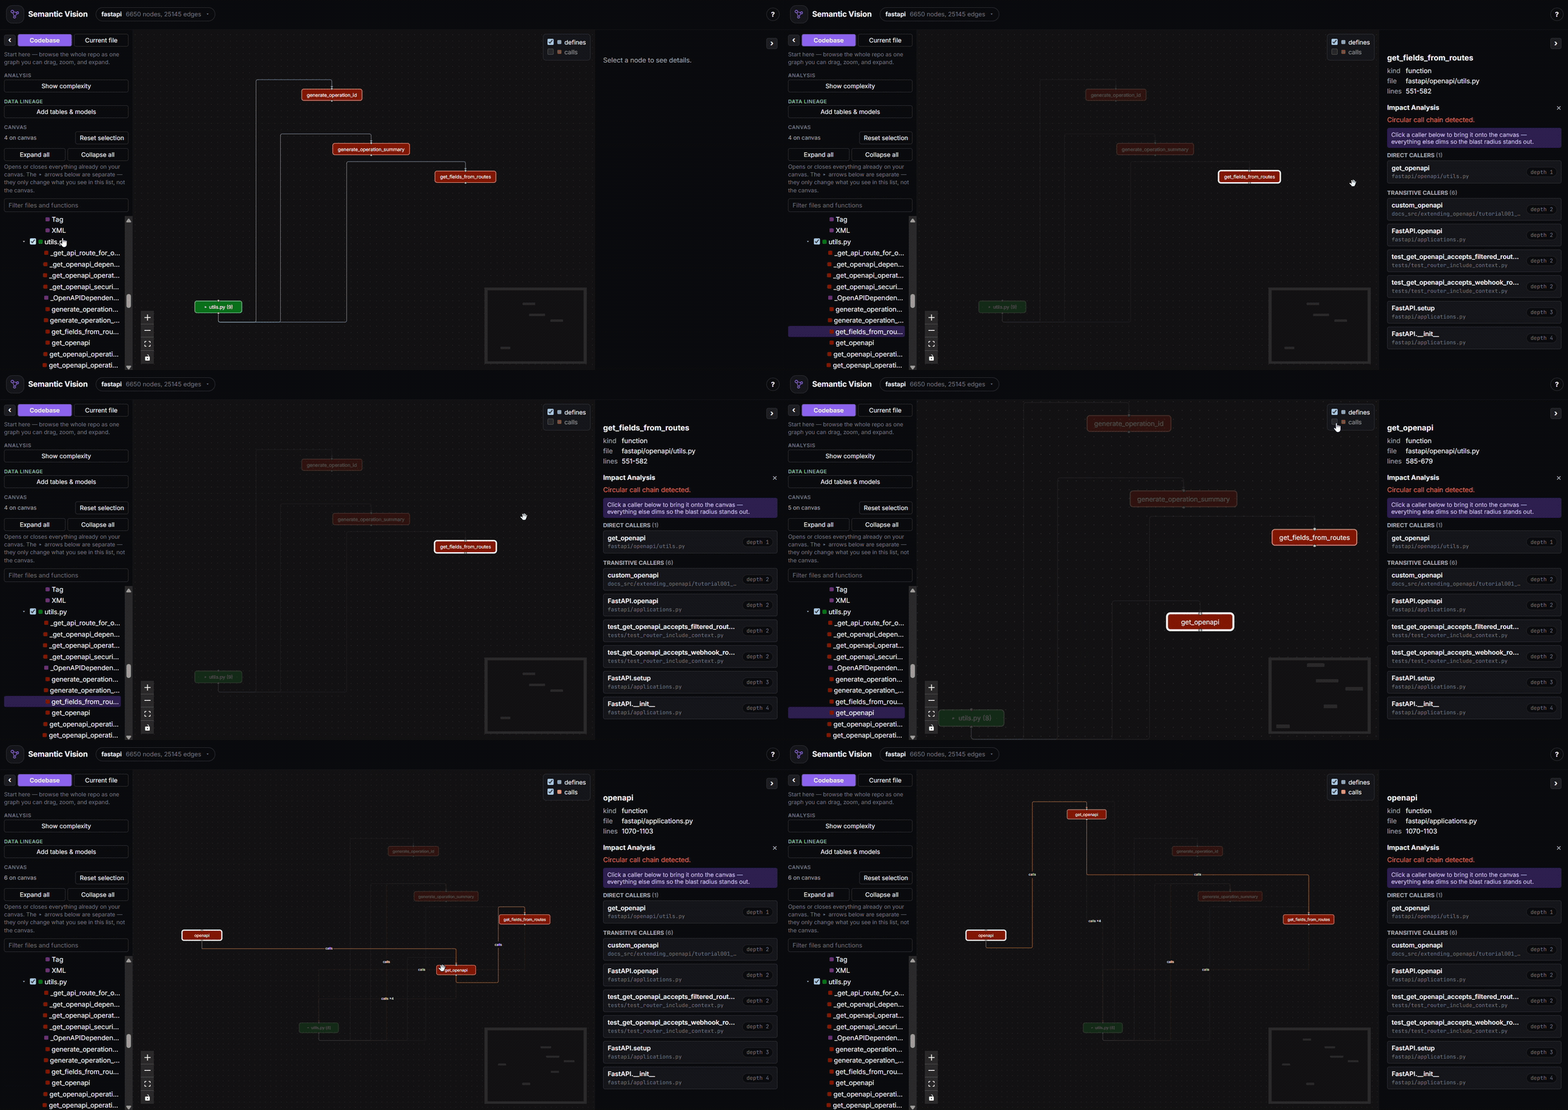
WhyWhether a teammate wrote it or an AI agent did, code still has to be understood before you can trust it. The traditional way — grep, jump between files, trace dependencies by hand, build a mental model, hope you didn't miss something — takes as long as it ever did, no matter how fast the code got written. Semantic Vision replaces all of that with one question: right-click a function and see its blast radius, its behavior, or its health, in seconds instead of an afternoon. Impact analysisRight-click any function — or, with code-to-data lineage connected, any table or column — and choose Impact Analysis to see every direct and transitive caller, resolved from the real call graph, not a guess. Circular call chains are flagged instead of silently mishandled, and the whole blast radius highlights live on the graph. This is the answer to "what actually depends on this" before you merge a change, not after something breaks in production.
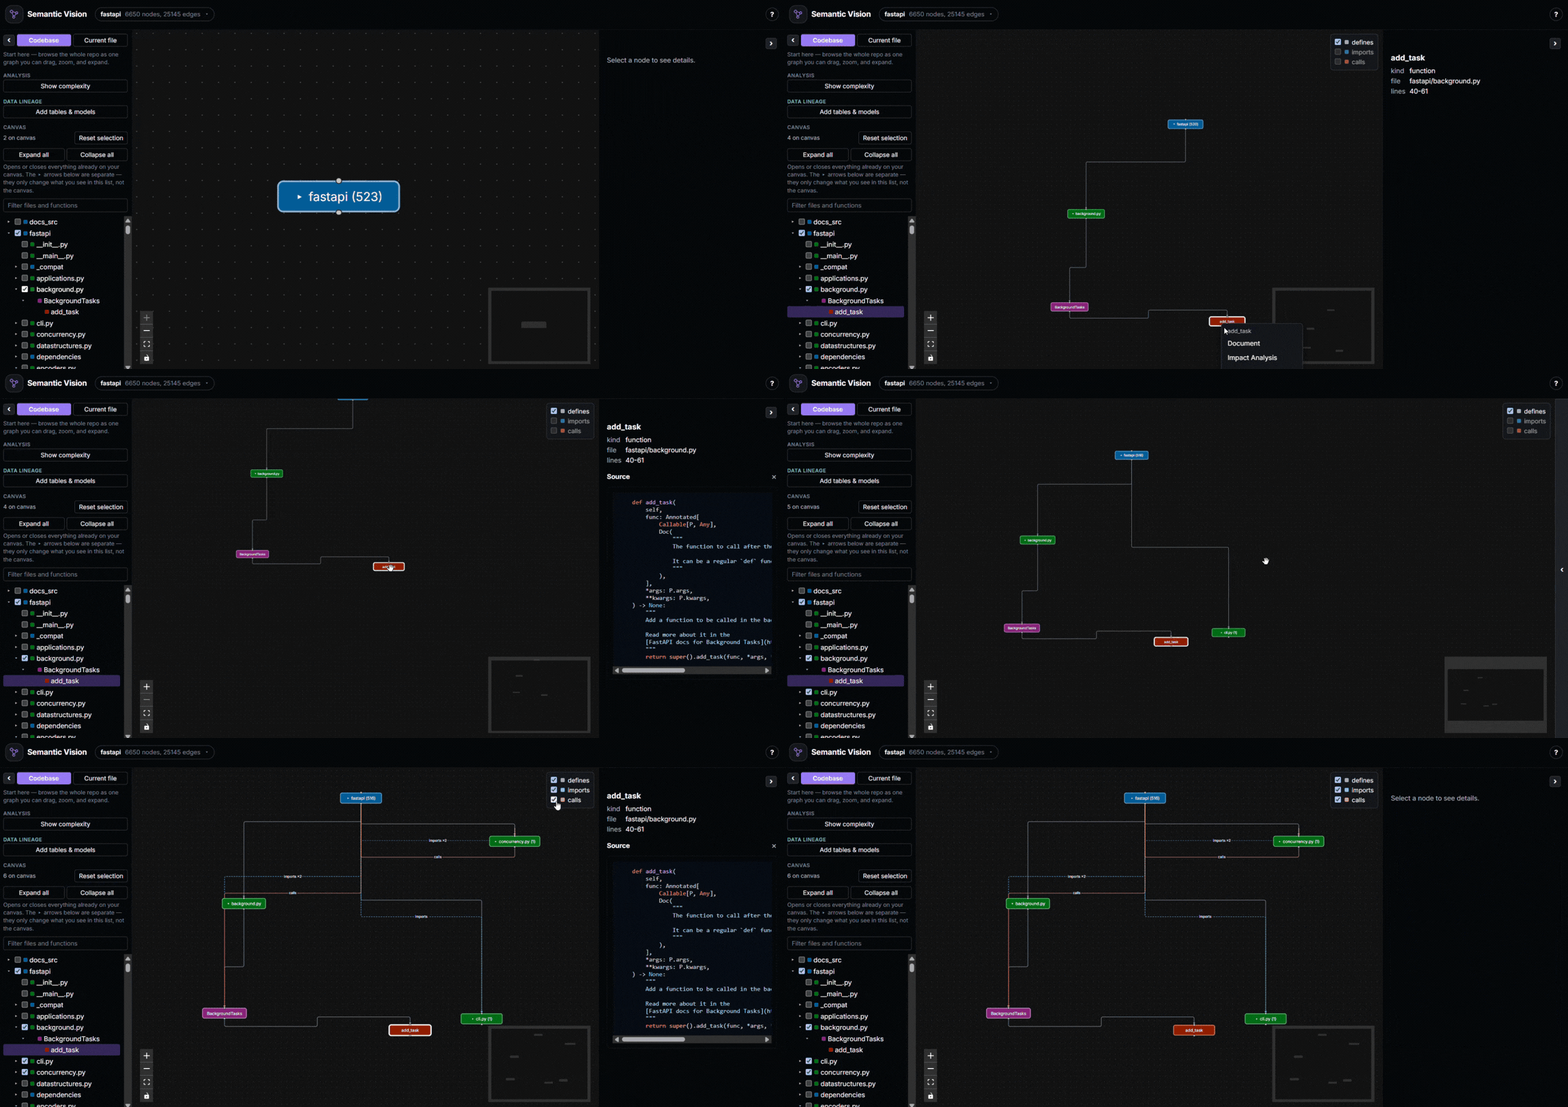
Everything else, in the same panelOnce the graph is open, every other feature works exactly as it does in the web app. Interactive call graphEvery directory, file, class, and function as a zoomable, color-coded graph with call/import/defines edges — structure that would otherwise take an hour of grepping to piece together by hand. Real-time search across the whole repo or scoped to one file, and your dragged layout persists automatically.
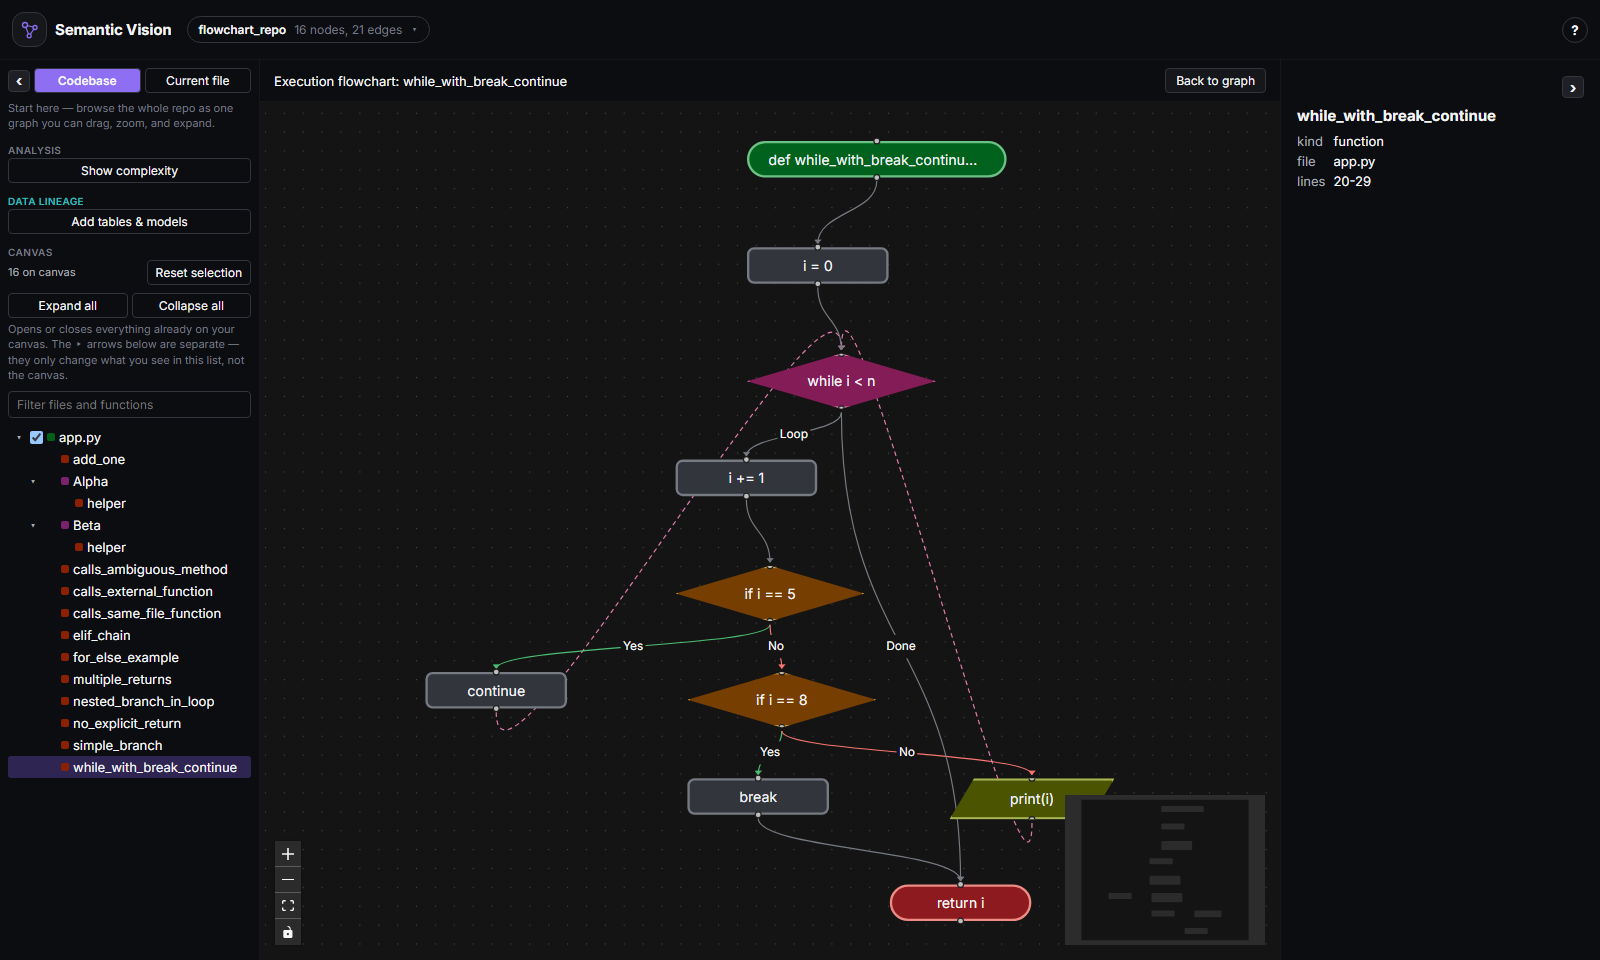
Execution flowchartsRight-click any function for its execution flowchart, built from its real
AST/CST: entry and return points, decisions with Yes/No edges, loops with a
visible back-edge, I/O calls, and calls out to other functions — each in
its own conventional shape. Works for Python, JS/TS, and Java, including
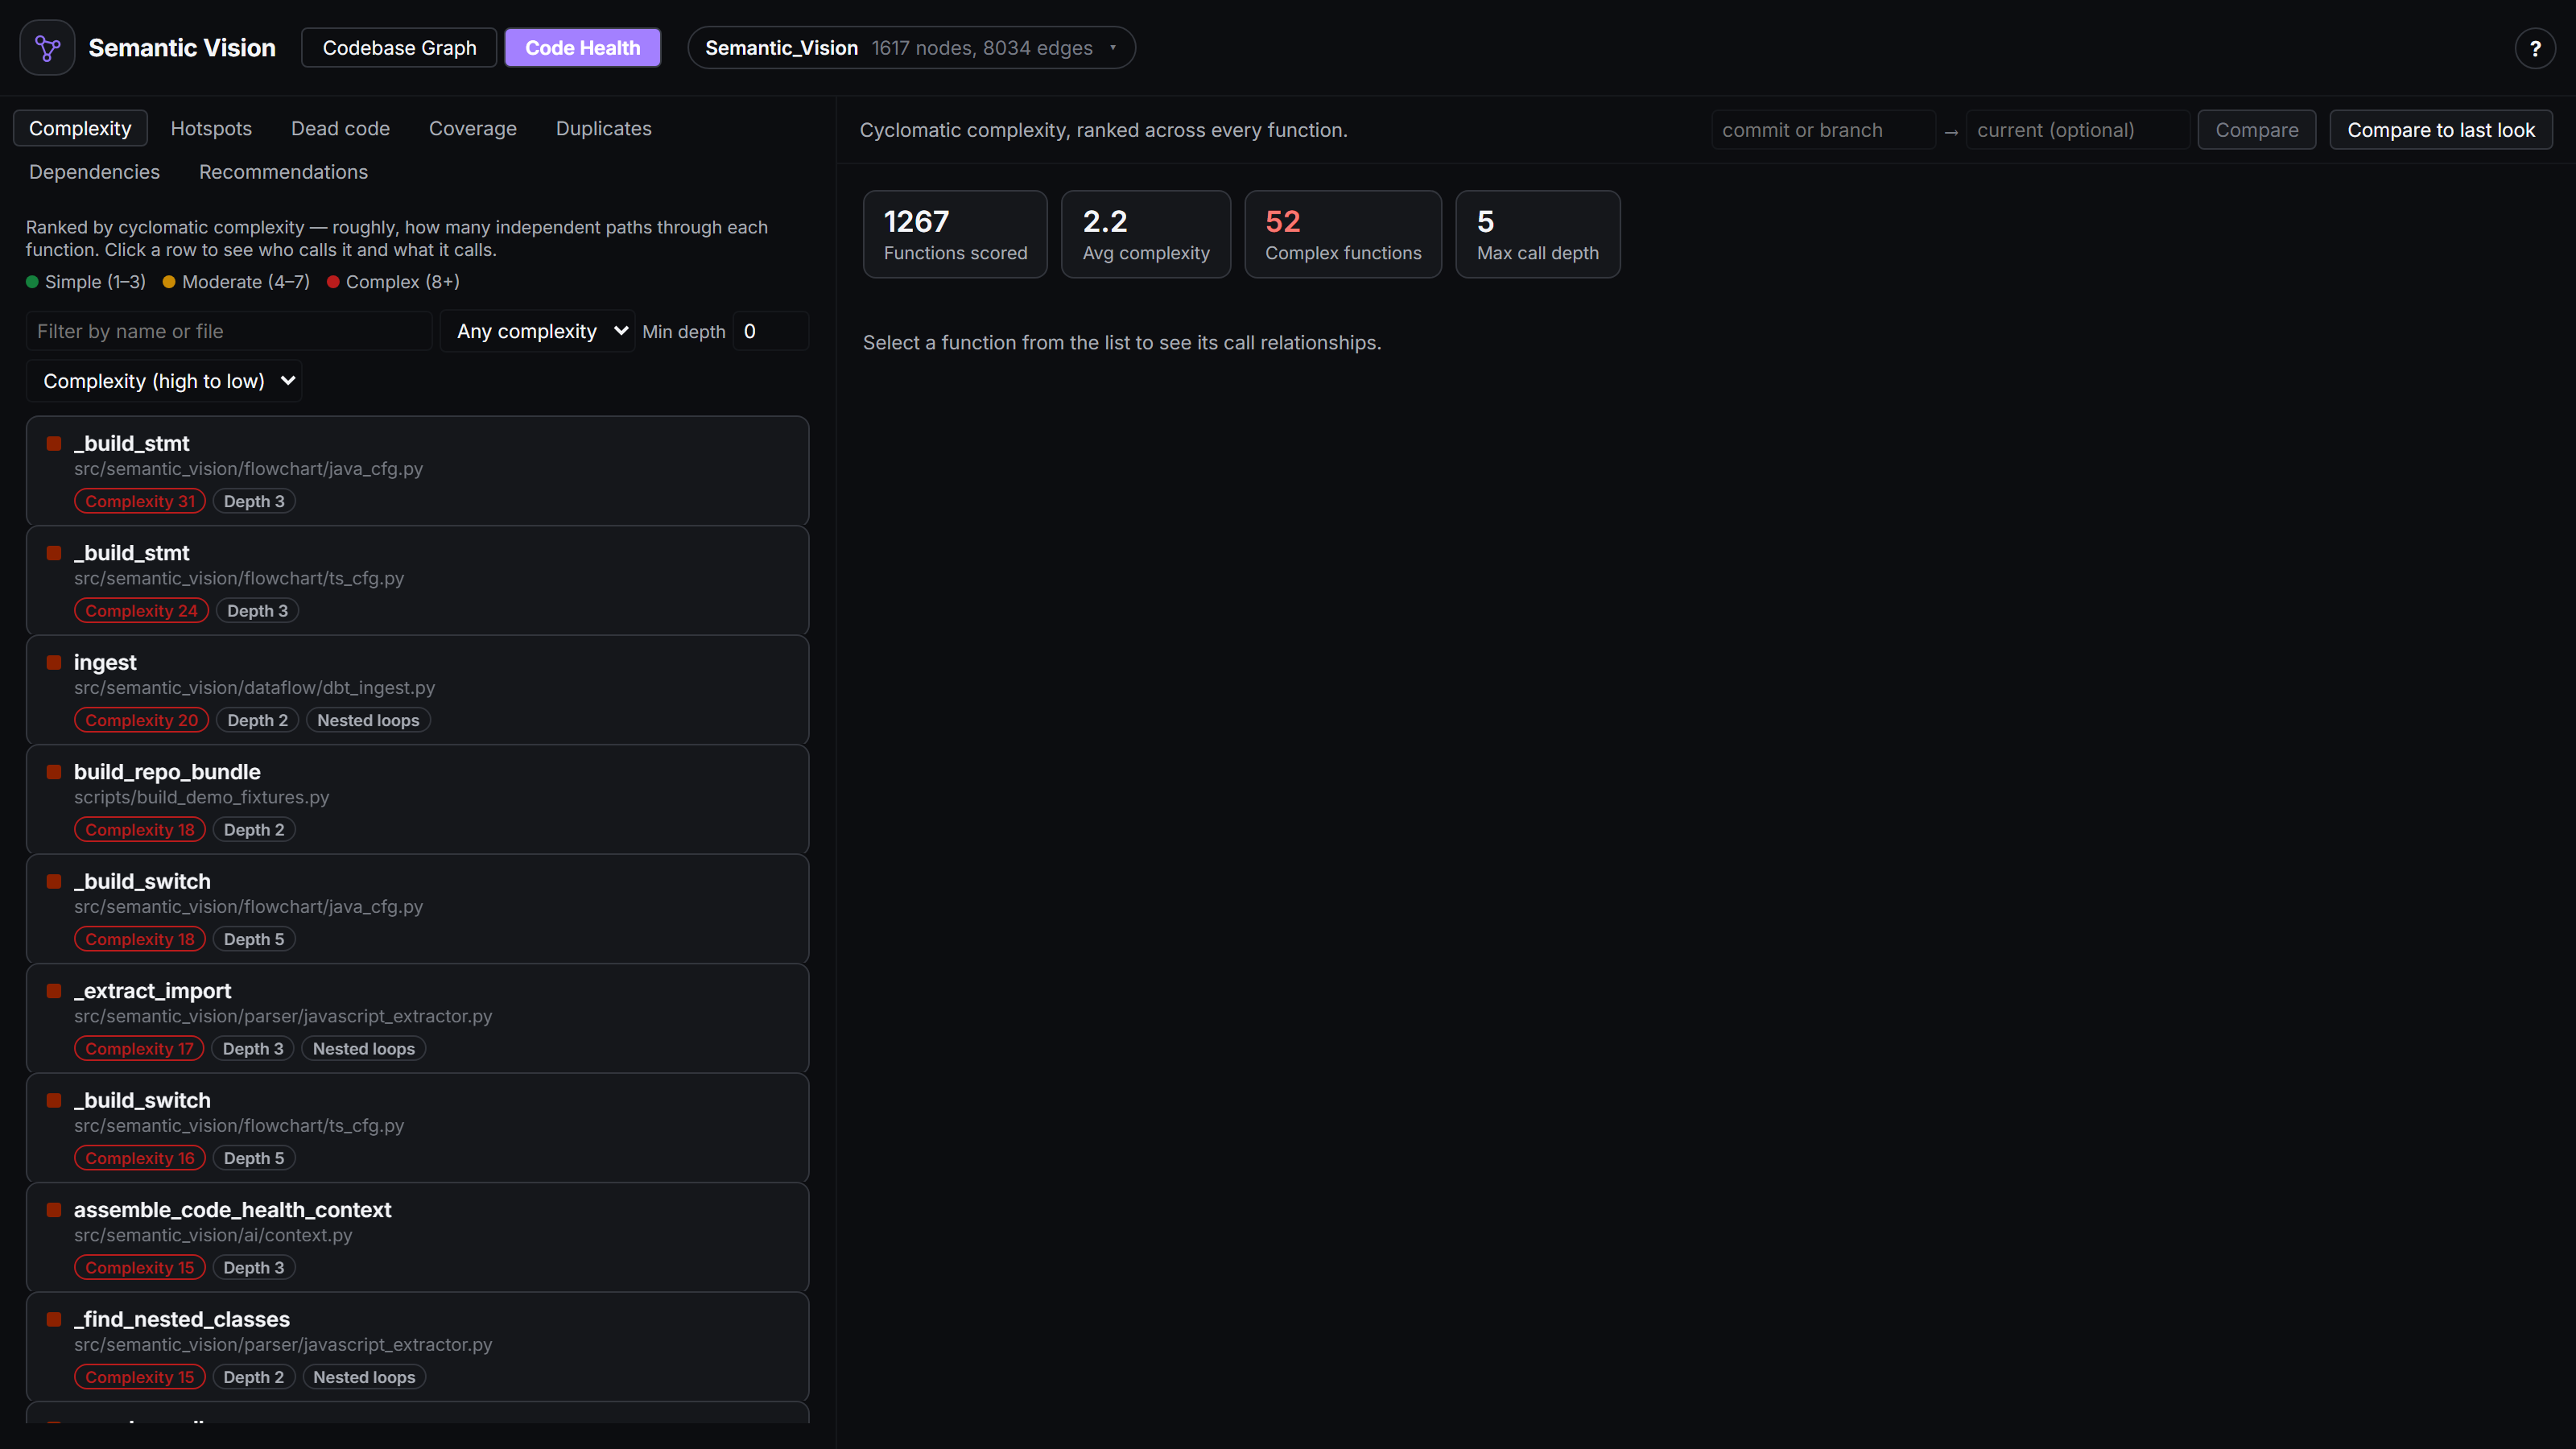
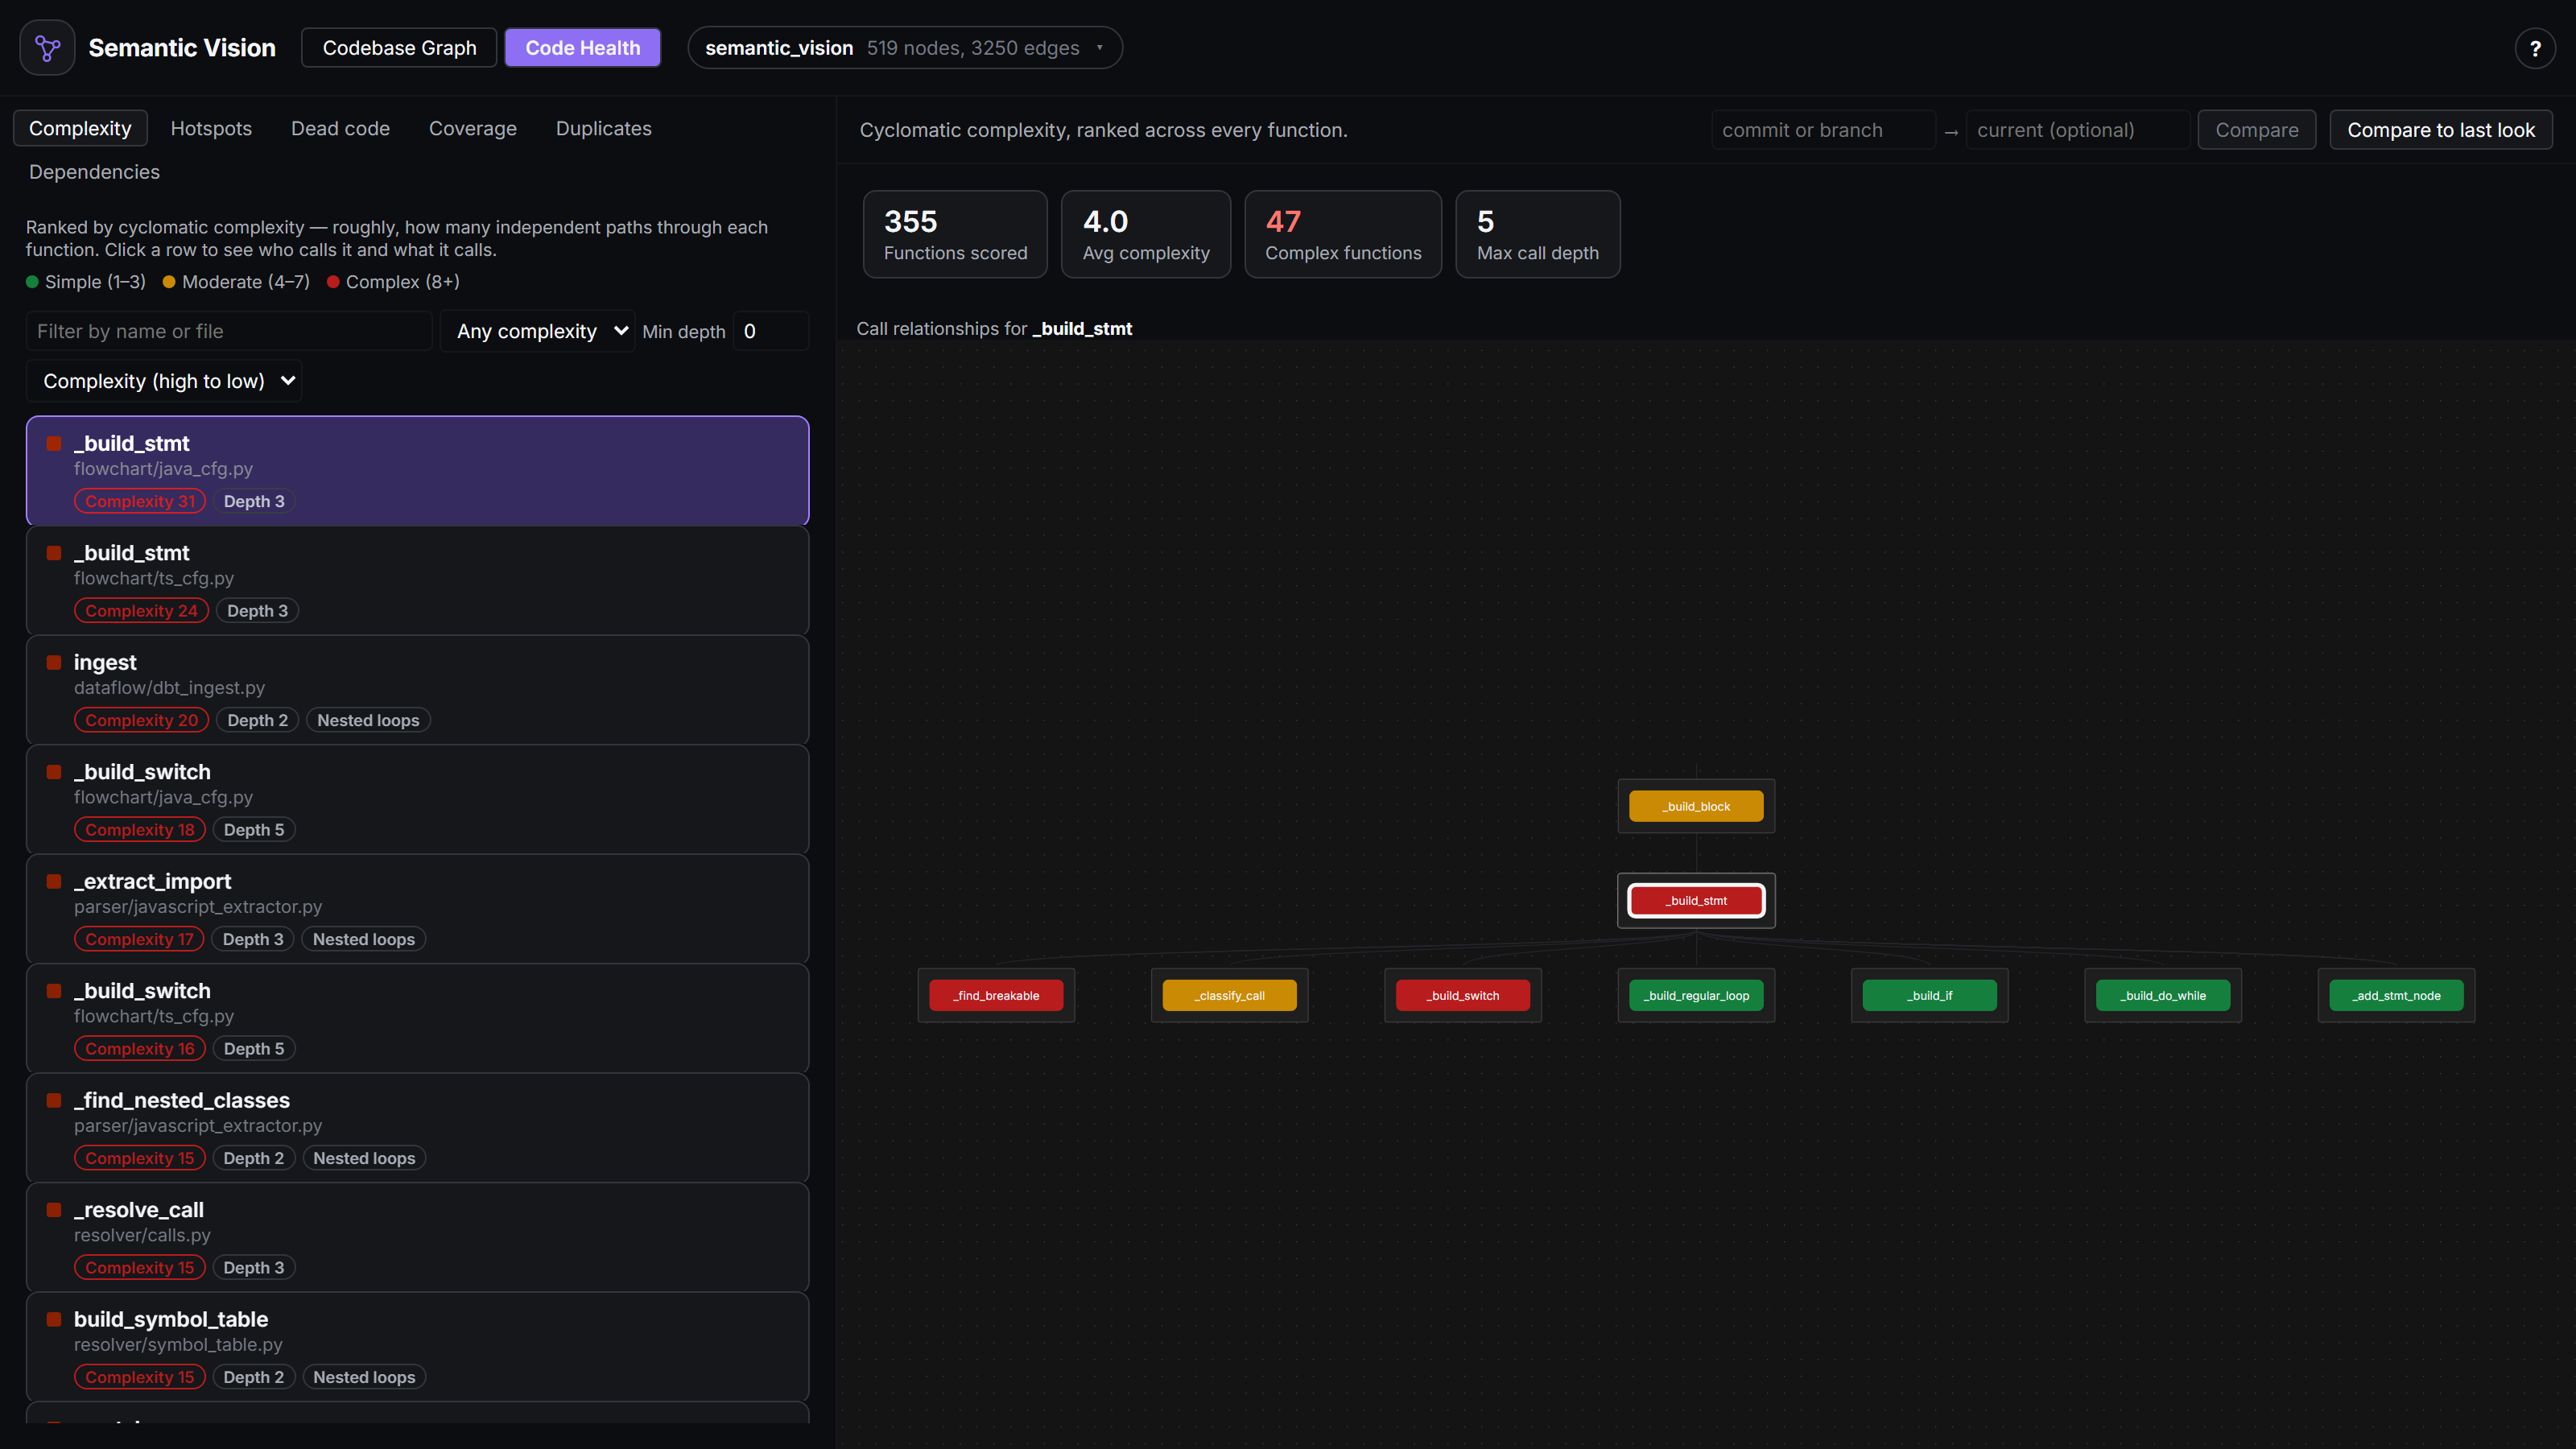
Code HealthA peer lens to the codebase graph, switched via a header tab: a filterable, sortable ranked list across seven signals — Complexity (a real AST walk, not a line-count guess), Hotspots (complexity × how often a file actually changes), Dead code (zero-caller candidates), Coverage risk (complexity × blast radius × untested, from a coverage.py or lcov report you provide), Duplicates (identical once names and literals are stripped), Dependencies (known vulnerabilities via osv.dev — opt-in, the one signal that reaches the network), and Recommendations (an AI pass prioritizing across every signal above at once).
Click any row to see exactly who calls it and what it calls, live, or diff against any commit to see whether an edit helped or hurt.
AI-generated documentationRight-click any function and choose Document to stream real Markdown documentation (Purpose, Parameters, Returns, Side Effects, Notes) assembled from its actual source, callers, callees, and parent class. Right-click a file for a module-level summary. Pick a local Ollama model (free, nothing leaves your machine), OpenAI, or Anthropic — nothing is saved until you click Save.
Code-to-data lineageSQLAlchemy models are detected automatically on every parse; connect a dbt
Your AI agent can see the map tooThe same analysis this extension shows you is also available to coding
agents over MCP: call graphs, impact
analysis, complexity, hotspots, dead code, coverage risk, duplicates,
execution flow, and more, as tools Claude Code, Cursor, or any
MCP-compatible agent can call directly — instead of grepping for context
this project has already computed. Run RequirementsThis extension is a thin client: it renders the same frontend as the web app, backed by a FastAPI server that does the actual parsing.
Nothing about your code is ever executed or sent anywhere — parsing is static, and the backend runs entirely on your own machine. Nothing leaves it unless you explicitly ask for AI-generated docs from a cloud provider, or opt in to a dependency vulnerability scan. Getting started
Learn moreFull documentation, screenshots, and setup guides (AI provider setup, the MCP server, code-to-data lineage, multi-language support) live in the main project's README and guides/ directory. |