Claude's Changes
Track file changes without Git and revert specific chunks with one click. Built as the perfect companion for AI-assisted coding in VS Code, Windsurf, Cursor, and other VS Code-based editors.
Claude's Changes
Features
- Changed Files panel (Activity Bar) — live list of every modified file with
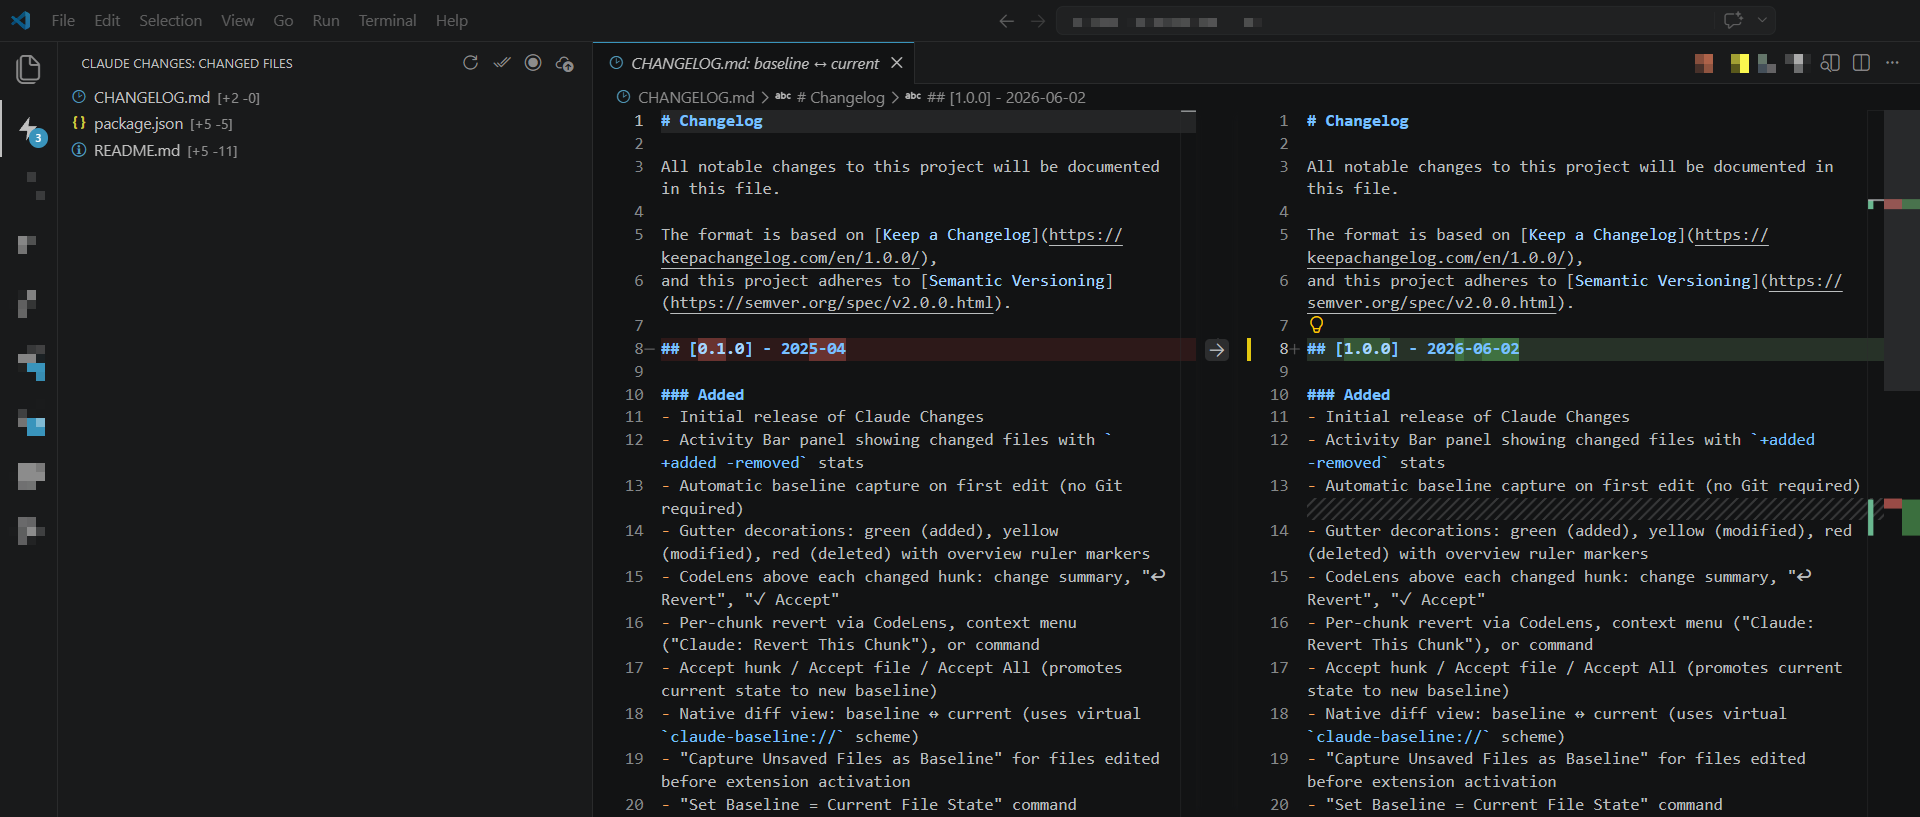
+added -removed stats. Click any file to open a clean baseline ↔ current diff.
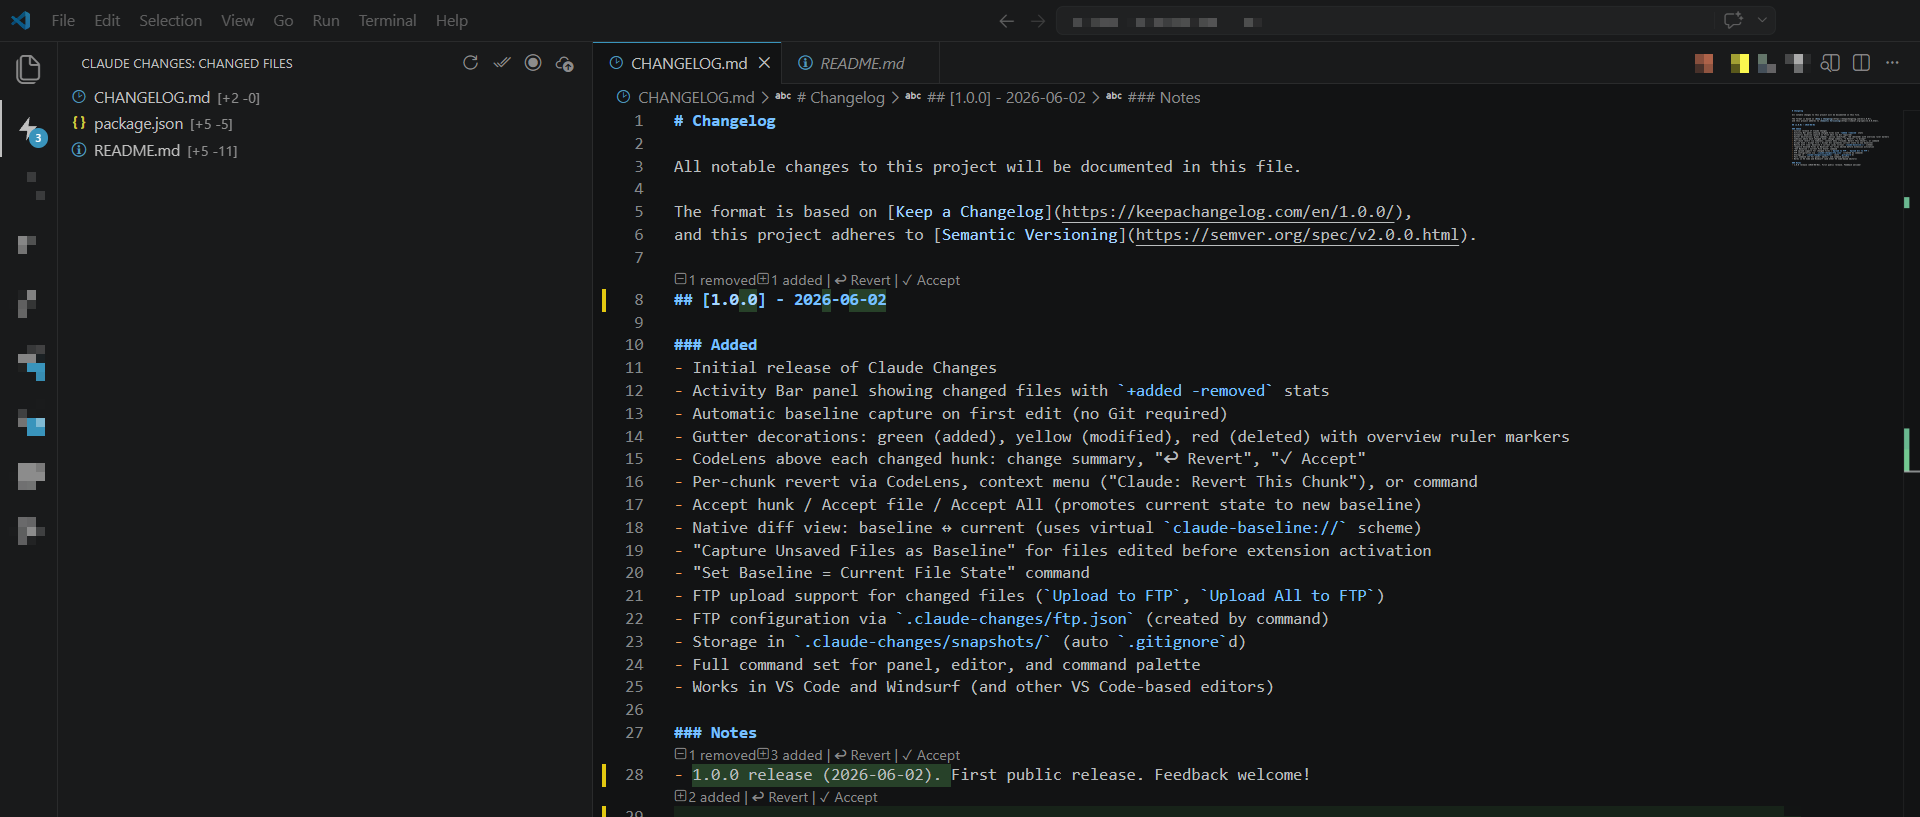
- Gutter decorations — green (added), yellow (modified), red (deleted) line highlights + overview ruler markers.
- CodeLens on every hunk — shows change summary (
2 removed 5 added), plus one-click ↩ Revert and ✓ Accept buttons right above the changed code.
- Context menu — Right-click in the editor → Claude: Revert This Chunk.
- Per-chunk Accept — promote only a specific hunk to the new baseline (great when you like some AI suggestions but not others).
- Full-file Revert / Accept.
- Accept All — wipe all baselines at once (treat current state as "new ground truth").
- Smart baseline capture — first edit after opening a file automatically becomes the baseline. Works even for files you edited before the extension loaded.
- FTP upload — one-click or bulk upload changed files to a remote server (optional).
- Zero Git required — everything lives in a local
.claude-changes/ folder that is automatically gitignored.
How It Works
- You (or an AI) edit a file.
- On the first change, the extension silently saves the original content as a baseline.
- All future diffs are computed against that baseline.
- Reverting a chunk/file restores the text from the baseline.
- Accepting a chunk/file updates the baseline to the current text (so future "revert" will go to this new state).
Baselines are stored in <workspace>/.claude-changes/snapshots/ (the whole folder is gitignored automatically).
The Changed Files Panel
- Located in the Activity Bar (icon looks like a document with arrows).
- Shows only files that actually differ from their baseline.
- Inline buttons: Open Diff (↔), Accept, Revert, Upload.
- Panel badge shows the number of truly changed files.
Gutter + CodeLens + In-Editor Revert
Every tracked change gets:
- Colored gutter bar (green/yellow/red)
- CodeLens line above the hunk with:
- Summary of the diff
↩ Revert (revert just this hunk)✓ Accept (make this hunk the new baseline for future reverts)
You can also select any range and run Claude: Revert This Chunk from the context menu — it will revert all hunks that intersect your selection.
Commands
All commands are available from the Command Palette (Ctrl+Shift+P / Cmd+Shift+P) under the Claude's Changes category.
| Command |
Description |
Claude's Changes: Open Diff |
Open split diff: baseline ↔ current |
Claude's Changes: Revert File |
Revert the entire file to its baseline |
Claude's Changes: Revert This Chunk |
Revert the chunk(s) under cursor or selection (also in editor context menu) |
Claude's Changes: Accept File (Clear Baseline) |
Accept current file state as the new baseline |
Claude's Changes: Accept All |
Accept everything — clear all baselines |
Claude's Changes: Accept This Chunk |
Accept only the hunk under the cursor (via CodeLens) |
Claude's Changes: Capture Unsaved Files as Baseline |
Useful for files that were already dirty when VS Code started |
Claude's Changes: Set Baseline = Current File State |
Explicitly set baseline to whatever is in the editor right now |
Claude's Changes: Upload to FTP |
Upload the selected file |
Claude's Changes: Upload All to FTP |
Upload every changed file |
Claude's Changes: Configure FTP |
Create/edit .claude-changes/ftp.json |
Claude's Changes: Refresh |
Force refresh the panel and decorations |
FTP Support (Optional)
Useful when you edit locally with AI and want to push only the changed files to a staging server.
- Run Claude's Changes: Configure FTP
- Fill in
host, user, password, remotePath
- Use the Upload commands from the panel or Command Palette
Example .claude-changes/ftp.json:
{
  "host": "ftp.example.com",
  "port": 21,
  "user": "username",
  "password": "password",
  "remotePath": "/public_html"
}
⚠️ The ftp.json file lives inside .claude-changes/ and is also gitignored.
Storage & Git
<your-workspace>/
├── .claude-changes/
│   ├── .gitignore          # contains "*" so nothing is committed
│   ├── snapshots/
│   │   └── <hash>.snap   # your baselines
│   └── ftp.json            # optional
└── ... your project ...
The extension never touches your Git history.
Requirements
- VS Code ^1.85.0 or any compatible editor (Windsurf, Cursor, etc.)
- No other dependencies
Installation
From the Marketplace (recommended after publication)
Search for "Claude's Changes" in the Extensions view.
From VSIX (any version)
code --install-extension claudes-changes-1.0.0.vsix
For Windsurf:
windsurf --install-extension claudes-changes-1.0.0.vsix
Or use the UI: Extensions → ⋯ menu → Install from VSIX…
Uninstall
code --uninstall-extension userID503.claudes-changes
Or right-click the extension in the Extensions panel → Uninstall.
Development
git clone https://github.com/userID503/claude-changes.git
cd claude-changes
npm install
npm run watch          # or "build"
- Press
F5 in VS Code to launch an Extension Development Host window.
- Changes to TypeScript are automatically rebuilt by esbuild.
Package a local .vsix
npm run package
The resulting .vsix can be installed with the command above.
Publishing
1. To GitHub (source of truth)
- Update version in
package.json (semantic versioning)
- Update
CHANGELOG.md
- Commit everything
git tag vX.Y.Zgit push && git push --tags- Create a GitHub Release and attach the
.vsix produced by npm run package
2. To the VS Code Marketplace
Prerequisites:
- You are a member of the
userID503 publisher (or create one via vsce create-publisher)
- Personal Access Token with Marketplace publish rights
npm install -g @vscode/vsce
vsce login userID503
npm run publish
Or manually:
npm run build
vsce publish --no-dependencies
After the first successful publish, the Marketplace badges and links in this README will become live.
License
MIT © 2026 userID503
Credits
Created for fast, safe AI-assisted editing workflows where you want the power of "undo specific AI changes" without forcing everything through Git.
Found a bug or have an idea? Open an issue on GitHub.