UIlicious Test Runner
Run your UIlicious tests locally inside VSCode.
UIlicious is a flexible and intuitive tool that allows anyone to test and monitor user journeys on anything that runs in a web browser.
If you are new to UIlicious, check out the documentation.
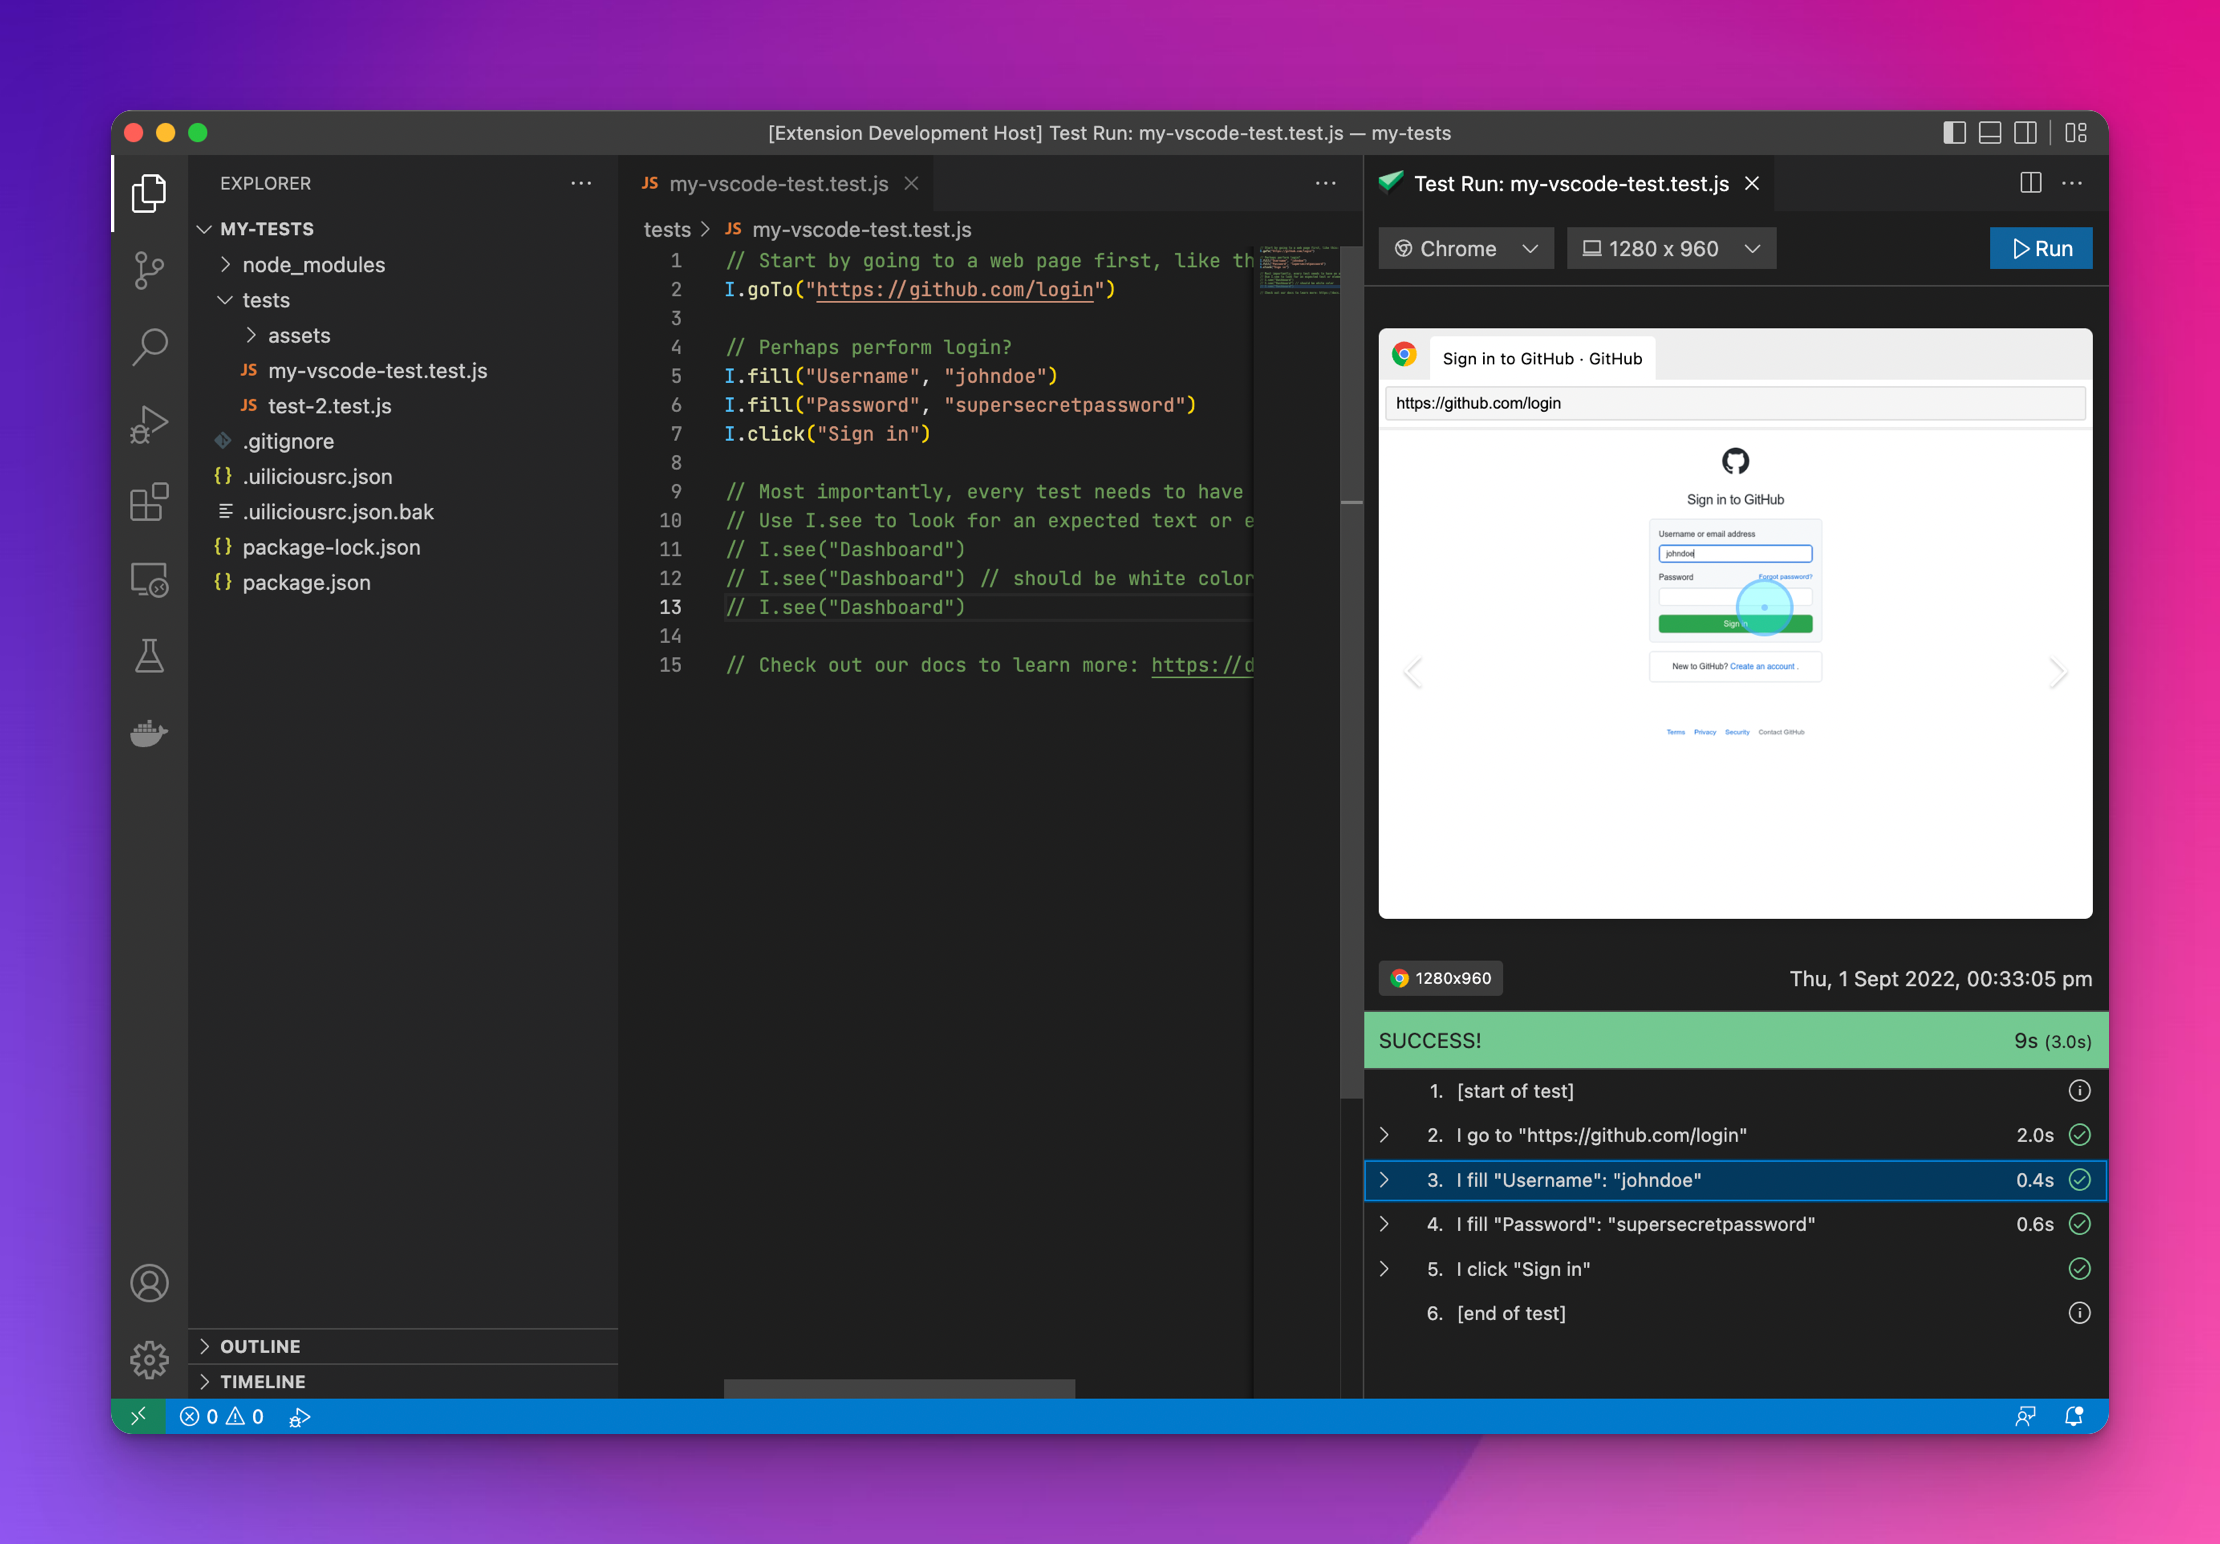
Table of Contents
What is UIlicious?
UIlicious is a simple and robust tool for automating interactions with modern web applications.
Use it to test your web applications to make sure that your users aren't running into unexpected errors in critical user flows like when they are registering for an account or checking out their order.
UIlicious is framework agnostic so it can with with your favourite frameworks like ReactJS, AngularJS, VueJS, Polymer, VanillaJS, etc!
// It's (almost!) like plain english
I.goTo("https://facebook.com");
I.fill("Email", "peter@example.com");
I.fill("Password", "mysupersecretpassword");
I.click("Login");
I.see("Peter");
Features
Here are the features of this extension:
- Run local UIlicious test files using within VSCode
- View test run results within VSCode
- Cross-browser testing on Chrome, Firefox, Safari, MS Edge & IE11
- Framework agnostic
See the full list of features.
Getting Started
To get started:
Sign up for UI-licious
You will need a UIlicious account before you can use this extension. Sign up for an account for an account if you haven't.
Write your first test
Create a new test file in the ./tests folder. The filename should end with ".test.js".
Example: ./tests/homepage.test.js
Learn more about the basic commands.
Run the test
Click on the  cake icon to open the UIlicious test run panel.
Press the Run button to start the test run.
You may be asked to configure the project when you open it for the first time.
Viewing the test results
After starting the test run, the results should start appearing in the panel.
You can click on individual steps to navigate between the steps.
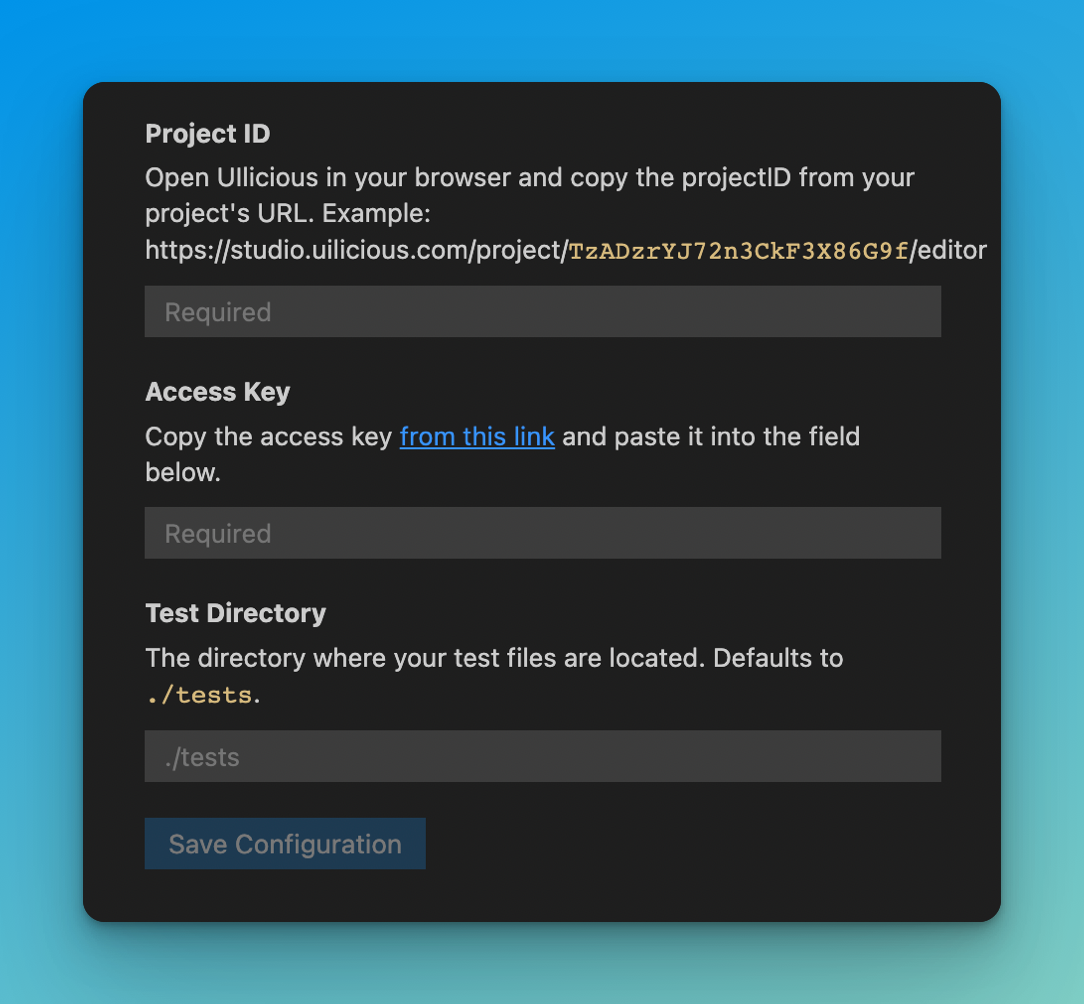
Project Configuration
When you open the test run panel for the first time, you'll be prompted to setup your project:
Project ID: this is the identifier of your UIlicious project. Copy and paste this from your project's URL.Access Key: your UIlicious access key.Test Directory: (optional) the directory where your test files are located. Defaults to ./tests
The configuration will be saved in your project root in a file called .uiliciousrc.json.
Release Notes
This section describes major releases and their improvements. For a detailed list of changes, please refer to the change log.
Version 1.0.0