WAPPL
WAPPL is a vscode-based Tizen Web Application SDK extension which stands for Web Application studio.
You can easily create a project in WAPPL.
WAPPL provides commands for VS Code Command Palette and Project Wizard.
Prerequisites
- Install vscode
You can use extensions on Windows and Linux, Mac.
- Install Node (>= v8.11.2 Version)
- Install JAVA
Currently, version 8 is the most stable version.
Install Guide
Install from Marketplace
To install VS Code Extension for WAPPL from the Visual Studio Code Marketplace, follow these steps:
In the Activity Bar of VS Code, click Extensions  . .

In the EXTENSIONS view that appears, click the search box at the top and type WAPPL.
In the WAPPL search result that appears, click Install.
After the installation is complete, to activate the extension, click Reload.
After the extension is active, WAPPL installation is complete.
Install using VSIX file
To install VS Code extension for WAPPL from a VSIX file, follow these steps:
In the Activity Bar of VS Code, click Extensions .
In the EXTENSIONS view that appears, click More  > Install from VSIX. > Install from VSIX.
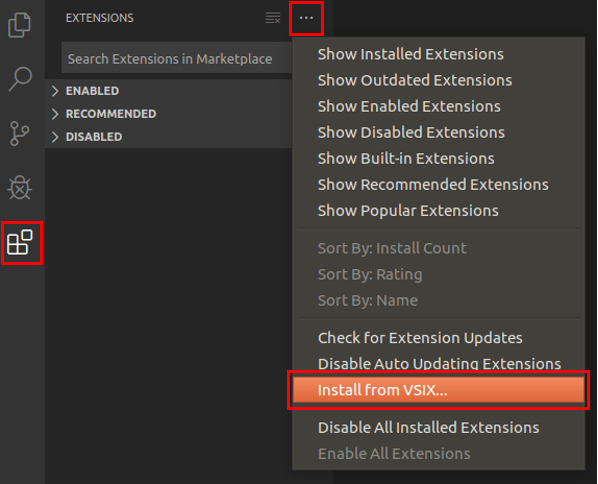
In the Install from VSIX window that appears, select an appropriate VSIX file and click Install.
After the installation is complete, to activate the extension, click Reload.
After the extension is active, WAPPL installation is complete.
Install emulator images
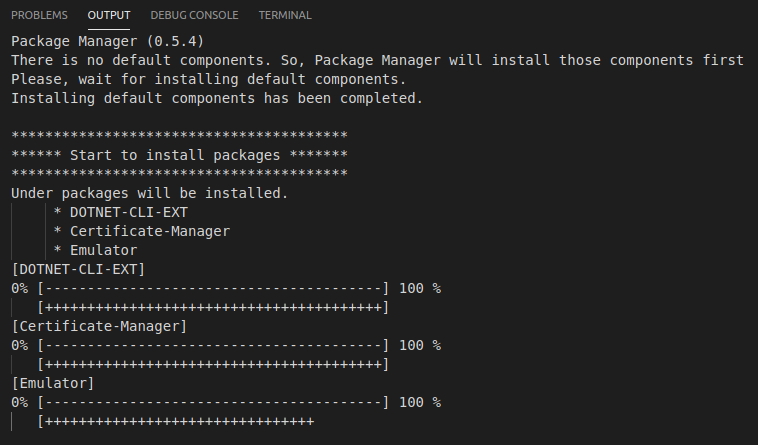
If you do not have a real device, you can run your application in a virtual environment using Tizen Emulator. To download the emulator images, you can use Tizen Package Manager or Tizen Emulator Manager.
To use Tizen Package Manager, follow these steps:
In VS Code, click View > Command Palette.
In the input field of the Command Palette that appears, type Tizen Web: Run Package-Manager and press Enter.
Select the profiles and versions for your project, and click install.

To use Tizen Emulator Manager, follow these steps:
NOTE
Tizen Emulator Manager shows the emulator images installation window only when no images are installed on your computer.
In VS Code, click View > Command Palette.
In the input field of the Command Palette that appears, type Tizen Web: Run Emulator-Manager and press Enter.
Select the profiles and versions for your project, and click Ok.

Develop applications
This section explains how to use VS Code Extension for WAPPL to develop applications.
Change Tizen SDK path
To change a Tizen SDK path, follow these steps:
- In VS Code, click View > Command Palette.
- In the input field of the Command Palette that appears, type Tizen Web: Change Tizen SDK Path and press Enter.
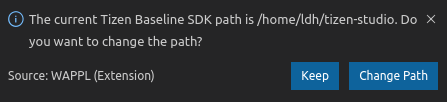
- In the change notification that appears, perform one of the following:
To keep the current path, click Keep.
To change the path, click Change Path. In the input field of the Command Palette that appears, type the path and press Enter.
NOTE
The default path for:
Install Tizen Baseline SDK
NOTE
You must install Oracle Java Development Kit (JDK) 8 or OpenJDK 12 for Tizen Studio 3.5 and higher.
For more information on download and install, see Oracle Java Download page.
To install a Tizen Baseline SDK, follow these steps:
In VS Code, click View > Command Palette.
In the input field of the Command Palette that appears, type Tizen Web: Install Tizen Baseline SDK and press Enter.
In the notification that appears, perform one of the following:
If SDK is already installed, click YES, and run Tizen Web: Change SDK Path.
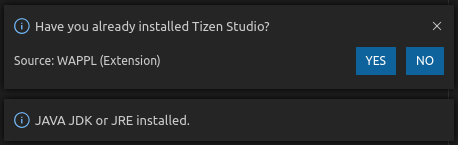
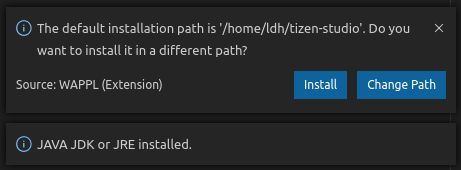
If SDK is not installed, to perform a fresh installation, click NO. In the notification that appears:
To start the Tizen Baseline SDK installation, click Install.
If the path of the popup is null, change the path by clicking Change Path.
Proceed with the installation. The installation progress appears in the log. The extension reloads when the installation is complete.
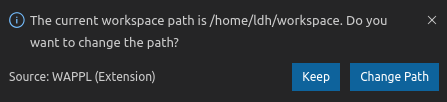
Change workspace path
To change a workspace path, follow thse steps:
- In VS Code, click View > Command Palette.
- In the input field of the Command Palette that appears, type Tizen Web: Change Workspace Path and press Enter.
- In the change notification that appears, perform one of the following:
To keep the path, click Keep.
To change the path, click Change Path. In the input field of the Command Palette that appears, type the path and press Enter.
NOTE
The default path for:
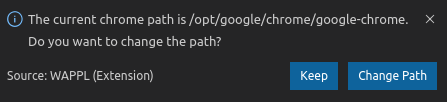
Change Chrome path
To change a Chrome browser path, follow these steps:
- In VS Code, click View > Command Palette.
- In the input field of the Command Palette that appears, type Tizen Web: Change Chrome Path and press Enter.
- In the change notification that appears:
To keep the path, click Keep.
To change the path, click Change Path. In the input field of the Command Palette that appears, type the path and press Enter.
NOTE
If the installation is complete with the Chrome installer, the path is set to below default path:
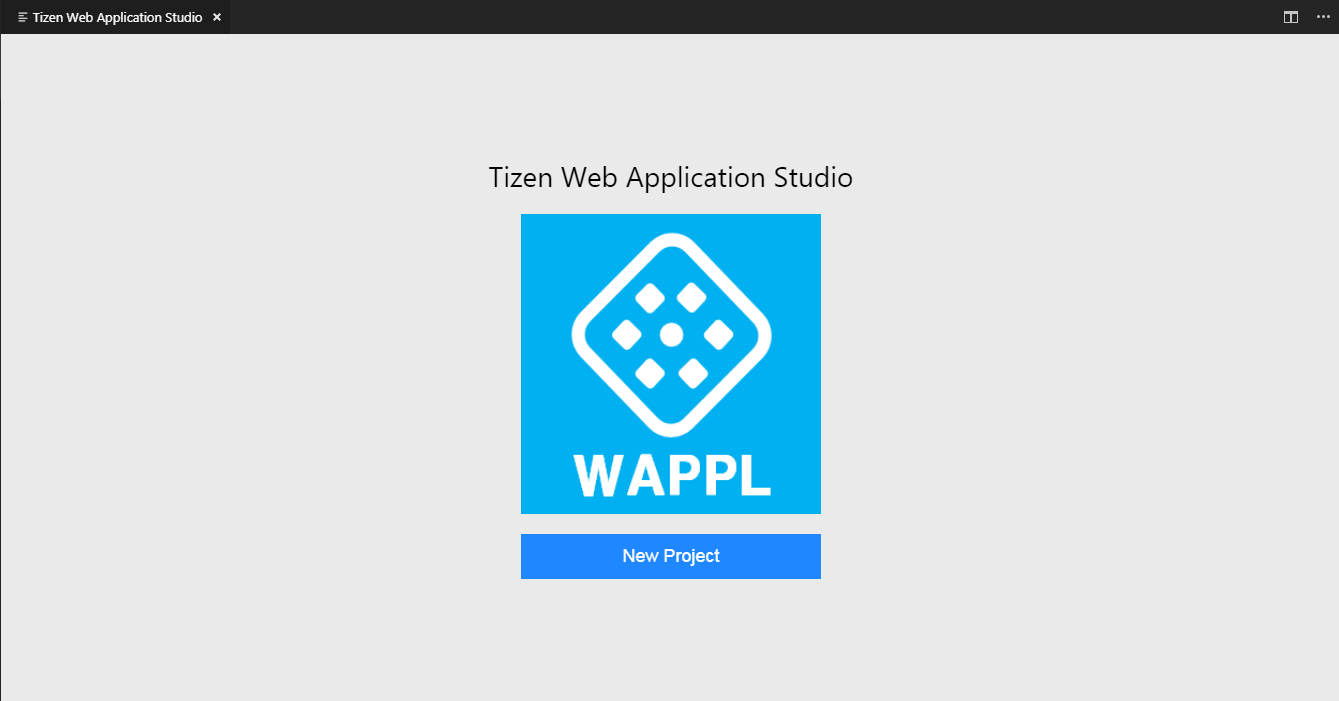
Create Tizen Web project
To create a Tizen Web project, follow these steps:
In VS Code, click View > Command Palette.
In the input field of the Command Palette that appears, type Tizen Web: Create Wizard Project and press Enter.
Click New Project.
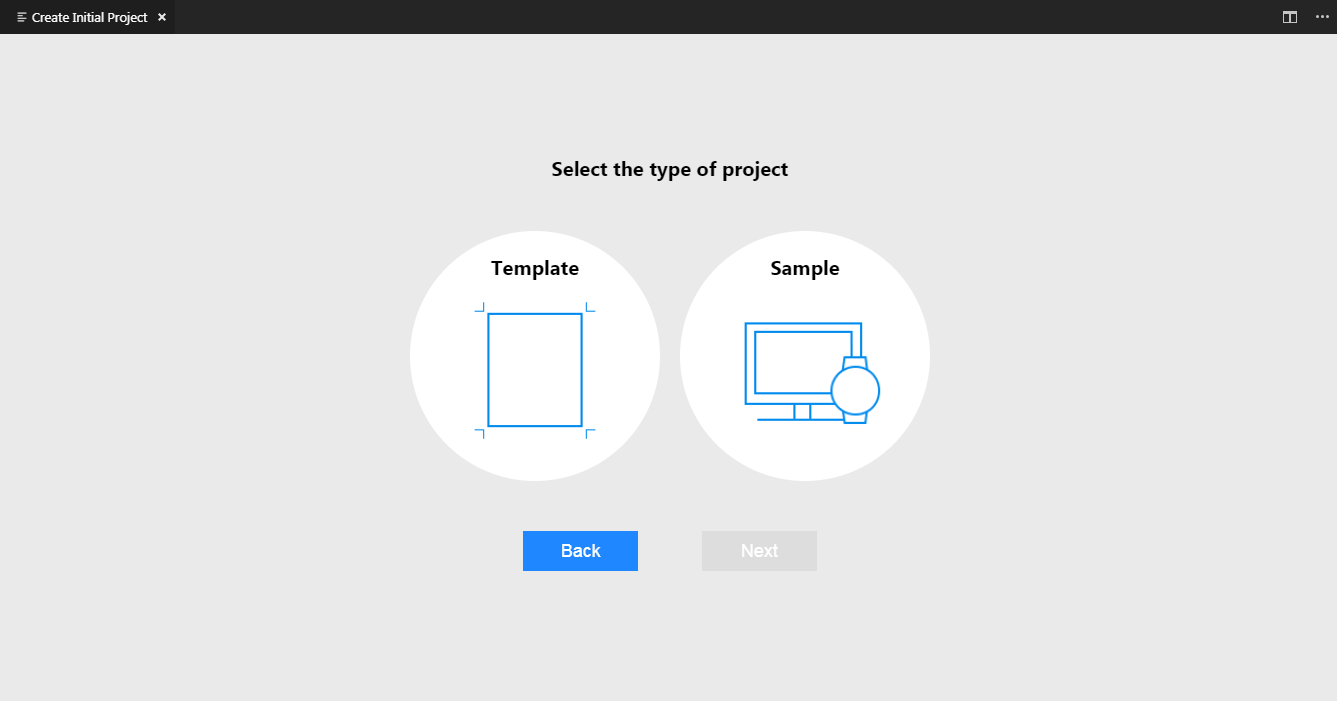
Select the project type and click Next.
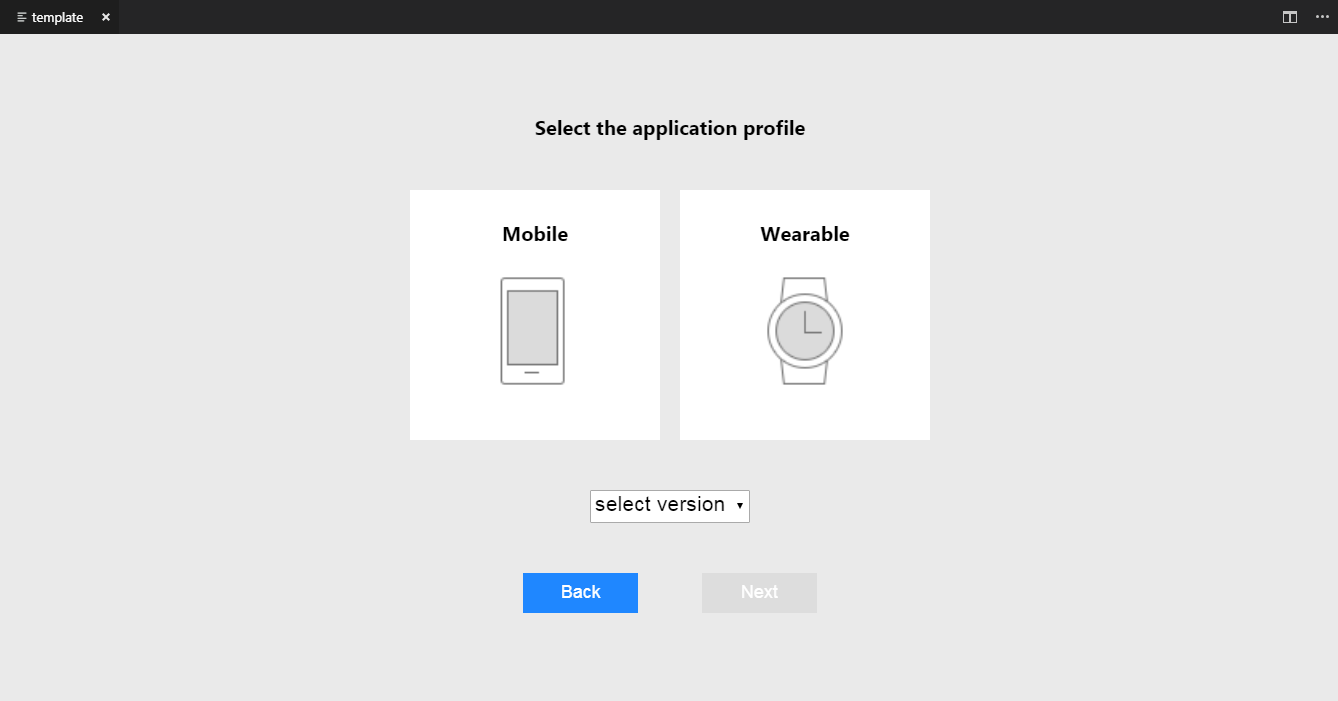
Select the application profile, the version from the drop-down list, and click Next.
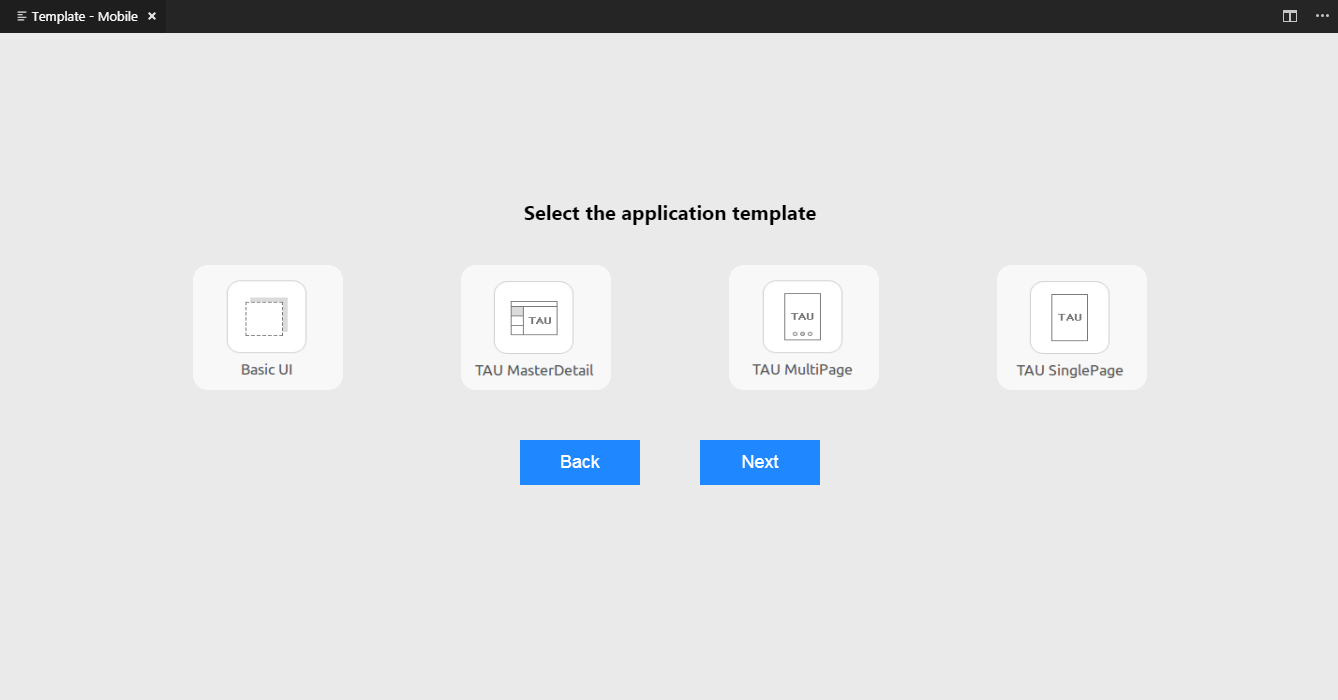
Select the application template, for example Basic UI, and click Next.
NOTE
The application template options that appear will differ based on the type and profile of the previously selected project.
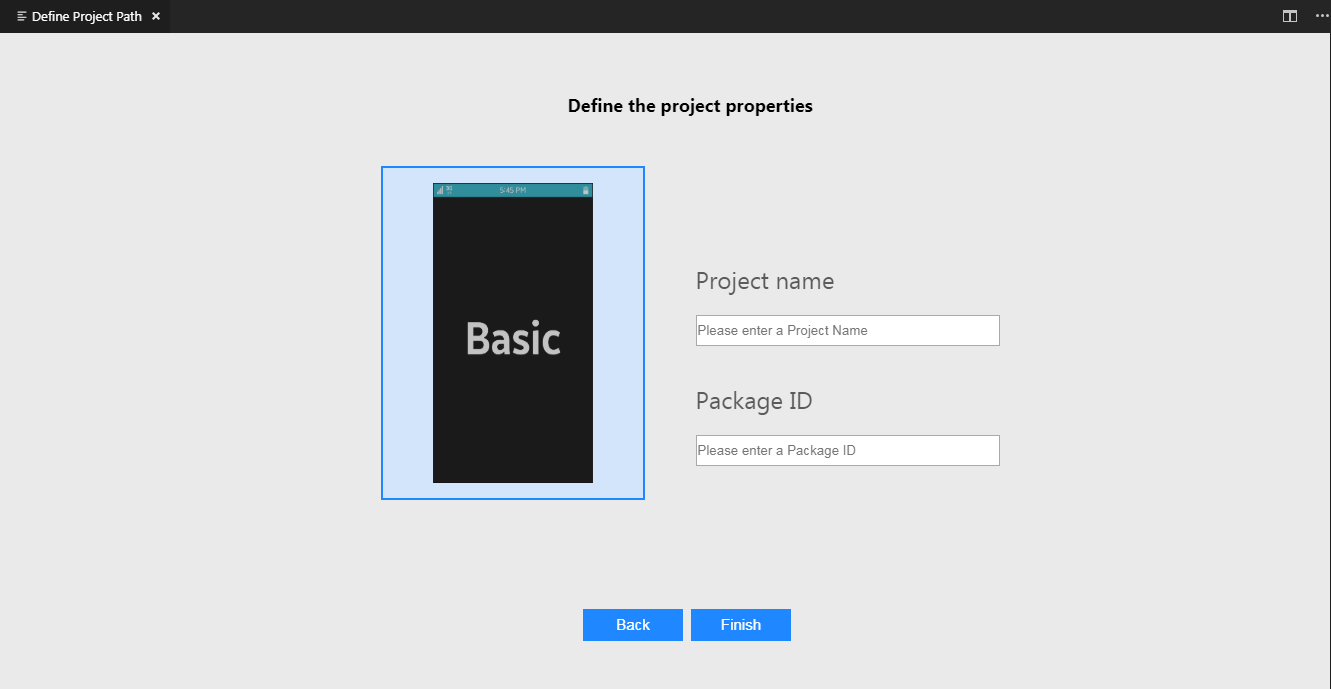
To complete the project creation in workspace, enter Project name and click Finish.
NOTE
Package ID is an optional field and the details are generated automatically.
Create and add Tizen certificate
To create and add Tizen Certificate, follow these steps:
In VS Code, click View > Command Palette.
In the input field of the Command Palette that appears, type Tizen Web: Create and Add Tizen Certificate and press Enter.
Enter the name of the certificate.
Enter the password of the certificate.
The certificate is now added.
NOTE
To view the added certificate, type Tizen Web: Run Certificate-Manager in Command Palette.
Remove Tizen certificate
If you want to change the Certificate, you need to remove the added Certificate. To remove Tizen Certificate, follow these steps:
In VS Code, click View > Command Palette.
In the input field of the Command Palette that appears, type Tizen Web: Remove Tizen Certificate and press Enter.
Enter the name of the certificate.
The certificate is now removed.
NOTE
To view the Tizen Certificate Manager window, type Tizen Web: Run Certificate-Manager in Command Palette.
Build your project
To build project, follow these steps:
In VS Code, click View > Command Palette.
In the input field of the Command Palette that appears, type Tizen Web: Build Tizen App and press Enter.
Enter the folder name of the project you want to build. For example, type only basic to enter the c:\workspace\basic path.
NOTE
If you have a Tizen device and want to build the application into it, then you must first generate a certificate and add it.
Exclude build list
To build the project after removing unwanted files, follow these steps:
In VS Code, click View > Command Palette.
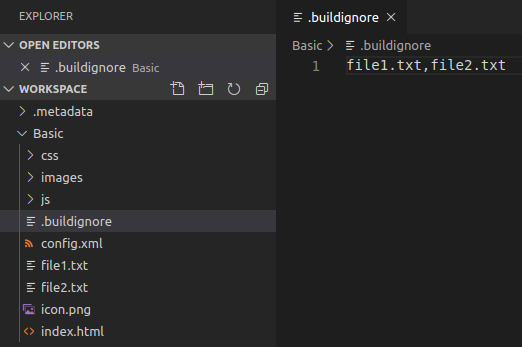
In the input field of the Command Palette that appears, type Tizen Web: Make Exclude Build List and press Enter.
Enter the name of the file to remove.
NOTE
Separate the file name with commas and ensure that there is no space between them. For example, file1.txt,file2.txt.
.buildignore file is created with the input data in the project folder and the build excludes the input data and generates a packaged wgt file.
Import the selected wgt file into the workspace
To import the built wgt file into your workspace, follow these steps:
In VS Code, click View > Command Palette.
In the input field of the Command Palette that appears, type Tizen Web: Import WGT file to workspace and press Enter.
When the dialog opens, select the wgt file you want to import.
NOTE
Extract and import into the workspace path registered in WAPPL.
If a folder with the same name already exists, do not import.
If it is not a wgt file, do not import.
Deploy and Run Application in Emulator
To deploy and run application, follow these steps:
In VS Code, click View > Command Palette.
In the input field of the Command Palette that appears, type Tizen Web: Run Emulator-Manager and press Enter.
NOTE
To launch an emulator in VS Code, you must launch Tizen Emulator Manager and select the emulator you want to launch.
Create and launch an emulator instance in the Emulator Manager.
To deploy your application to the target, in the Command Palette type Tizen Web: Install Tizen App.
To run the application on the emulator, in the Command Palette type Tizen Web: Run Tizen App.
To install project:
In VS Code, click View > Command Palette.
In the input field of the Command Palette that appears, type Tizen Web: Install Tizen App and press Enter.
Enter the folder name of the project you want to install.
NOTE
Ensure that you enter the name of the folder and not the path.
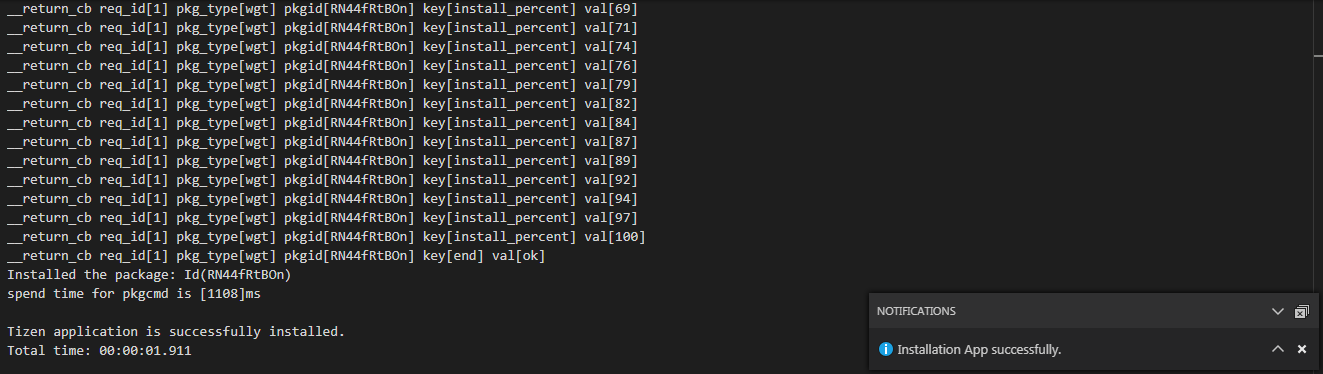
The app launches automatically when the installation completes successfully.
NOTE
If you have a Tizen device and want to deploy the application into it, then you must first generate a certificate and add it.
To run project if your app is already installed, follow these steps:
In VS Code, click View > Command Palette.
In the input field of the Command Palette that appears, type Tizen Web: Run Tizen App and press Enter.
Enter the folder name of the project that you want to run.
NOTE
Ensure that you enter the name of the folder and not the path.
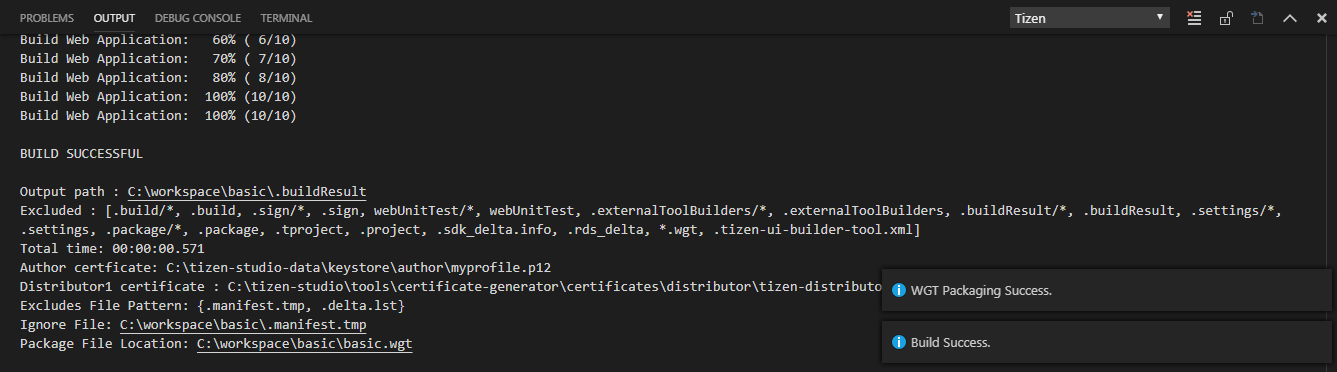
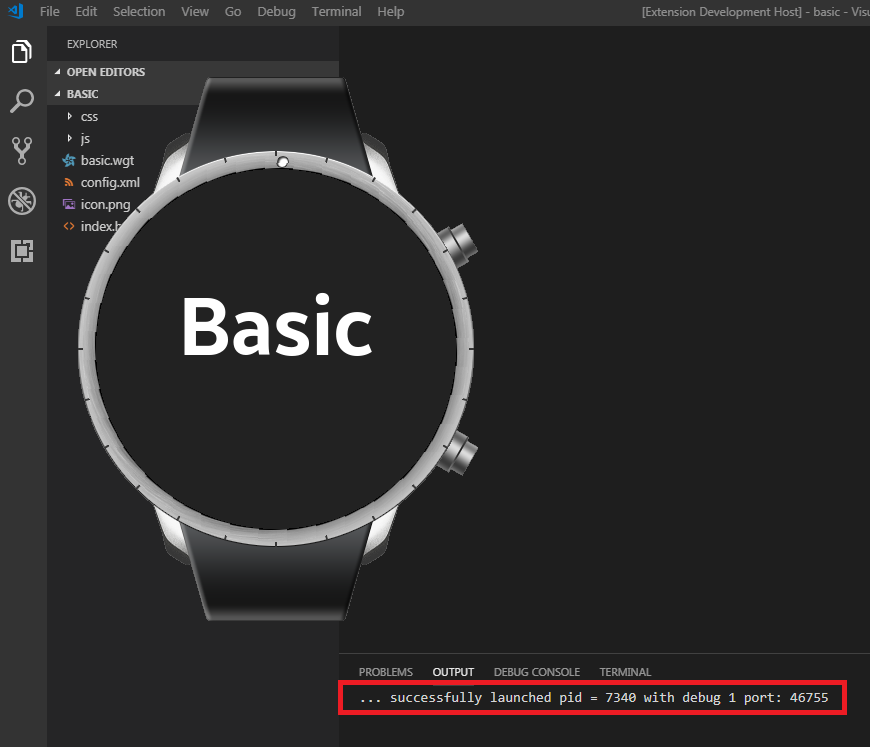
When the installation is successfully completed, an install successful notification appears. Also, you will see a build success log in the terminal at the bottom of the vscode.
NOTE
If you have a Tizen device and want to deploy the application into it, then you must first generate a certificate and add it.
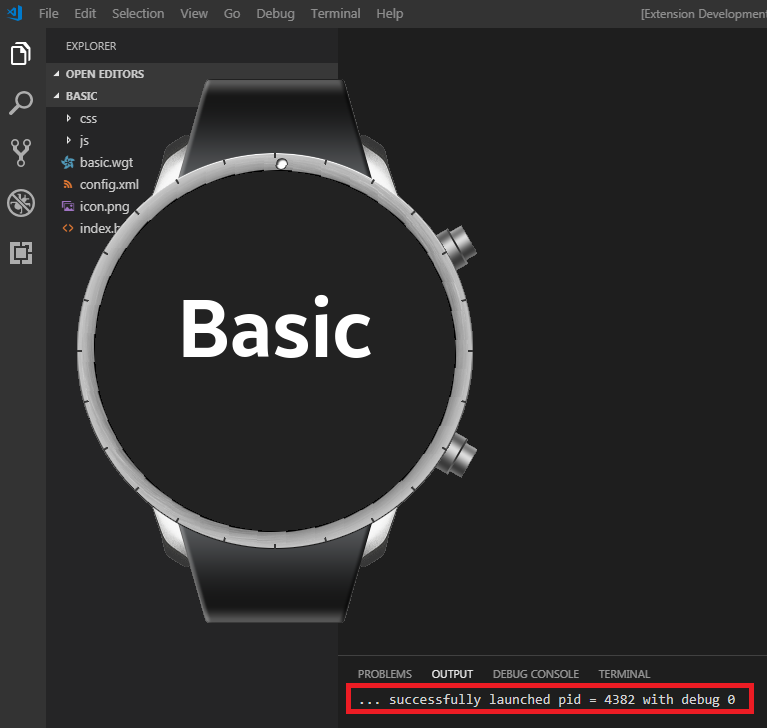
In addition, vscode terminal displays successful launch log messages:
- debug
0 means normal launch.
- debug
1 means launching an inspector available from command line.
Debug your application in emulator
In VS Code, click View > Command Palette.
In the input field of the Command Palette that appears, type Tizen Web: Debug Tizen App and press Enter.
Enter the name of the Tizen Web App you want to run.
A successful notification appears and the app is launched. Also, you will see a successful launch log in the terminal on the vscode.
- debug
0 means normal launch.
- debug
1 means launching an inspector available from command line.
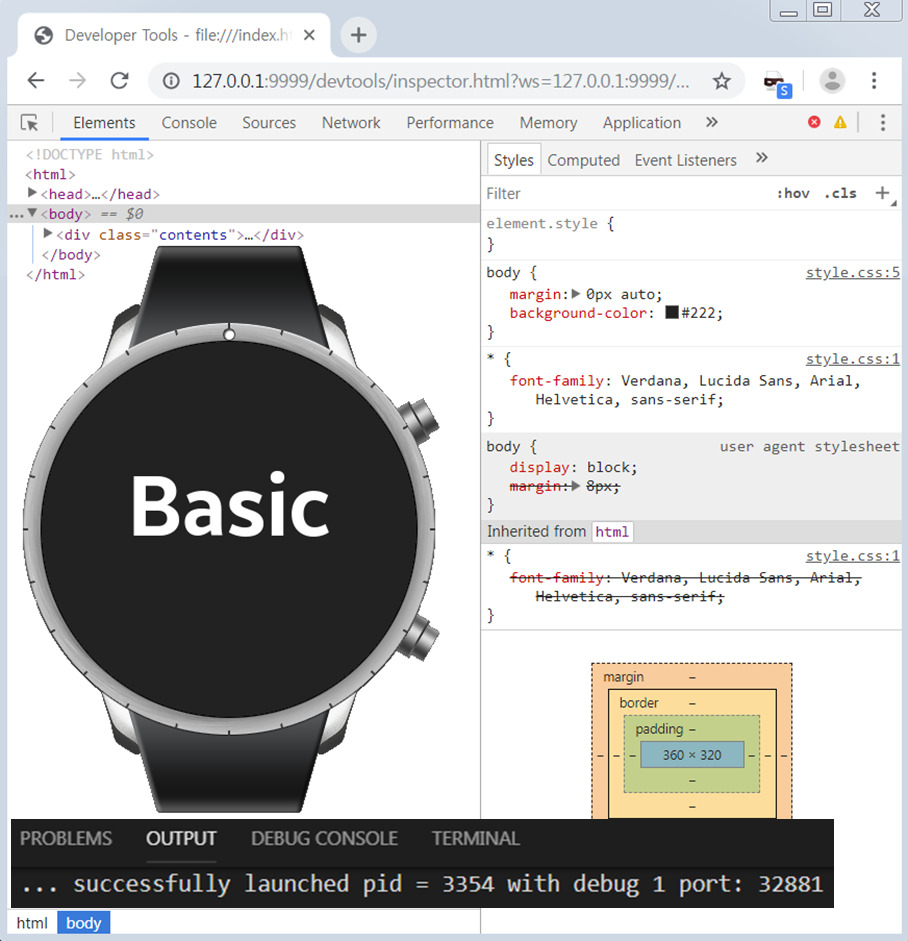
When port information is displayed in OUTPUT, it means that it is launched in debug mode.
NOTE
Ensure the following:
- Emulator is launched, or device is connected to the PC
- Chrome browser is installed
In Chrome browser, the Inspector automatically launches and associates with the launched app.
NOTE
If you have a Tizen device and want to deploy the application into it, then you must first generate a certificate and add it.
Debug your application in Web simulator
To debug application, follow these steps:
In VS Code, click View > Command Palette.
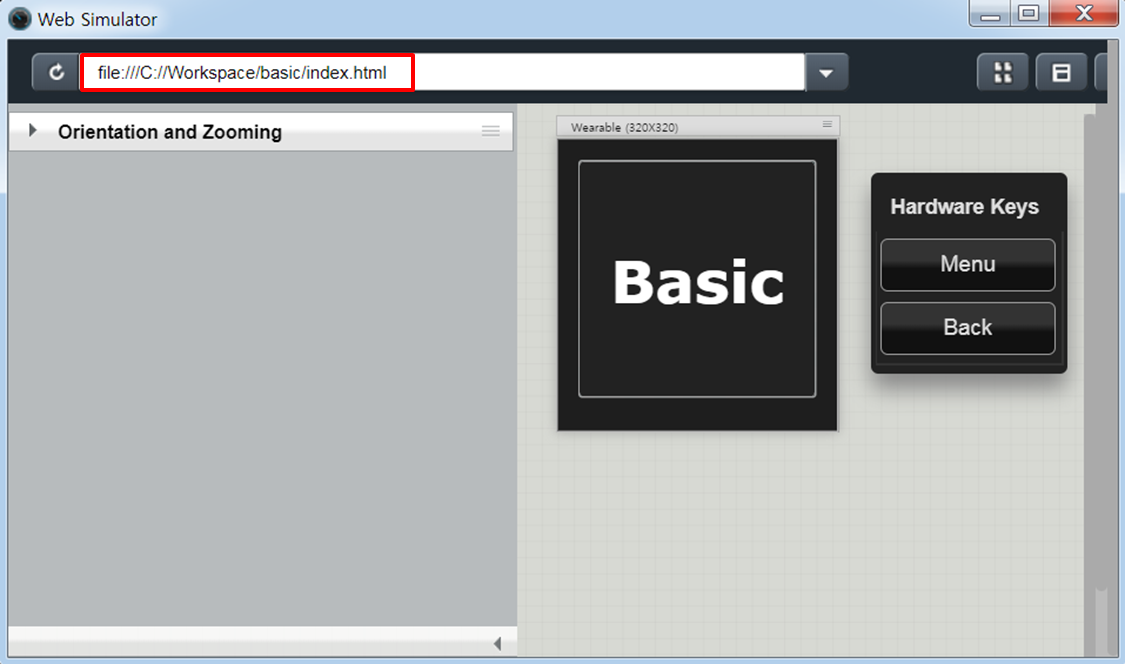
In the input field of the Command Palette that appears, type Tizen Web: Run Web Simulator and press Enter.
After the Web Simulator is launched, enter the path of the file in the box. For example, file:///C://Workspace/basic/index.html.
Quick action execution
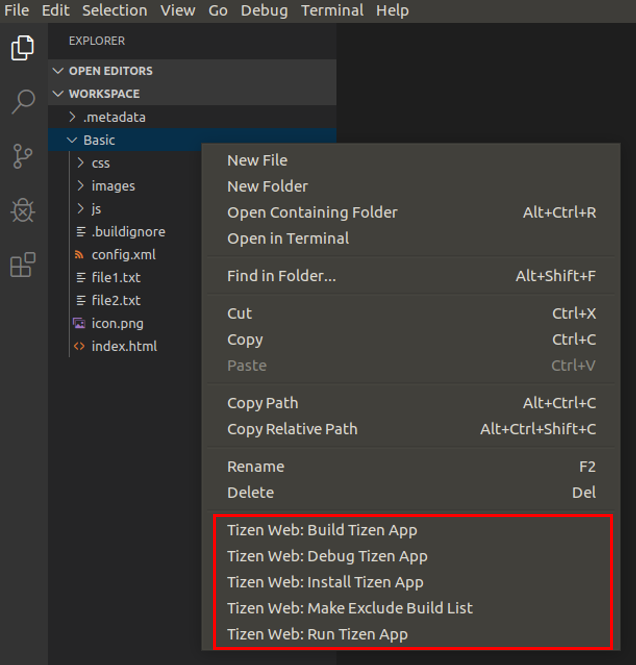
Right-click on the project folder to use the extension function in the menu.
For more information on each function, see:
Troubleshoot
This section contains instructions for common problems with the Tizen Baseline Web IDE.
- In VS Code, click View > Command Palette.
- In the input field of the Command Palette that appears, type Tizen Web: Run Web Simulator, and press Enter.
- If the red screen appears, press F12.
- In the DevTools window that appears, click Application.
- In the Application side bar that appears, click Clear storage and click Clear site data.
- Close DevTools and Web Simulator, and launch Web Simulator again.
| |
