STRATO MercataVSCode Integration for the STRATO Mercata blockchain Installation Launch VS Code Quick Open ( Ctrl+P), paste the following command, and press enter.Copied to clipboard |
STRATO IDEThis extension interfaces with a running STRATO node using STRATO's API and a debugging API. The extension allows developers to interact with the STRATO blockchain and manage their STRATO dApps from a VS Code workspace. NodesFirst-time users will be prompted with a sample configuration file that can be used to get started
and connect to the STRATO Mercata network ( If more than one node is provided, the user can select the active node they wish to send transactions to and query blockchain data from. Once the configuration file is set, the user can log into the STRATO Mercata network to start interacting with the blockchain!
ContractsUploading a contract will add the newly created contract's blockchain address to the Contracts view list where users can interact with functions and view state data.
Contracts can also be manually added by their address.
CirrusCirrus can be used to query data in specific contracts using state data as parameters:
More information about to use Cirrus can be found in our API docs. Debugger SetupNOTE: The following are required in order to use the debugger:
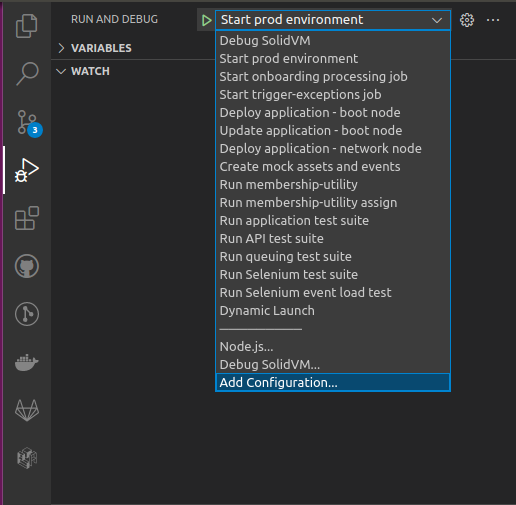
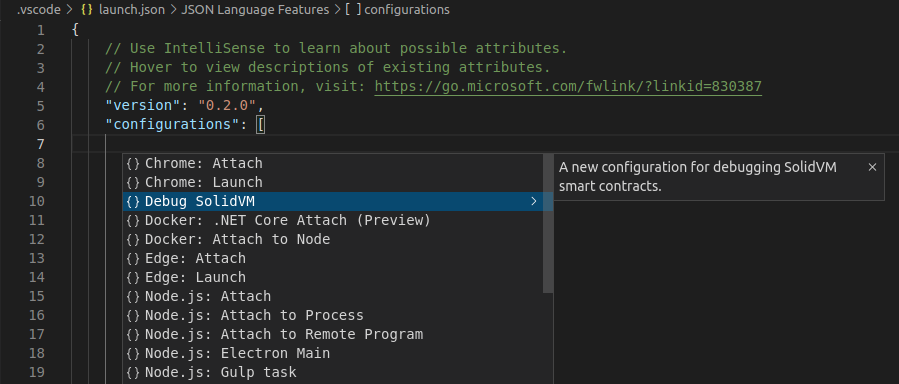
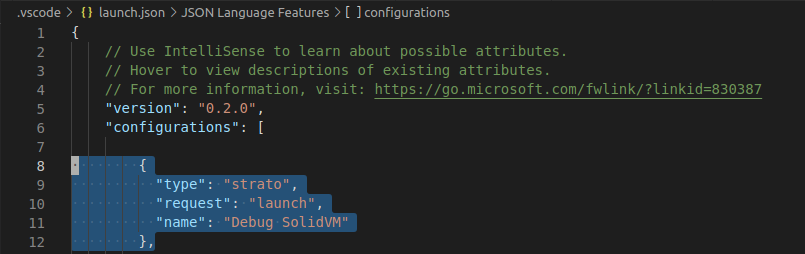
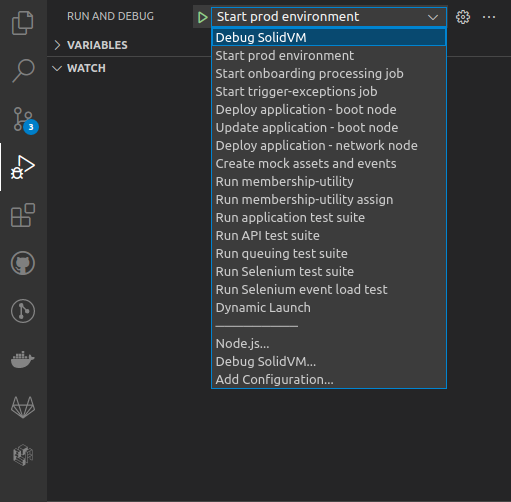
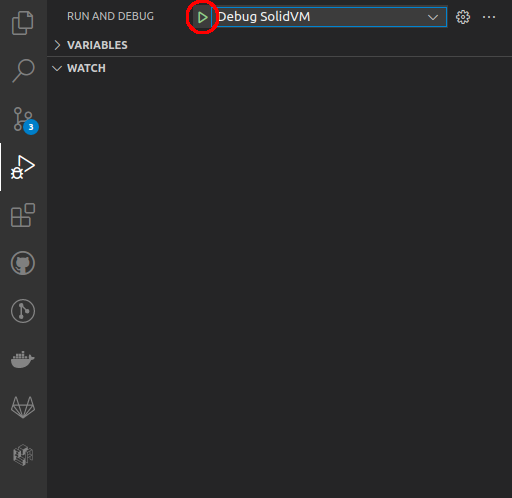
To set the Debugger up, click on the icon for Run and Debug. Click the dropdown for the box with the green play arrow. In the dropdown, select Add Configuration..., which will open the Click Debug SolidVM in the dropdown. Go to the box with the green arrow once again and make sure Debug SolidVM is selected from the dropdown. Click the green play button itself, which should start the debugger. TroubleshootingI pressed step in/over/out while debugging, and the debugger appears to have resumed execution unexpectedly. Try pressing the pause button in the debugger control panel again I have configured my extension correctly, but I am still not able to connect to my node. Check to make sure that the OAuth configuration in your |