SFDocs Markdown Assistant
SFDocs Markdown Assistant makes it easier to write Markdown. Use shortcuts and easy routes for adding markdown syntax. Furthermore, you get authoring support for GFM tables and some advanced Markdown plugins. With SFDocs Markdown Assistant, we got you covered for the markdown authoring experience inside Visual Studio Code.
SFDocs Markdown Assistant is compliant with CommonMark and GitHub Flavored Markdown (GFM).
All features are available in the command palette. All features expect table cell navigation are also available in the context menu.
Shortcuts
| Feature |
Shortcut |
| Toggle Bold |
Ctrl/Cmd+B |
| Toggle Italic |
Ctrl/Cmd+I |
| Toggle Strikethrough |
Alt/Option+S |
| Insert Link |
Ctrl/Cmd+L |
| Insert a cross-reference (file) |
Ctrl/Cmd+R |
| Table: Next cell |
Tab |
| Table: Previous cell |
Shift+Tab |
| Insert Video |
Ctrl/Cmd + Shift + M |
Basic Styling
- Toggle Bold, Italic, ~Strikethrough~,
Inline Code, code blocks, and block quotes.
- Make a hyperlink.
- Add a cross-reference to another markdown file (with auto-complete suggestions for files in the repository).
- Insert an image (with auto-complete suggestions for files in the repository).
Toggling works as expected when there is a selection in the editor.
Without a selection, enter Cmd+B to toggle bold on and off.

To style a word, click the word and toggle the styles, no selection required.
To revert styling, click the start or end of the stylized text and toggle the style.

Apply a blockquote to a single line. Click the line and select Toggle Blockquote .
Lists
- Toggle bulleted list.
- Toggle numbered list.
- Toggle check list.
- Select a subset of check boxes.
- Description list.
Select the lines to convert to a list and toggle the list type (bullet, numbered, checklist).
To convert a list to a different type of list, toggle the list type.
To select a subset of a checklist, select Check List Items from the context menu.
To cross out a list item, click the list item and toggle strikethrough.
Enter, Tab, and Backspace behave differently when used with lists.
Enter key at the end of a list item creates a list item on the next line. If Enter is pressed again without typing anything for this list item, the list item is removed and the cursor goes to the next line. If you want a newline instead of a new list item, press Shift+Enter.Tab key converts the selected list item into a sublist item.Backspace converts a sublist item into a normal list item, and a normal list item into normal text.
Tables
- Add a table (with default (left) alignment)
- Add Table with Alignment (chosen by user)
- Insert Row
- Insert Column (Left/Right)
- Delete Selected Rows
- Delete Selected Columns
- Move Row (Up/Down)
- Move Column (Right/Left)
- Copy Column
- Paste Column (Right/Left, for the columns copied using copy column)
- Paste Table (from sources like Quip, Sheets, and Excel)
- Format (To make the table more readable)
- Remove Formatting (To condense the table as formatting can lead to readability issues if the cell contents are too long)
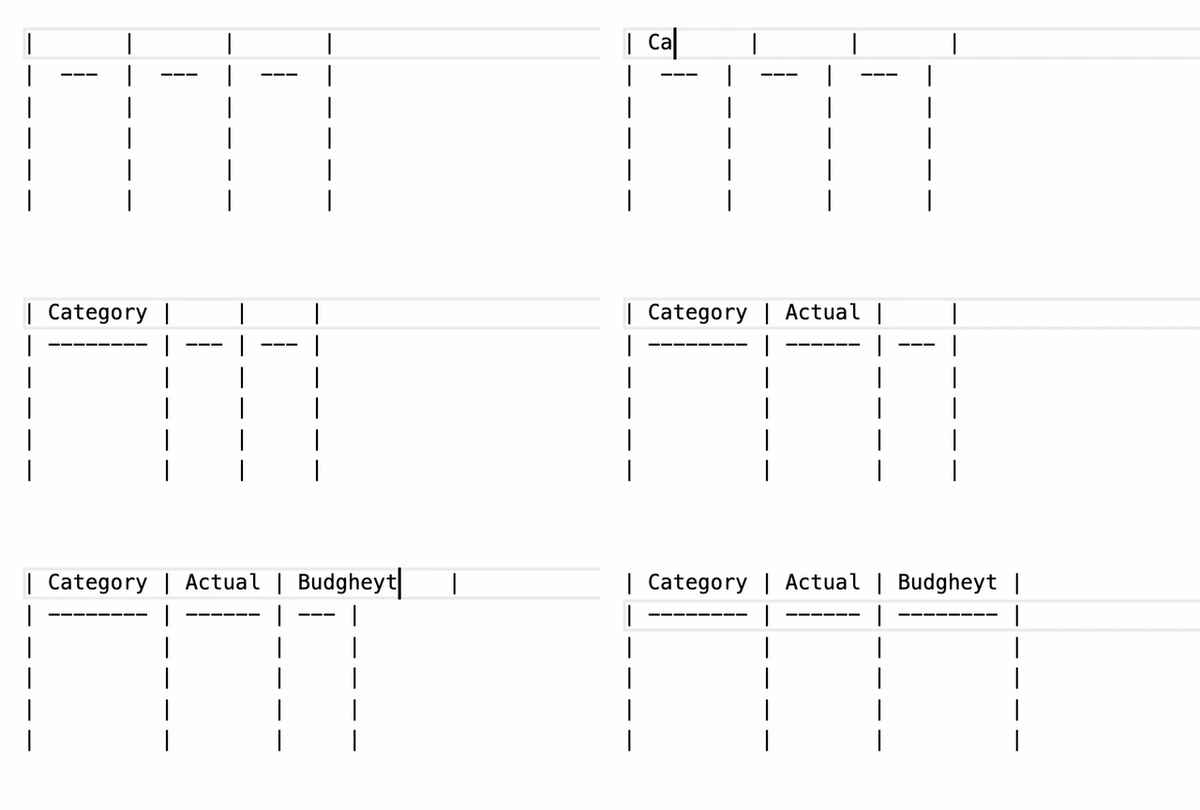
Tables reformat as you type into a more readable format (if you navigate using Tab and Shift+Tab as mentioned).

Tab (Next Cell) and Shift+Tab (Previous Cell) are the easiest ways to navigate through the cells.
To copy a table from a source other than Markdown and paste it in Markdown format, select Table > Paste Table from the context menu.
Table Columns/Rows Editing
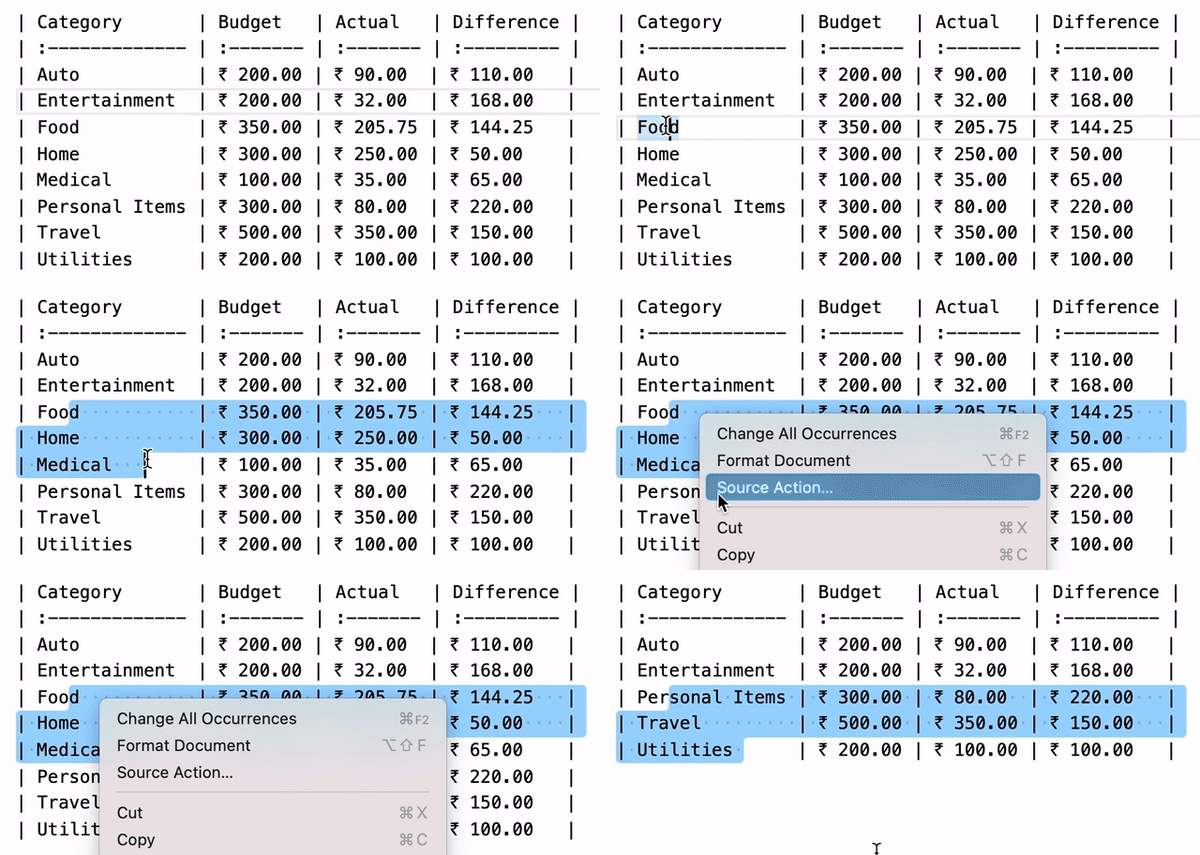
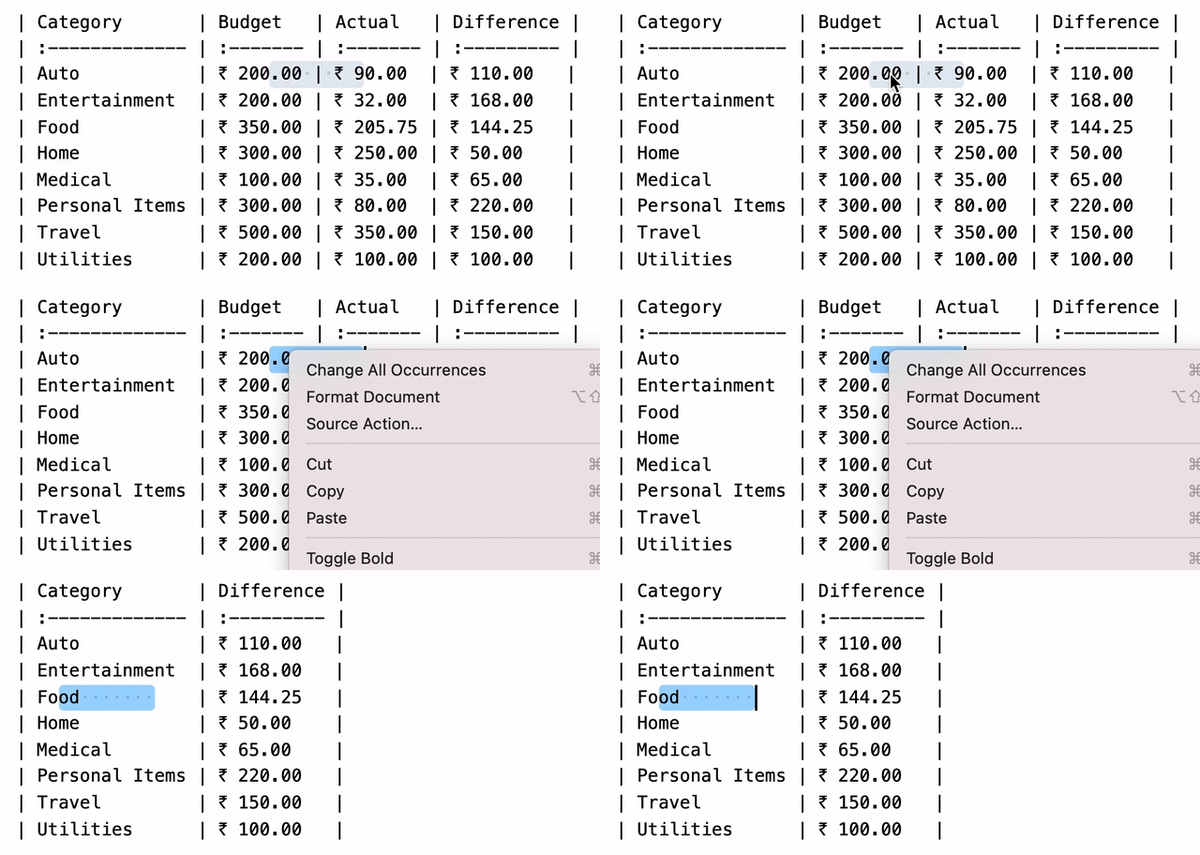
Select any portion of the rows or columns to delete and select Table > Delete Selected Rows/Columns from the context menu.
 .
.
In the following example, the rows corresponding to Food, Home and Medical were selected, and Table > Delete Selected Rows/Columns is chosen from the right click menu.

The columns corresponding to Budget and Actual were selected, and Table > Delete Selected Columns is chosen from the right click menu.
Insert, move, copy, or paste a table row or a column: Place the cursor on the required row/column and use the feature. (Insert Row on the header row inserts a new first row.)
Custom Salesforce Plugins
- Enhanced Callouts–Tip, Warning, Note, Important
- Enhanced Code blocks
- Insert Video - VidYard, YouTube, Local file
- Content Reuse (Include)
These commands are available in the context menu.
You can also type : or ` followed by first letter of the desired Markdown.

Settings
SFDocs Markdown Assistant uses these settings:
SFDocs.markdownAssistant.completion.respectVscodeSearchExclude: Whether to exclude files from auto-completion using VS Code's #search.exclude# setting (node_modules, bower_components, and *.code-search are always excluded).SFDocs.markdownAssistant.completion.root: The root folder for path auto-completion.SFDocs.markdownAssistant.italic.indicator: Use * or _ to wrap italic text.SFDocs.markdownAssistant.orderedList.autoRenumber: Auto fix ordered list markers.SFDocs.markdownAssistant.orderedList.marker: Ordered list marker (1. everywhere or 1., 2. and so on).SFDocs.markdownAssistant.table.autoFormat: Whether to auto format tables while editing.SFDocs.markdownAssistant.disableCustom: Whether to disable custom Salesforce plugins (Video, Include, and so on).
Known Issues
Tables with excessive styling or newline character in their cell contents can result in malformed Markdown while pasting.
0.0.1
Initial release


 .
.
