Pixel Weather
Turn an unused terminal into a living artwork.
A procedural pixel landscape in your editor panel.
Clouds, rain, storms, mountains, and seasonal snow that follow your local time and calendar.
Unique events to spice things up
Customizable -- Free -- Open Source.
Screenshots
In IDE
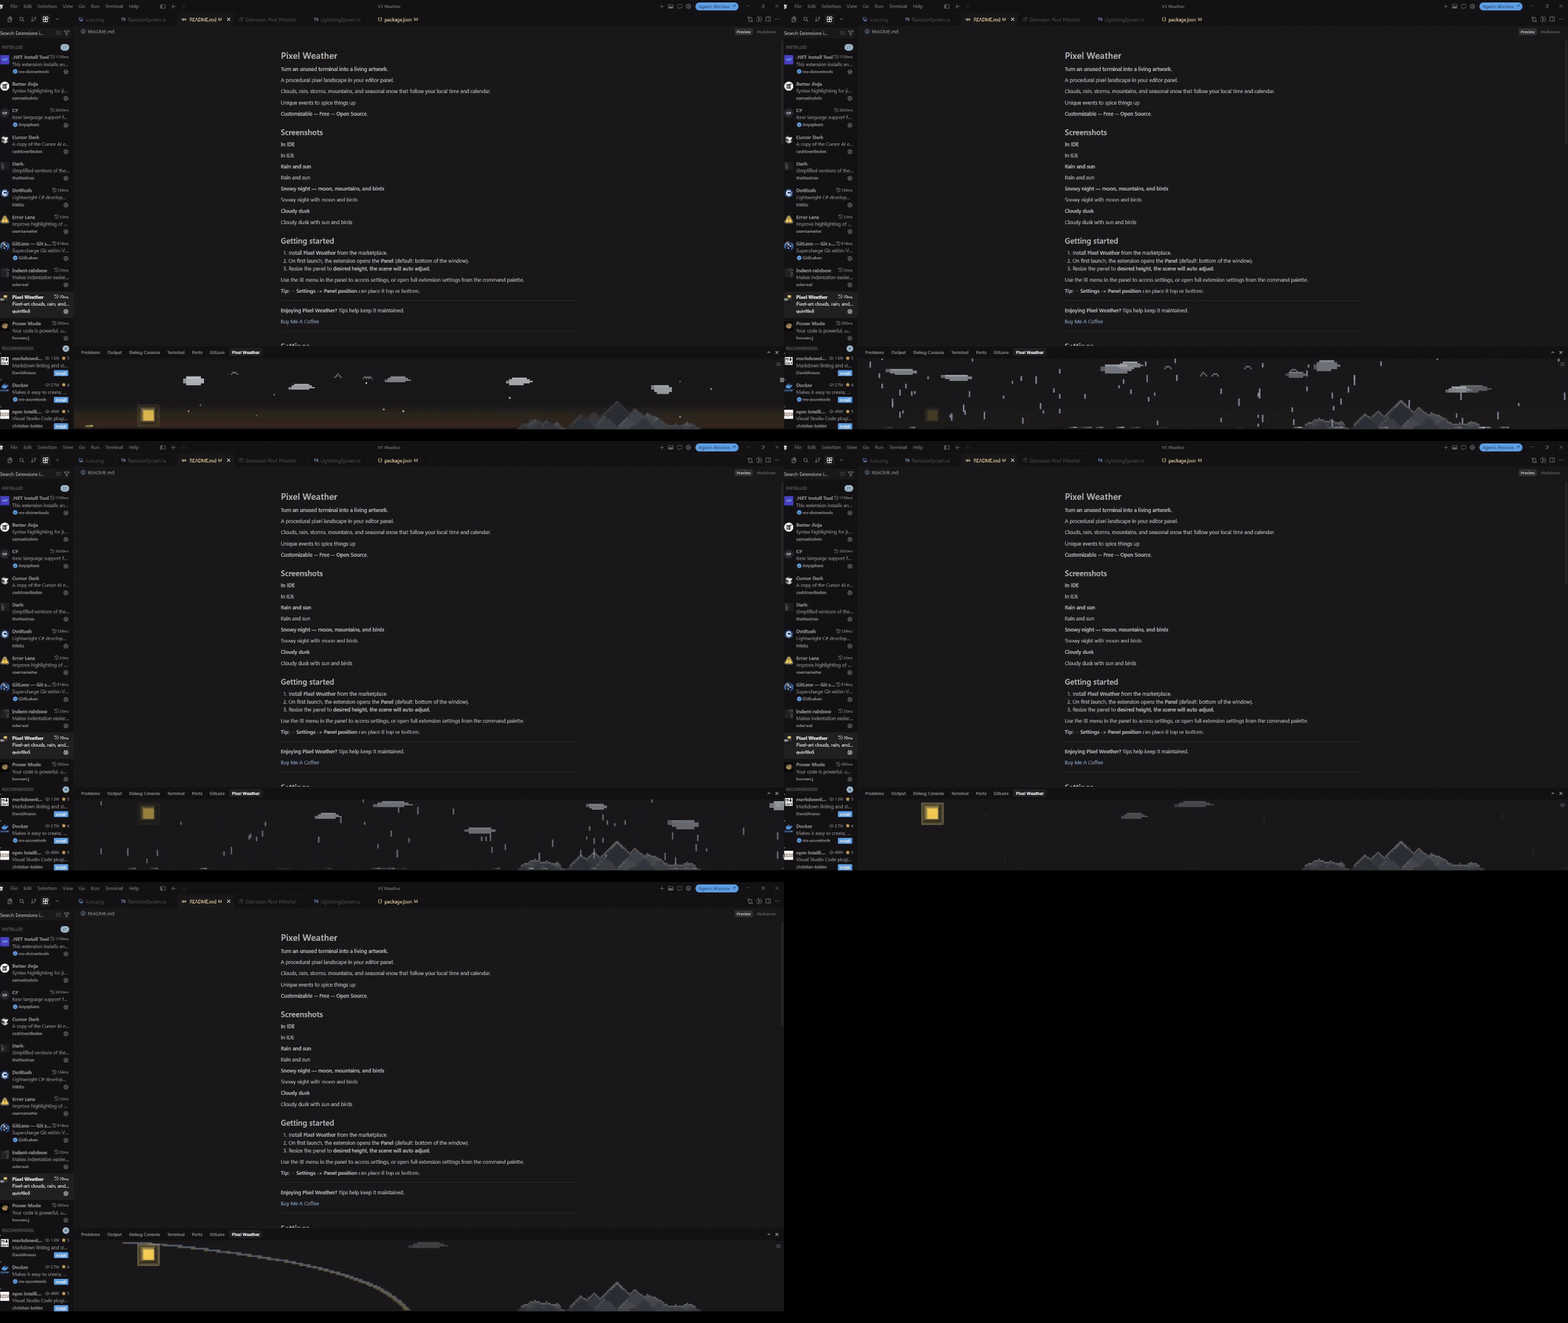
Sunny day — rainbow

Autumn — falling leaves

Winter night — aurora over snow

Clear night — moon

Thunderstorm — lightning

Screenshots use a transparent background so you can see how the strip sits over a theme.
Patch notes
2.0.0
Ambient life
- Seasonal ground strip: spring patchy grass, summer solid green, autumn earth tones (winter stays snow-only)
- Critters: butterflies, bees, snails, bats, inchworms (and friends) with seasonal / weather gating
- Autumn falling leaves
- Cursor drag paint: rain, water, leaves, or snow depending on season (disabled during thunderstorms)
Sky events
- Aurora curtains on clear winter nights
- Shooting stars and meteor showers
- Softer moon pulse (less extreme bright/dim swing)
- Sun glow pulse dialed down so it stays subtle
Storms
- Stronger thunderstorm personality: variable lightning rate and denser rain
- Lightning can strike birds or bats (with a cartoon explosion)
- Clicking during a thunderstorm can call down a bolt
- Ground strikes kick up debris
Polish
- Shared ground alignment for grass, snow, rain splashes, and critters
- Smoother ambient wind / rain density drift
- Clouds and bees fade in more gently
- New marketplace screenshots (rainbow, leaves, aurora, moon, lightning)
Getting started
- Install Pixel Weather from the marketplace.
- On first launch, the extension opens the Panel (default: bottom of the window).
- Resize the panel to desired height, the scene will auto adjust.
Use the ☰ menu in the panel to access settings, or open full extension settings from the command palette.
Tip: -- Settings -> Panel position can place it top or bottom.
Enjoying Pixel Weather? Tips help keep it maintained.
Buy Me A Coffee
Settings
Settings → Extensions → Pixel Weather, or run Pixel Weather: Open Extension Settings.
Most options are also in the in-panel ☰ menu. Winter dates appear when snow season is Auto; night hours appear when Day & night is on.
| Setting |
Default |
Description |
weather.enabled |
true |
Show the scene |
weather.showOnStartup |
true |
Open the panel when the editor starts |
weather.panelPosition |
bottom |
Panel above or below the editor |
weather.intensity |
1.0 |
Effect strength (0–2) |
weather.dayNight |
true |
Sun, moon, and stars from local time |
weather.nightEndHour |
6.5 |
When night ends / day begins (sunrise). Decimals = half hours (6.5 = 6:30 AM) |
weather.nightStartHour |
19.5 |
When night begins / day ends (sunset). 19.5 = 7:30 PM |
weather.birds |
true |
Occasional bird flocks |
weather.mountains |
true |
Pixel mountains along the horizon |
weather.lightning |
true |
Lightning during storms |
weather.snowSeason |
auto |
When snow can appear: auto, always, or never |
weather.winterStartMonth |
12 |
Winter start month (1–12) for auto snow |
weather.winterStartDay |
1 |
Winter start day |
weather.winterEndMonth |
2 |
Winter end month |
weather.winterEndDay |
28 |
Winter end day. Ranges can wrap the year (e.g. Dec 1 – Feb 28) |
weather.cycleIntervalMin |
5 |
Earliest minutes before weather may change |
weather.cycleIntervalMax |
15 |
Latest minutes before weather may change |
weather.pauseWhenHidden |
true |
Pause animation when the panel is collapsed |
weather.uiMode |
normal |
In-panel menu: normal or dev |
Switch the in-panel menu with Pixel Weather: Use Normal Settings Mode / Pixel Weather: Use Developer Mode. Developer mode adds live overrides for testing weather, time, and wind.
Commands
| Command |
Description |
| Pixel Weather: Show Panel |
Move panel to your chosen position and open the scene |
| Pixel Weather: Open Extension Settings |
Open settings |
| Pixel Weather: Toggle Settings Menu |
Open the in-panel ☰ menu |
Development
npm install
npm run build
npm run screenshot    # hero image → media/screenshot.png
npm run screenshots   # marketplace gallery → media/screenshots/
Press F5 to launch the Extension Development Host.
License / Source
MIT — source on GitHub: Quin10o5/Pixel-Weather

