Push & Pull ⬆⬇
Push & Pull lets you upload, download, and compare project files without leaving your editor.
It adds upload, download, and compare actions to the editor and toolbar. You can compare the online version of the current file with your local changes before uploading or downloading. File and folder transfers are also available from the file explorer and project menus.
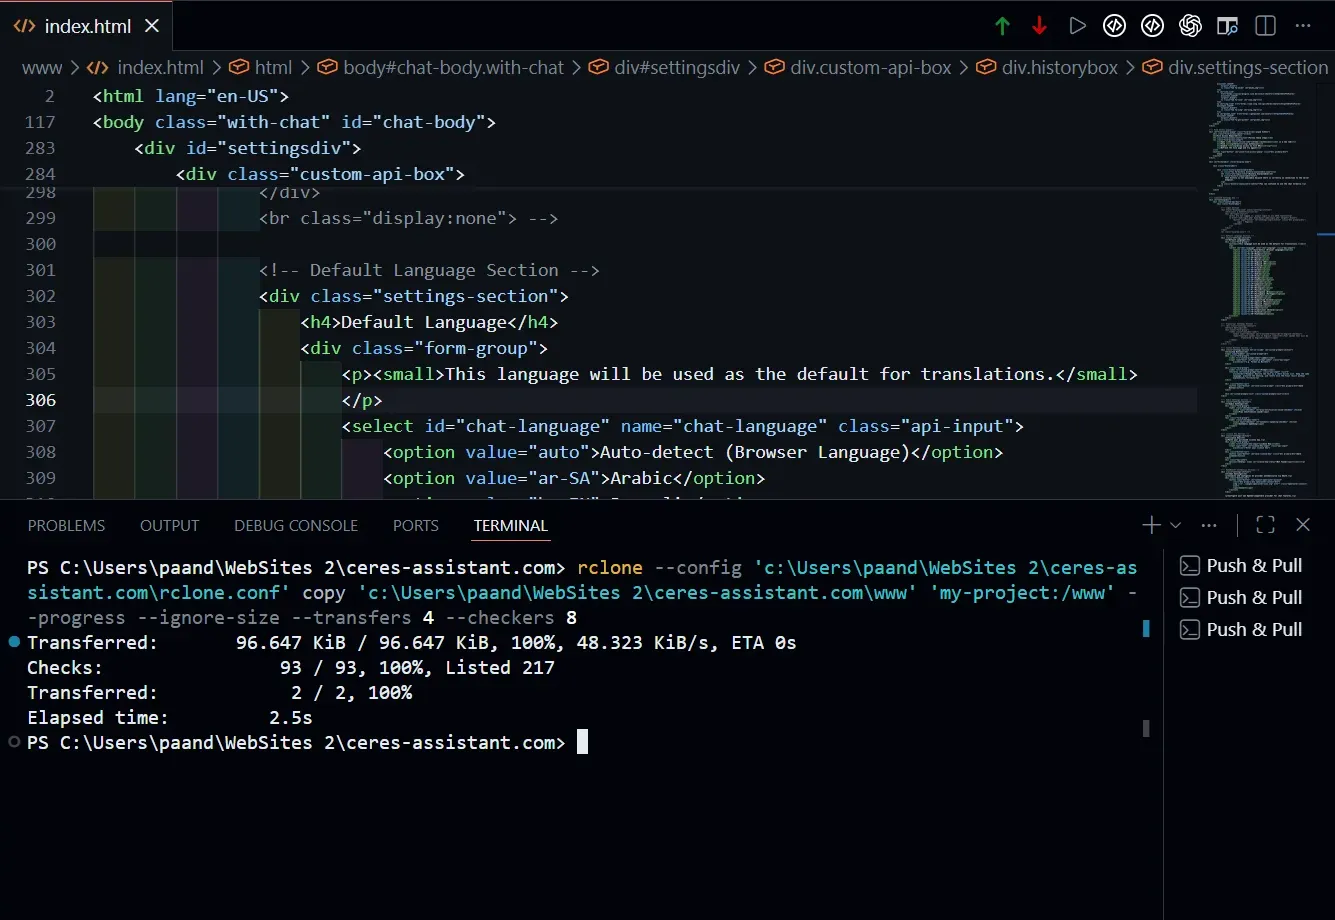
What You Can Do
- Upload files to your server.
- Download files from your server.
- Compare the online version of the current file with your local changes.
- Upload or download complete folders.
- Transfer multiple selected files or folders.
- Use toolbar buttons, context menus, or keyboard shortcuts.
- See live transfer progress inside the editor.
- Connect to FTP, SFTP, WebDAV, S3, and many other services supported by rclone.
Push & Pull uses rclone for the actual file transfers. You only need to describe your server once in an rclone.conf file inside your project.
Keyboard Shortcuts
Ctrl+Up: upload the current file.Ctrl+Down: download the current file.- On macOS, use
Cmd+Up and Cmd+Down.
Folder transfers and multiple selections are available from the file or project context menu.
Project Setup
Create an rclone.conf file in the root folder of your project.
Push & Pull uses this file to understand:
- where your server is,
- which connection type to use,
- which username and port to use,
- where the project should be uploaded,
- and how the connection should be authenticated.
Add rclone.conf to your .gitignore so passwords, access tokens, and server details are not committed to your repository:
rclone.conf
Basic rclone.conf Example
The following example creates an FTP connection named my-server:
[my-server]
type = ftp
host = example.com
user = my-user
port = 21
explicit_tls = true
passive = true
no_check_certificate = true
pass-visible = my-password
Replace the example host, username, password, and connection options with the details of your server.
The my-project Destination
Push & Pull sends project files to a destination named my-project:.
Create a my-project alias in the same rclone.conf and point it to the folder where your project should be deployed:
[my-project]
type = alias
remote = my-server:/httpdocs
In this example:
my-server is the FTP connection./httpdocs is the website folder on the server.my-project: represents that folder inside Push & Pull.
If you upload this local file:
images/logo.png
Push & Pull uploads it to:
my-project:/images/logo.png
This keeps the local project structure and the remote project structure in sync.
You can choose any name for the real server connection, but the deploy alias must be named my-project.
How pass-visible Works
The pass-visible option lets you enter the real password in a readable form:
pass-visible = my-password
Before every upload, download, or comparison, Push & Pull finds pass-visible and asks rclone to obscure that password. It then adds or updates the pass option directly below it:
pass-visible = my-password
pass = obscured-password-created-by-rclone
The generated pass value is the format rclone expects for the connection. You do not need to run rclone obscure yourself or manually copy the generated value.
If the visible password changes, Push & Pull generates a new pass value on the next upload, download, or comparison.
pass-visible still contains the real password as plain text. Always keep rclone.conf private and exclude it from Git.
Other Connection Types
Push & Pull can use the connection types supported by rclone, including:
- FTP and FTPS
- SFTP and SSH
- WebDAV
- S3 and S3-compatible storage
- SMB
- Azure Blob Storage
- Google Cloud Storage
- Google Drive
- OneDrive
- Backblaze B2
- Swift
The server section changes depending on the connection type, but the my-project alias works in the same way.
For example, a WebDAV connection can be used as the real remote while my-project continues to point to the correct website folder.
Uploading and Downloading
Read Only Website Downloads
To download and compare files directly from a website, create .skia/read-only-url.txt with the website URL:
https://example.com
This works for file downloads and comparisons. Uploads still use rclone, and folder downloads are unavailable.
To upload a file or folder:
- Select it in the editor or project explorer.
- Choose
Push (Upload) or Push Folder (Upload).
- Follow the live progress notification.
To download a file or folder:
- Select its local location in the project.
- Choose
Pull (Download) or Pull Folder (Download).
- Push & Pull downloads the matching path from
my-project:.
For example, downloading:
css/style.css
reads the remote file from:
my-project:/css/style.css
and writes it back to the same location in the local project.
Comparing Online and Local Files
Open a local file and choose Compare Online with Local.
Push & Pull downloads the matching online file to the editor's private storage and opens the built-in diff viewer:
Online appears on the left.Local appears on the right.- Unsaved changes in the current editor are included.
- Your local file is not overwritten.
Finding the Project Configuration
Push & Pull normally uses the rclone.conf in the project root.
If the selected file belongs to a nested project, Push & Pull searches its parent folders for the nearest rclone.conf. This allows different projects to use different servers and deployment folders.
Transfer Settings
Open your editor settings and search for Push & Pull.
Available settings:
Transfers: how many files rclone can transfer at the same time. The default is 4.Checkers: how many checks rclone can run at the same time. The default is 8.
The default values are suitable for most servers. Higher values may make transfers faster on powerful servers, while lower values may work better on limited shared hosting.
rclone Installation
You do not need to install rclone manually.
On first use, Push & Pull downloads a compatible rclone version for your operating system. It keeps that version inside the editor's private storage and checks periodically for updates.
If an update check cannot connect to the internet, Push & Pull continues using the previously downloaded version when available.
Transfer Progress and Errors
During an upload or download, Push & Pull shows the latest transfer information, including transferred size, percentage, speed, and estimated time when rclone provides them.
When the transfer finishes, you receive a completion notification. If it fails, the notification shows the latest useful error returned by rclone.
Bug Reports and Feedback
https://ceres-assistant.com/web/contact.php
Privacy Policy
https://ceres-assistant.com/web/privacy-policy.php

