mapcan for VS Code
Language support for mapcan CAN signal maps. A map is a YAML
file with a top-level mapcan: 1 key. Other YAML files are left alone: the language server starts
when the first map is opened and never sees other files.
Features
Getting started. With no map open, the Map view offers Create Map — a new map from a
template (CANopen, SAE J1939, CAN with explicit IDs, empty) saved where you choose — and links to
open an example (an electric vehicle, a CANopen drive, a J1939 ECU, a map in several files) as a
copy in a folder of yours, or a map you have. Get started with mapcan on the Welcome page
(Help → Welcome) is a short tour: installing mapcan, the Map view, a problem and its quick fix on
a map of its own, the hover of a frame, export and history.
Map view. The mapcan icon in the Activity Bar opens the buses, devices, frames, signals and
flags of the active map, with computed CAN IDs and signal bits. Nodes are labelled with their
names for people (title, a device as "abbreviation · full name"), as in the web editor; a node
without a title shows its identifier, and the tooltip always shows it.
- Clicking a node selects its lines in the editor, and moving the cursor selects the node under it.
- The + buttons add buses, devices, frames and signals. The new node opens in the Node
panel below the tree: its fields (name, identifier, ID, position, scaling…) are written to the
YAML as you type, so the editor shows each change. The unit field offers the standard units
and accepts any other text. Done closes the panel, Discard deletes the new node. Edit… (the pencil) opens any node in the same panel; while it is open,
it follows the selection in the tree.
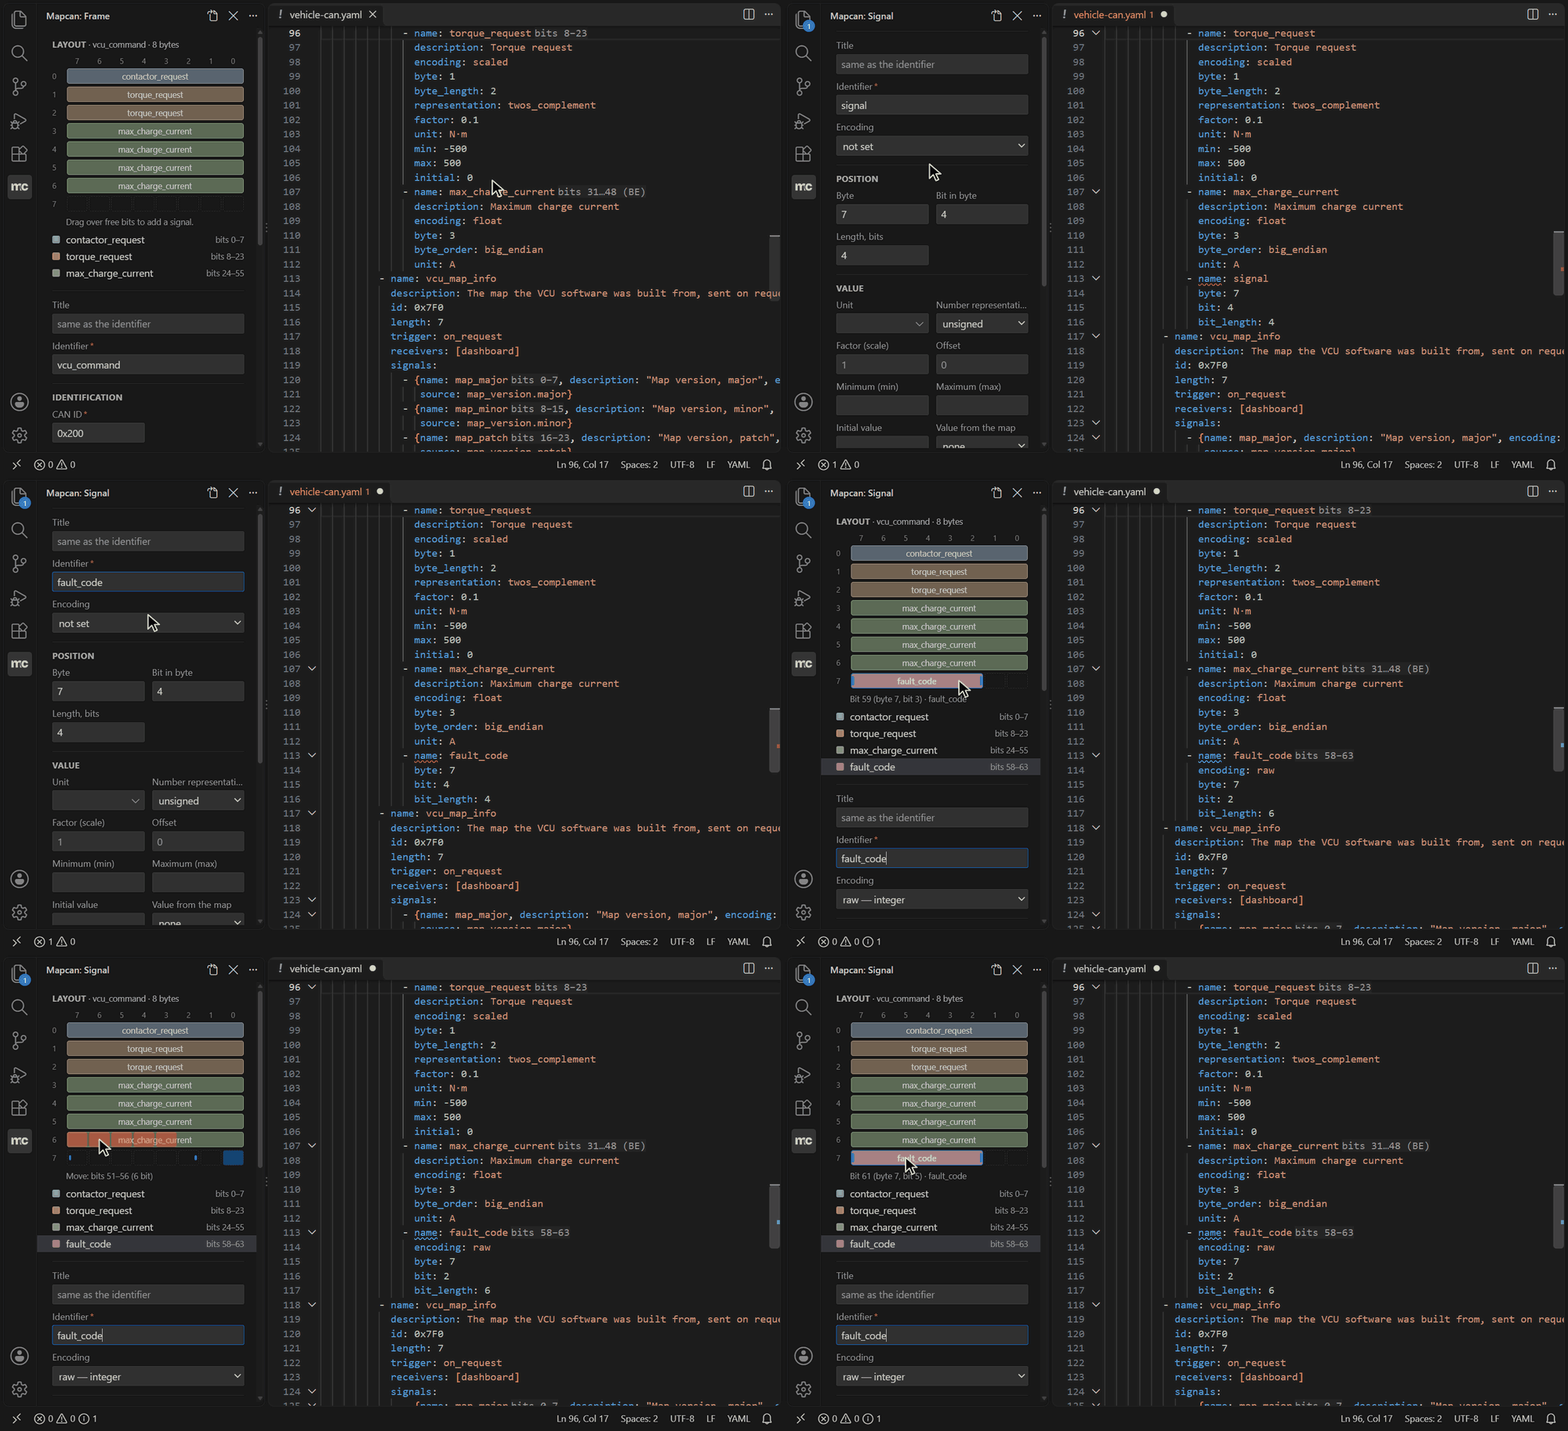
- The panel of a frame, signal, flag or SDO exchange shows the frame's bit layout, as in the web
editor: dragging over free bits adds a signal, clicking a signal shows it, dragging the shown
signal moves it and dragging its edge changes its length. A signal's value table and the flags
of a bit field are edited in tables below the fields.
- The context menu also renames (F2), duplicates and deletes (Delete) nodes. Every change is a
normal edit, so Undo reverts it.
- A map split into several files (
include) is one tree, the same from any of its files: you edit
the map, and each change goes to the file the node is written in (the node's tooltip names it,
and clicking the node opens it there). A new node goes to the file of the node it is added to,
and a renamed device takes its receivers and senders along in every file. A change that touches
two files is one edit: Undo in either file undoes it in both. A file changed while no tab shows
it is saved together with the map, the next time you save a file of the map.
- Nodes with errors or warnings are colored, and a badge shows how many problems they have.
- Nodes added or modified since the last commit, unsaved edits included, are marked as Source
Control marks files: green with A, yellow with M; nodes with changes inside are yellow.
The comparison is the same as in the Changes tab. mapcan.tree.showChanges turns it off.
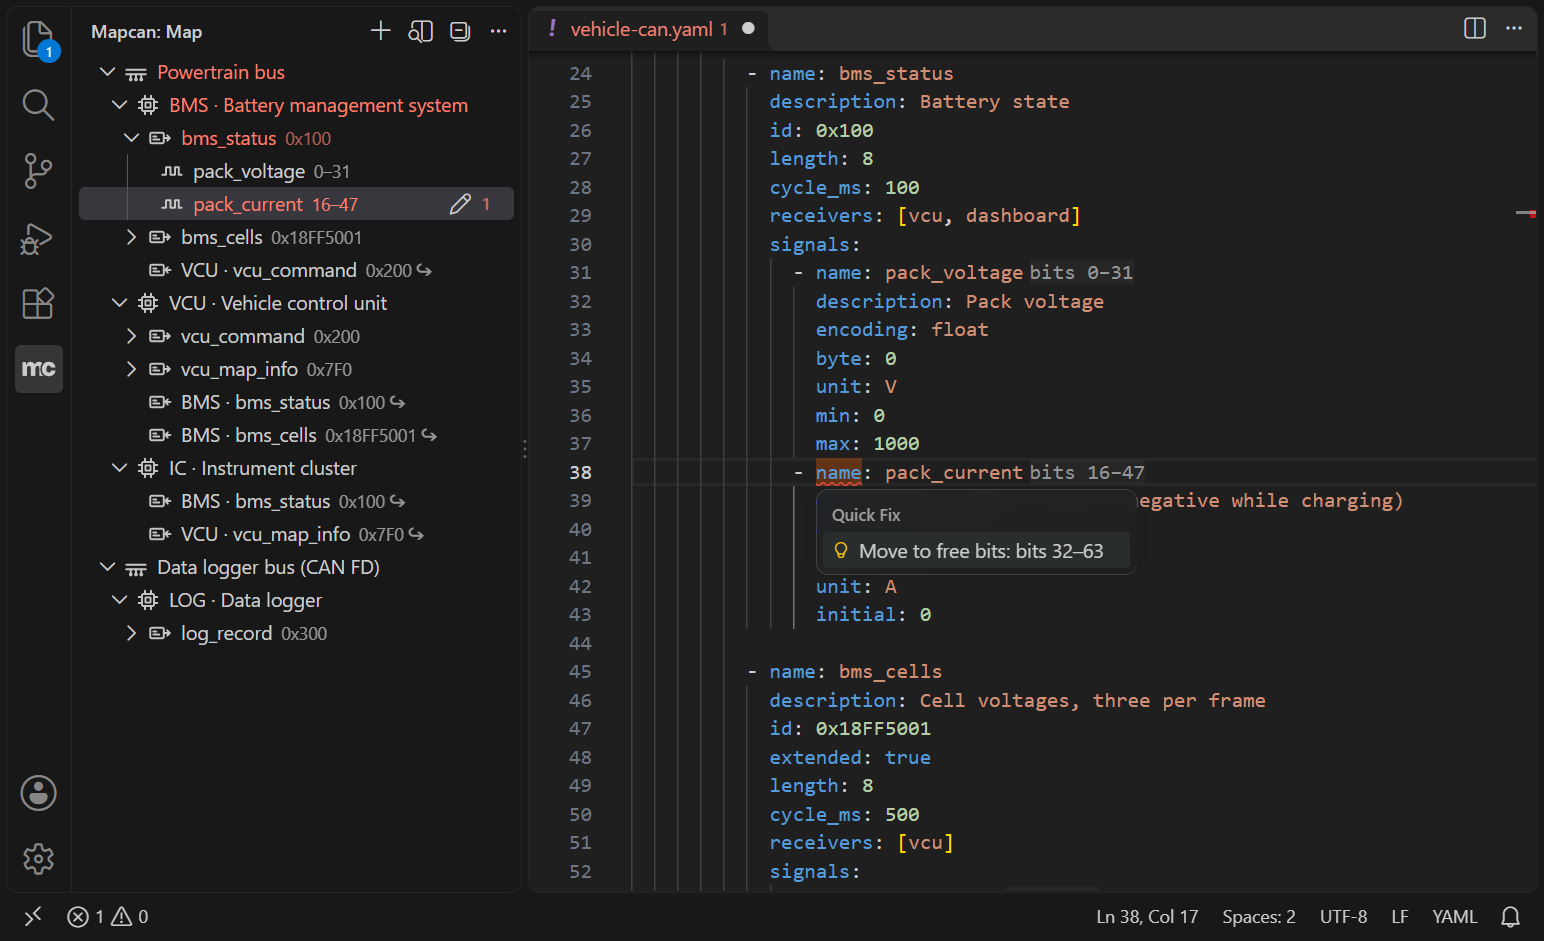
Quick fixes (the light bulb, Ctrl+.):
- decimal commas, a Cyrillic «х» in hex numbers and hex numbers in quotes;
- a missing space after
-;
- misspelled keys, values, receivers and senders;
- overlapping signals moved to free bits,
extended: true for 29-bit IDs, names in the lint
style, the document version from the history.
Device references. Go to Definition (F12) from receivers and sender to the device, Find
All References (Shift+F12), and Rename (F2) that updates every reference.
Snippets. After - , completion offers a device, a frame and signals (plain, with a value
table, a physical quantity, a bit field).
Preview. mapcan: Open Document Preview shows the map's document in the Markdown preview
and follows edits.
History. The History panel in the mapcan side bar lists the map's Git commits, renames
included, with uncommitted changes on top. Clicking a commit shows what changed in signals,
frames and devices since that version in the Changes tab, which every comparison reuses.
- Uncommitted changes: Commit… (only this map), Discard Changes…, YAML diff.
- A commit: the changes it made, Select for Compare and Compare with Selected for any two
versions, YAML diff with the current text, Open This Version, Restore This Version (an
edit that Undo reverts), Copy Commit ID.
- Add to Revision History… writes the changes since the last commit (or since the chosen
one) as the first
document.history entry and sets the document's version and date. The last
step asks for the author, prefilled with the name entered last time (at first, the name from
the mapcan profile or from Git); Enter keeps it, and a new name is remembered.
- Release Version… (the tag button) does the whole release: the revision history entry with
the changes since the last release (the latest tag) or commit, the document's version and
date, a commit of the map and the annotated tag
v<version>. If the history already has an
entry for the document's version that is not tagged yet, that version is released as it is.
Tags are shown next to their commits.
Export. The Export panel in the mapcan side bar builds DBC, C and Python code, Excel, PDF,
Markdown and HTML from the current text of the map, unsaved edits included, into build/ next
to the map or the folder chosen in the panel, and lists the files it wrote. It refuses while the
map has errors.
Validation as you type. mapcan reports errors and warnings in the editor and in the Problems
panel, each with its rule code.
Hovers.
- A field key shows what the field means.
- A signal shows its bits, scaling, unit, range and value table.
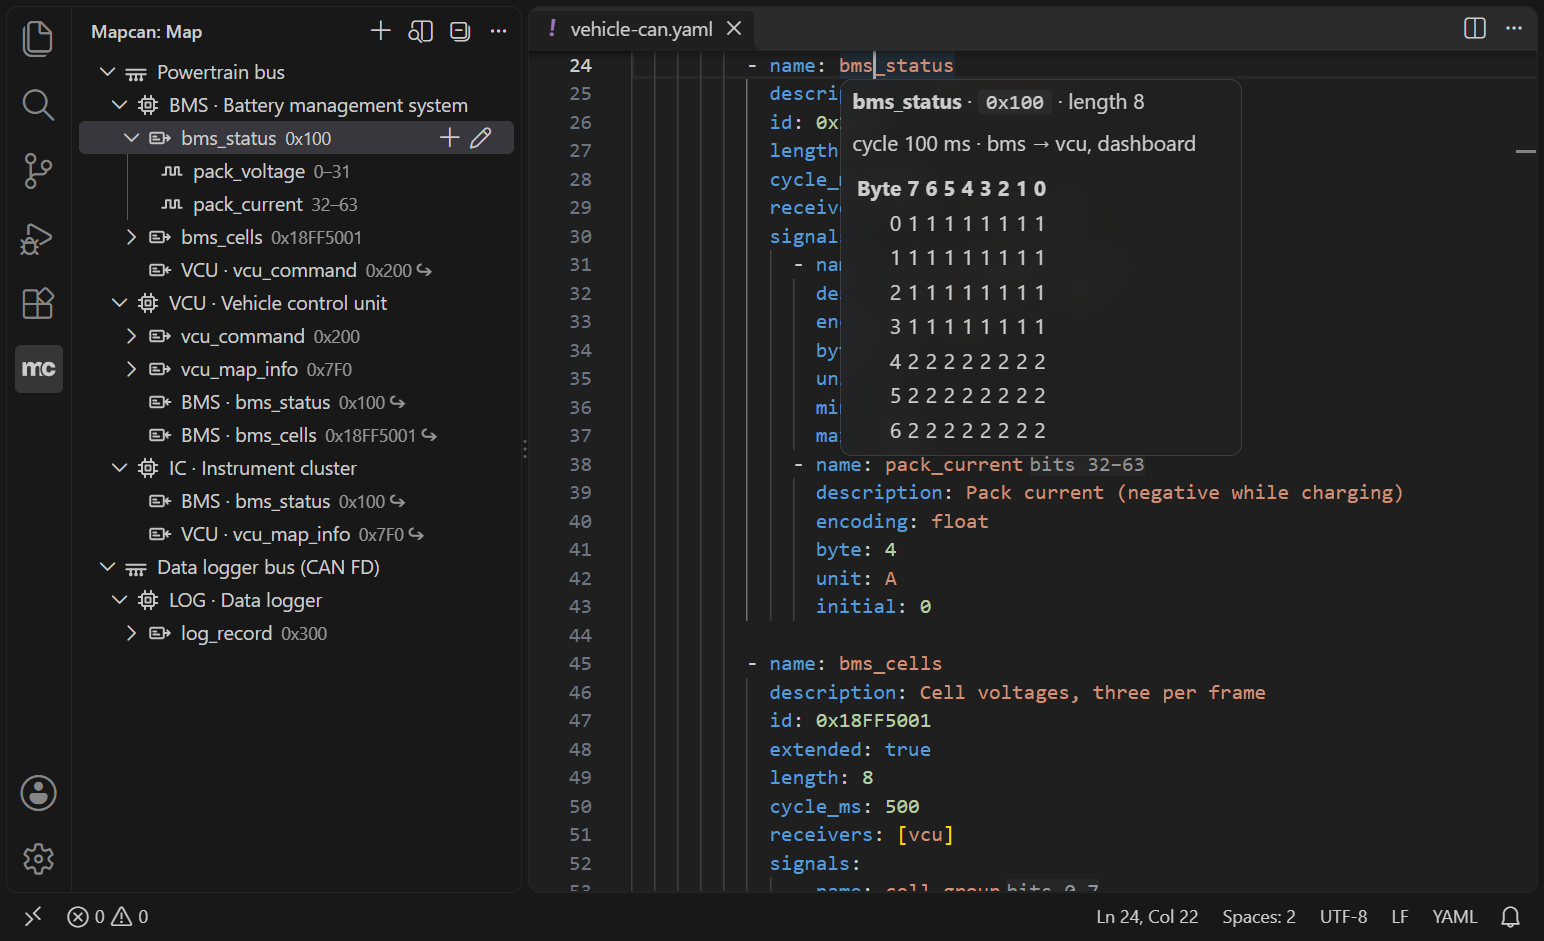
- A frame shows its CAN ID, length, cycle, sender and receivers, plus a byte-by-bit layout table.
Inlay hints. Computed CAN IDs appear next to frames that have no explicit id (CANopen,
J1939), and the occupied bits appear next to each signal.
Completion. Enumerated values such as kind, byte_order, protocol and canopen, and device
names for sender and receivers.
Outline and breadcrumbs. Buses, devices, frames, signals and flags.
For completion of keys, install the
YAML extension: the
extension gives it the format's schema for every map and every file a map includes, with no
# yaml-language-server: $schema= line needed (one in a file still takes precedence).
Requirements
None: the extension installs what it needs. It runs the language server of the mapcan command-line
tool, and when no mapcan is found it offers to install one (also mapcan: Install or Update mapcan). It
downloads uv, which sets up Python and installs mapcan[lsp,pdf,xlsx] from
PyPI into the extension's global storage: one copy per user that serves every folder, about 200 MB on the
disk. Python does not have to be installed, and nothing is added to PATH. Once a session of VS Code,
when the server starts, the extension looks on PyPI for a newer mapcan and offers to update this copy
(mapcan.server.checkForUpdates turns it off).
A mapcan of your own is used when there is one. The order is: mapcan.server.path; with the Python
extension, the Python environment selected there (a project's venv or conda environment); the one the
extension installed; PATH. The extension needs mapcan 0.21 or newer: with an older one it says so and
offers to update it, in the environment it was found in.
In Restricted Mode (a folder you have not
trusted) the extension works, but mapcan.server.path, mapcan.server.args and
mapcan.export.outputDir are read from your user settings only: a folder's .vscode/settings.json
cannot choose the command the extension runs or where an export writes. Once you trust the folder,
the server restarts with its settings.
Settings
| Setting |
Default |
Description |
mapcan.server.path |
"" |
Path to the mapcan executable; empty uses the selected Python environment, then the mapcan the extension installed, then PATH |
mapcan.server.args |
["lsp"] |
Arguments for the executable |
mapcan.server.checkForUpdates |
true |
Once a session, offer to update the mapcan the extension installed when PyPI has a newer one |
mapcan.export.outputDir |
"build" |
Export folder, relative to the map's folder; a folder chosen in the Export panel takes precedence for that map |
mapcan.tree.showChanges |
true |
Mark nodes of the Map view added or modified since the last commit |
Commands
- mapcan: Create Map…, mapcan: Open Example…
- mapcan: Export (shows the Export panel)
- mapcan: Add Bus
- mapcan: Open Document Preview
- mapcan: Compare with Revision…
- mapcan: Release Version…
- mapcan: Restart Language Server
- mapcan: Show Language Server Output
- mapcan: Show Server Version (the versions of the extension and of
mapcan, for bug reports)
- mapcan: mapcan on GitHub, mapcan: Report an Issue (also in the … menu of the Map view;
a new issue gets the versions filled in)
Development
cd vscode
npm install
npm run build
Open the vscode/ folder in VS Code and press F5. The Extension Development Host opens the
examples/ folder and runs the language server from the repository's .venv
(uv sync).
npm test runs the integration tests in a separate VS Code that it downloads into .vscode-test/.
To use an installed VS Code instead, set VSCODE_PATH to its executable; that VS Code must not be
running.
npm run screenshots (Windows) takes the screenshots of this README and of the main one again, in the
light and the dark theme, into docs/images/: it opens examples/vehicle-can.yaml in a separate VS
Code and sets up each scene (scripts/screenshot-scenes.cjs). The window may be covered meanwhile.
The pictures of the tour that the README has none of (Export, History) come from
scripts/walkthrough-scenes.cjs the same way; its header says how.
License
Apache License 2.0. Copyright 2026 Ali Ordu.
| |