Workflow - Release management
In Mitto AG, we are focused on constantly improving our service features and quality. This cannot be achieved without properly tested short product release cycles and release management workflow transparency. We are using Microsoft Azure DevOps as software development support tool with all of its features. Starting with agile product backlog tracking, git source control, artifacts to CI/CD, testing and release management. Our definition of done is having a feature tested on production environment. Azure DevOps offers many dashboards, widgets and views, but it is still hard to organize all of those with a simple goal: to put releasable software increment to production as soon as possible. This is why we have decided to develop a plugin for Azure DevOps that brings us this value. Focusing on release, we have also organized our codebase around release git branch. This branch is made for the release. If this release doesn’t pass the validation, it’s been discarded, and new minor release is created with only successful tested PBIs, thus increasing chances of success. The failed ones will be recommitted to development team, and will be included in one of the next releases.
Code organization following this principle is easy. Only flaw is that it puts one great assumption as a base principle: every coding work on an PBI is completely independent of any other work. In practice, this is rarely true. On code conflicts, we have to create new merge branches from features branches in order not to make feature branches dirty with untested code. Here we encountered our first problem. How do we track which items were successful and which were not per a release? Azure DevOps doesn’t have a view or dashboard filtering an PBIs based on code that was in a specific git branch. And how would you even do that? We have decided to distinguish by using pull requests. Pull requests would have to represent the work a developer performed on a single PBI.
Azure DevOps, by default, offers one Committed column and one Done column. In order to track our work items more efficiently we have added Recommitted, Tested, Retested and Deployed column. Committed, Recommitted, Tested and Retested with two sub columns: Doing and Done. In short: PBI is Committed / Doing when work is assigned to development team. Committed / Done when pull request is approved and completed. Once build and deployed to staging environment, it’s Tested / Doing. QA team tests and from that stage it goes to Tested / Done if successful or Recommitted / Doing if not. If release is successful, gets deployed to production, and PBIs moved to Deployed column. Once validated on production, they are Done. If release fails, new minor release is created with successful items. This means again new pull request by developers to new release branch, PBIs moved from Tested / Done to Retested / Doing. PBIs which did not pass the validation (in Recommitted column now) are given priority over the Committed ones.
With release in focus, we have to clearly differentiate which PBIs were being processed in which release, and the plugin we developed brings us exactly that.
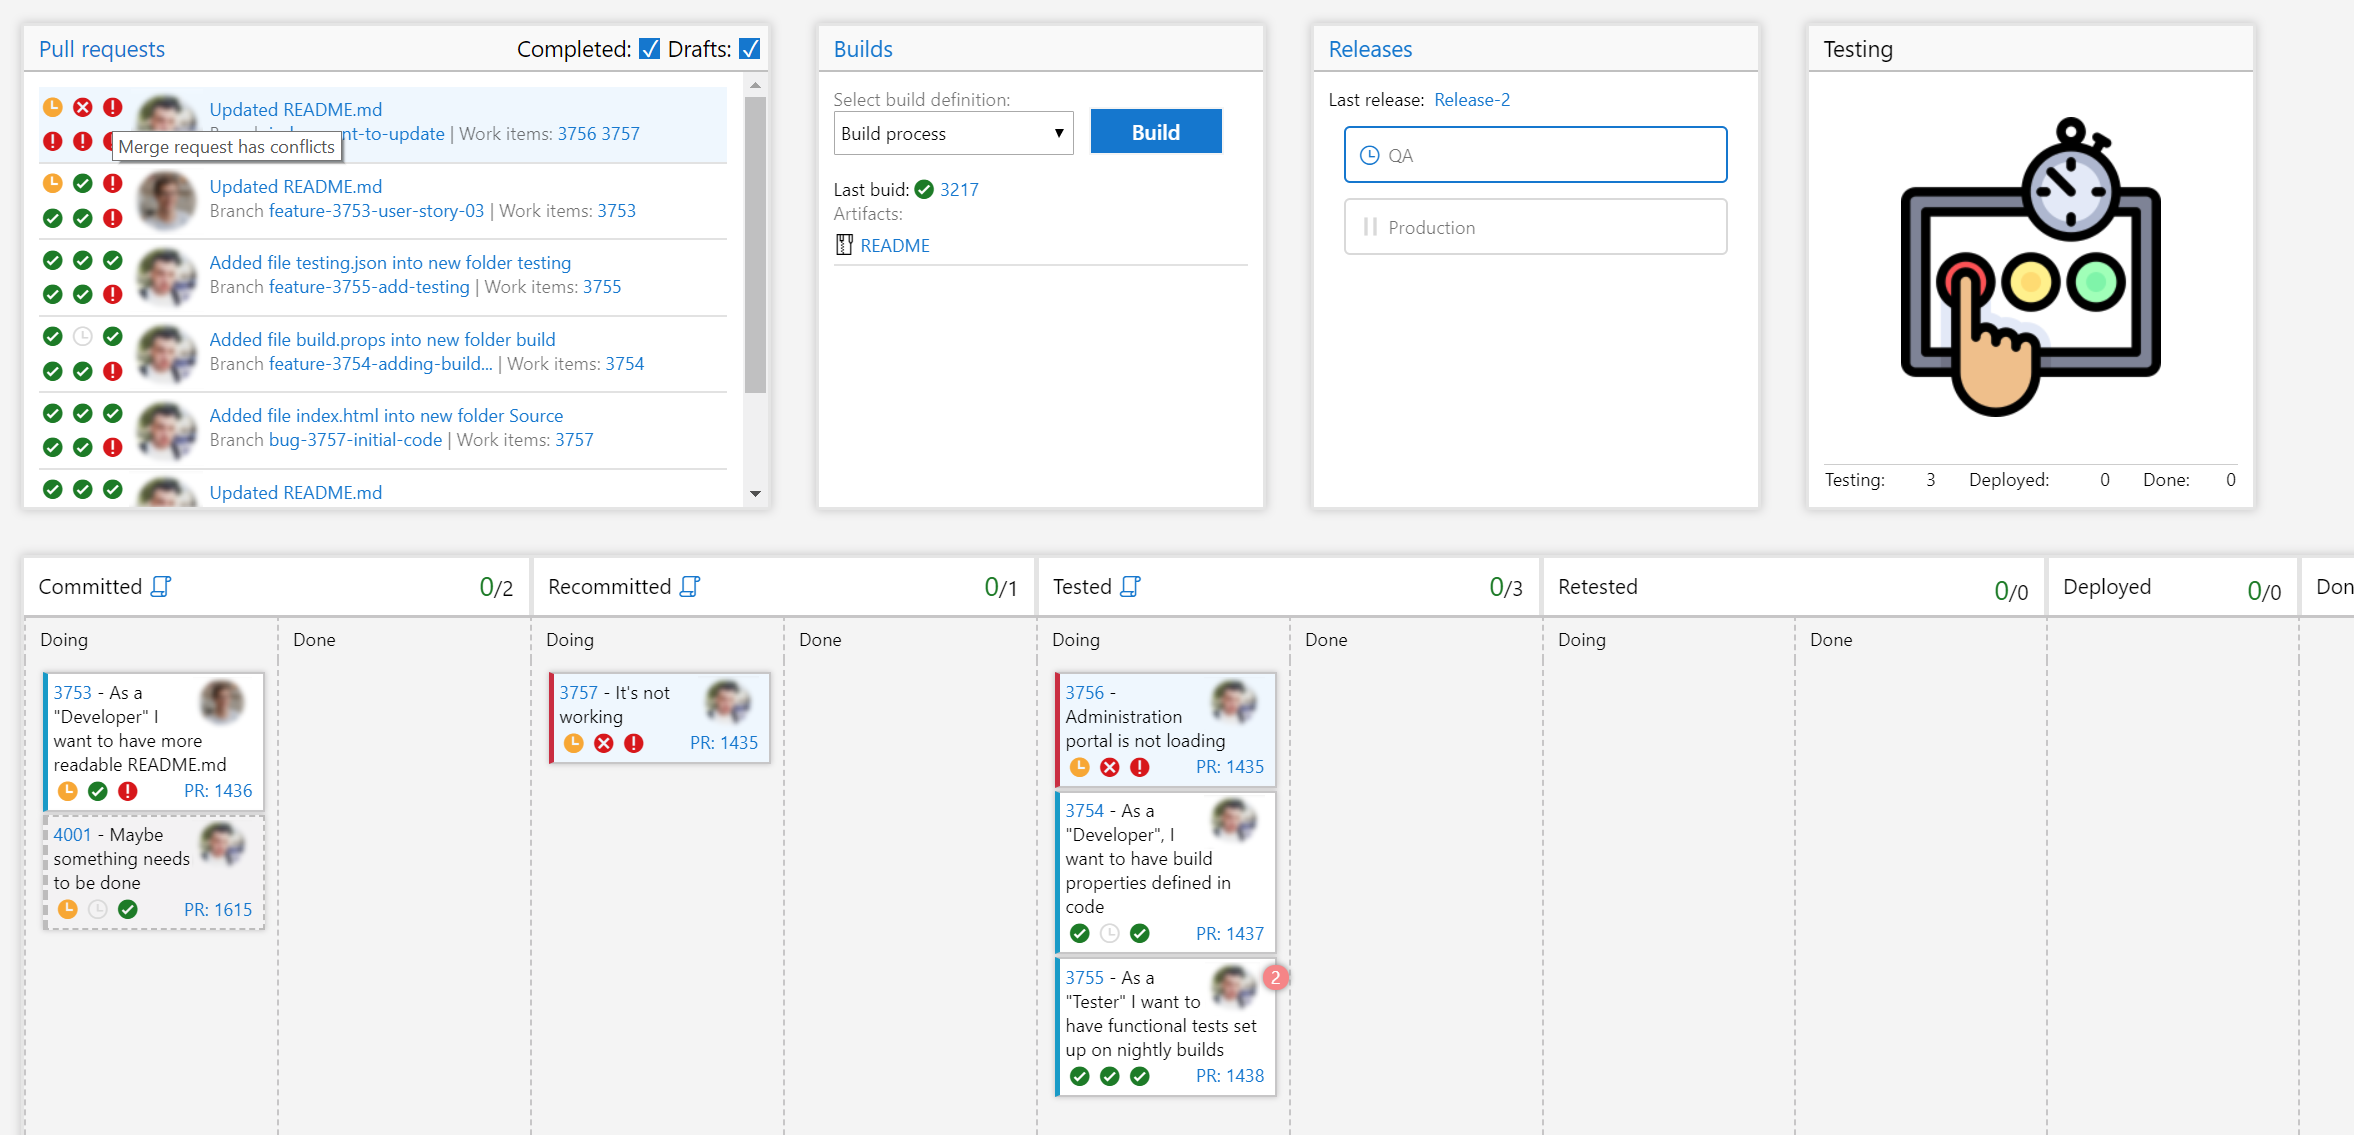
Workflow plugin, developed by Mitto AG, has six main sections:
Title and settingsTitle contains main release info and actions. Here you may choose which release you want to examine. Latest one is loaded by default, and it is marked with a star (⭐). This tells developers that their pull requests should be targeted to this release. Special branch master (visually different) is also here for hotfix overview. Next is “comparing to master” info. By clicking on this link, you go to Azure DevOps branch compare page. This info is very important to use, because we want to be 0 behind master, and many ahead. If we see that we are behind master, release branch should be updated with commits from master, as described in git workflow. Action buttons let us create new major and minor release (git branch), refresh current view below and show release branch git history. Settings window let us choose projects and their corresponding build processes that should be shown. Here is assumed that a project is defined by git repository. One Azure DevOps project may contain multiple git repositories, and here we can select what we want to see in workflow. Advanced options let you define:
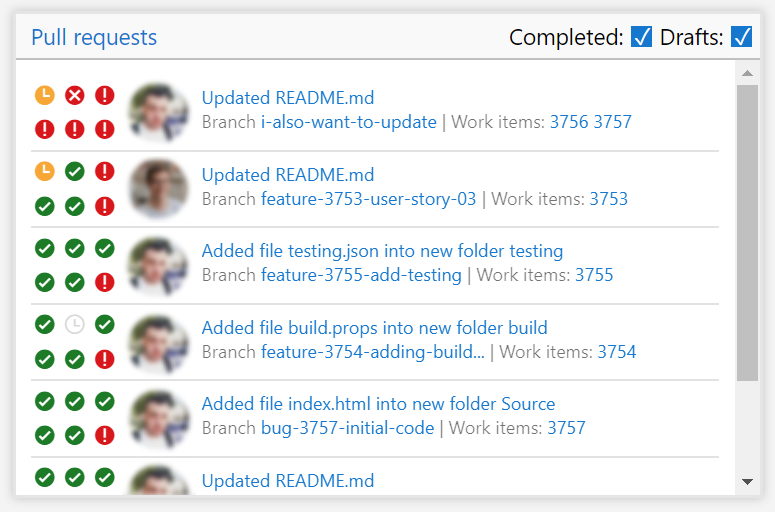
Pull requestsThey are main unit of developer’s work, and should be uniquely corelated to PBIs. In order to make a process much easier to maintain, you need to make sure that branch is named properly (contains PBI ID – fifth validation icon), not behind master (sixth validation icon) and related only to one PBI (fourth validation icon). Additionally, plugin validates if pull request is completed (first validation icon), approved (second validation icon), and if code can be merged properly (third validation icon). On hover you get your PBI(s) selected on the view below. The item itself contains links to pull request, feature branch and work item(s). Work item also contains three relevant validation items, link to PBI and PR. For a release manager, this is very important, because it provides the overview of all pull request, and PBIs in corresponding state.
BuildsHere, all builds can be triggered. Latest build (configured in settings) is displayed, with corresponding artifacts. Icon is displaying the state, and will show if the build is currently running, canceled or failed, which is important for build engineers. Downloading artifacts is also helpful for quickly checking the validity before release.
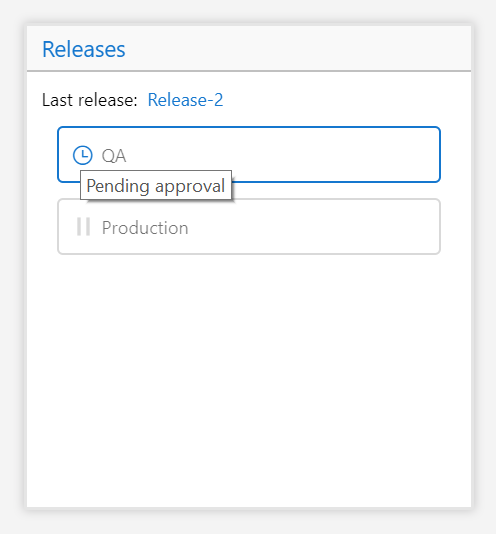
ReleasesOverview of all stages. This can be also considered as the status of release overall. Everybody involved in a process (developers, testers, release managers, build engineers, stakeholders) can see the state of it. Contains a link to Azure DevOps page for the current release.
StatusThis is the overall status of current release. It helps visually identifying the current stage for entire team.
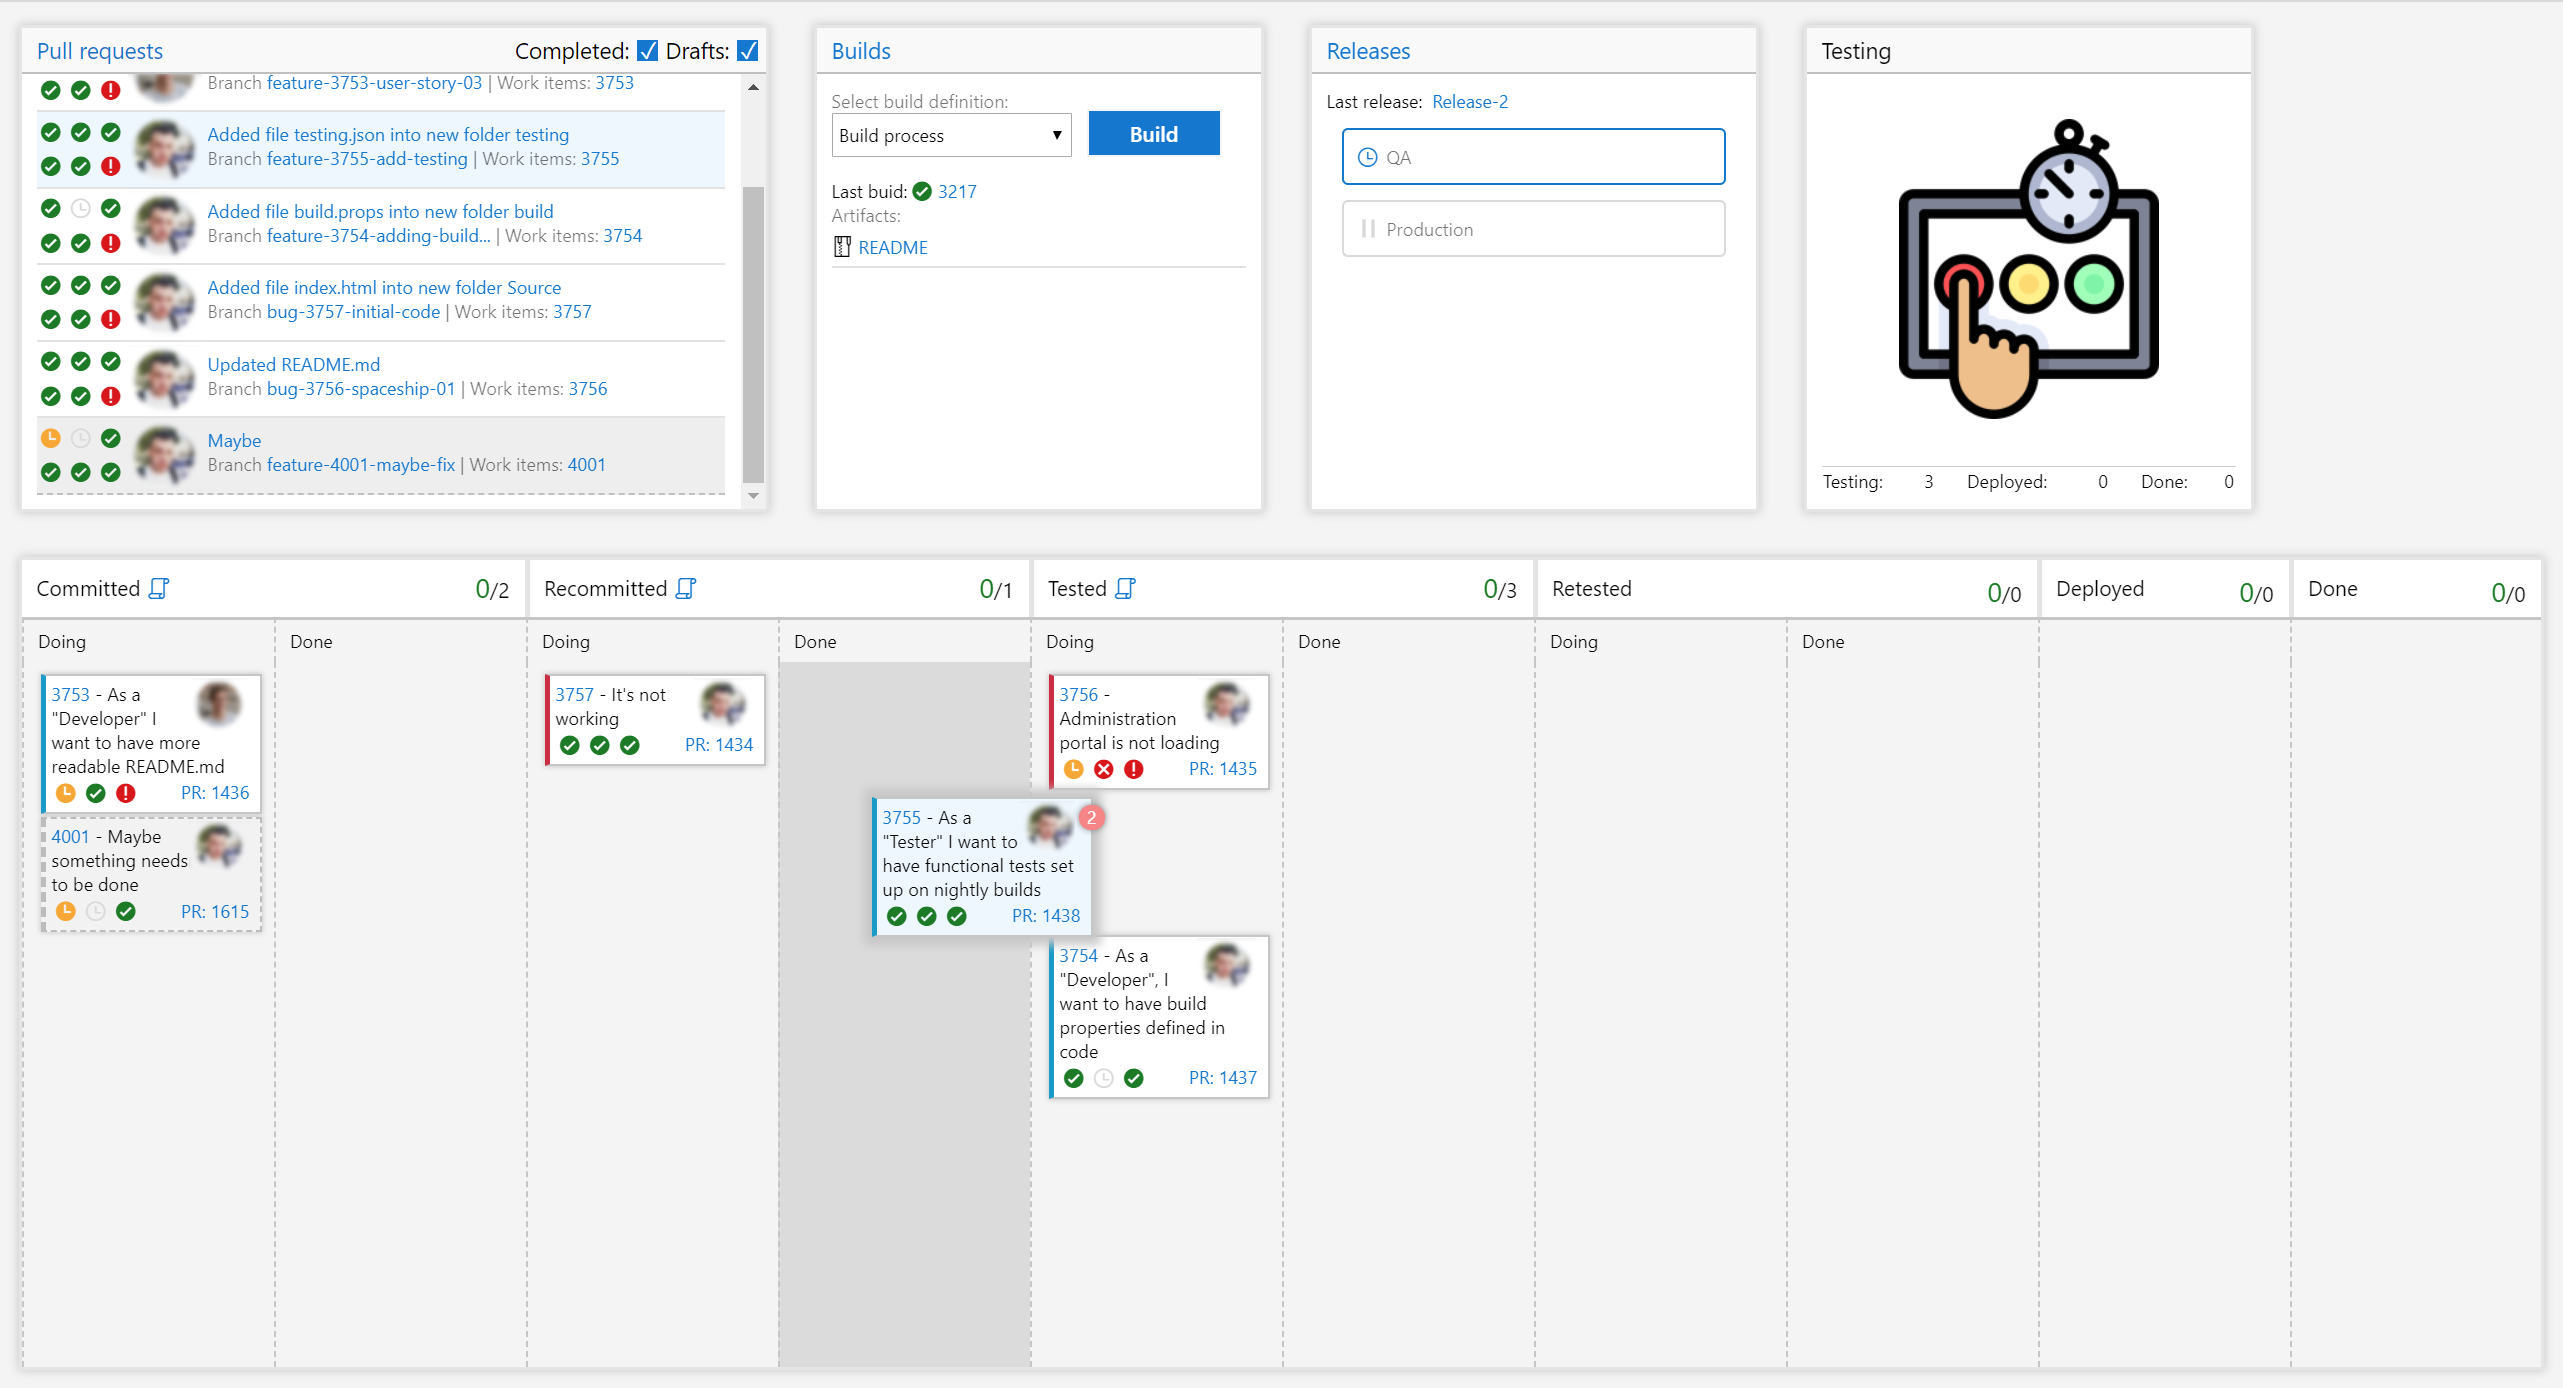
Work ItemsProvides overview of items only related to the release, unlike the Azure DevOps boards. Items may be dragged and dropped within the columns, while showing corresponding pull request. They show validation if pull request is completed (first validation icon), approved (second validation icon), and if code can be merged properly (third validation icon). They also contain a link to Azure DevOps PBI page and the PR. If some PBI is contained in multiple releases, it shows a number on the right; releases are shown on hover.
In Mitto AG, we are were happy to use this plugin as it’s making us release the product much faster. We have filled in the hole that Microsoft Azure DevOps has left in our process. While still improving this plugin, and having more exciting features coming soon, we are working on process automation with Azure Functions. Again, some of actions can be automated by system itself, but some require additional development (like, eg making pull request from release to master once release has been deployed to production). We will also open source this code, and are very eager to get community feedback. Please tell us if you have any ideas or comments on the workflow or the process itself. This code is licensed under MIT license. Icons used are from Azure DevOps itself and Settings Questions SVG Vector (license Creative Commons Attribution 4.0 International Public License). Plugin developer: Edmundas Bubliauskas Process and documents: Marko Pađen Process and redact: Ramon Kania |


