Mindcraft is a tile-based programming language for creative coding applications. Programs are built by arranging tiles -- typed, composable tokens -- into rules. A collection of rules forms a brain, which drives the behavior of systems ranging from video game characters to physical devices like robots.
What This Extension Does
This extension lets you author custom brain tiles in TypeScript and use them in a live Mindcraft app. It runs in both VS Code for the Web and VS Code desktop, with a workflow suited to each:
- In the browser (vscode.dev): pair VS Code with a Mindcraft app running in another browser tab. A bridge connects the two -- edit a tile source file, save it, and the tile is available in the brain editor immediately. No install, no local toolchain.
- On desktop: work with Mindcraft projects as regular folders on disk. The extension hosts the project's Mindcraft app in an editor tab, and everything -- brains, tiles, project settings -- saves to your project folder. Projects work offline and are ready for version control.
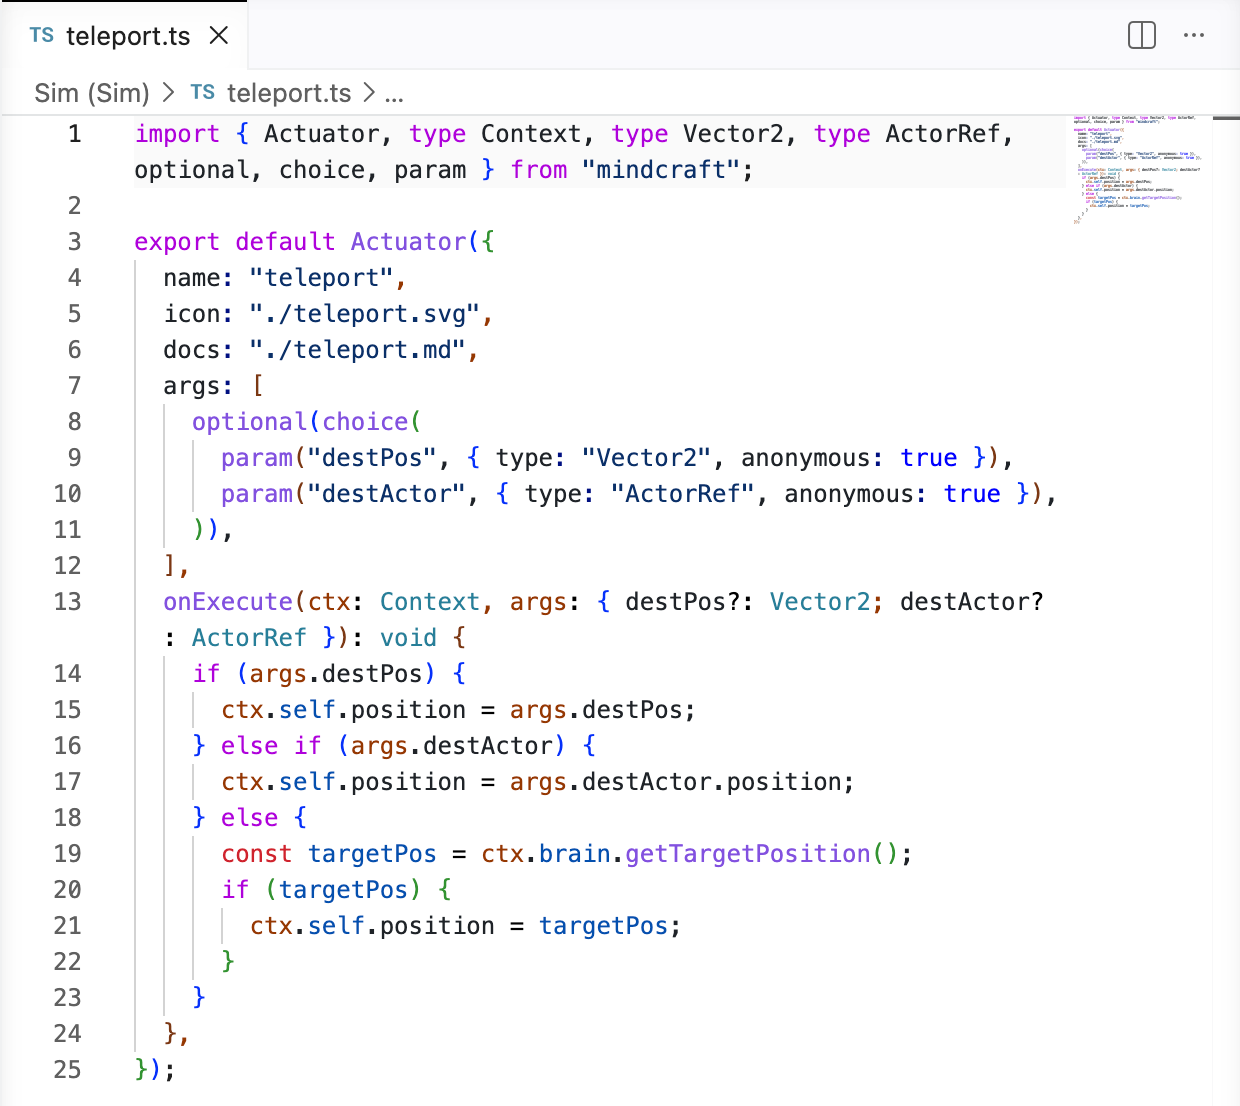
Example: Authoring a "teleport" actuator in TypeScript:
Getting Started in the Browser
- Open vscode.dev and install the Mindcraft extension.
- Launch your Mindcraft app and enable the VS Code Bridge. Make note of the generated join code.
- In VS Code, open the Command Palette (
Ctrl+Shift+P / Cmd+Shift+P) and run Mindcraft: Connect, entering your join code.
- Scaffold a new tile with Mindcraft: Create New Sensor or Mindcraft: Create New Actuator.
- Edit the generated TypeScript file -- save it and the tile is instantly available in the brain editor.
Once your editor is paired to your app, the connection persists and reconnects automatically. A new join code is only needed if either side is manually disconnected.
Getting Started on Desktop
On desktop, the extension hosts a Mindcraft app inside a VS Code editor tab. Which app it hosts is the platform target the project declares in its mindcraft.json, fetched from the published target registry -- so an existing project opens and runs with no extra setup.
- Open the folder you want the project to live in.
- Run Mindcraft: New Project and pick a target from the list (or Mindcraft: Open Project Folder for an existing project).
- The Mindcraft editor opens in a tab. Brains you build there and tiles you author in TypeScript all save to the project folder.
- Use the Mindcraft panel in the Explorer sidebar for the common actions: create a sensor, create an actuator, open the editor, open settings. Closing the editor tab is fine -- Mindcraft: Open Editor brings it back.
- Run Mindcraft: Update Target to move the project to the latest published build of its target.
New projects include a generated tsconfig.json and a .libraries folder so tile sources get full type information and error checking in the editor, plus a .gitignore that keeps the generated files out of version control.
Hosting a local or specific target build
You normally do not set the hosted app by hand -- it follows the project's declared target. To override it, set mindcraft.devTarget. This is the setup for authoring a target app itself (host a local, unpublished build) or pinning a project to a specific published build:
"mindcraft.devTarget": {
  "appPath": "/path/to/the/target/app/dist"
}
Use appPath for a local build's dist directory, or appRef (<owner>/<repo>@<ref>) for a published build. The override's optional extensions and targets entries are seeded into new projects you create.
Flashing a Device
For targets whose hardware is programmed by copying a firmware file to a USB drive -- the micro:bit and its MICROBIT drive, for example -- each brain has a Flash action in the Mindcraft editor. Plug the device in, click Flash, and the compiled program is written to the drive. Flashing from desktop VS Code is currently supported on macOS and Linux; Windows support is not yet available (use the browser app to flash on Windows).
Commands
| Command |
Where |
Description |
Mindcraft: Connect |
Web |
Connect to a running Mindcraft app with a join code |
Mindcraft: Disconnect |
Web |
Disconnect from the current session |
Mindcraft: Show |
Web |
Open the Mindcraft panel, prompting to connect if needed |
Mindcraft: Hide |
Web |
Hide the Mindcraft panel |
Mindcraft: Sync Files |
Web |
Re-sync workspace files with the connected app |
Mindcraft: Unlock mindcraft.json for Editing |
Web |
Allow direct edits to the project manifest |
Mindcraft: New Project |
Desktop |
Create a Mindcraft project in a workspace folder and open the editor |
Mindcraft: Open Project Folder |
Desktop |
Open the editor for an existing project folder |
Mindcraft: Open Editor |
Desktop |
Bring the Mindcraft editor tab to front, reopening it if closed |
Mindcraft: Update Target |
Desktop |
Move the project to the latest published build of its target app |
Mindcraft: Create New Sensor |
Both |
Scaffold a new, empty sensor tile |
Mindcraft: Create New Actuator |
Both |
Scaffold a new, empty actuator tile |
Mindcraft: Open Settings |
Both |
Open VS Code Settings filtered to Mindcraft options |
Settings
| Setting |
Where |
Description |
mindcraft.bridgeUrl |
Web |
URL of the bridge service used to pair with a running app |
mindcraft.devTarget |
Desktop |
Author override of the hosted target app -- a local build (appPath) or a pinned published build (appRef) -- plus optional library and platform-target seeds for new projects |