Marke Code
Markdown editor with project tracking and Focus mode, so you never miss a deadline again.
Works where you code: Cursor, Antigravity, VS Code, Windsurf and more.
Get more done and stop losing project deadlines:
- Project tracking: every list in your
.md shows its progress, its deadline and what is overdue, and the Todas panel gathers the tasks from all your files in one place.
- Focus mode: what can't slip stays at the top, with a countdown, until you finish it.
- Write like in Obsidian: the same commands work here.
# for headings, - [ ] for checklists, ``` for code, [[ to link a note. If you type it in Obsidian, you can type it here.
- Bring your Obsidian notes: they are plain
.md files, so just open your vault folder and start tracking.
Everything lives in the .md file itself, which stays readable anywhere: git, GitHub, Obsidian, any editor.
The interface is in Brazilian Portuguese. Button and label names below are shown as they appear on screen, with the English meaning next to them.
Ps. Feito no Brasil: a interface do Marke Code é toda em português.
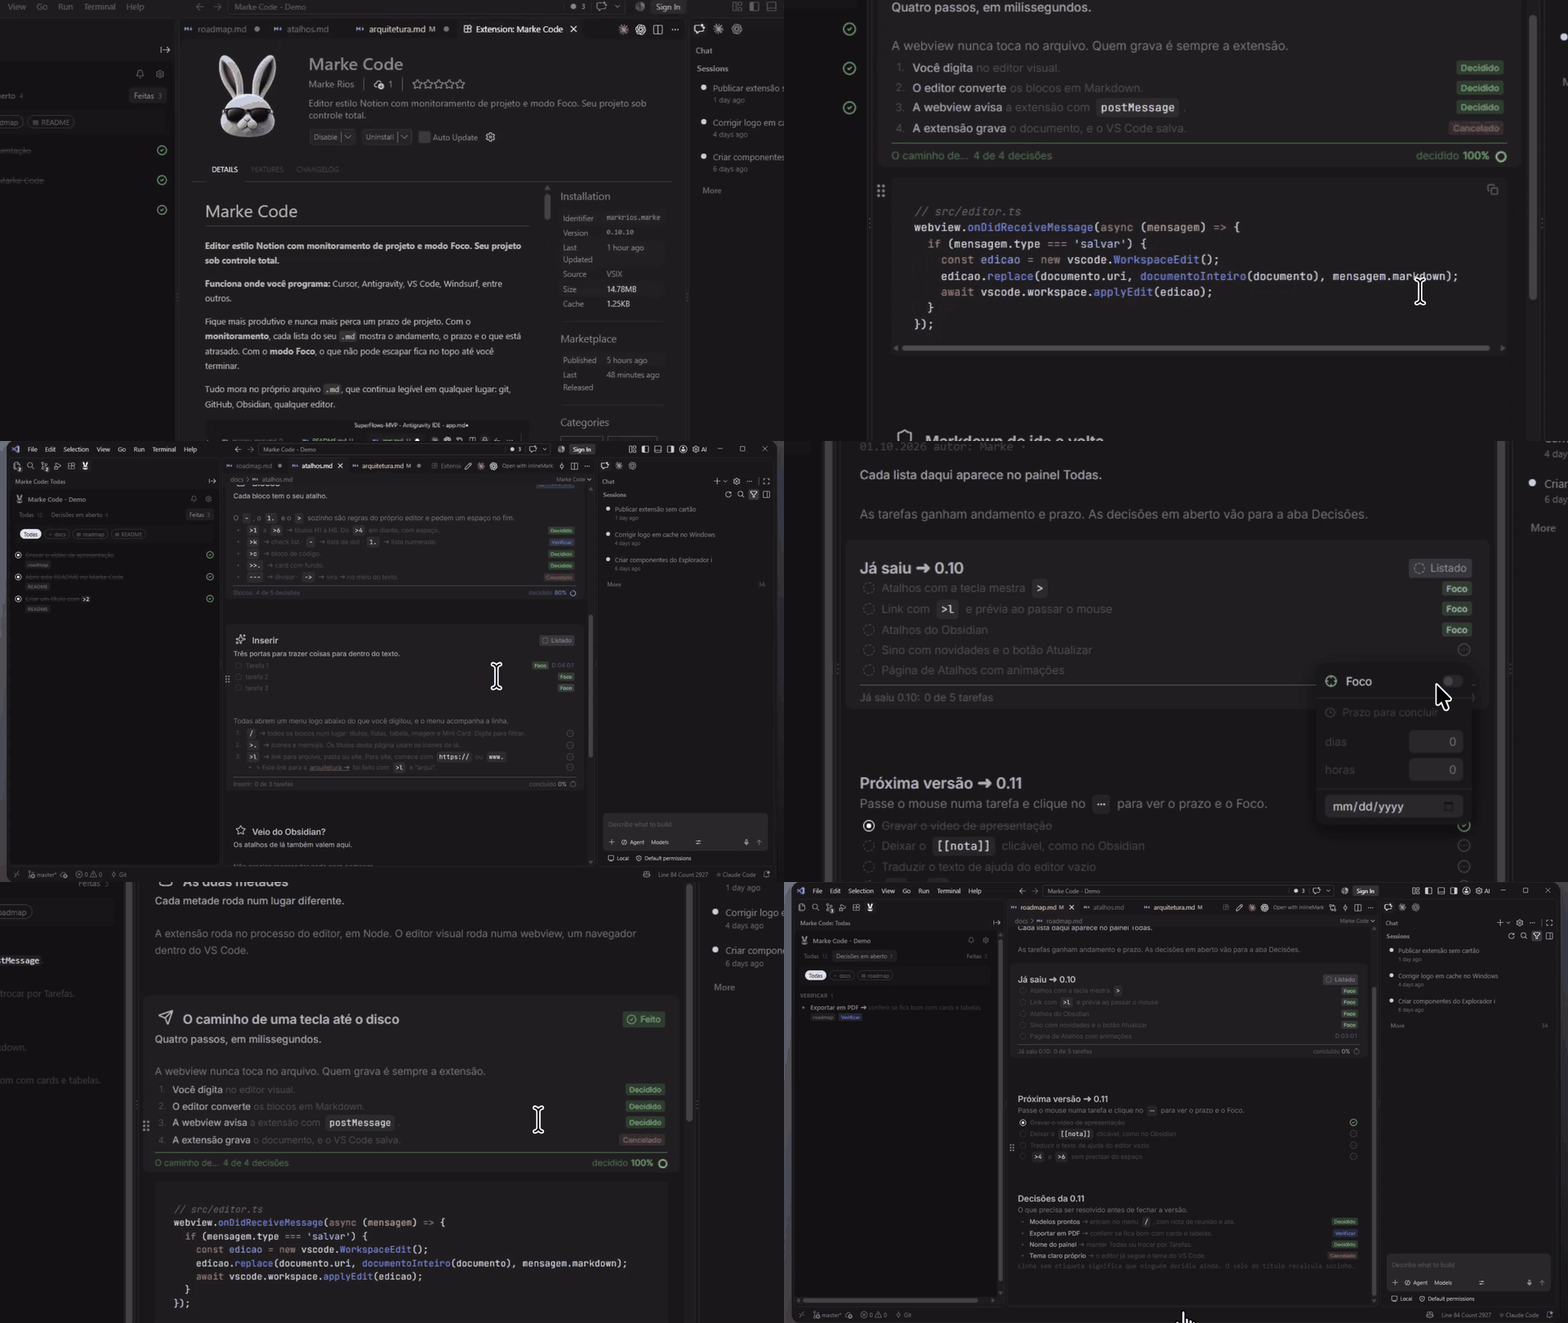
Project tracking
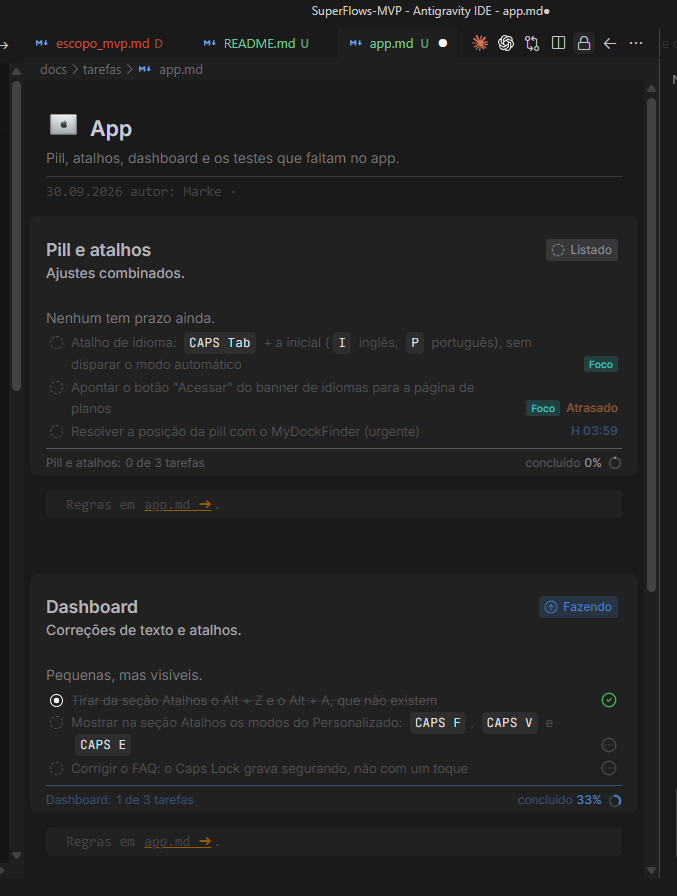
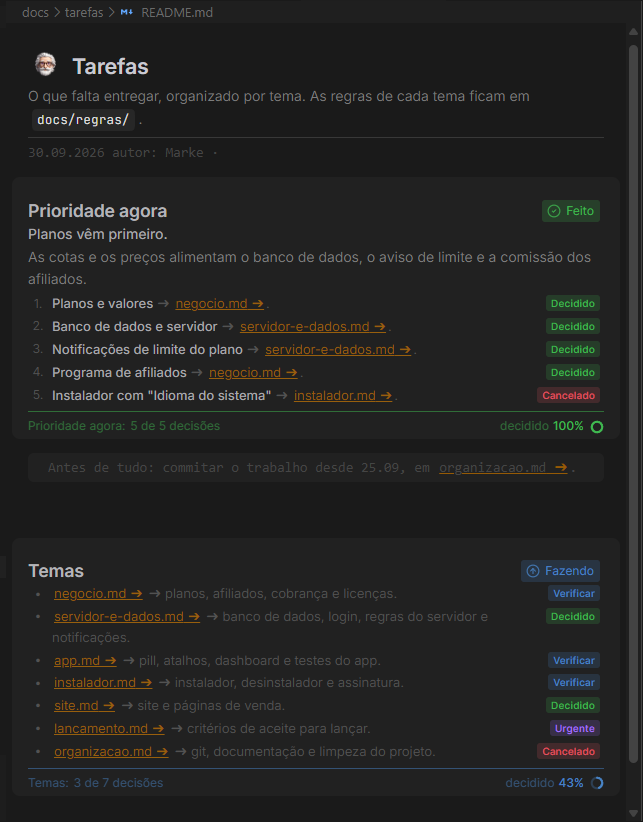
Turn any list in your document into a tracked section. The section becomes a card with its state (Listado · listed, Fazendo · doing, Feito · done, Atrasado · overdue, Cancelado · cancelled), its progress ("1 de 3 tarefas", 1 of 3 tasks) and the percentage done, which updates as you check items off.
To start tracking, pick one of two ways:
- Select the text you want to track (the heading and the list below it) and click Status on the toolbar that appears over the selection.
- Or hover over the heading of a list and click Criar monitoramento (create tracking).
- A checklist (
- [ ]) becomes task tracking: each item has its own deadline, Focus and state.
- A bulleted or numbered list becomes decision tracking: each item is marked Decidido (decided), Verificar (to check), Urgente (urgent) or Cancelado (cancelled).
Focus mode
Focus means "I need to keep my attention on this until it's done". The task gets a Foco badge and jumps to the top of the Todas (all) panel, above everything else, so it never leaves your radar. With a deadline, a countdown shows how much time is left and tells you when it's overdue.
To turn it on, click the ⋯ on the right margin of the task: the Foco switch is at the top of the menu. Below it, days, hours and date are optional. With a deadline, the time becomes the expected finish.
| Combination |
What the line shows |
Mark saved in the .md |
| Focus only |
Foco badge, no countdown |
<!-- marke:prazo foco=1 --> |
| Focus + deadline |
Foco badge + countdown (D 02:23, H 04:00, M 43:38) |
<!-- marke:prazo ate=2026-10-02T18:00:00;foco=1 --> |
| Deadline only |
The countdown and, once past, Atrasado (overdue) |
<!-- marke:prazo ate=2026-10-02T18:00:00 --> |
- The countdown scales down on its own: D (days and hours) while days are left, H (hours and minutes) on the last day, M (minutes and seconds) in the last hour.
- Focus never hides a delay: an overdue task in focus shows Foco and Atrasado together.
- Check the task off and it shows Feito (done) and leaves focus. A cancelled one shows Cancelado.
- Removing the deadline clears only the date and keeps the focus. Turning focus off clears only the focus and keeps the date.
The Todas panel
Tasks end up spread across many files: one per topic, one per client. The Todas (all) panel brings them together in one place, without moving anything out of your files and without creating any file in your project.
Click the rabbit in the side bar. The project name shows at the top, with three tabs below:
- Todas (all): open tasks from every file, by priority.
- Decisões em aberto (open decisions): what is still waiting for an answer (Urgente and Verificar).
- Feitas (done): what is already finished, for reference.
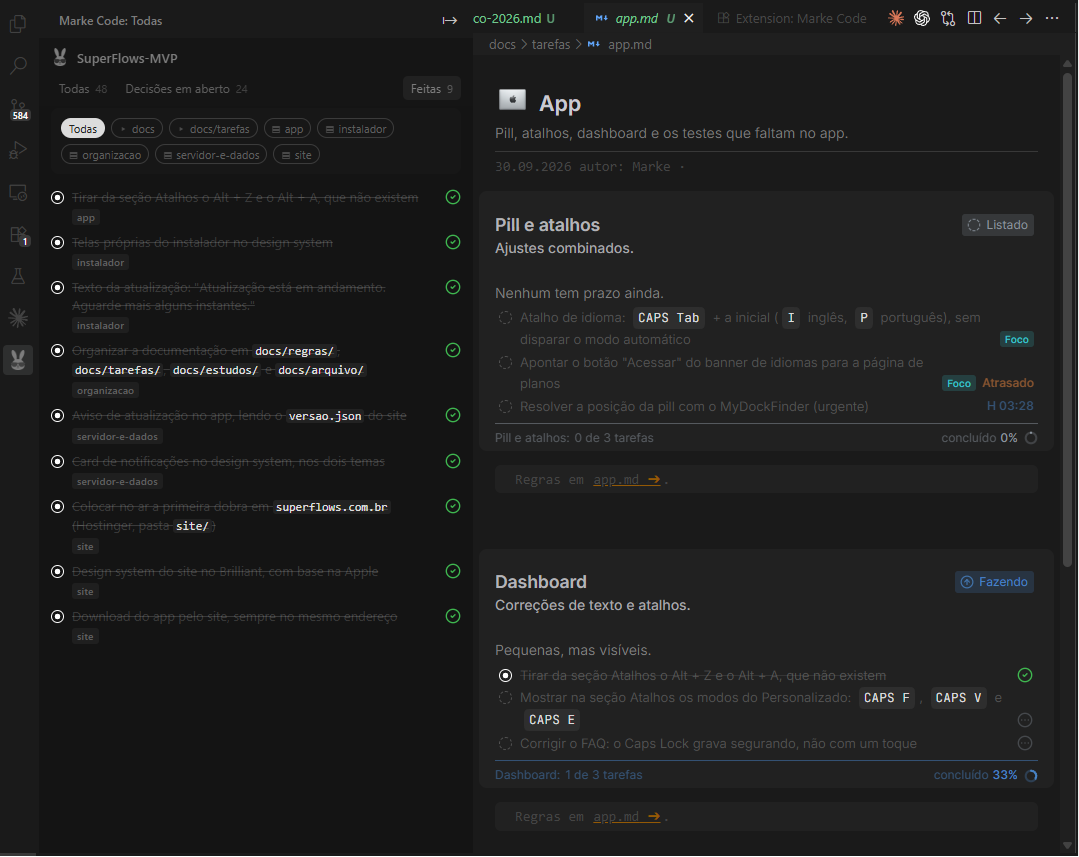
Todas sorts open tasks by priority:
- Foco (focus): the ones with a deadline first, nearest to farthest
- Atrasadas (overdue)
- Hoje (today)
- Esta semana (this week, through Sunday)
- Mais tarde (later)
- Sem data (no date)
Decisões em aberto gathers the decisions that still need an answer, from every file: Urgente first, then Verificar. Nothing gets lost in an old conversation.
Feitas lists finished tasks, struck through with a green ✓, so you can see what shipped without cluttering the list of what's left.
- Check the box in the panel and the task is checked in its source file right away, even in an open editor.
- Click the text to open the file right at the task's line.
- Filter by folder or file in the tag bar. The filter is remembered per project.
- The panel updates itself whenever any
.md changes, from the editor or from another program.
- Notification bell: news and tips in one place. When something new arrives, the bell gets a dot. When a new version is out, it also shows Atualização (update), and the Atualizar (update) button installs it right there.
- Export (optional): the button on the panel bar saves the current list to a
.md, wherever you choose.
Decisions
In bulleted or numbered lists, the ⋯ on each item marks where the discussion stands: Decidido (decided), Verificar (to check), Urgente (urgent) or Cancelado (cancelled). The section card adds up the decisions and shows how much is already settled.
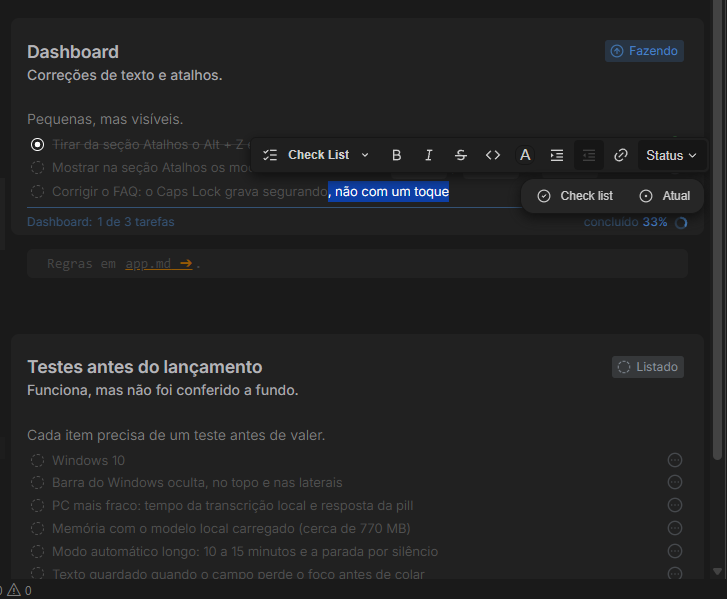
Editor with checklist and status on selection
Select some text and the formatting toolbar shows up with everything at hand: turn it into a Check List, bold, italic, strikethrough, code, color, indent, link and Status, which creates tracking for that section on the spot.
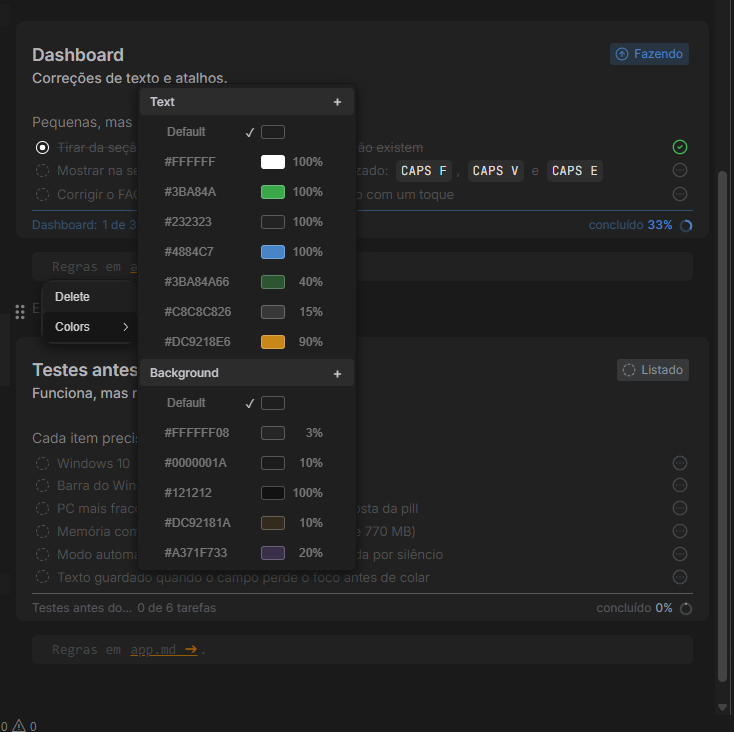
Text and card background colors
Color the text and background of any block or card with your own palette. Click + to save a new color, with any opacity you like. It's saved for all your documents.
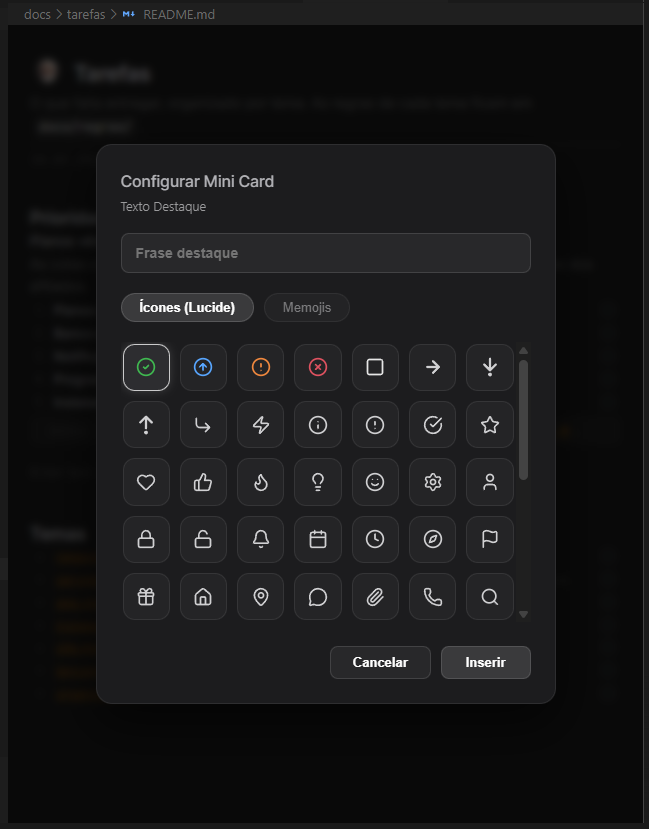
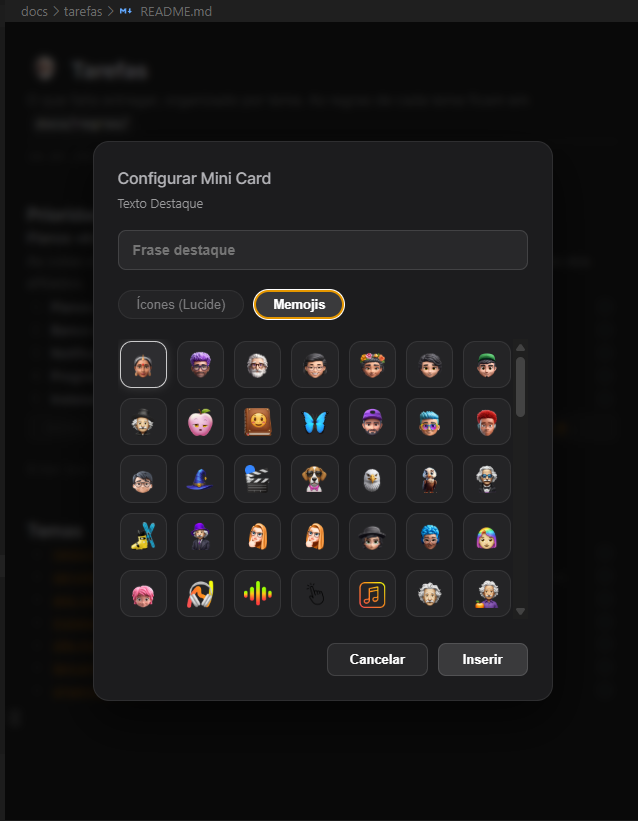
Built-in icons and memojis
Marke Code comes with icons (Lucide) and memojis ready to use in text, headings and cards. Type >. anywhere in the document and pick one.
More features
- Visual block editing, with no markup in sight
- Ready-made layout: Marke Code ships with tuned fonts and colors. Prefer your own? Click the gear in the Todas panel and choose Meu layout (my layout).
- Block menu: type
/
- Link to a file, folder or website: type
>l, pick the file or type the address, and click the link to open it
- Link preview: hover over a link to see the start of the file, what's in the folder, or the site's title and description
- Mini Card: a highlight block with an icon or memoji. Type
/ and choose Mini Card
- Code blocks with highlighting for over 20 languages
- Images: paste or upload, stored next to the document
- Light and dark theme: follows your editor's theme
Shortcuts
All of them, each with an animation, are under the gear in the Todas panel → Atalhos (shortcuts).
| Shortcut |
Result |
>. |
Icons and memojis |
>>. |
Card |
>1 to >6 |
Headings |
>p |
Paragraph |
>b |
Bold |
>i |
Italic |
>k |
Checklist |
>c or ``` |
Code block |
>l |
Link to a file, folder or website |
/ |
Block menu |
- + space |
Bulleted list |
-> |
Arrow |
--- |
Divider |
Coming from Obsidian? Write exactly as you do there. Its shortcuts work here too: # to ###### + space for headings, -, * or + for lists, 1. for numbered lists, - [ ] for checklists, > for quotes, ``` + Enter for code blocks, **bold**, *italic*, ~~strikethrough~~, `code` and [[ to link another file (the same menu as >l). Your vault opens as it is: no export, no conversion.
Getting started
- Install it. The welcome page opens on its own, with a 6-step tutorial and a sample document to try.
- Click any
.md file: it opens straight in Marke Code.
- Add tracking to the lists you want to follow.
Prefer to open .md files in the text editor? Under the gear in the Todas panel, turn off Abrir .md direto no Marke Code (open .md directly in Marke Code). The tutorial is in that menu too.
How the marks look in the file
Everything Marke Code tracks lives in the .md itself, in HTML comments that any other Markdown reader ignores:
| Mark |
Where it goes |
Example |
| Deadline and Focus |
checklist line |
* [ ] <!-- marke:prazo ate=2026-10-02;foco=1 -->Record the video |
| Decision |
list line |
* <!-- marke:decisao valor=urgente -->Choose the bank |
| Tracking |
section heading |
## <!-- marke:status modo=checklist;valor=listado;n=4 -->Tasks |
Attributes are separated by ; and read in any order. A file opened and saved without changes stays identical, byte for byte. Marks with the old name (motiond:) are still read and switch to marke: the next time the file is edited in Marke Code.
Settings
The options are in Settings, under marke.*. Search for @ext:markrios.marke.
| Option |
Default |
What it does |
marke.painel.ignorar |
[] |
Folders or files the Todas panel skips, relative to the root. E.g. docs/arquivo, **/drafts/** |
The panel already skips node_modules, .git, dist, out and target, and lines inside code blocks.
Known limitations
- Image dimensions are not preserved.
Development
npm install
npm run dev     # builds and installs into the local copy
npx vsce package --allow-missing-repository
License and credits
Marke Code started as a fork of Motiond and has been rewritten almost entirely: today more than 95% of the code is its own. MIT license. Third-party attributions are in THIRD_PARTY_NOTICES.md, included in the package.
Built with BlockNote.

