lwebp - Image Converter for VS Code
Convert images to WebP, JPEG, or PNG directly from VS Code with pixel-art styled UI, sidebar panel, custom image editor, and light/dark theme support.
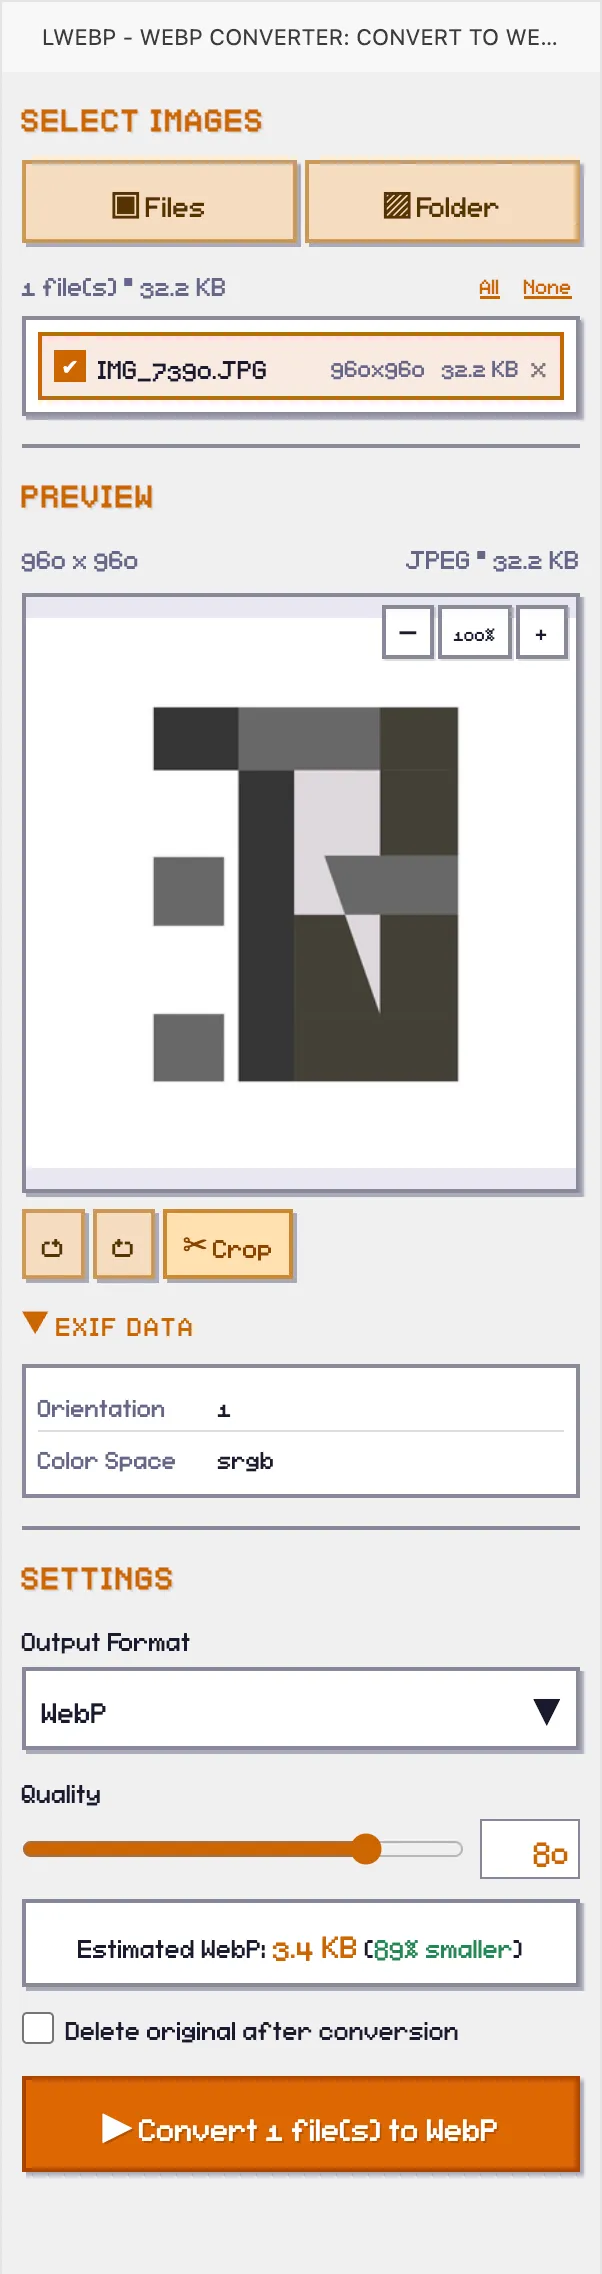
Features
- Multi-file & multi-folder selection — pick files or scan multiple folders at once
- Multi-select — checkbox to select which files to convert, with Select All / None
- Image preview with zoom (scroll wheel or +/- buttons), rotate, and crop
- Quality slider with real-time estimated output size
- Output format selector — WebP, JPEG, or PNG
- Visual crop tool — draw a crop region or enter exact pixel coordinates
- EXIF viewer — camera, lens, exposure, ISO, GPS, and more
- Batch conversion with progress tracking
- Theme toggle — Light, Dark, or Auto (follows VS Code theme)
Custom Image Editor
Open any image with "Reopen Editor With..." > lwebp Image Editor to get a full editing UI.
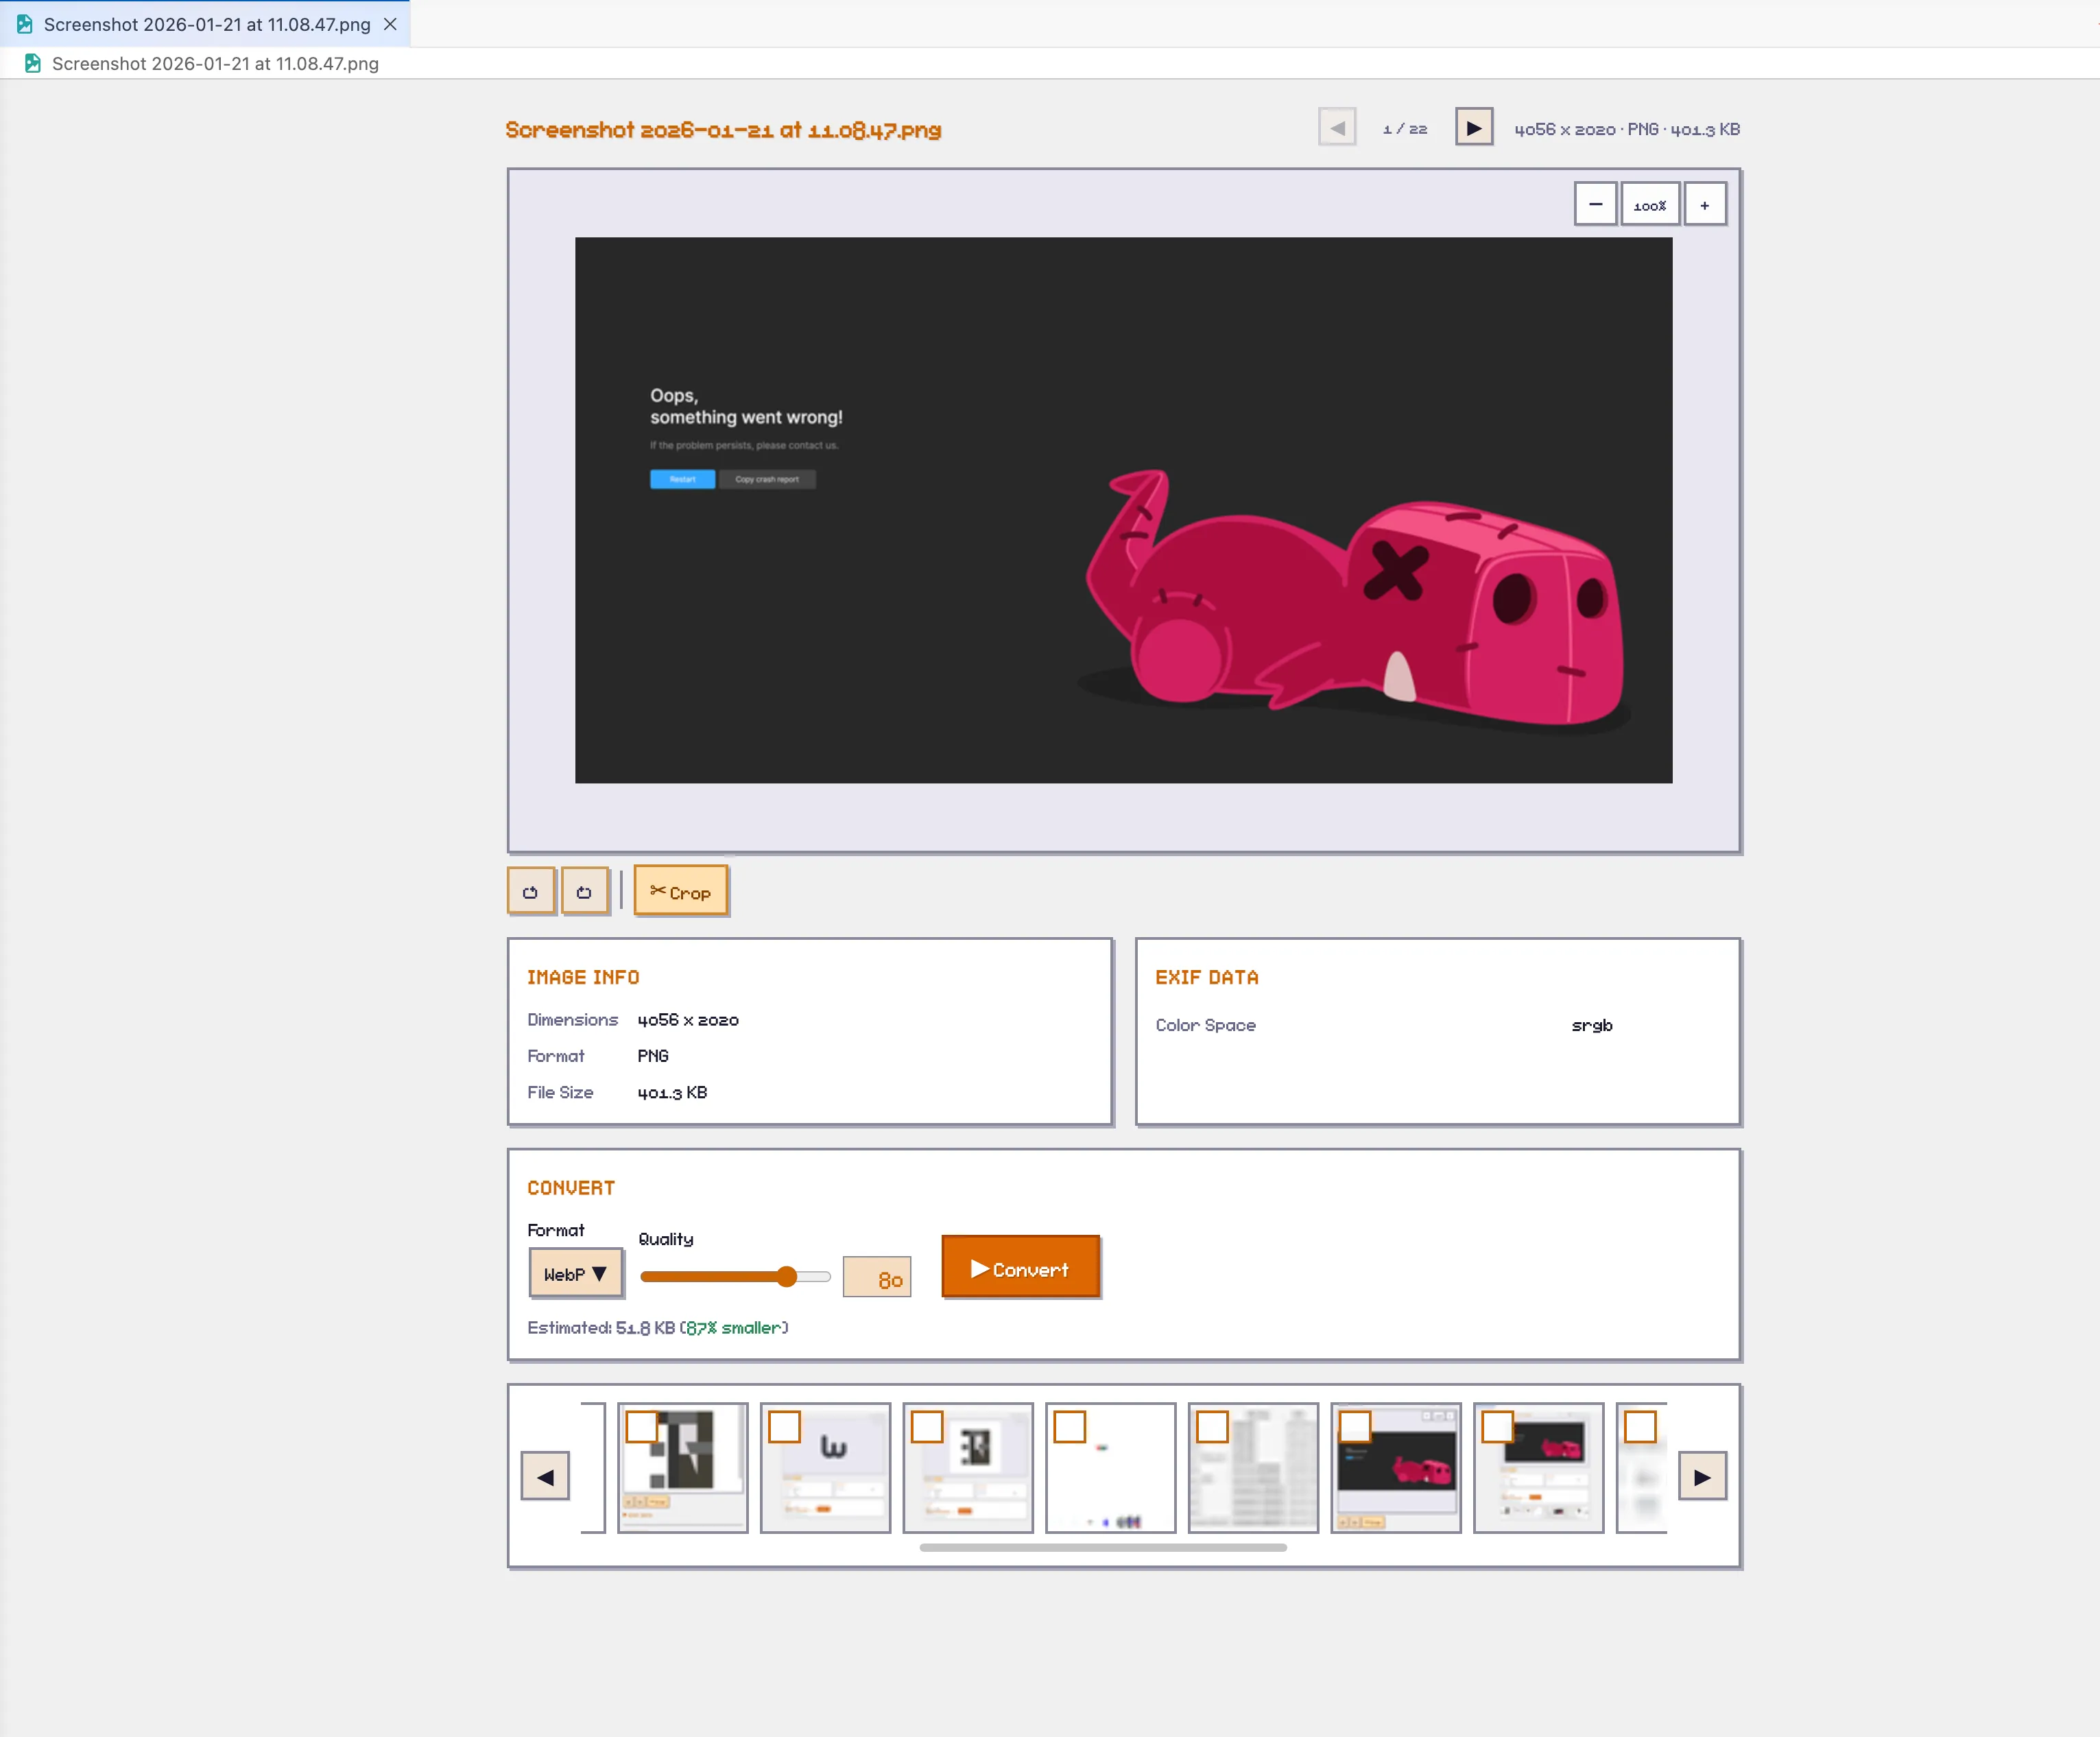
- Rotate left/right with continuous rotation support
- Zoom in/out with buttons or scroll wheel (25%-400%)
- Crop — draw region on preview or enter exact coordinates
- File navigation — browse other images in the same folder
- EXIF data display
- Convert with format, quality, and crop options
- Theme toggle — synced from sidebar panel or standalone per editor
Right-click any image in Explorer or editor tab:
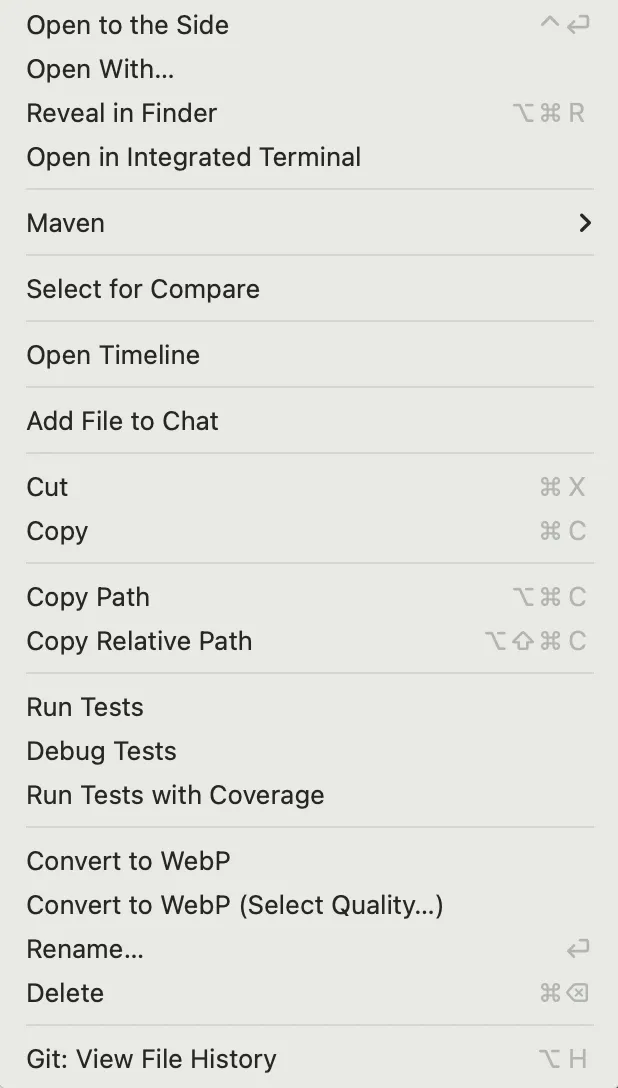
- Convert to WebP — instant conversion
- Convert to WebP (Select Quality...) — choose quality first
- Convert All Images in Folder — batch convert entire folder
| Input |
Output |
| PNG, JPG, GIF, BMP, TIFF, AVIF, HEIC/HEIF, WebP, SVG, ICO, JPEG XL (.jxl), Camera RAW (.cr2, .nef, .arw, .raw) |
WebP, JPEG, PNG |
- HEIC/HEIF — native sharp on macOS, automatic fallback to
heic-convert on Windows/Linux
- SVG — rasterized via sharp (librsvg)
- JPEG XL — via sharp (requires libvips with libjxl support)
- ICO — decoded via
icojs (picks largest image from icon)
- Camera RAW (.cr2, .nef, .arw, .raw) — decoded via
dcraw to TIFF, then processed by sharp
Usage
- Click the lwebp icon in the Activity Bar
- Select files or folders
- Check/uncheck files you want to convert
- Choose format, quality, and optionally crop
- Click Convert
Image Editor
- Open an image file
- "Reopen Editor With..." > lwebp Image Editor
- Rotate, zoom, crop as needed
- Click Convert
Settings
| Setting |
Default |
Description |
lwebp.quality |
80 |
Output quality (0-100) |
lwebp.deleteOriginal |
false |
Delete original after conversion |
lwebp.outputDirectory |
"" |
Output directory (empty = same as original) |
Published as platform-specific packages for optimal size:
- macOS (Apple Silicon & Intel)
- Linux (x64 & ARM64)
- Windows (x64)
License
MIT
| |
