WTANIWE - Writing Tool, An Integrated Writing EnvironmentWriting Tool, An Integrated Writing Environment Installation Launch VS Code Quick Open ( Ctrl+P), paste the following command, and press enter.Copied to clipboard |
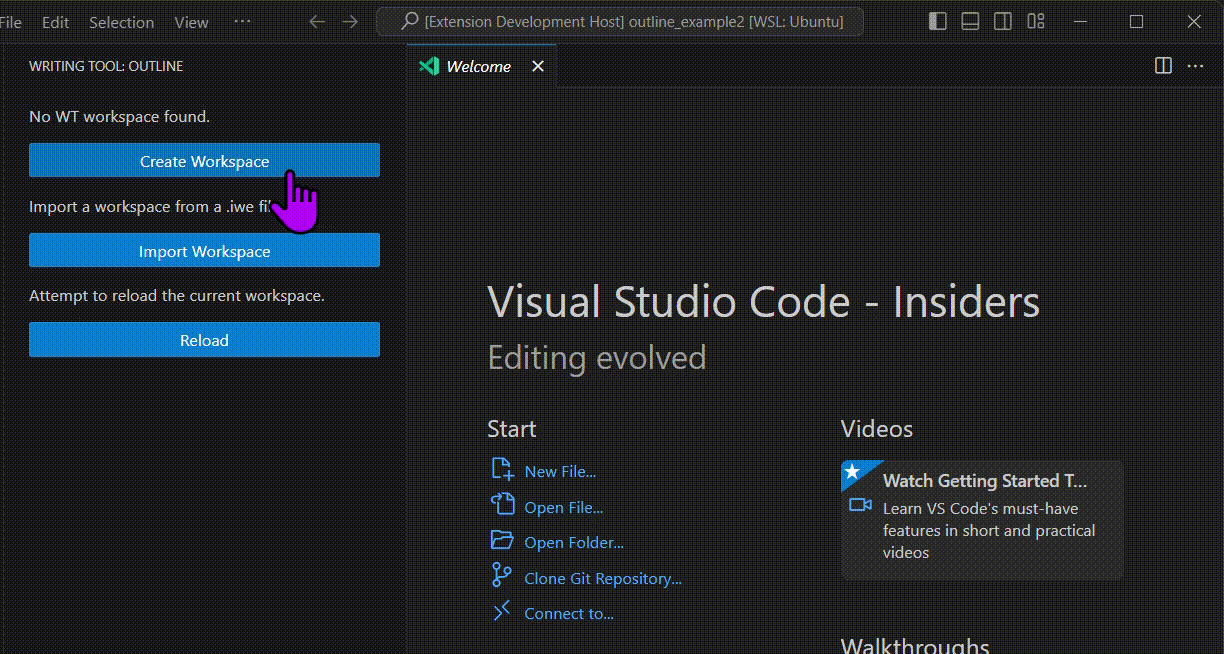
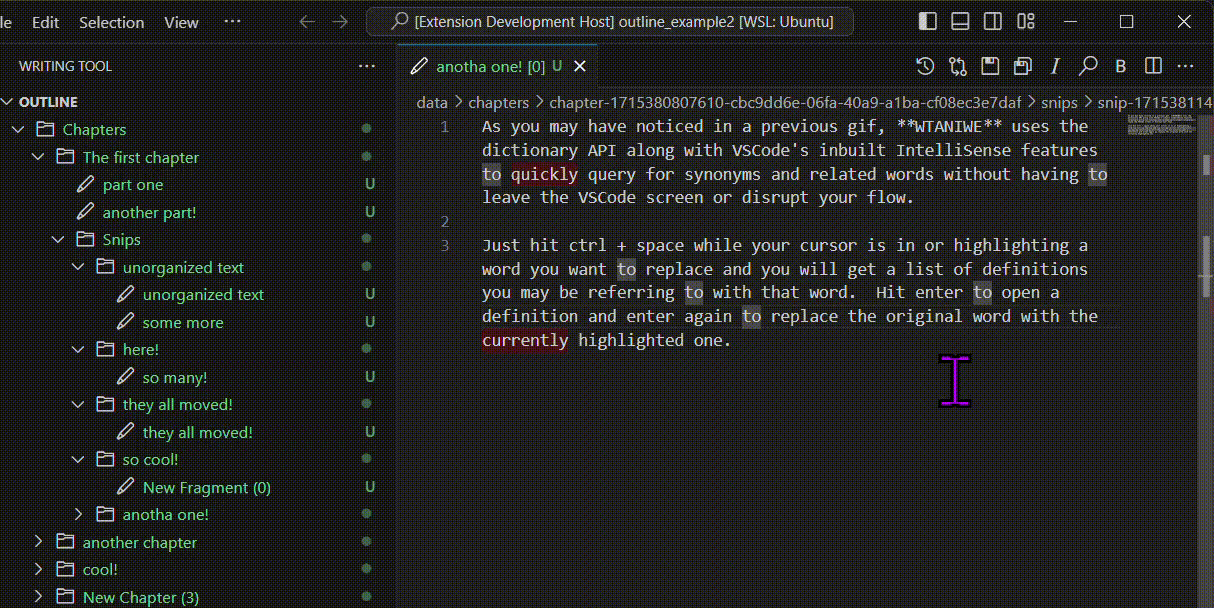
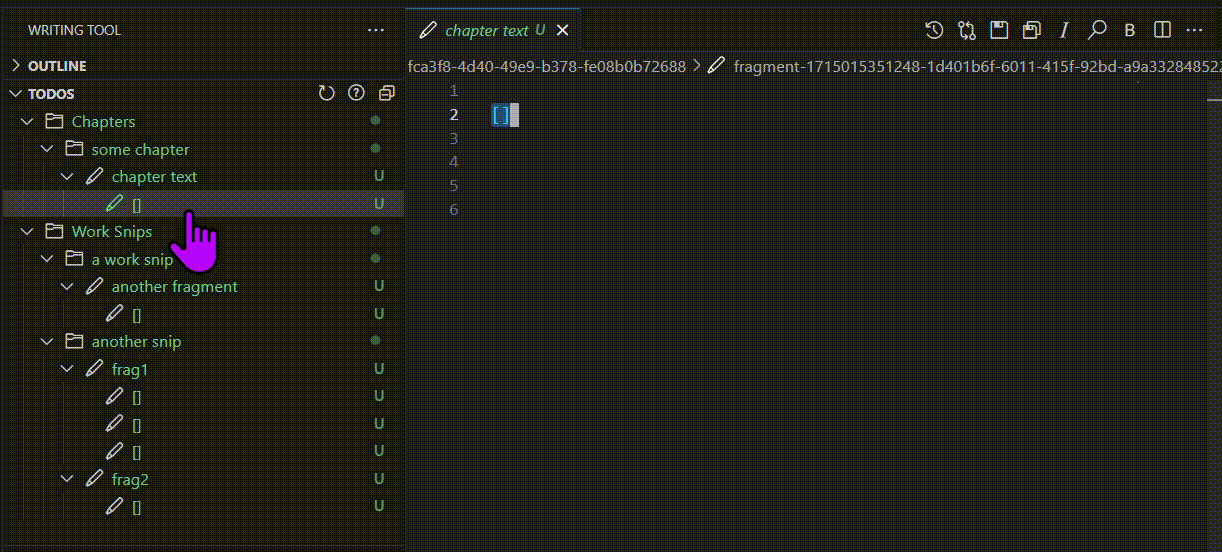
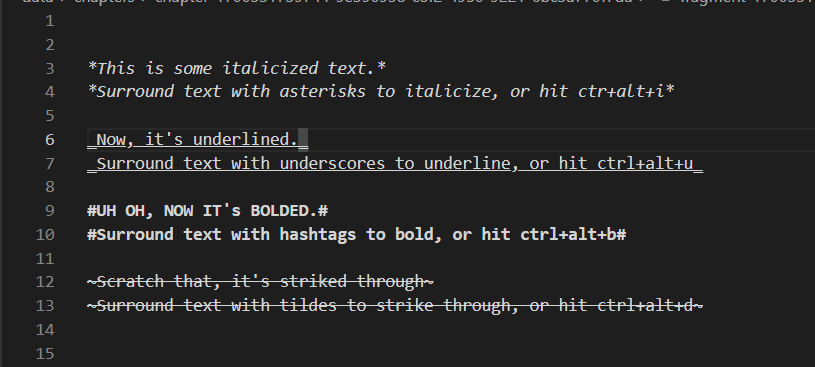
Writing Tool -- An Integrated Writing Environment (WTANIWE) READMEWriting Tool -- An Integrated Writing Environment (WTANIWE). An extension tailor made to write fiction and prose in VSCode, from start to finish including: importing old work, tracking via git, and exporting into industry formats. FeaturesGit trackingLet's be honest, Google Docs and Microsoft Word version tracking is... flimsy at best. It never seems to save a revision at the spot you wanted and it hardly ever has enough of a revision history for you to get an accurate view of the old version you're looking for. WTANIWE uses git. You probably don't need me to explain much else. Save revisions of your work how you want to, where you want to. See exact diffs between the text. Importing Work from outside sourcesIf you've gotten this far, you probably have some writing sitting in other document repositories that you don't want to entirely re-write if you switch to WTANIWE. WTANIWE offers extensive features for importing from many sources, including Once WTANIWE is installed, run the command Organized writing structureThe main reason WTANIWE was first created was to organize and name snippets of writing. With WTANIWE, you can store all writing in organized, easily namable and searchable structure very much akin to a folder structure (because it is one). There are two sections to the WTANIWE outline tree: Chapters and Work Snips. In "Work Snips" you can store snippets of text which have not yet been organized into a specific chapter yet. "Chapters", on the other hand, will store the main text of your work. In each section, you can also store folders of snips which can each store more fragments and snips. Here is an example of working with the WTANIWE outline: Some more advanced features, such as moving and ordering content: IntelliSense-based synonymsAs you may have noticed in a previous gif, WTANIWE uses the dictionary API along with VSCode's inbuilt IntelliSense features to quickly query for synonyms and related words without having to leave the VSCode screen or disrupt your flow. Just hit Here is an example: MarkDown-like styling tailored specifically to writingMore details on this below, but the basics is that WTANIWE uses MarkDown-like text styling to quickly insert obvious demarkations of stylized text. Stylizations such as *italics*, ^bolds^, ~~~strike throughs~~~, and _underlines_ (uh oh that one doesn't exist in MarkDown). TODO trackingMark areas of text you want to come back to later by surrounding "TODO" text with with square brackets. All TODOs are stored in an organized tree panel and are immediately updated when square brackets are added or removed. Only the brackets and text within brackets are shown in the TODO tree, so you are always able to return to things you've marked as TODO. Text-to-Speech[[ONLY ON WINDOWS AS OF NOW!!]] Using the debug adapter API, you can read out contents of a file with real-time tracking. The current word will be highlighted as it is spoken. You can also use breakpoints to skip to certain points in the text. CLick the speech bubble: Exporting WorkssExport work developed in WTANIWE to many standard formats such as Working with Writing Tool fragment files (.wt and .wtnote)There are two new file types introduced and mainly used in this extension, .wt fragment files and .wtnote note files. Fragment files are the main documents you will be writing in and they are meant to represent specific, named "fragments" of text. When importing outside work, all work will be converted into WT fragments. And when exporting WT into outside file types, the fragments of your project will be stitched together and converted into outside file types. WT Note (.wtnote) files have all the same advantages of .wt fragment files, but they are used only for note taking. Here are some of the tools built specifically for .wt and .wtnote files. StylingAs mentioned above, WTANIWE uses similar text styling conventions as MarkDown, however they have been modified, reduced, and tailored specifically towards writing. Specifically, I did not use the conventional MarkDown styling for .wt and .wtnote files because, honestly, there is a lot of clutter in MarkDown. WTANIWE is not here to write research papers or cleanly display code and data, it is here for writing. By eschewing the prebuilt fluff of MarkDown, it becomes easy to focus in on the necessary text styling for writing only and give the best experience for those. For example, automatically toggling styling to selected text or inserting/removing style marks at cursors, and showing the text styling on the document itself, without having to open a preview window. These are the style options:
Example: NavigationSomething no other writing editor I have tried does is custom keybindings for nevigating text, and, honestly, this is a game changer. If you've found this extension, chances are you know a thing or two about programming, and you know that navigating code with shortcuts is a blessing. So why not navigating sentences in prose in the same way? Features:
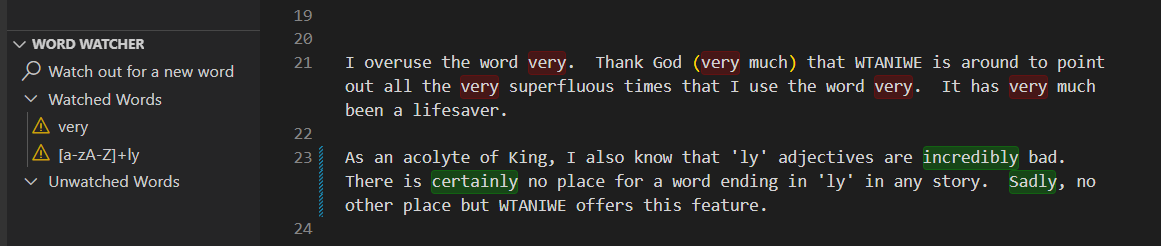
Example: DictionaryMisspelled words are highlighted in red. If you want to prevent certain words from being detected as misspelled, you can also add them to a personal dictionary. Word WatcherIf you know you have certain 'problem' words that you want to avoid, use word watching to automatically highlight all instances of that word in your text. For example, the word 'very' and all words that end with 'ly' are automatically added to the word word watched on WTANIWE workspace creation. And will be highlighted as shown. In addition, you can assign certain colors to specific watched words. To know which pattern is being matched on sight. RequirementsVSCode must be kept up-to-date for access to all features. VSCode often has the habit of introducing new features or breaking old features with their updates and I am always trying to stay ahead of the break-fix, break-fix cycle. To have a fully-functional WTANIWE experience, enable automatic updates on VSCode. Some features only function when your machine has external dependancies installed:
Extension SettingsPanels settings. Settings for showing/hiding certain panels from the UI of VSCode. NOTE: side effects/commands related to these panels will still be active, even if the panels are hidden.
Timed views settings. Settings for enabling/disabling querying of certain kinds of features. When disabled, the background process for querying these things will stop and in-document higlighting and styling will go away.
Text-to-Speech Settings. Set the speed and voice of the text-to-speech feature.
Code Mode settings.
Known IssuesThis extension is still technically in beta, even though I am confident in its general usability. It is not perfect. Multiple Actions at once:It is very rare for an action with WTANIWE to cause problems in the workspace itself, but it does happen. And, when it does happen, it's because I did too many things at once. I have been actively using WTANIWE for my own use for many months now, and in that time I have "broken" my WTANIWE workspace maybe a couple of times, and it's always been on a slower machine with huge WTANIWE workspace directories when I got impatient and started messing around with the Outline tree structure without waiting for other updates to resolve. On slower machines:On a sufficiently slow machine with a sufficiently large WTANIWE Outline tree, you may experience slowness. I am actively working to combat this, but it's difficult. WTANIWE is a large extension which uses Javascript -- a very slow language -- as its main driver, so there is a limit to how much you can do. For reference, I use a huge WTANIWE workspace with hundreds of fragment files floating around the directory tree on a very old ThinkPad and it functioned fine for months before I experienced significant slow down. My recommendations:
Release Notes0.1.0
Enjoy! |