Shellscript Language Server


This README aims to provide a guide for contributing language features to this Language Server and to document some aspects of its inner workings.
If starting a new Language Server from scratch, see Getting started. If you want to add a feature to this language server instead go to Implementing new features.
Getting Started
Clone the repo this project is based on: minimum-viable-vscode-language-server-extension
Replace items in package.json marked REPLACE_ME with text related to the extension
- Name
- Description
- Author
- Publisher
Do the same for client/package.json
- Name
- Descripton
- Author
- Publisher
- Github repo link
Do the same for server/package.json
- Name
- Descripton
- Author
- Github repo link
Do the same in client/src/extension.ts
- language-server-id
- language-server name
OPTIONAL: Remove dependencies in server/package.json and leave server.ts empty if you want to develop it from scratch, without VS Code types (recommended)
Run npm install from the repo root.
Scripts
Run these from the repo root with npm run <script>:
| Script |
Description |
compile |
Compile TypeScript for client + server |
watch |
Rebuild on save |
lint |
Run ESLint on all TypeScript source files |
format |
Auto-format all TypeScript source files with Prettier |
format:check |
Check formatting without writing changes (used in CI) |
To make it easy to get started, the language server will run on every file type by default. To target specific languages, change
package.json's activationEvents from
"activationEvents": [
  "onLanguage"
],
to something like
"activationEvents": [
  "onLanguage: <your-language>"
],
And change the documentSelector in client/src/extension.ts to replace the * (e.g.)
documentSelector: [{ scheme: "file", language: "<your-language>" }],
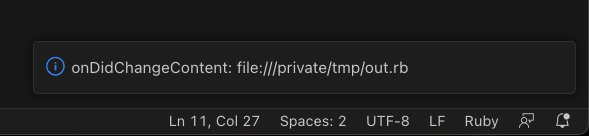
To help verify everything is working properly, we've included the following code in server.ts after the onInitialize function:
documents.onDidChangeContent((change) => {
  connection.window.showInformationMessage(
    "onDidChangeContent: " + change.document.uri
  );
});
From the root directory of this project, run code . Then in VS Code
Build the extension (both client and server) with ⌘+shift+B (or ctrl+shift+B on windows)
Open the Run and Debug view and press "Launch Client" (or press F5). This will open a [Extension Development Host] VS Code window.
Opening or editing a file of the chosen language in that window should show an information message in VS Code like you see below.
Edits made to your server.ts will be rebuilt immediately but you'll need to "Launch Client" again (⌘-shift-F5) from the primary VS Code window to see the impact of your changes.
Implementing new features to this project
- Add the capability corresponding to the language feature to
server/src/methods/initialize.ts. Both the name and value of the capability related to the implemented language feature can be found in the official LSP docs inside the specification section (see information of interest below)
- Add method name and implementation to the
methodLookup record located in server/src/server.ts
- Create a file inside
methods/ named after the implemented method
- Add the newly created method to the
RequestMethod return type
- Create necessary interfaces inside the new file (or inside
interfaces/) and implement the method used on step 2. The interfaces can be extracted from the official LSP docs.
Anatomy
.
├── .vscode
│   ├── launch.json         // Tells VS Code how to launch our extension
│   └── tasks.json          // Tells VS Code how to build our extension
├── LICENSE
├── README.md
├── client
│   ├── package-lock.json   // Client dependencies lock file
│   ├── package.json        // Client manifest
│   ├── src
│   │   └── extension.ts    // Code to tell VS Code how to run our language server
│   └── tsconfig.json       // TypeScript config for the client
├── package-lock.json       // Top-level Dependencies lock file
├── package.json            // Top-level manifest
├── server
│   ├── package-lock.json   // Server dependencies lock file
│   ├── package.json        // Server manifest
│   ├── src
│   │   └── server.ts       // Language server code
│   └── tsconfig.json       // TypeScript config for the client
└── tsconfig.json           // Top-level TypeScript config
Installation and Neovim setup
The server can be installed as a standalone shell-language-server command and used by any LSP client (including Neovim). See docs/installation-and-nvim.md for packaging details, installing from npm, and Neovim configuration.
Deployment
See docs/deployment-and-updating.md for first-time VS Code Marketplace setup and how to ship updates to both the Marketplace and the npm CLI.