Skip to content
| Marketplace
Sign in
Visual Studio Code>Programming Languages>FlowerNew to Visual Studio Code? Get it now.
Flower

Flower

flowerforce

|
776 installs
| (2) | Free
Installation
Launch VS Code Quick Open (Ctrl+P), paste the following command, and press enter.
Copied to clipboard
More Info

Flower React

Flower is ad advance React library for managing state applications flows.

VS Code Plugin

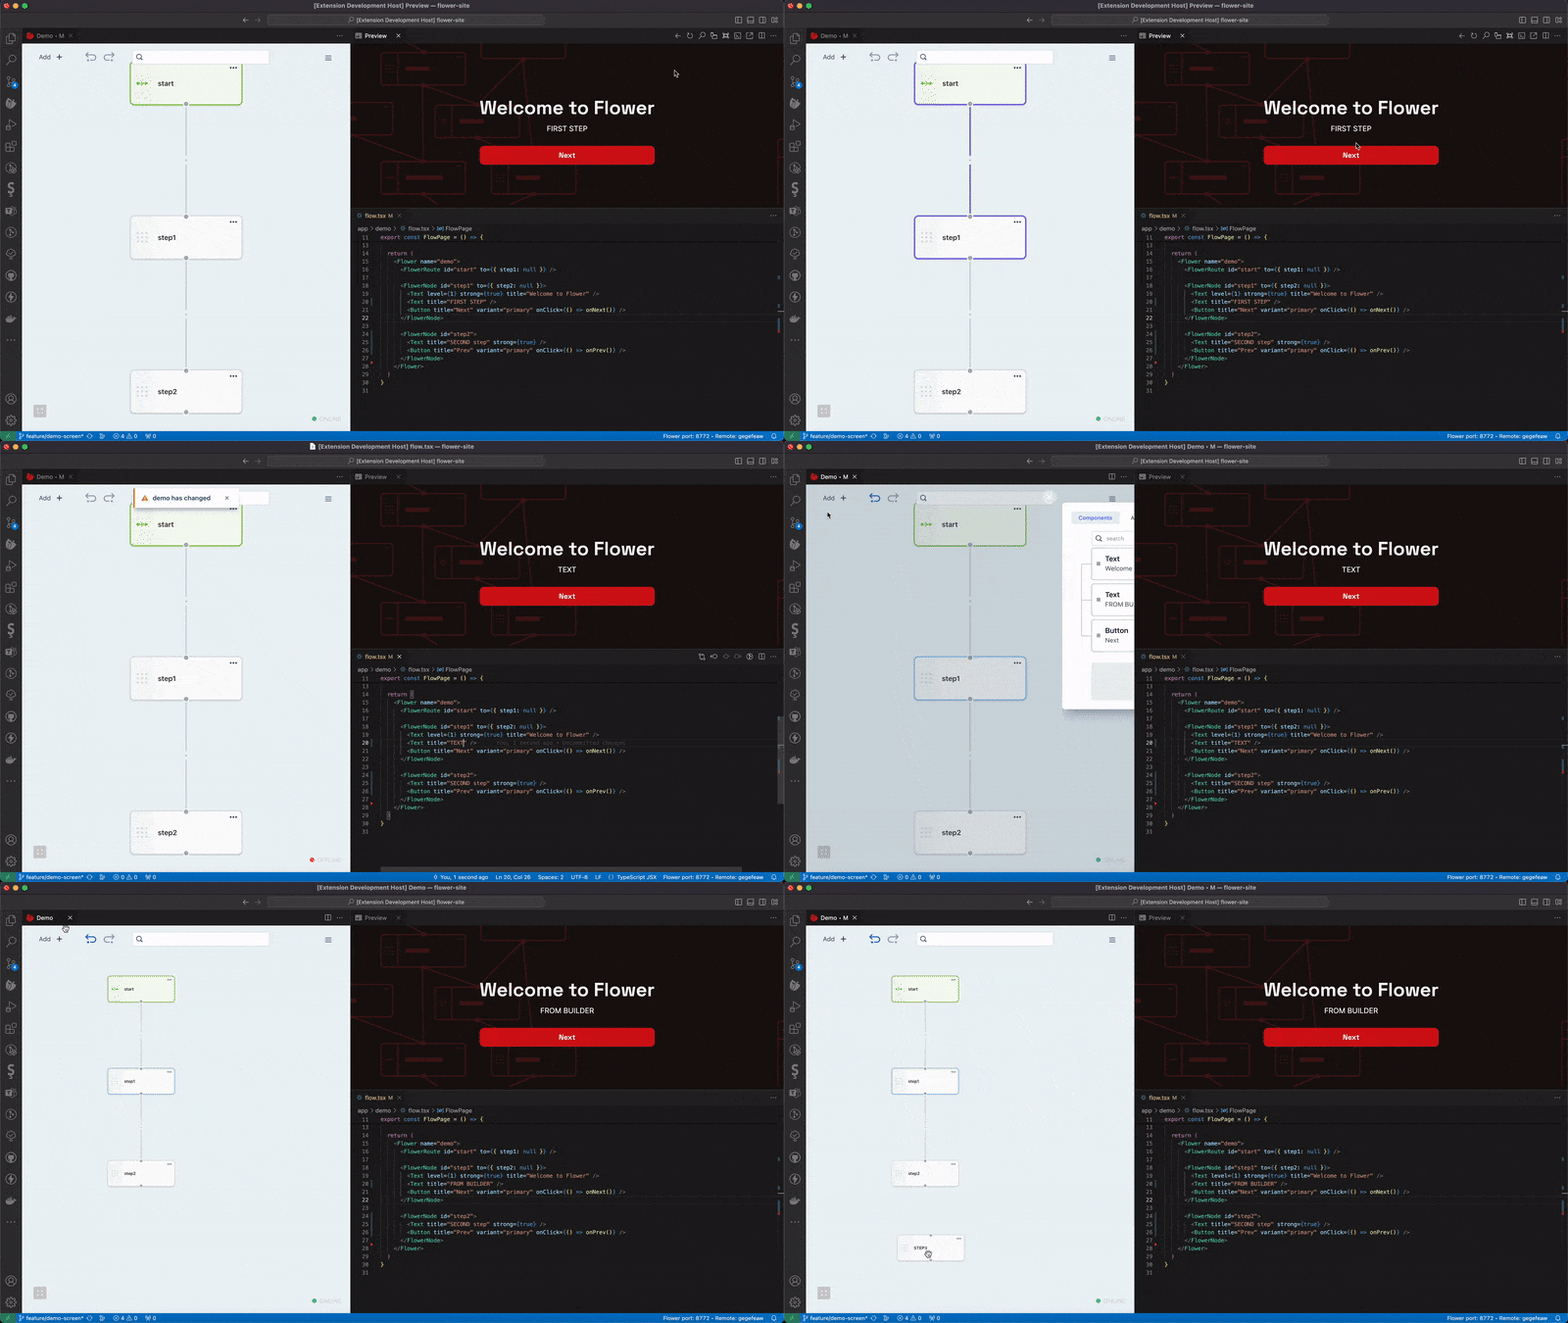
Through the VS Code plugin, it's possible to visually edit flows using a graphical editor.

Easy Editor Builder: It allows for quick code editing directly within the graphical editor.

Debugging: Highlights the current node and all previously traversed nodes in the flow.

Flower react tool

Documentation

https://www.npmjs.com/package/@flowerforce/flower-react

How to write Documentation for Flows in Flower

Flower provides an easy and smart way for organizational figures like project managers to interact smoothly with the project

It allows writing simple .md documentation files for a Flower flow by following straightforward and intuitive conventions.

NOTE: Documentation is not required in order to use all Flower functionalities, but it could be a nice and smooth solution to enhance both development and planning workflows.

This guide provides rules and conventions for creating markdown (MD) files that integrate seamlessly with the Graphic Flow Builder.

Config file to find flower components

/flower.config.json

{
  "include": ["src/**/*.{js,ts,tsx,jsx}"],
  "exclude": "**/{node_modules,asstes,lib,build,android,ios}/**"
}

File Naming and Storage

  • Each flow documentation file must follow the naming pattern: Flowname.docs.md.
  • All documentation files should be stored inside a .flower folder.

Markdown Standards for Flow Documentation

Node Definition

Nodes in the flow are defined using headers and special comments. Each node begins with a header that contains the node ID, followed by the node name and a description like:

Syntax

<!-- Node ID -->
# NODE-ID
<!-- Node Name -->
## NODE-NAME
<!-- Node Description -->
Node description

Example:

<!-- Start node -->
# START
## NODE-NAME
start

Edges Between Nodes

Edges between nodes are defined using an arrow (- ->) syntax. Optionally, you can add a description for the edge by including it in parentheses (some description).

Syntax

- -> nextNode
- -> nextNode (edge description)

Example:

- -> step1
- -> step2 (edge description)

Node Applications

Nodes can contain various applications such as links, markdown content, tasks, code, and JSON data. Each application is defined with a header (### [tabname]) and followed by the respective content.

Link Tab

### appName
[link](https://example.com)

Markdown Tab

### markdown
some textual content here

Tasks Tab

### tasks
- [x] task1 - [link](https://example.com/task)
- [ ] task2

Code Editor Tab

    ### code
    ```js
    // JavaScript code here
    console.log('Hello, world!');
    ```

JSON Editor Tab

    ### code
    ```json
    {
        "key": "value",
        "number": 42
    }
    ```

Full Example

Below is a complete example of a flow documentation file.

  # step
  ## START1
  start

  - -> step1

  # step1
  ## STEP1
  step 1

  - -> step2 (to aaaaa)

  ### code editor tab
    ```js
    const a = 19
    const b = 23

    const sum = (a,b) => a + b

    sum (a, b)
    ```

  ### Tasks tab
  - [x] task 1 - [link](https://figma.com/task_1)

  - [ ] task 2

  ### markdown tab
    ```
    some text here
    ```

  ### url tab
  [link](https://figma.com)

  ### mock editor tab
    ```json
    {
    "data": 10,
    "name": "mario"
    }
    ```

  # step2
  ## TITOLO STEP 2
  step 2

  - -> success
  - -> error (testasgdasgduasuduag)

  ### Tab name
  - [ ] task 2 

  # success
  step 3

  - -> step-test

  # error
  step 4

  - -> step-test

  ### figma
  [link](https://figma.com)

  # step-test
  step-test

By following these conventions and examples, you can create documentation that integrates effectively with the Graphic Flow Builder, ensuring clarity and consistency in your flow descriptions.

  • Contact us
  • Jobs
  • Privacy
  • Manage cookies
  • Terms of use
  • Trademarks
© 2025 Microsoft