DevCPC for VS Code
VS Code extension to work with DevCPC projects from inside the editor.
macOS · Linux · WSL — Windows native is not supported.
What It Includes
- Project Setup view (DevCPC activity bar, left sidebar):
- Open an existing project folder
- Create a new DevCPC project with a guided wizard
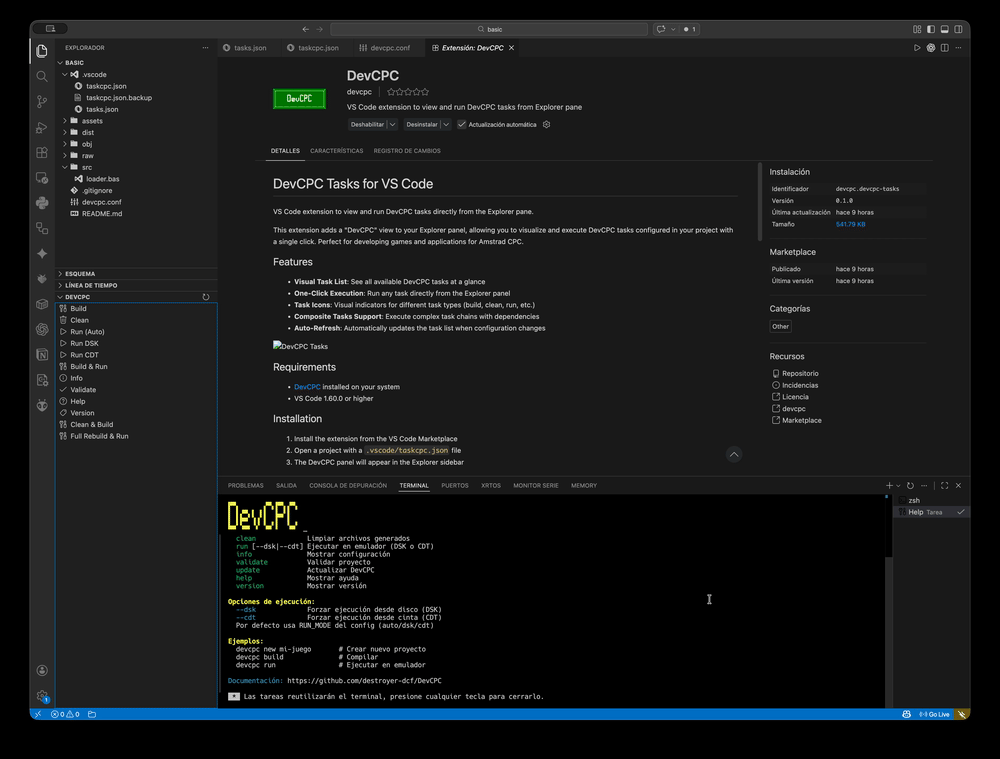
- DevCPC tasks view (Explorer): run tasks defined in
.vscode/taskcpc.json
- Retro Virtual Machine (RVM) launcher: launch RVM for a specific CPC model directly from the editor toolbar
Requirements
- DevCPC CLI
- VS Code
1.60.0 or higher
- macOS, Linux or WSL
Installation
- Install the extension from the Marketplace or from a
.vsix file.
- Open a folder that contains a DevCPC project, or create one from the
Project Setup sidebar.
- Add
.vscode/taskcpc.json to your project to enable task execution from the Explorer panel.
The DevCPC icon in the VS Code activity bar (left sidebar) opens the Project Setup panel. It provides two actions:
Open existing project
Click Pick a folder to browse for an existing DevCPC project directory. A dialog will ask whether to open it in the current window or in a new VS Code window.
Create a new project
Click Create New Project to open the creation wizard as a side panel. Fill in:
| Field |
Description |
| Project name |
Name of the new project directory |
| Project type |
Template to use (e.g. Basic, C, …) |
| CPC model |
Target machine: 464, 664 or 6128 |
| RVM path (optional) |
Path to the Retro Virtual Machine executable |
| Destination folder |
Where the project will be created |
Once confirmed, the CLI scaffolds the project and the extension offers to open the generated folder immediately.
Task Execution — Explorer Panel
The DevCPC section in the Explorer panel lists all tasks defined in .vscode/taskcpc.json. Click any task to run it in the integrated terminal.
Example taskcpc.json:
{
  "version": "2.0.0",
  "tasks": [
    {
      "label": "DevCPC: Build",
      "type": "shell",
      "command": "$HOME/.DevCPC/bin/devcpc",
      "args": ["build"],
      "presentation": {
        "reveal": "always",
        "panel": "shared",
        "focus": false,
        "clear": true
      },
      "problemMatcher": []
    },
    {
      "label": "DevCPC: Run",
      "type": "shell",
      "command": "$HOME/.DevCPC/bin/devcpc",
      "args": ["run"],
      "problemMatcher": []
    }
  ]
}
Composite tasks with dependsOn / dependsOrder are fully supported.
Retro Virtual Machine (RVM) Launcher
A menu in the editor toolbar (▶ DevCPC → Emulador → Retro Virtual Machine) lets you launch RVM for a specific CPC model without leaving VS Code.
How to use
- Configure the path to the RVM executable in VS Code settings (
devcpc.rvm.path).
- Open any file inside a DevCPC project.
- Click the ▶ button in the editor title bar and navigate to DevCPC → Emulador → Retro Virtual Machine.
- Choose the target model: 464, 664 or 6128.
The extension will:
- Optionally terminate any running RVM instance (see
devcpc.rvm.killExistingInstance).
- Spawn RVM as a detached, fire-and-forget process with the
-b=cpcXXX argument.
VS Code Settings
| Setting |
Type |
Default |
Description |
devcpc.rvm.path |
string |
"" |
Absolute path to the RVM executable |
devcpc.rvm.killExistingInstance |
boolean |
true |
Terminate any running RVM instance before starting a new one |
devcpc.software.installPath |
string |
"" |
Absolute path to the DevCPC software installation directory. Defaults to ~/.DevCPC if left empty |
devcpc.conf Reference
The extension reads devcpc.conf from the workspace root to drive emulator and runtime decisions.
# Target CPC model: 464 | 664 | 6128
CPC_MODEL=6128

# File to run after loading (omit for tape load on CPC 464)
RUN_FILE=mygame.bas

# Emulator type: integrated | rvm
EMULATOR_TYPE=rvm
Issues
Report issues at: https://github.com/destroyer-dcf/devcpc-vscode-ext/issues
License
MIT