Datus Studio
Datus Studio is the official VS Code extension for Datus-agent.
It brings Datus's AI-powered data engineering into the editor you already use:
chat with your data, generate and run SQL, browse your catalog and context,
orchestrate SubAgents, and visualize results with AI charts — without leaving
VS Code.
The extension is a thin client. Every capability is served by a running
Datus-agent Web Server, so models, datasources, metadata, context, and
subagents all come from the same Datus instance you connect to.
Features
- Chat — natural-language Q&A that generates SQL, calls tools, and returns
Markdown / tables / links. Switch SubAgent, datasource, and Plan mode inline,
and resume past sessions per project.
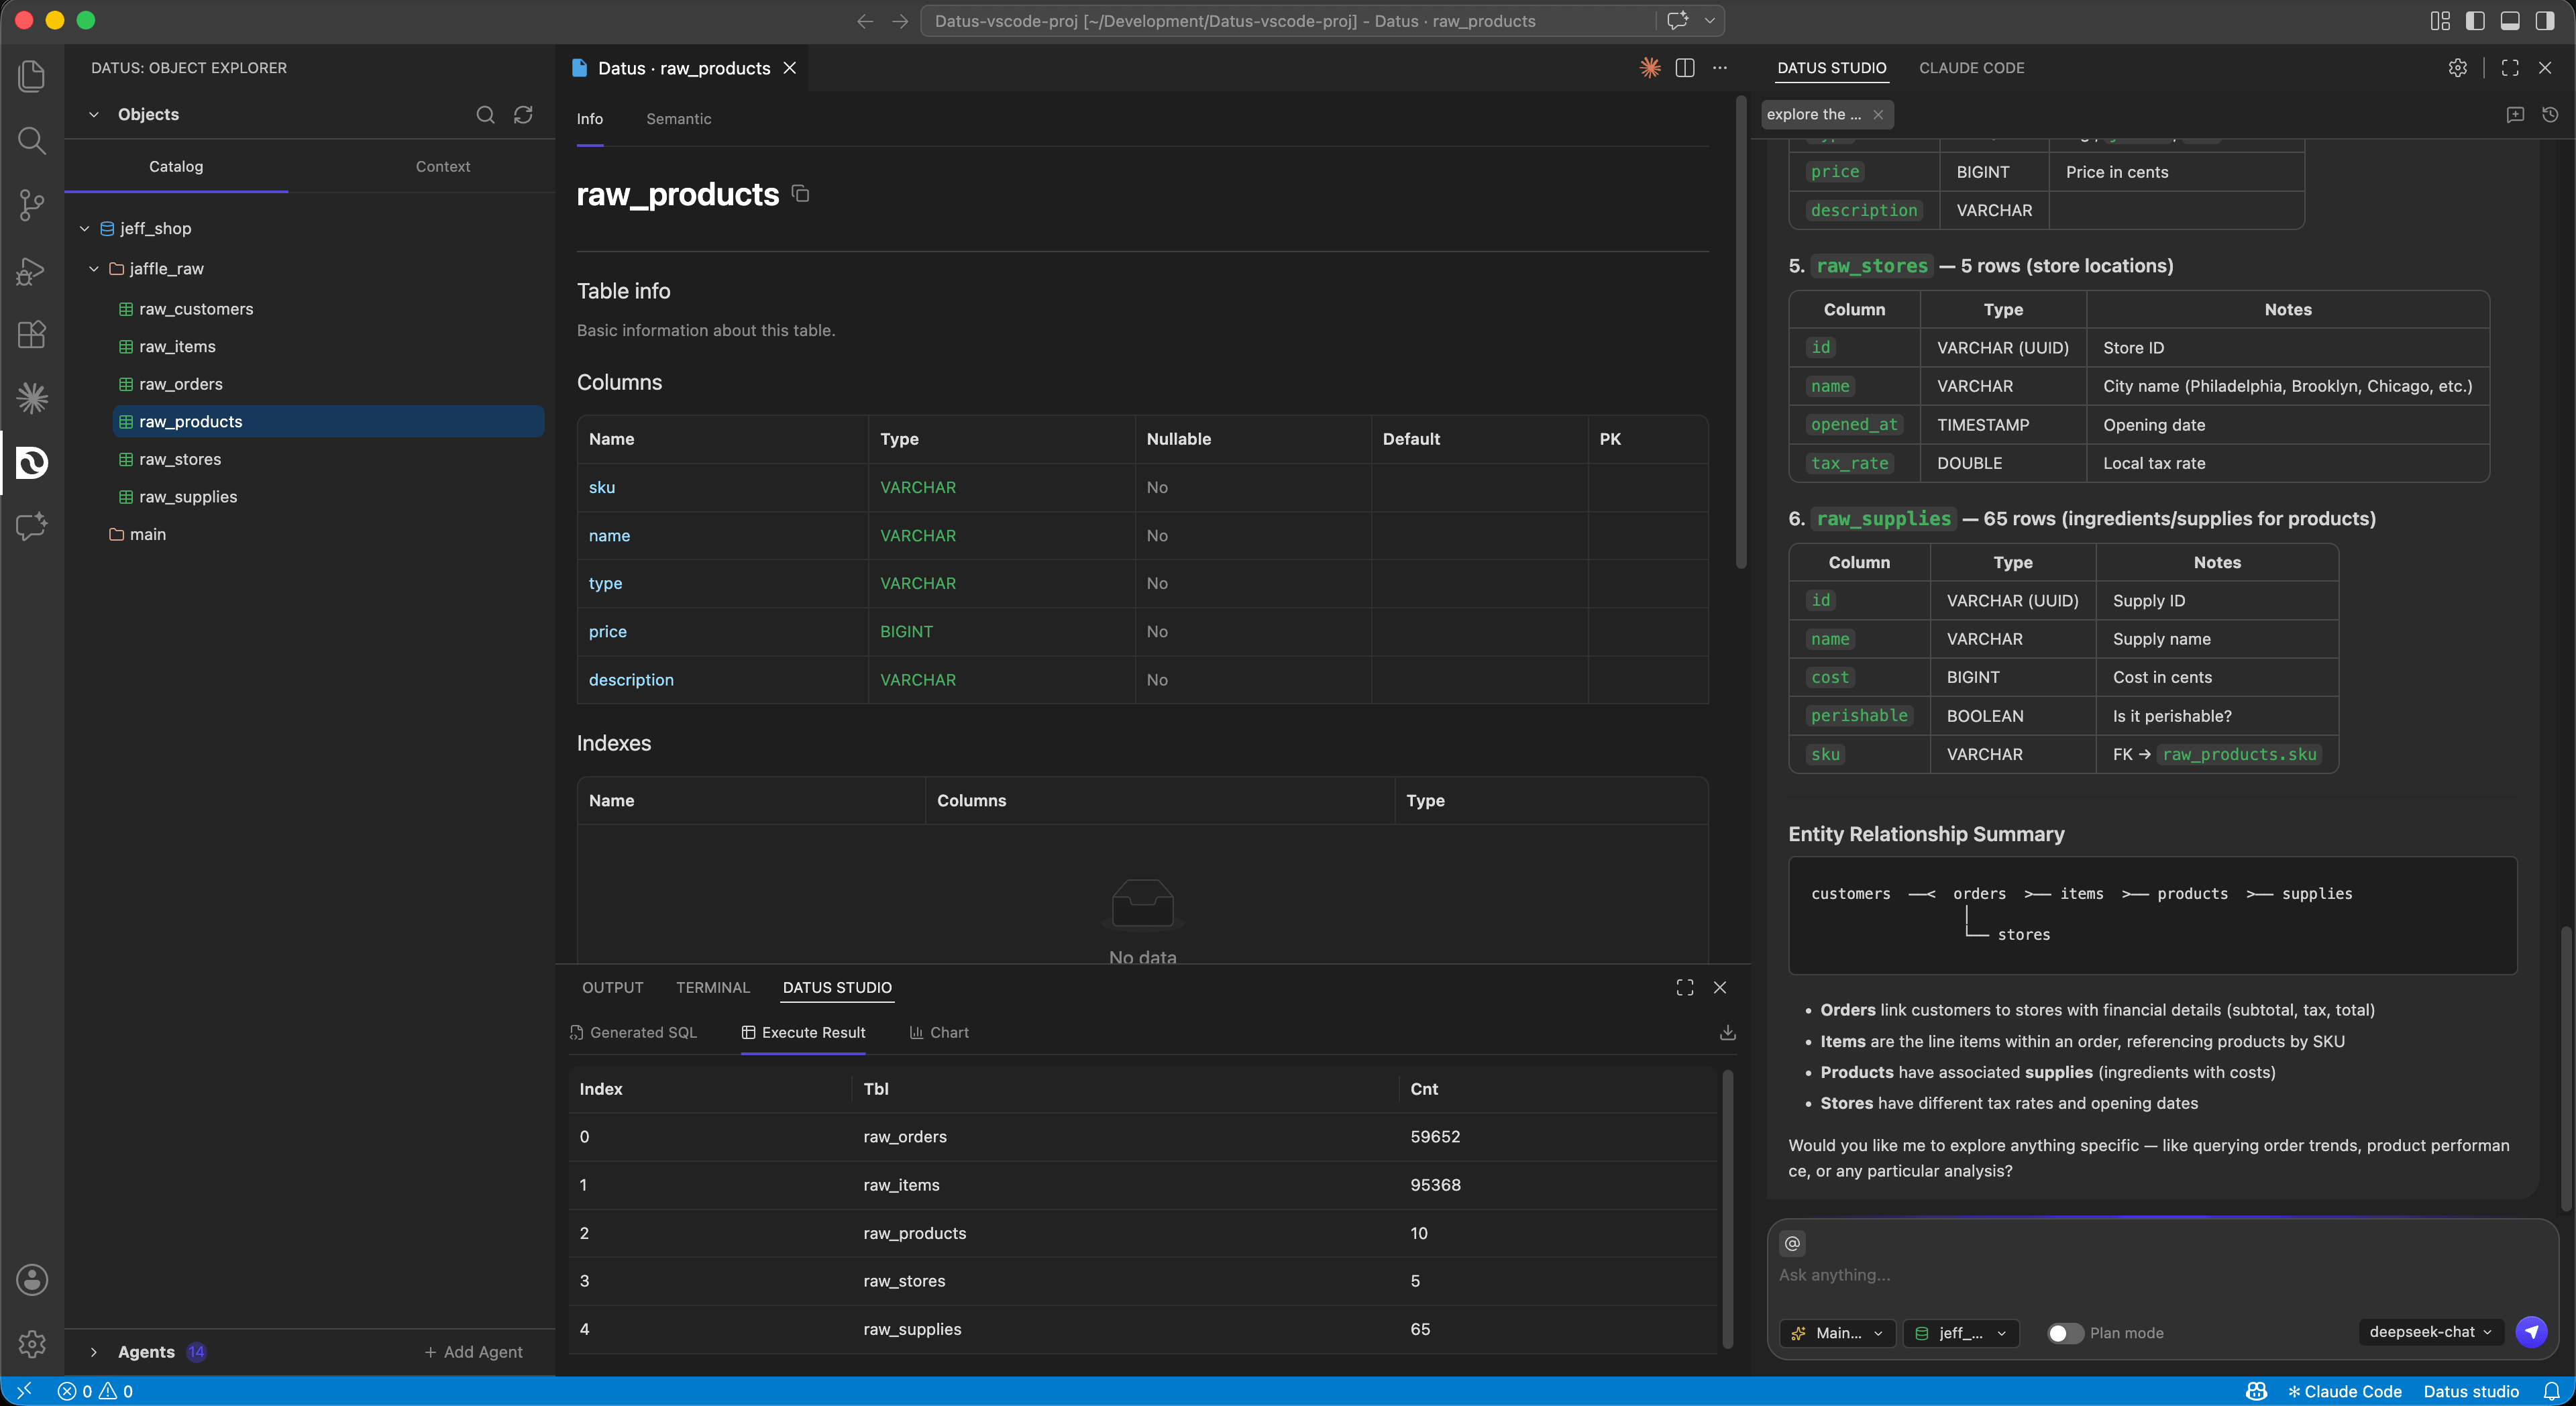
- Object Explorer — a Catalog tree (
database → schema → table, with a Table
Info view for columns, indexes, and sample data) and a Context tree
(Metrics / Reference / Knowledge). Reference any node from chat with @.
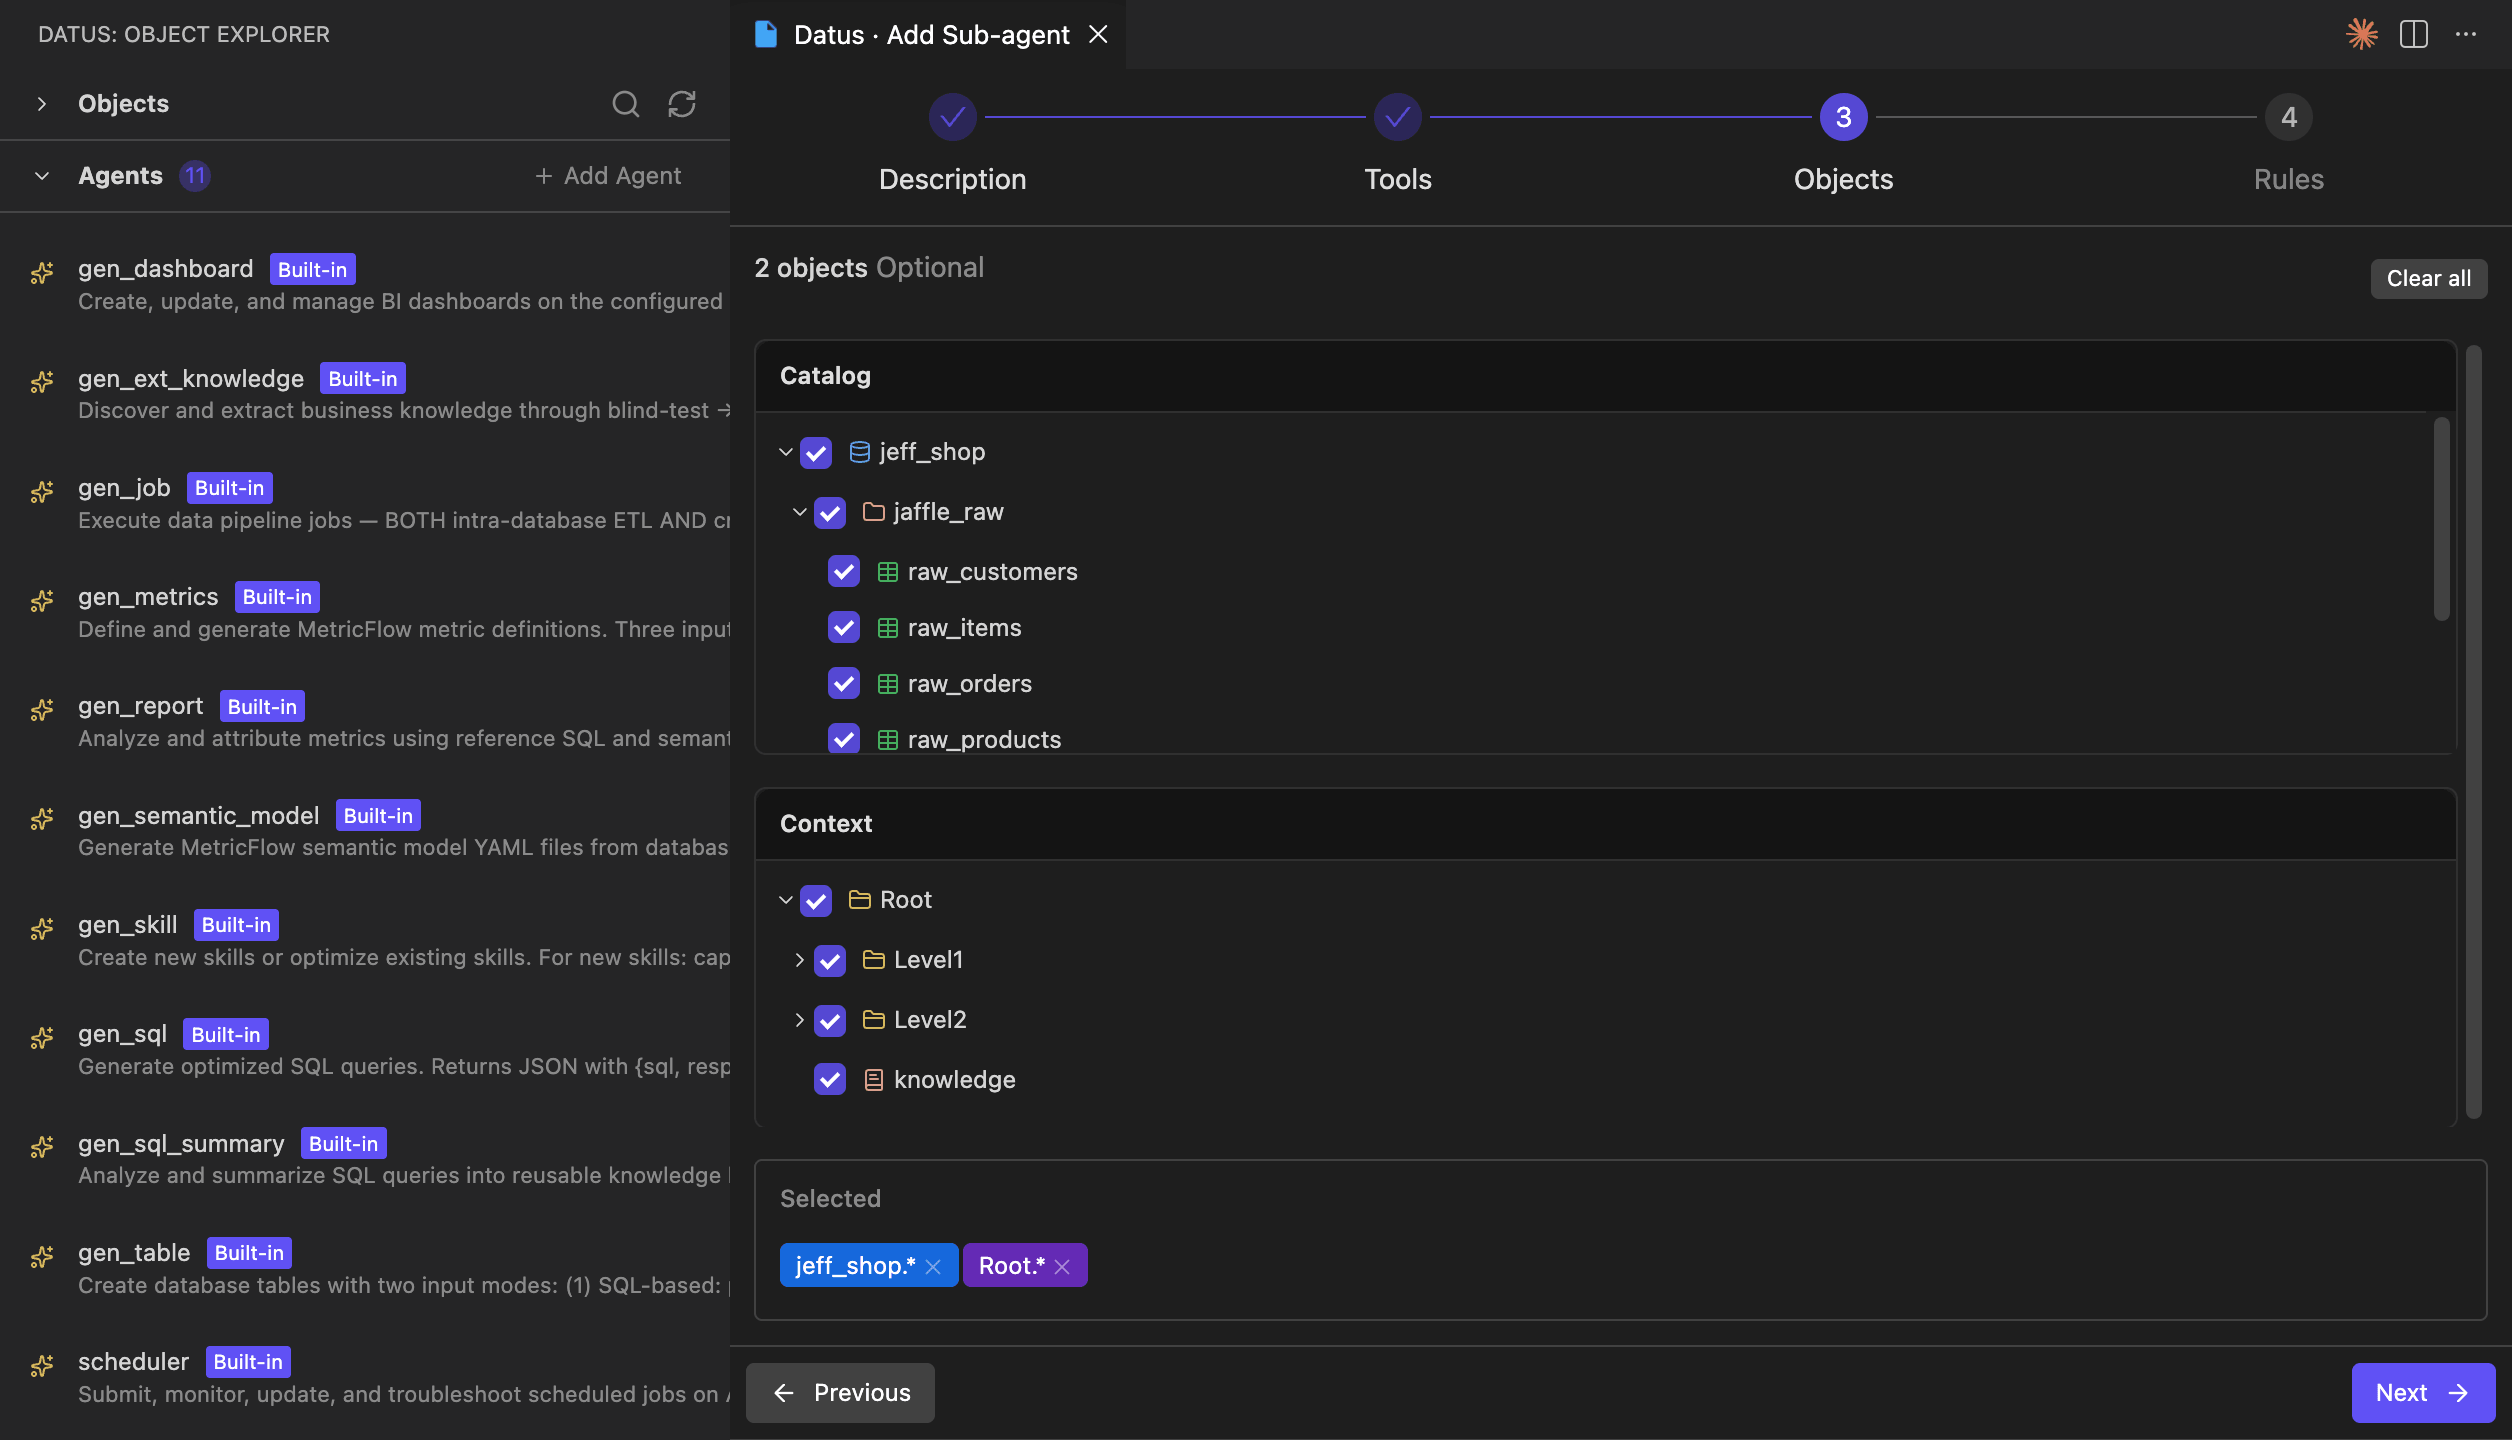
- SubAgents — create and manage subagents through a guided wizard
(Description → Tools → Objects → Rules). Built-in subagents are inspectable
and read-only.
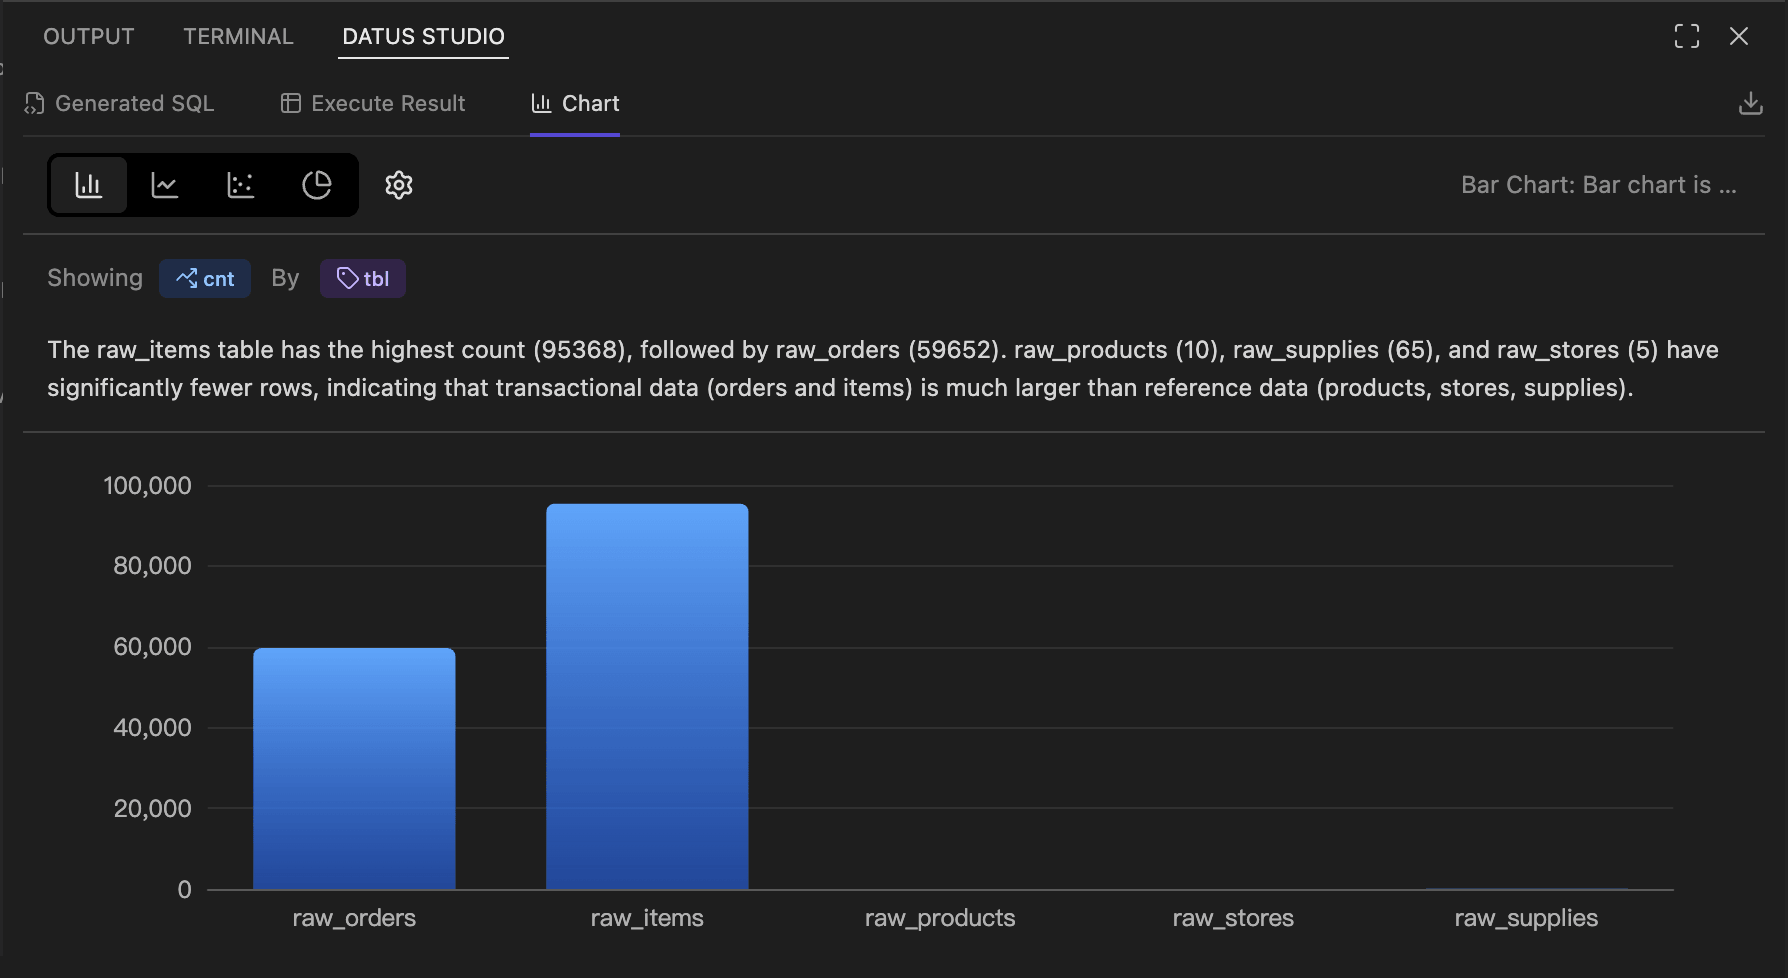
- SQL Result & AI Chart — view the generated SQL, page through results with
CSV / Excel export, and explore an ECharts-powered chart with AI-generated
commentary.
- Editor integration —
Datus: Add Selection to Chat, plus Execute SQL
and Execute selected SQL from the .sql editor context menu.
- Workspace-anchored file tools — file reads and writes performed by the
agent are intercepted and sandboxed to your open VS Code workspace.
Requirements
- VS Code
1.74.0 or newer.
- A running Datus-agent Web Server reachable over HTTP. Start Datus-agent
with the
--web flag (CLI-only mode exposes no HTTP port for the extension
to connect to).
Getting Started
1. Start Datus-agent with the Web Server
# Use a config file + datasource (recommended for project-scoped setups)
datus-cli --web --config /path/to/conf/agent.yml --datasource <your_datasource>
The terminal prints the service URL, for example http://localhost:8501.
Note it for the next step.
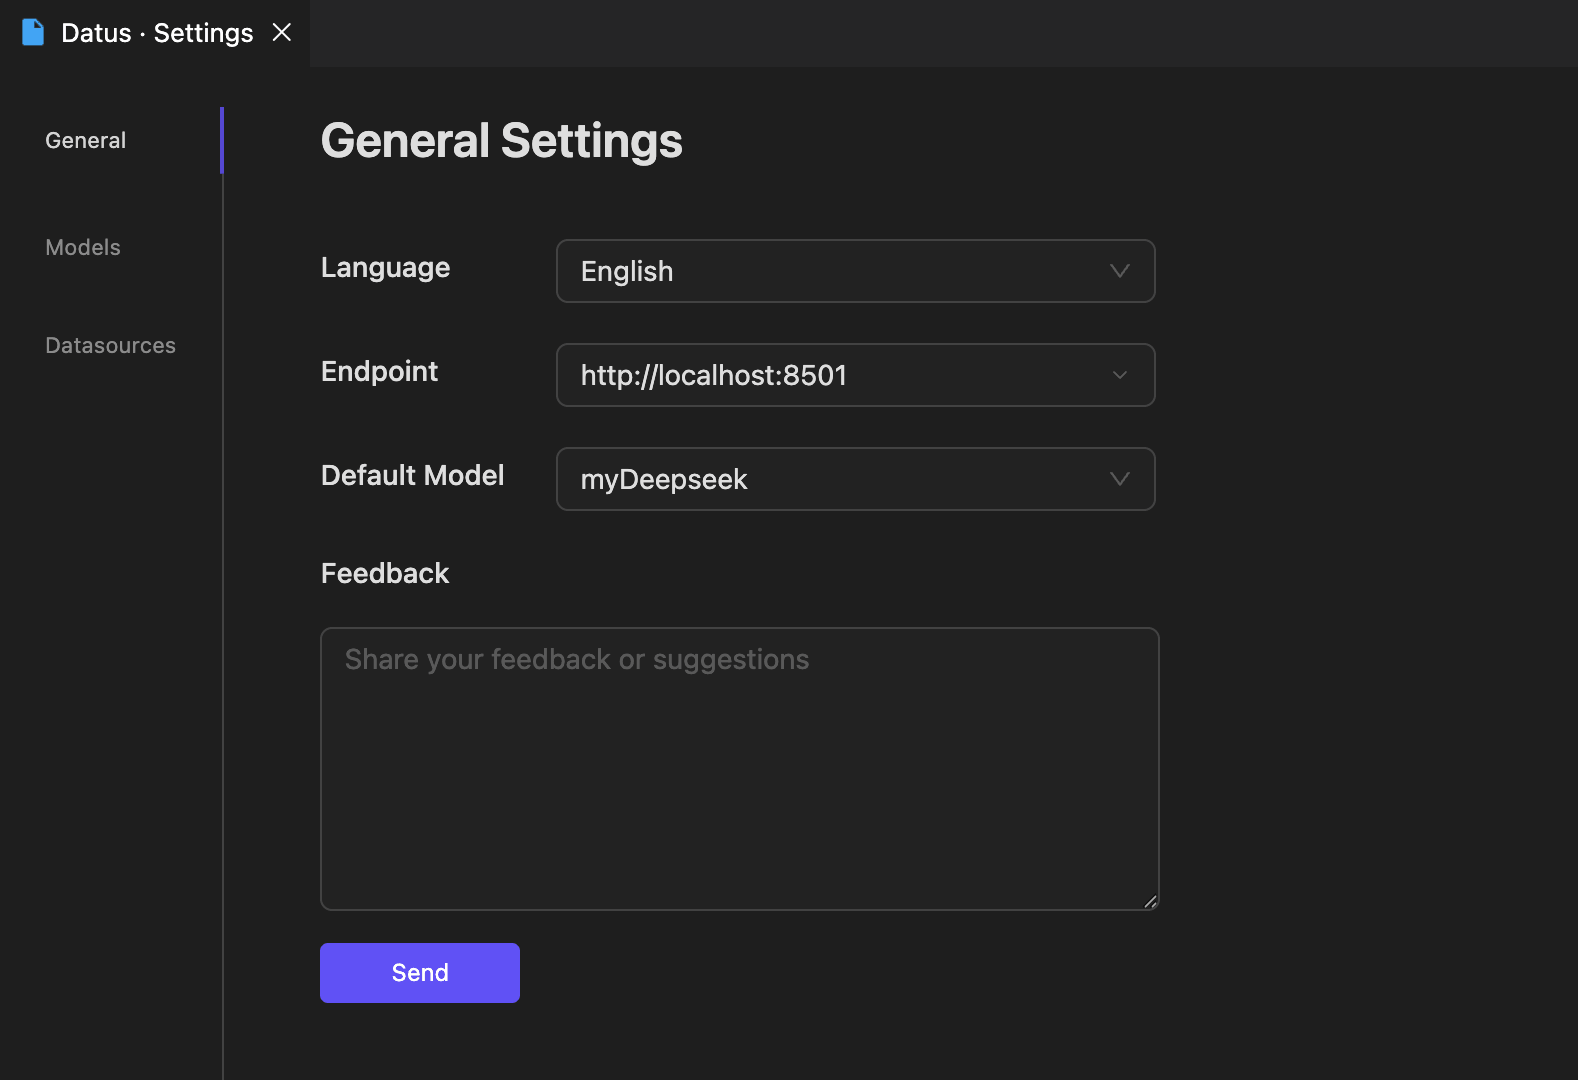
- Open the Datus Studio chat panel from the Activity Bar and click the gear
icon to open Datus · Settings.
- On the General tab, paste the URL into Endpoint (e.g.
http://localhost:8501).
- Optionally set the UI Language and Default Model (populated from the
providers configured in Datus-agent).
After saving, the extension reloads and connects. The Object Explorer fetches
the database catalog and registered subagents.
Screenshots
Create and scope SubAgents with a guided wizard:
Inspect results and AI charts side by side:
Commands
| Command |
Description |
Datus: Add Selection to Chat |
Send the current editor selection to chat as context |
Datus: Execute SQL |
Run the current .sql file |
Datus: Execute selected SQL |
Run the selected SQL statement |
Settings |
Open the Datus Studio settings panel |
Troubleshooting
- Stuck on "Disconnected" — verify the Endpoint, confirm Datus-agent was
started with
--web, and check firewall rules on remote hosts.
- Port already in use — restart with
--port <port> and update
Settings → Endpoint to match.
- Catalog has no tables — run metadata ingestion in Datus-agent
(
/init or /refresh-meta); the extension only renders what the backend
returns.
- File tools return errors — open a project via File → Open Folder…; the
tools are anchored to the open workspace and require one.
License
Proprietary. See LICENSE.md.