Ascenda IDE Extension (VS Code & Cursor)
Privacy-first extension for pairing a local developer tool installation with the Ascenda mobile app and sending AI workload telemetry events. One extension, one package identity (ascenda-one.ascenda) published to both the VS Code Marketplace and Open VSX — Cursor installs the same VSIX from Open VSX. The host is detected at runtime (packages/ide-extension-core/src/host.ts); there is no separate Cursor build.
Part of ai-engineer-tools. For what these measurements do and do not
establish, see What this measures.
What it measures
This package is the baseline IDE telemetry source for both hosts. Each row
is a named, observable event — a proxy for the input beside it, not a
measurement of it:
| Input |
What this extension actually observes |
| FocusDuration |
Session boundaries, file-save cadence (partial proxy) |
| TaskSwitchRate |
active_editor_changed events (partial proxy) |
| Interruptions |
Session end, after-hours flag |
| AIInteractionLoad |
Not yet — use Claude hooks or the Cursor MCP adapter plan |
| Verification / friction |
Terminal test/lint/build/typecheck classification, failure outcomes |
"Partial proxy" is meant literally: file-save cadence is not focus, and editor
switches are not task switches. They are the observable traces those things
leave in an editor. Whether the traces track the underlying construct is the
open question — see
What this measures.
Subjective strain (NASA-TLX-style check-ins), meeting load, and personalised
baselines are handled by the Ascenda app and backend — not this extension.
Running in Cursor
Identical telemetry to VS Code, reported with source: cursor_mcp /
toolType: cursor_mcp — detected automatically, no separate install or
config. Cursor is treated as a first-class telemetry producer for AI
engineers; for richer AI-agent signals today, also run Claude Code
hooks. Deeper agent-level capture
(prompts, tool calls, correction loops) is tracked as a separate future
surface — see CURSOR_ADAPTER_PLAN.md — not
a second editor extension.
No permission posture (autonomyMode) — on purpose
The hook adapters send an autonomyMode on their events: the posture an agent
was working under — default, accept_edits, dont_ask, bypass_permissions
and so on, each mirroring the runtime's own word — read from
Claude Code's
and Codex's
permission_mode. This extension deliberately sends no such key, and its
absence is not an oversight. Checked 28 Aug 2026:
- Its events are not agent actions. A file save, an active-editor change
and a terminal command are things a person did, or things that appeared in
a terminal with no record of who started them. There is no per-action
approval to be in a posture about, so no value would be true of the row it
rode on.
- The API surface exposes no posture. The extension targets the VS Code API
baseline in
engines.vscode and uses onDidChangeTextDocument,
onDidSaveTextDocument, onDidChangeActiveTextEditor and the terminal shell
integration events. None of them reports an approval mode, and there is no
event for "an agent was allowed to do this without asking".
- A chat auto-approve setting would be the wrong thing. A host's agent
settings are readable through
workspace.getConfiguration, and reading one
would be a mistake: it describes the configuration of a different agent
whose actions this extension never observes. Attaching it to a human's file
save would manufacture a link that does not exist, and would then pollute the
cross-collector cohort comparison the field exists to enable.
Absence is the correct wire state and is already meaningful: autonomyMode
distinguishes absent ("this runtime has no such concept") from "unknown"
("a posture arrived that we could not read"). If agent-level capture lands —
CURSOR_ADAPTER_PLAN.md — the events it adds
would be agent actions, and the question becomes live again for those events
only.
What this version provides
- Common Ascenda telemetry event types
- Privacy-safe editor activity events
- Terminal command classification where VS Code shell integration exposes execution events
- Session start/end events
- After-hours AI session signalling
- Event queue + periodic flush, with the undelivered backlog kept on disk across reloads, crashes and a failed final flush (re-sent only when
ascenda.telemetry.drainPersistedQueue is on)
- Loose-coupled pairing model:
- extension stores only
toolInstallationId
- extension stores scoped
eventWriteToken
- backend privately maps tool → anonymous app user → push device
Loose coupling invariant
The extension does not know:
- user email
- phone number
- real name
- Ascenda app user ID
- mobile push token
- organisation identity
The extension only knows:
toolInstallationId- scoped
eventWriteToken
The backend resolves:
toolInstallationId
  -> anonymous Ascenda user
  -> active app device
  -> APNs / FCM push token
Install
Requires VS Code 1.90+ or any recent Cursor.
Open the Extensions pane — ⇧⌘X (macOS) or Ctrl+Shift+X — search
Ascenda, and click Install. The publisher is ascenda-one.
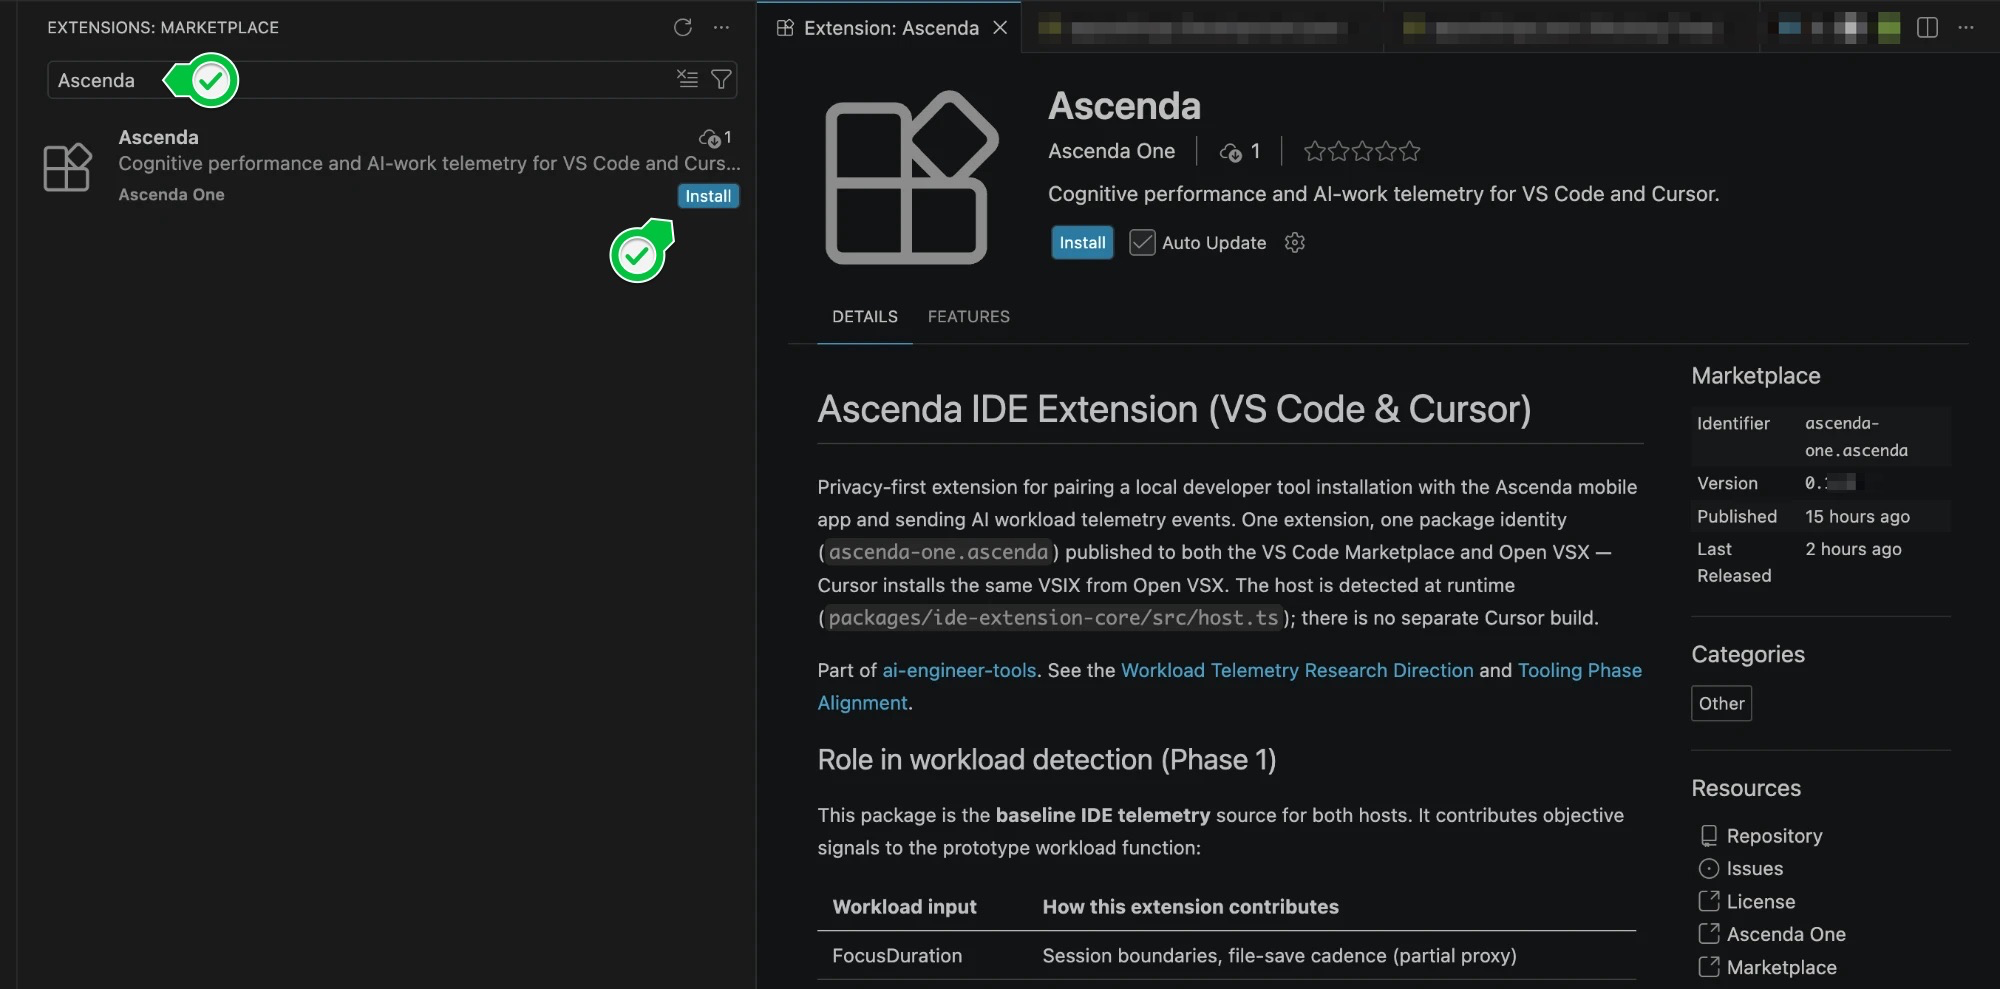
Cursor installs the same extension from Open VSX — same publisher, same build,
no separate package to choose between. From a terminal instead:
code   --install-extension ascenda-one.ascenda   # VS Code
cursor --install-extension ascenda-one.ascenda   # Cursor
On macOS neither CLI is on PATH until you run ⇧⌘P → Shell Command: Install
'code' command in PATH (Cursor has the equivalent). The Extensions pane needs
no setup at all, so it is the shorter route.
Pair
Open the Command Palette — ⇧⌘P / Ctrl+Shift+P — and run
Ascenda: Connect App.
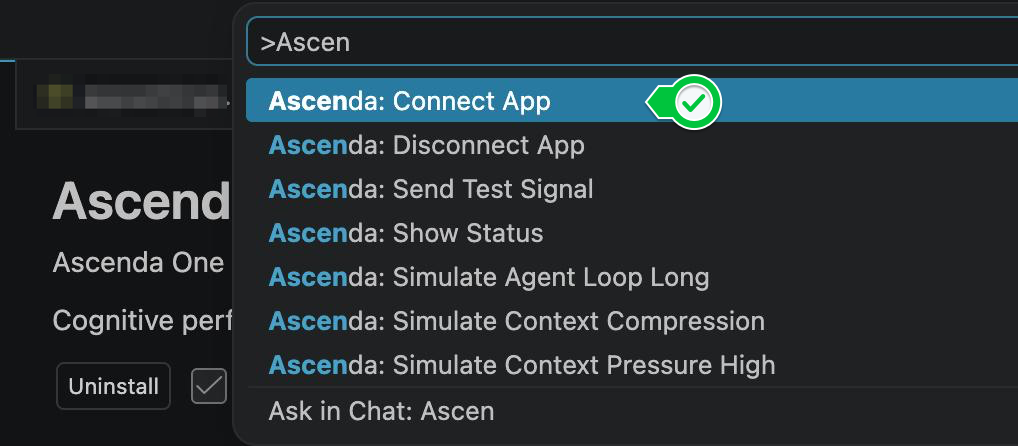
The editor shows a QR code and a six-digit code, valid for a few minutes.
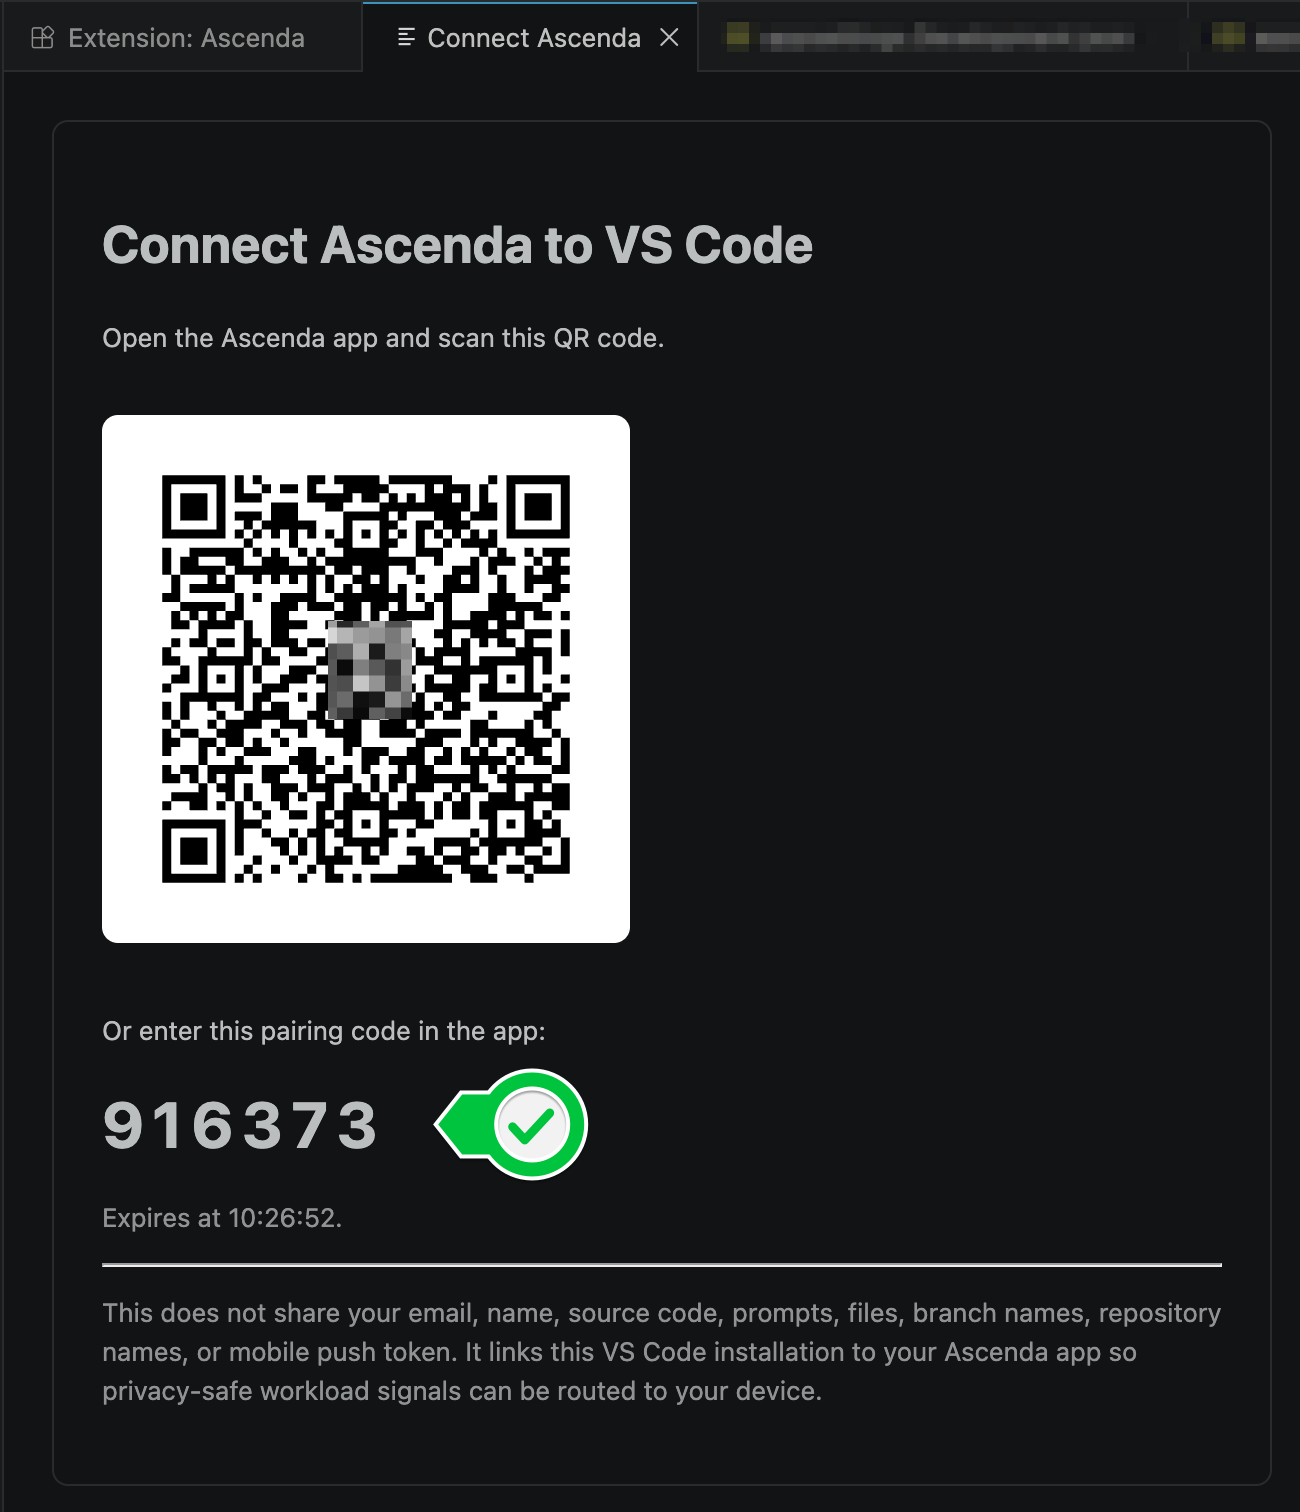
Scan the QR in the Ascenda app, or enter the code under Connections →
Ingest telemetry. On a Dev backend with no phone,
ascenda-pairing-sim stands in for the app:
ascenda-pairing-sim confirm-device-code <6-digit-code>
Confirm with Ascenda: Show Status, then send one event end to end with
Ascenda: Send Test Signal.
This pairing covers the editor. The CLI adapters — Claude Code
hooks, Codex hooks,
the MCP server — hold their own installation, paired
against the same account with one command
(npx -y @ascenda-one/claude-code-hooks pair); this extension's token stays
in the editor's private secret storage and is not shared with them. See the
repo README.
Settings
Preferences → Settings → search "Ascenda", or in settings.json:
{
  "ascenda.apiBaseUrl": "https://api.ascenda.one",
  "ascenda.telemetry.enabled": true
}
ascenda.apiBaseUrl defaults to https://api.ascenda.one and only needs
changing to reach a development backend — http://localhost:5002 for a local
build, or the Azure Dev host. Every collection toggle is listed under the same
search; all default to on and all are per-user.
Events the backend could not take — it was unreachable, the token had lapsed,
consent was paused — are kept in the extension's global storage as
telemetry-queue.json, so a window reload, a crash or a shutdown while
offline no longer discards them. Each payload carries the idempotencyKey
minted when it was queued, so re-sending a backlog that overlaps what did get
through is answered duplicate rather than counted twice. Re-sending is
behind ascenda.telemetry.drainPersistedQueue (default off, until the
deployed backend is confirmed to dedupe on that key); while off the backlog is
kept and bounded but never sent. The file is bounded by
ascenda.telemetry.queueMaxEntries and ascenda.telemetry.queueMaxAgeDays,
and every discard is written into the file's own record and to the
Ascenda Telemetry output channel, so a truncation is never silent.
Commands
| Command |
Purpose |
Ascenda: Connect App |
Start QR/code pairing |
Ascenda: Disconnect App |
Clear local token (local only) |
Ascenda: Send Test Signal |
Smoke-test ingest |
Ascenda: Simulate Context Compression |
Manual catalog event |
Ascenda: Simulate Context Pressure High |
Manual catalog event |
Ascenda: Show Status |
Paired / token / tool id |
Backend contract
See TOOL_PAIRING_API_REFERENCE.md. Tool-side routes use /v1 (not /api).
Privacy defaults
Metadata-only telemetry. Does not send source code, raw prompts, AI responses, file names, branch names, terminal output, or repository names.
May send:
- event type, timestamp, workspace hash, session ID
- language ID, file extension/type, changed line count bucket
- terminal command class (test/lint/build/typecheck/run/git/install)
- success/failure/cancelled outcome
- after-hours flag
- pairing label: editor name plus machine hostname (never a workspace or
repository name — a pairing is editor-wide, so its label is too)
Disallowed metadata keys are stripped server-side.
Not a medical device: this measures workload patterns for self-awareness, not
diagnosis or treatment, and makes no clinical claim. Collection rides the
ide_telemetry consent scope, which is revocable from the app at any time —
revoking takes effect immediately and further ingest returns 401.
Build from source
Not needed to use the extension — the Marketplace and Open VSX both ship it
built. This is here so you can read and run what is actually collecting from
your editor, which is a fair thing to want from a telemetry tool.
# from the repo root — the workspace install resolves @ascenda-one/* locally
npm install
npm run build:shared

cd ascenda-vscode-extension-telemetry
npm run compile
Debug it live. Open this folder as the VS Code workspace, press F5
(or Run and Debug → Run Ascenda Extension), and a second window opens — the
Extension Development Host — running your build. Open any project in it and the
commands above work normally. Point it at a development backend with
ascenda.apiBaseUrl so you are not writing to production while testing.
Package a VSIX.
npm install -g @vscode/vsce
npm run compile
npx vsce package --no-dependencies
code --install-extension ascenda-<version>.vsix
<version> comes from this package's package.json. Releases stamp the git tag
over it in CI without committing back, so a local build is normally numbered
lower than the published extension — check the filename vsce prints.
In Cursor, install a VSIX through Extensions → … (Views and More Actions) →
Install from VSIX…, which needs no PATH setup. Reload the editor afterwards.
Uninstall from the Extensions view like any other extension.
Roadmap
| Phase |
Scope |
| Phase 1 |
Editor + terminal signals, pairing contract alignment, consent scope on ingest |
| Phase 2 |
Copilot OTEL adapter (if available) |
| Phase 3 |
Consume backend personalised baseline deltas in status UX |
The pairing QR never leaves your machine
The QR encodes the pairing secret, so rendering it is a privacy decision, not a
display detail. It is generated in-process and inlined into the panel as SVG
(packages/ide-extension-core/src/qr.ts) — the pairing panel makes no network
request to draw it, and no image service ever receives the secret.
This was not always true: an earlier build handed the URL to a third-party QR
image endpoint, which put pairing secrets in someone else's access logs. It is
now a regression test rather than an intention — tests/qr.test.mjs includes
"the pairing secret never reaches a remote URL", so a change that reintroduced
the leak would fail the build.
Called out because "we render our own QR" is exactly the kind of claim worth
being able to check yourself: qr.ts is about sixty lines.