Shiny Diagram
Visual editor for Mermaid class diagrams. Edit the picture — Shiny writes the source.
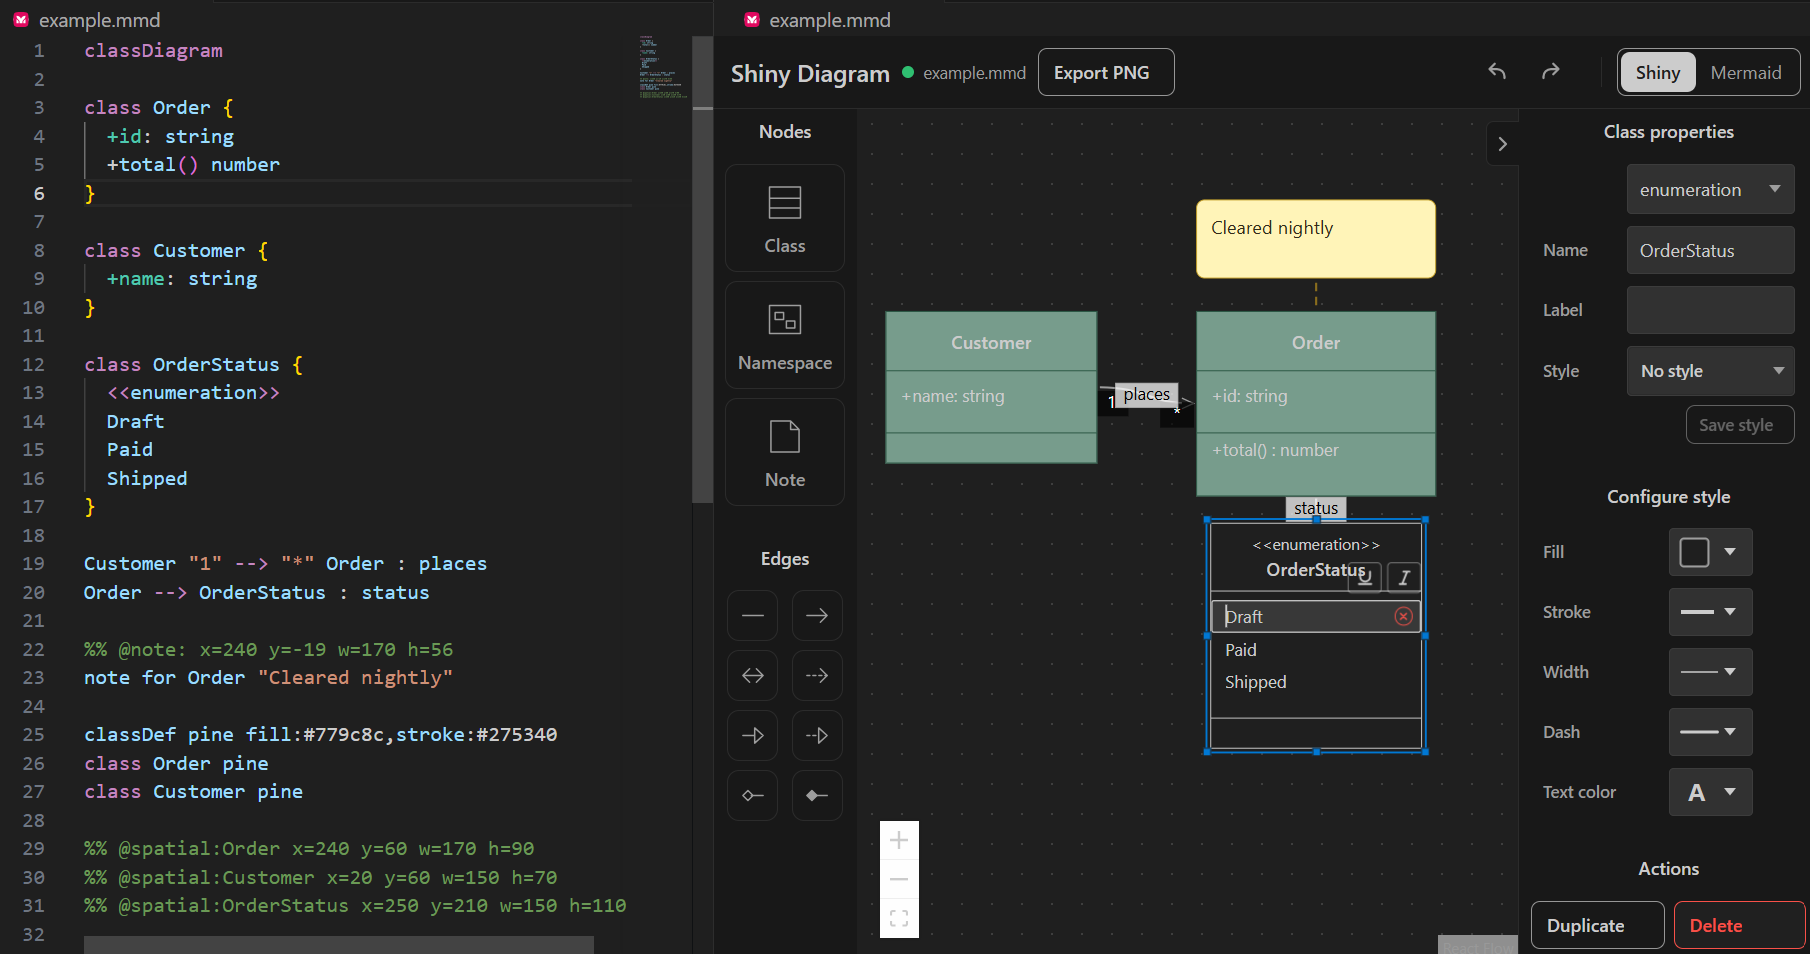
What it does
Shiny Diagram opens .mmd files in a visual editor inside VS Code. You move boxes, draw relationships, and edit text directly on the canvas. Every visual edit is written back into the Mermaid source text.
The file stays plain Mermaid. Layout and styling are stored as Mermaid comments, so the file renders anywhere Mermaid renders. There is no separate project file and no export step.
This makes the format a shared workspace for humans and AI agents. Both edit the same file: an agent through the text, you through the canvas.
Features
Shiny supports all Mermaid class diagram features, except:
- Lollipop interfaces
- Default styles
Beyond that, Shiny adds features that Mermaid itself does not have:
- Positions for class boxes and notes
- Styles for namespaces
Editor capabilities:
- Automatic layout — full layout for a new diagram, minimal-disturbance placement when elements are added.
- Autorender view — read-only preview of the same file through standard Mermaid rendering.
- PNG export.
- Native undo/redo — visual edits are text edits, so VS Code undo, redo, and dirty state work as usual.
Shiny stores its extra data as Mermaid comment lines (%%). Comments are invisible to Mermaid, so the file renders unchanged in any Mermaid tool. There are three annotation kinds. Each annotation binds to one object and carries position or style for it.
@spatial — binds to a class. Carries position and size.
%% @spatial:User x=120 y=80 w=180 h=96
The class is named after @spatial:. The entries are position (x, y) and size (w, h).
@note — binds to a note. Carries position and size.
%% @note: x=340 y=40 w=160 h=64
note for User "Cleared nightly"
Notes have no names in Mermaid, so the annotation names no target. It binds to the note statement directly below it.
@style — binds to a namespace. Carries style.
%% @style:Domain.Billing fill=#f4f0ff
The namespace is named after @style:, as a dotted path when nested. After it comes a list of property=value entries.
Getting started
Install the extension. Then take one of two paths.
Starting from scratch:
- Create an empty file with the
.mmd extension and open it.
- Click the Shiny: Open Diagram button in the editor title bar, or right-click the file and choose Open With… → Shiny Diagram.
- Place your first class from the tool pane. Shiny writes the
classDiagram header and the annotations for you.
Starting from an existing Mermaid diagram:
- Open your
.mmd file in the Shiny editor, the same way as above.
- The diagram has no Shiny annotations yet, so the classes have no positions. The editor lists them and offers Generate.
- Press Generate. It computes a layout for the whole diagram and writes the annotations into the source.
- From here, edit visually as usual.
Generate is also the repair tool for later: whenever classes are missing annotations — for example, after an AI agent adds new classes as plain Mermaid — Generate positions exactly those and leaves your existing layout unchanged.
Requirements
Release notes
See the CHANGELOG.
License
MIT