Overview Version History Q & A Rating & Review
Handlebars Navigator
🚀 Visual Studio Code extension for easy Handlebars navigation.
Features
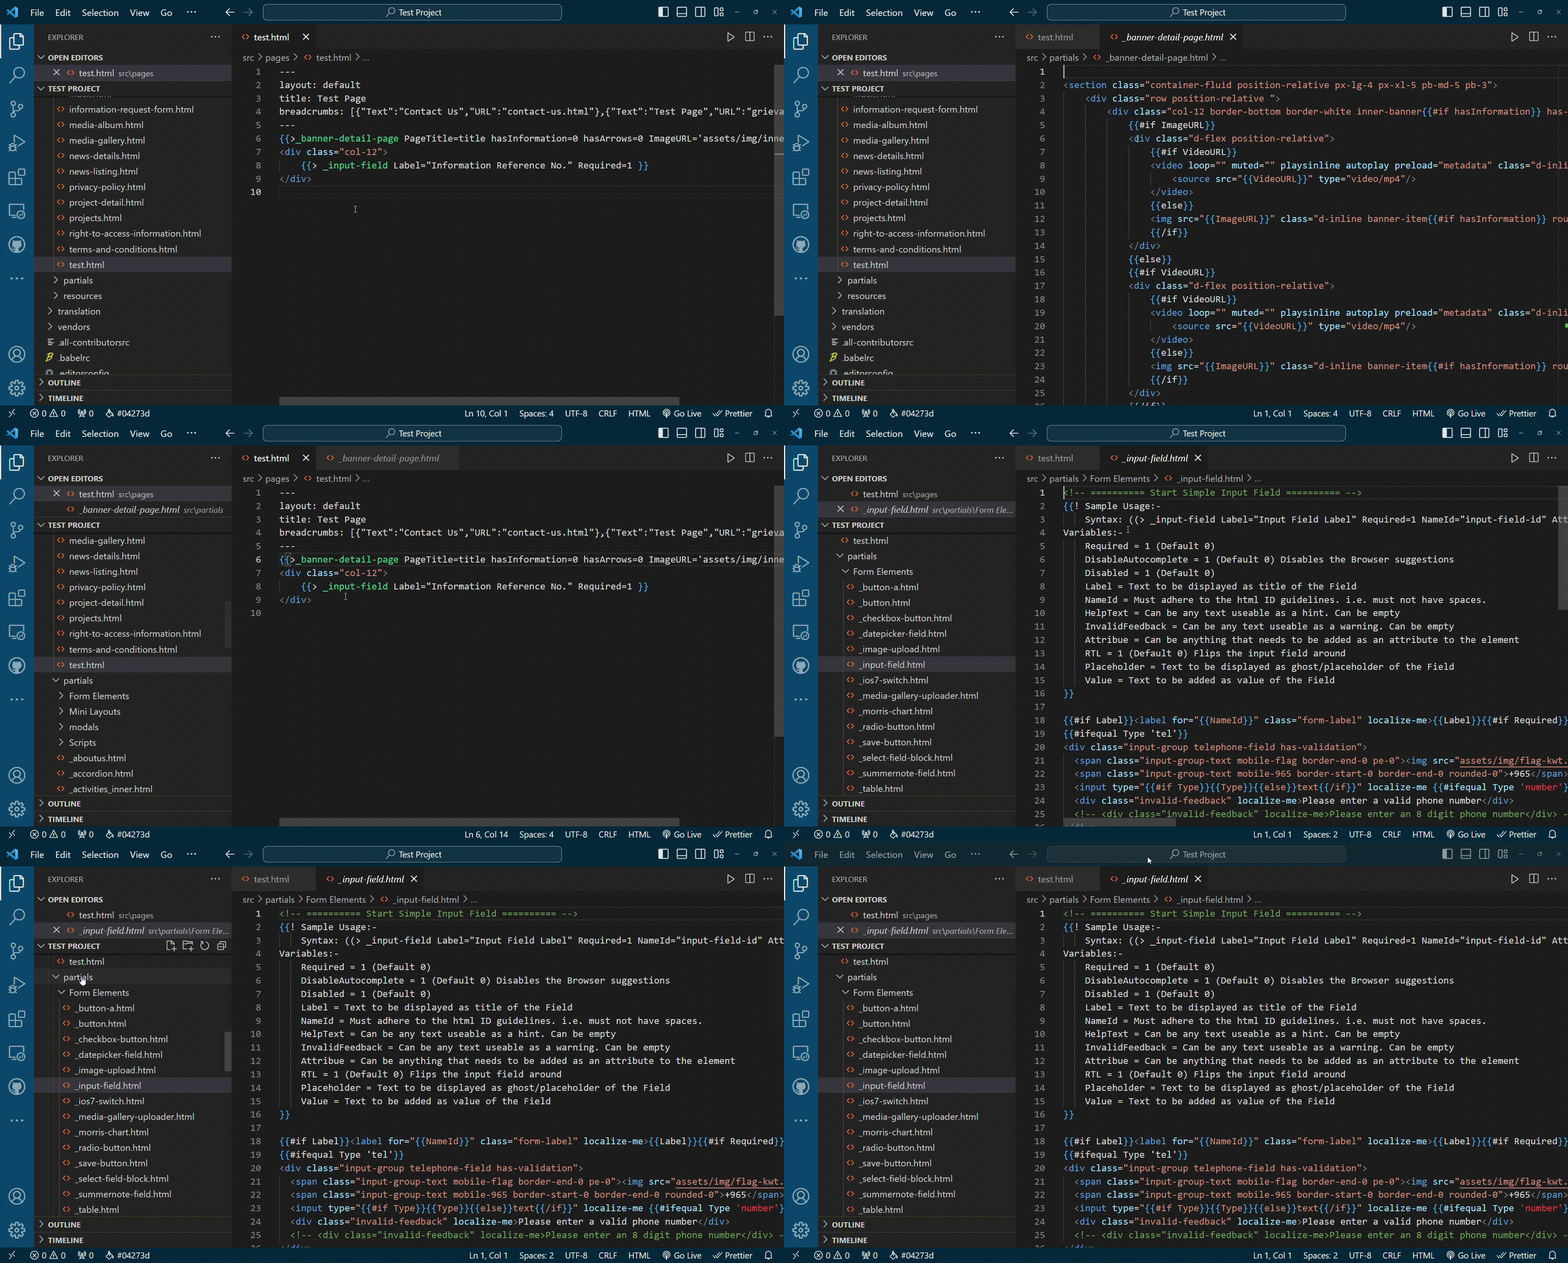
Navigate with Ease: Quickly jump to the definition of Handlebars partials, by simply CTRL + Click on the Partial. Ex: _{{>partial-name}} .
Handlebars Highlighting: Tailored support for Handlebars syntax, highlighting the handlebar mustaches and the partial names.
Installation
Open Visual Studio Code
Go to Extensions (Ctrl+Shift+X)
Search for "Handlebars Navigator"
Click Install to add the extension to your environment
Usage
Navigate to Partial Definition
Open an HTML file with handlebars in Visual Studio Code
Use Ctrl+Click on a partial. Ex: {{>_partial-name}}
_partial-name.html will be opened
Please note, Partials should exist as an html file in the "src>partials" folder. Can be any subfolders after that.
Select the lines that you would like commented
Press CTRL + SHIFT + /
Running Locally to Debug and Test
To test the extension locally in a development environment, follow these steps:
Clone the repository:
git clone https://github.com/adilasif-io/handlebars-navigator.git
Navigate to the project directory:
cd handlebars-navigator
Install dependencies:
npm install
Open file src > extension.ts
Run Debug mode by pressing F5 on your keyboard and select VS Code Extension Development
Building Locally
To build the extension locally, follow these steps:
Clone the repository:
git clone https://github.com/adilasif-io/handlebars-navigator.git
Navigate to the project directory:
cd handlebars-navigator
Install dependencies:
npm install
Build the extension:
npx tsc
Building VSIX
To build the VSIX package, follow these steps:
Clone the repository:
git clone https://github.com/adilasif-io/handlebars-navigator.git
Navigate to the project directory:
cd handlebars-navigator
Install dependencies:
npm install
Install Visual Studio Code CLI:
npm install -g @vscode/vsce
Run the packaging process:
vsce package
Contributing
Contributions are welcome! Whether you find a bug, have a feature request, or want to contribute code, please feel free to open an issue or submit a pull request.
License
This project is licensed under the MIT License .


