The official VsCode extension from Catalyst by Zoho
Features
- Project setup - Initialize a Catalyst project directory.
- Functions creation - Create new Catalyst functions.
- Client Setup - Create new Catalyst web client.
- Appsail Setup - Add AppSails to the Catalyst Project
- Local serve - Serve and test the Catalyst Functions, AppSails, Web Client and APIG rules locally.
- Deploy - Deploy the local Catalyst resources to Catalyst console (development environment).
- Pull - Pull resources from Catalyst console (development environment).
- Token operations - Generate, view and revoke the tokens that can authenticate accessing the Catalyst-CLI from a remote system.
Getting around the extension
Here we'll see the parts of the Catalyst Tools extension.
Catalyst explorer view
This view contains the Catalyst resources that are present in the local machine and allows you to perform some actions on them. This view is divided into four sections.
Catalyst Configs: Provides the options to do generalized operations.
Catalyst: This sections provides the options to perform the following operations.
Serve - Serve resources in local machine.Deploy - Deploy resources to Catalyst console (development environment)Project - To Open the Catalyst Project view.
APIG: This section provides the options to perform certain operation on the API Gateway implementation in your local machine.
Deploy - Deploy APIG rules to Catalyst console (development environment).Status - To enable or disable the APIG rules in local.
HTTP functions: Provides the options to perform certain operations on HTTP based functions. This includes Basic I/O, Advanced I/O and Browser Logic functions. This section contains all valid HTTP functions and options to perform the operations on them which includes
Add - Add new HTTP functions to the local Catalyst Project.Serve - Serve the function locally.Debug - Debug the function locally.Deploy - Deploy the specific function to Catalyst console (development environment).Delete - Delete the specific function from your local machine.
NON HTTP functions: Provides the options to perform certain operations on NON HTTP based functions. This includes Event, Cron, Job and Integration functions. This section contains all valid NON HTTP functions and options to perform the operations on them which includes
Add - Add new NON HTTP functions to the local Catalyst Project.Serve - Server the function locally (needs catalyst-inputs.json)Debug - Debug the function locally (needs catalyst-inputs.json)Deploy - Deploy the specific function to Catalyst console (development environment).Delete - Delete the specific function from your local machine.
AppSail: Provides the options to perform certain operations on Catalyst AppSails. This section contains all valid AppSails and options to perform the operations on them which includes
Add - Link/Add a new AppSail to your local Catalyst Project.Serve - Serve the AppSail locally.Deploy - Deploy the AppSail Catalyst console (development environment).
Client: Provides the options to perform certain operations on Catalyst Web Client. The options includes.
Add - Add a new Catalyst Web Client to your local Catalyst Project.Serve - Serve the Catalyst Web Client in local.Deploy - Deploy the Catalyst Web Client to Catalyst console (development environment).Delete - Delete the Catalyst Web Client from your local machine.
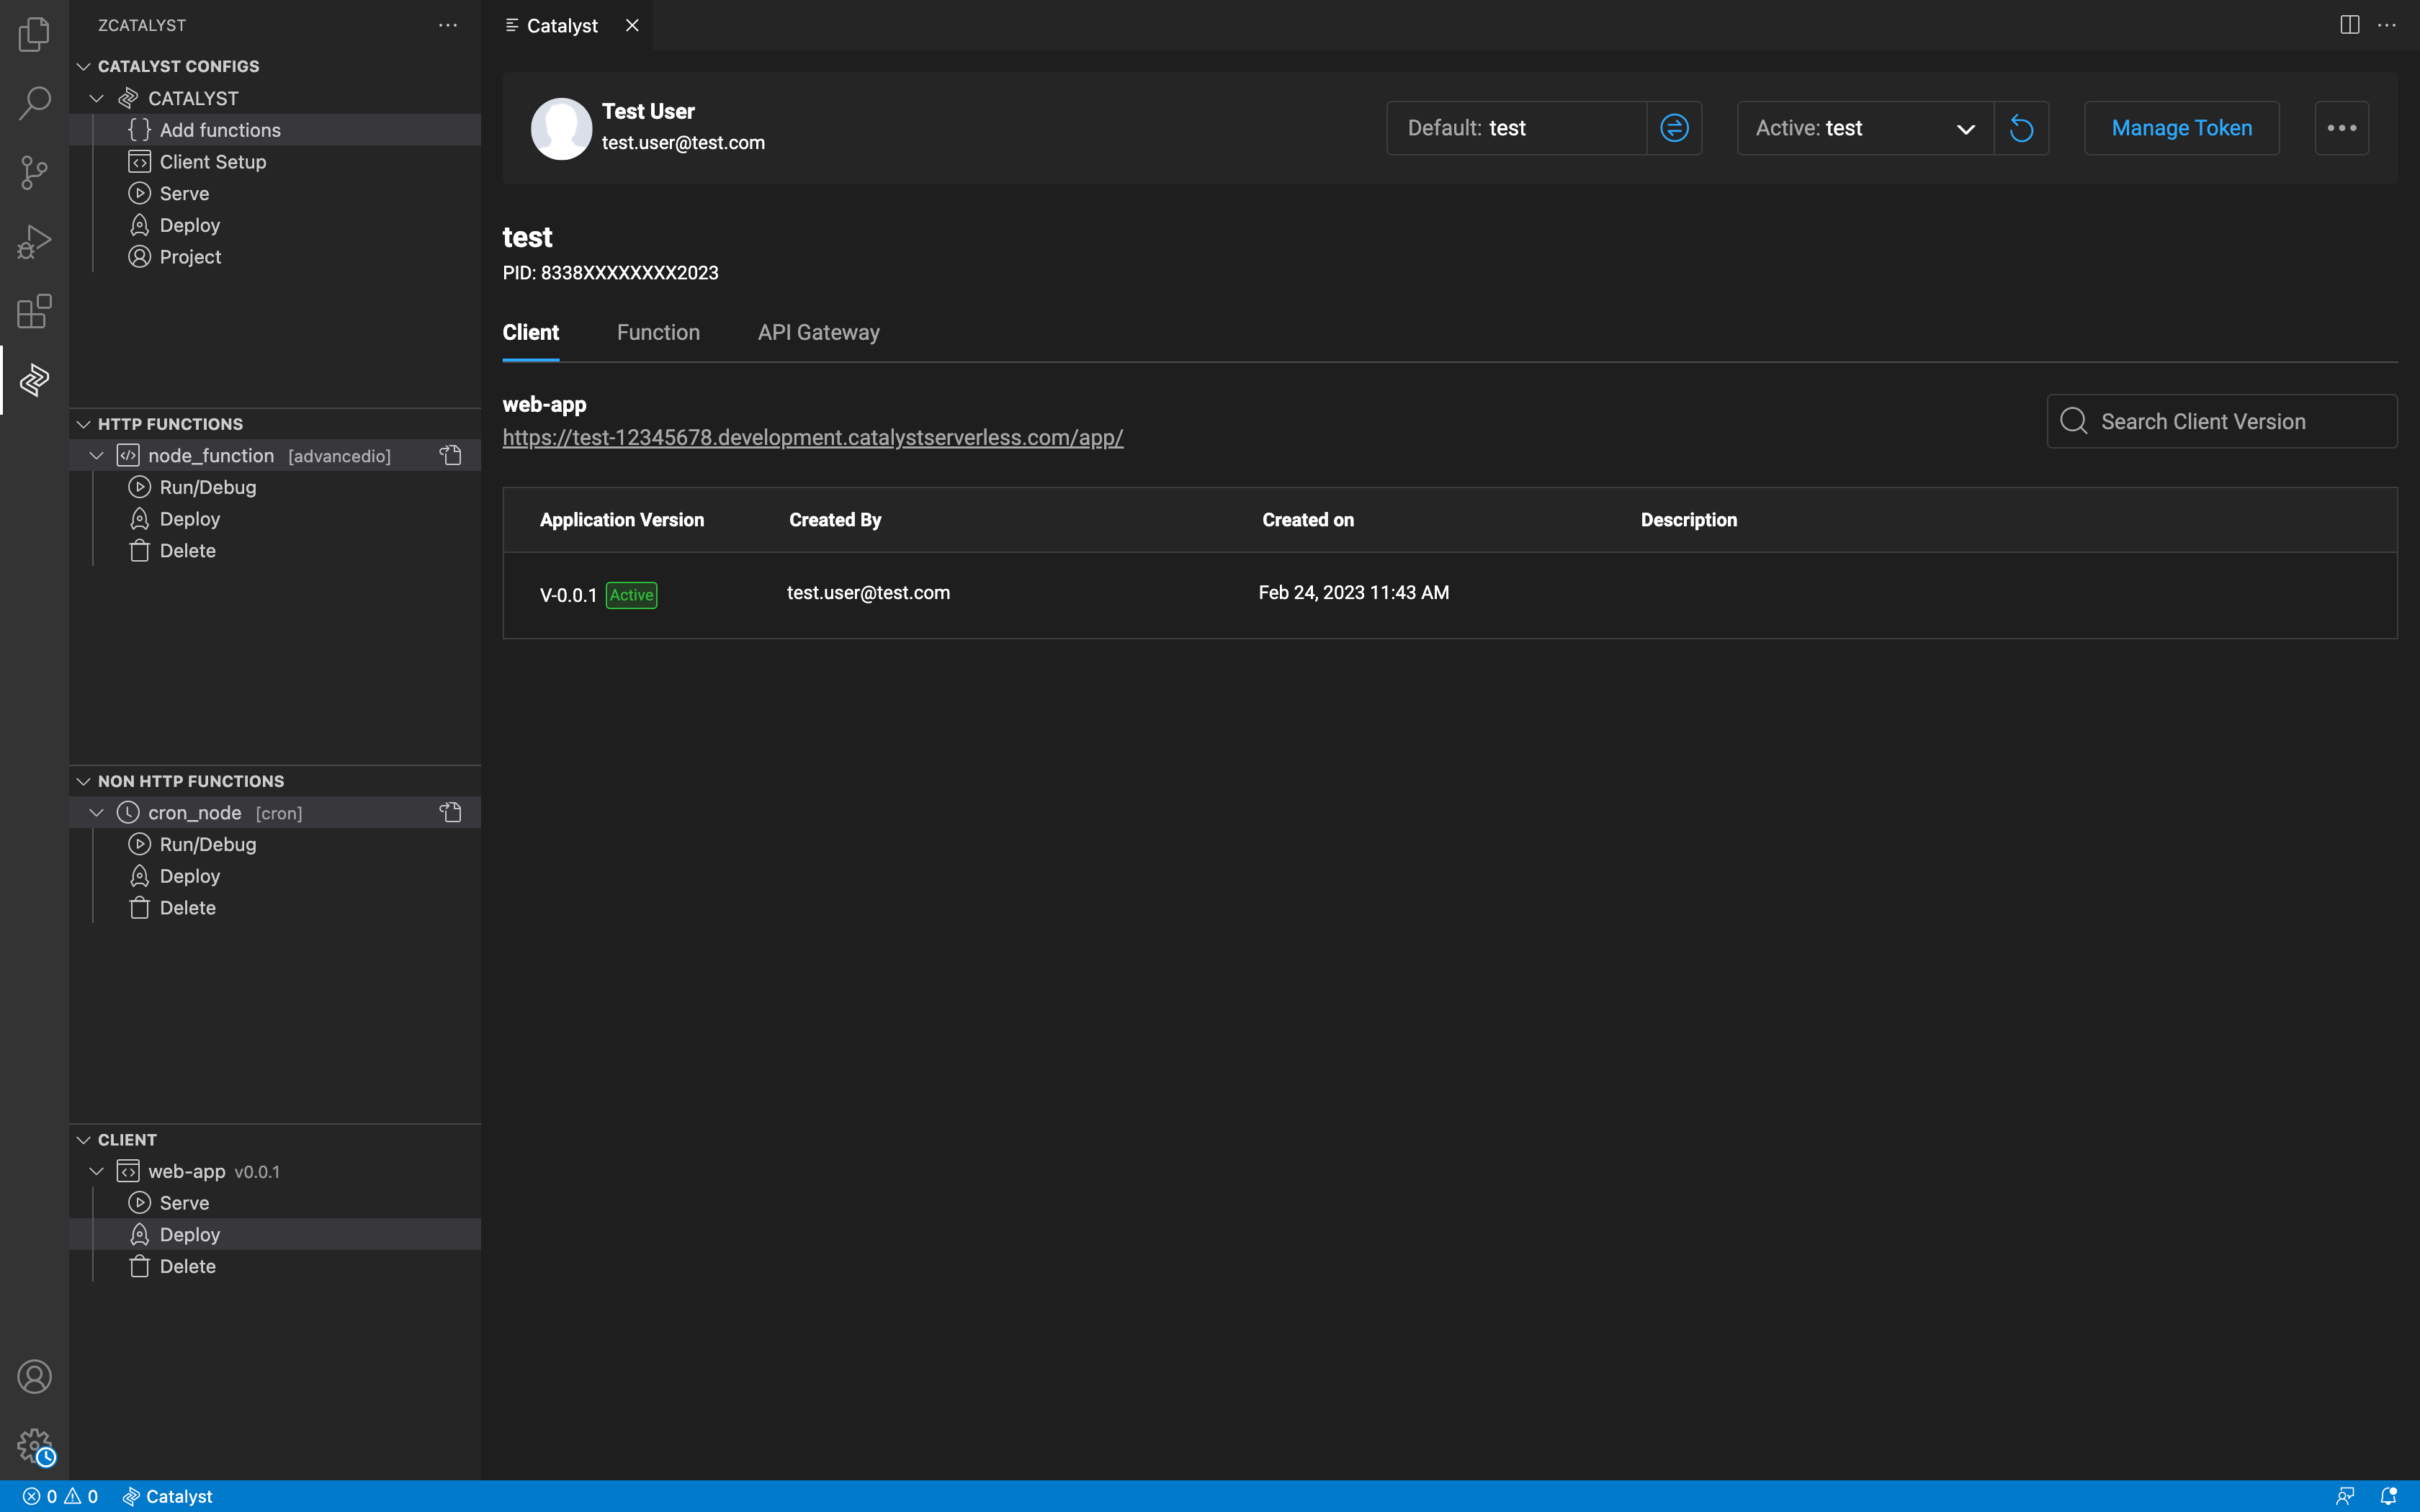
Catalyst Project view
This view contains general information such as the user details, project information and options to pull the resources from Catalyst remote console (development environment) to local machine and options to manage Catalyst CLI tokens that can be used in CI/CD environments.
Get Started
Here we'll see how to get started with the Catalyst Tools extension and initialize a Catalyst project.
The Catalyst Tools Extension can be accessed by clicking on the Catalyst icon in the activity bar and follow the instructions to get start stared with the extension.

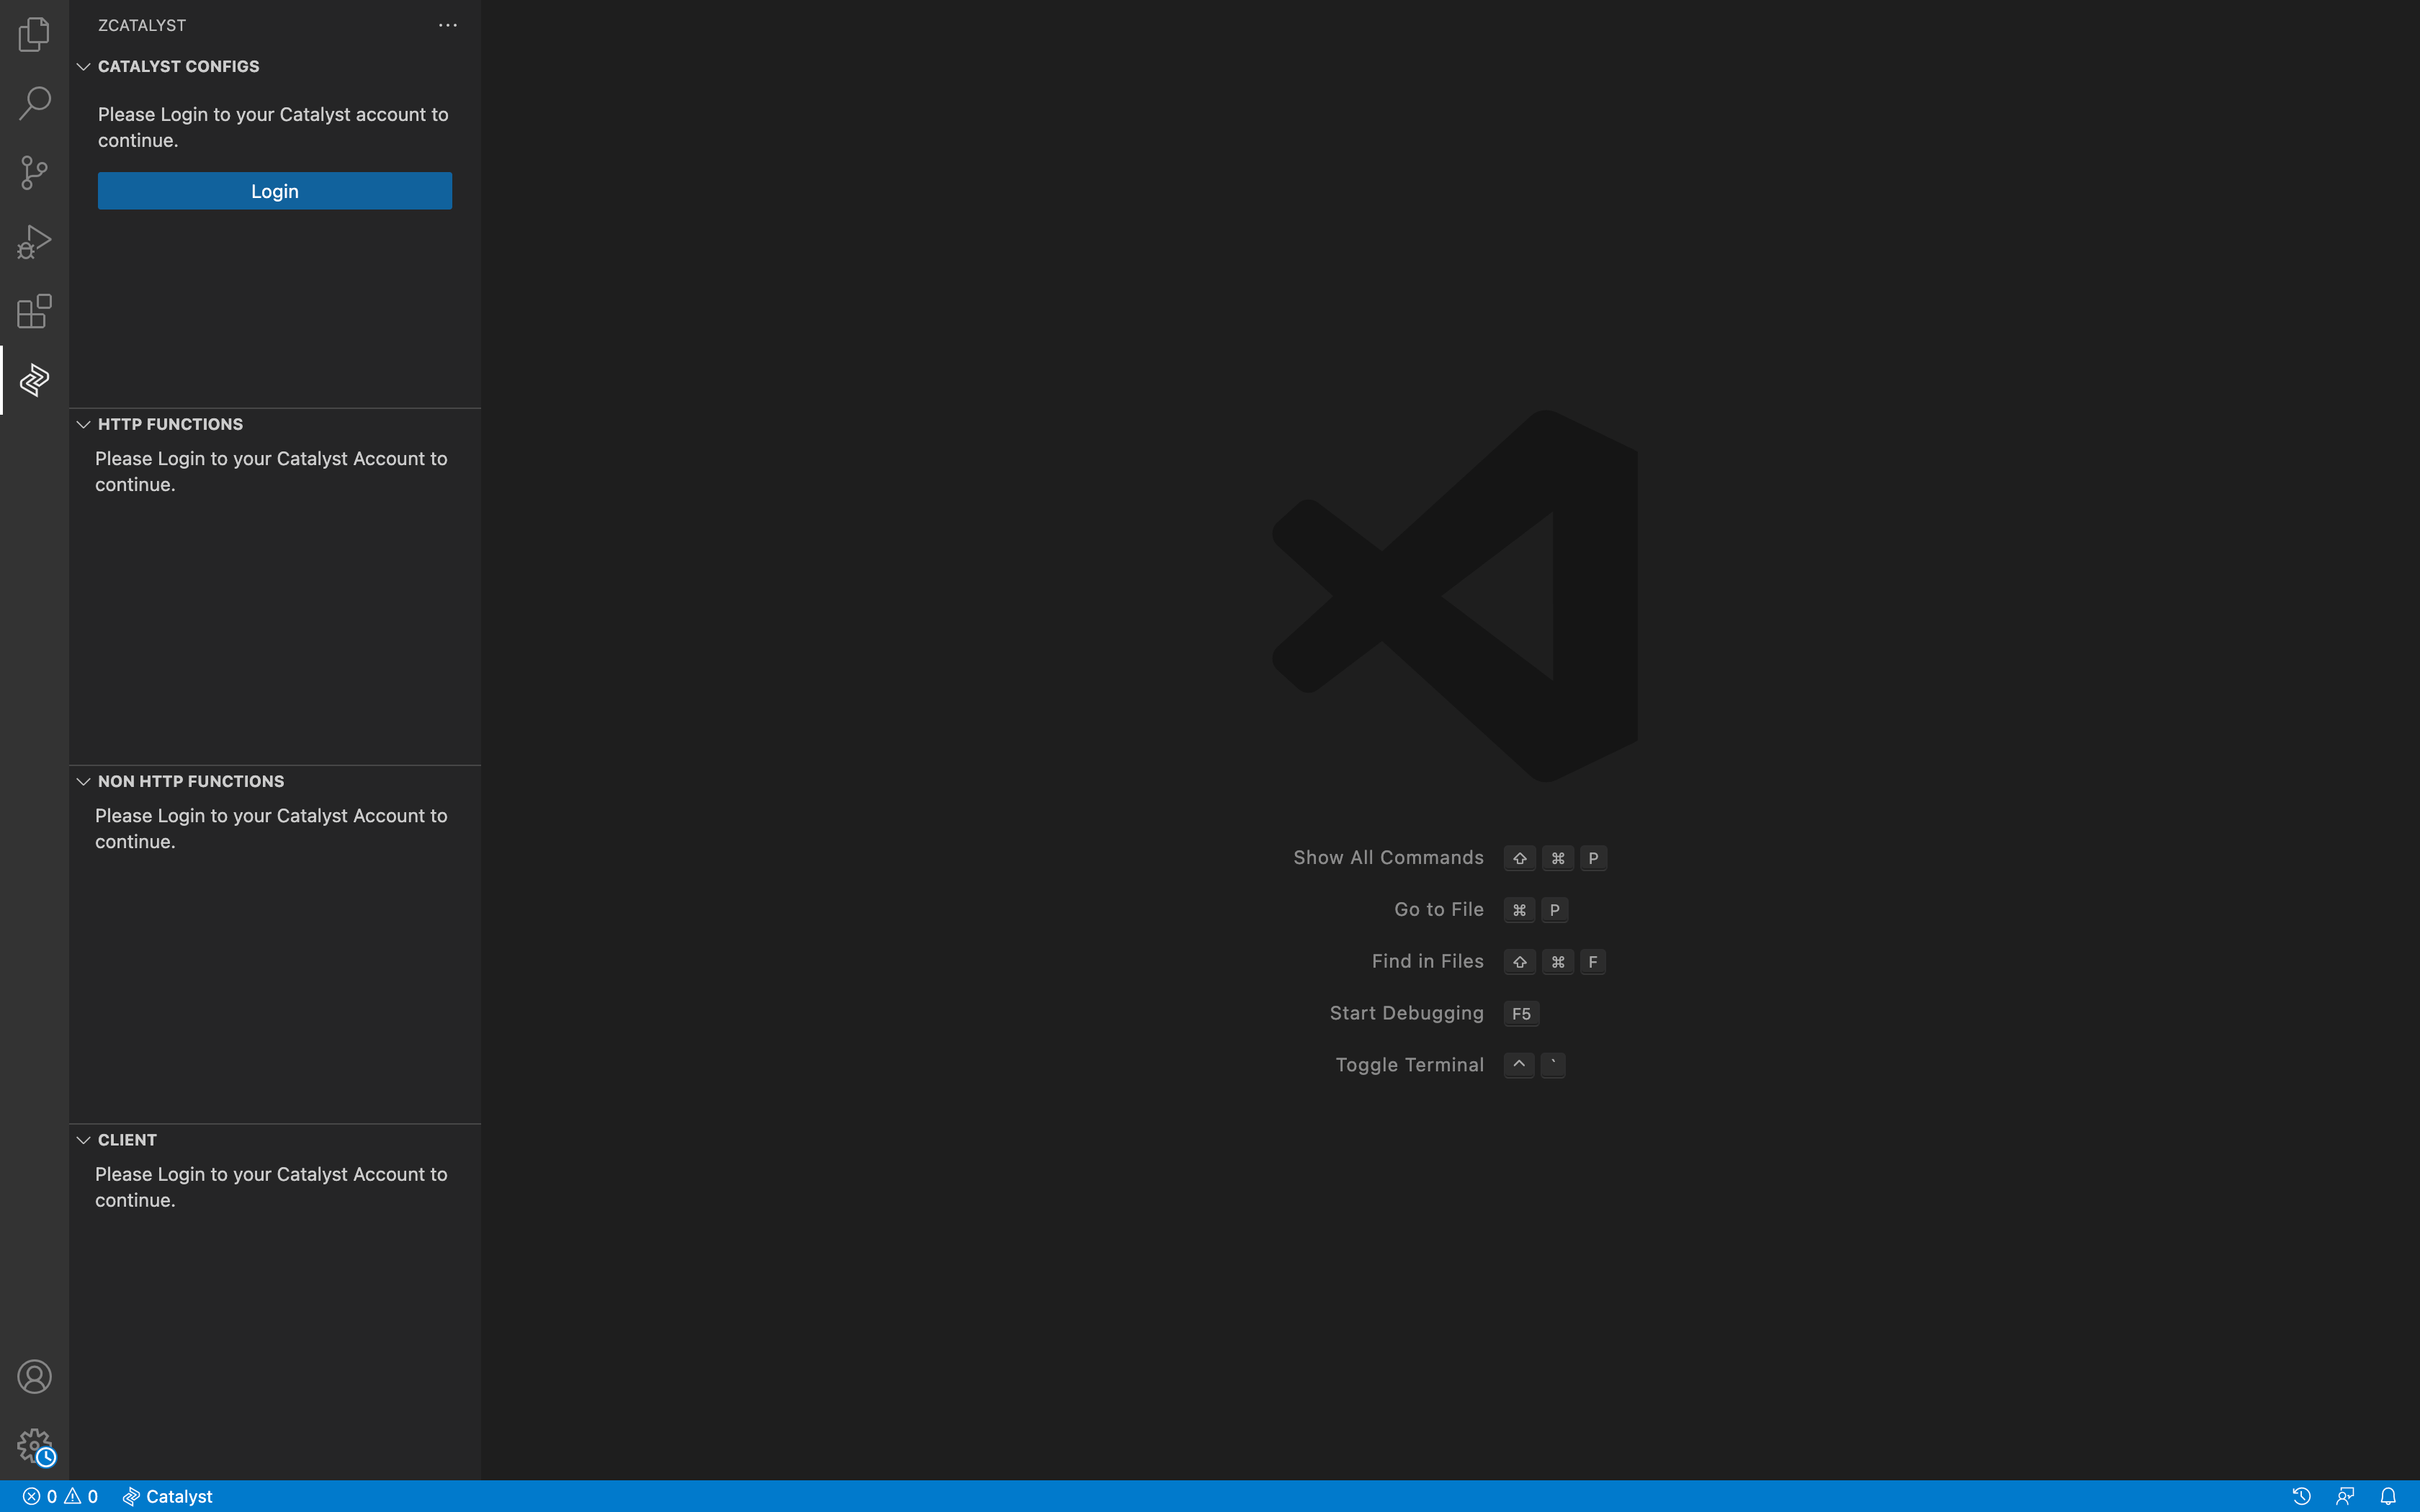
Login to Catalyst
- Login to your Catalyst account by clicking the
Login button in the Catalyst explorer. This button will be displayed only when no users are currently logged in.
Initialize a Catalyst Project
- After logging into your Catalyst account successfully, you'll see the
Initialize button in the Catalyst explorer. If there's no Catalyst project present in the workspace directory.
- Click on the button and choose a default project for the current workspace directory.
- After choosing the project you can choose to initialize resources such as functions or client to the current project directory. This step is optional.
Initializing resources
- Functions: To add functions click on the
Add Http function or Add Non-Http function button in the HTTP FUNCTIONS or the NON HTTP FUNCTIONS section of the Catalyst Explorer view.
- Client: To create new Catalyst web client, click on the
Setup Catalyst Web Client button in the Client section of the Catalyst Explorer view.
- AppSail: To add a new AppSail, click on the
Add AppSail button in the APPSAIL section of the Catalyst Explorer view.
Serving resources locally
- Serve all HTTP resources: Click on the
Serve button present in Catalyst under the Catalyst configs section in the Catalyst explorer
- Serve individual HTTP resource: You can choose to serve individual HTTP components by clicking the
Serve button or the Debug button present under the specific component.
Note: Debug only works with individual serve.
Deprecation: The enable debug option the extension setting is now deprecated and removed. Instead the users can use the Debug button under individual components to debug.
- Serve Non HTTP resources You can choose to serve individual Non HTTP components by clicking the
Serve button or the Debug button present under the specific component.
Note: The inputs to the functions need to be passed using a file named catalyst-inputs.json present in the functions root directory parallel to the catalyst-config.json file.
// catalyst-inputs.json - sample
{
    "input_1": {
        "test_input": "test value"
    }
}
Deploy resources to Catalyst console - development environment
Deploy all resources: Deploy the Catalyst resources from your local machine to the Catalyst console by clicking the Deploy button under the Catalyst configs section in the Catalyst explorer view.
Deploy individual resource: You can choose to deploy individual components by clicking the Deploy button present under the specific component.
Pull resources to local machine.
You can pull the resources present in the Catalyst console development environment using the Catalyst Project view. This view can be accessed by clicking the Project button present under the Catalyst Configs section in the Catalyst explorer view.
