Speak2Script: Trunscribe your voice to code
Speak2Script is an extension for Visual Studio Code or Cursor that transcribes your spoken words into text. This hands-free approach to coding allows you to focus on your ideas instead of your typing.
Powered by OpenAI Whisper
Note: This extension requires an API key.
By default, Speak2Script use OpeanAI WHisper model and requires API key.
There is also the option to use Groq API to transcribe your audio for remote transcription.
For more details about Whisper, visit the Whisper OpenAI GitHub page.
Getting Started: Installation Instructions
To install and setup Speak2Script, follow these steps:
Install SoX utility to enable easy microphone recording through the command line.
Install the Speak2Script extension into Visual Studio Code or Cursor.
How to Use Speak2Script
- Initialization: Upon loading Visual Studio Code, the extension verifies the correct installation of SoX. If any issues are detected, an error message will be displayed.
Once initialization is complete, a quote icon will appear in the bottom right status bar.
- Starting the Recording: Activate the extension by clicking on the quote icon or using the shortcut
Command+M (for Mac) or Control+M (for Windows). You can record for as long as you like, but remember, the longer the recording, the longer the transcription process. The recording time will be displayed in the status bar.

- Stopping the Recording: Stop the recording using the same shortcut (
Command+M or Control+M). The extension icon in the status bar will change to a loading icon, and a progress message will be displayed, indicating that the transcription is underway.
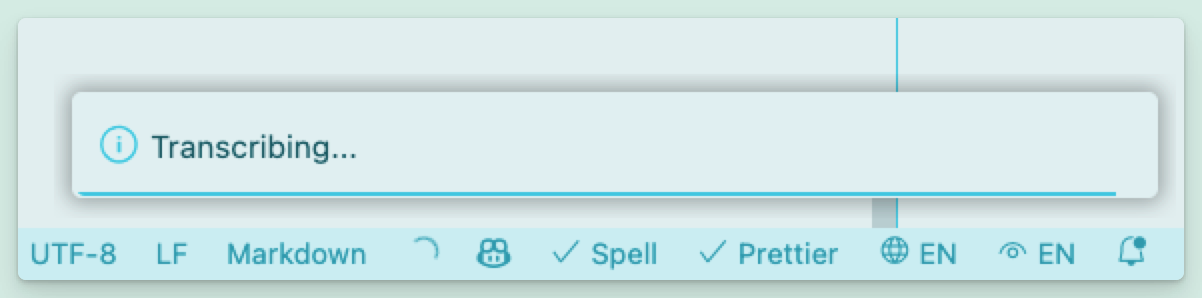
- Transcription: Once the transcription is complete, the text will be saved to the clipboard. This allows you to use the transcription in any program, not just within Visual Studio Code. If an editor is active, the transcription will be pasted there automatically.

Tip: A good microphone will improve transcription accuracy, although it is not a requirement.
Using Speak2Script with Cursor
To enhance your development experience with Cursor.so and Speak2Script, follow these simple steps:
- Start the recording: Press
Command+M (Mac) or Control+M (Windows).
- Speak your instructions clearly.
- Stop the recording: Press
Command+M (Mac) or Control+M (Windows).
Note: This initiates the transcription process.
- Open the Cursor dialog: Press
Command+K or Command+L.
Important: Do this before the transcription completes.
- The transcribed text will automatically populate the Cursor dialog. Here, you can edit the text or add files/docs, then press
Enter to execute the GPT query.
By integrating Cursor with Speak2Script, you can provide extensive instructions without the need for typing, significantly enhancing your development workflow.
Speak2Script offers two ways to transcribe your audio:
- OpenAI Cloud API: A powerful cloud option using OpenAI's Whisper-1 model for fast, accurate transcription (requires API key)
- Groq Cloud API: A powerful cloud option using Groq's Whisper Large v3 Turbo model for fast, accurate transcription (requires API key)
Configuring the API Provider
- Open VSCode settings (File > Preferences > Settings)
- Search for "Speak2Script"
- Set "Api Provider" to one of:
- Enter your API key: