🧩 OntoCode Studio
Edit, query, reason over, and visualize OWL/RDF ontologies — collaboratively, right inside VS Code.
A VS Code extension for ontology development, providing a full visual ontology editor through a React-based webview: SPARQL/DL querying, an AI-assisted change review workflow, an OWL reasoner, D3-powered graph visualization, real-time team collaboration, and a plugin marketplace.
This extension is part of the larger Ontology Platform but can be built and run independently.


🚀 Features
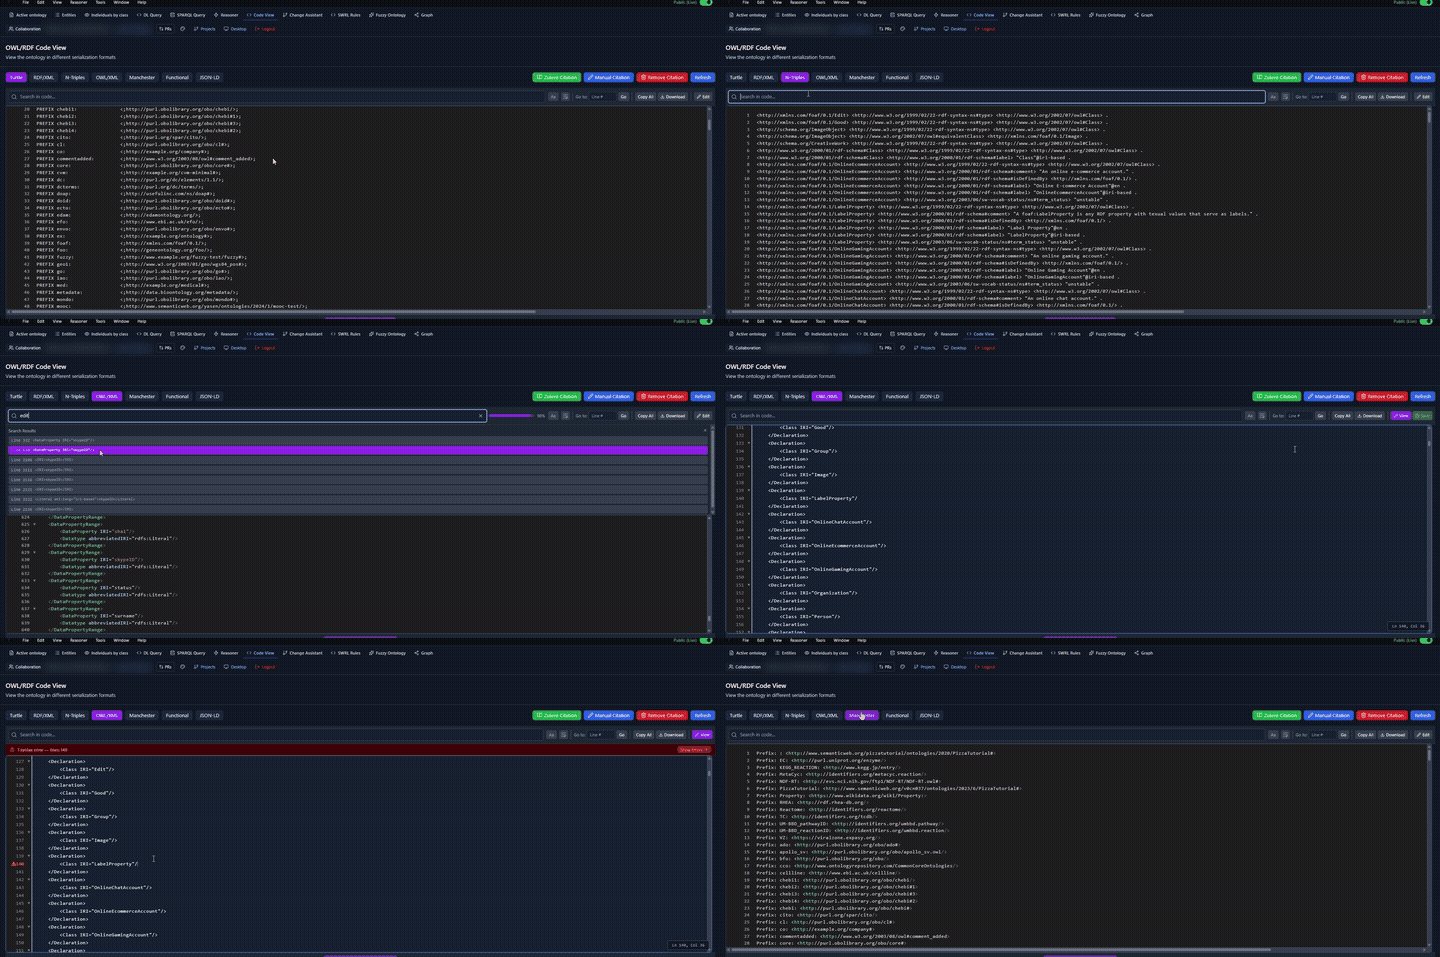
- Ontology editing across formats — the Code View editor reads and writes the same ontology as Turtle, RDF/XML, N-Triples, OWL/XML, Manchester, Functional, or JSON-LD. Switch formats and keep editing — it's not a one-way export.
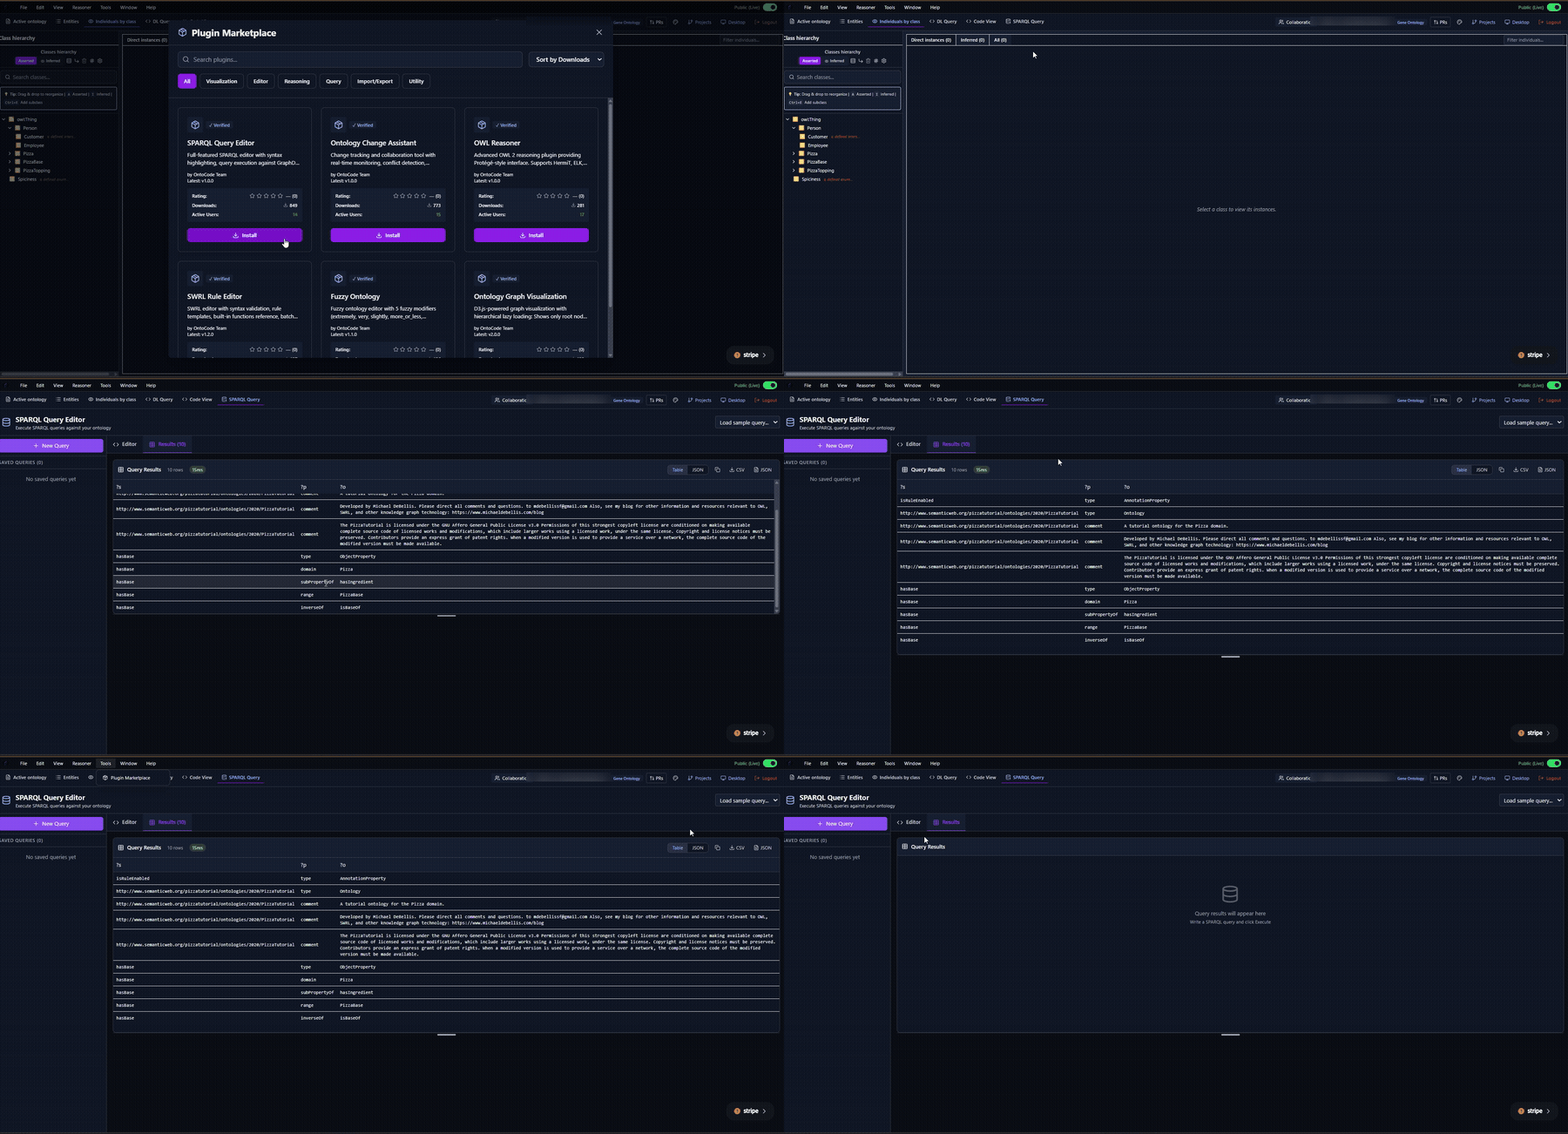
- SPARQL / DL Query Workbench — run SPARQL queries against your active ontology and browse results as a table or JSON.
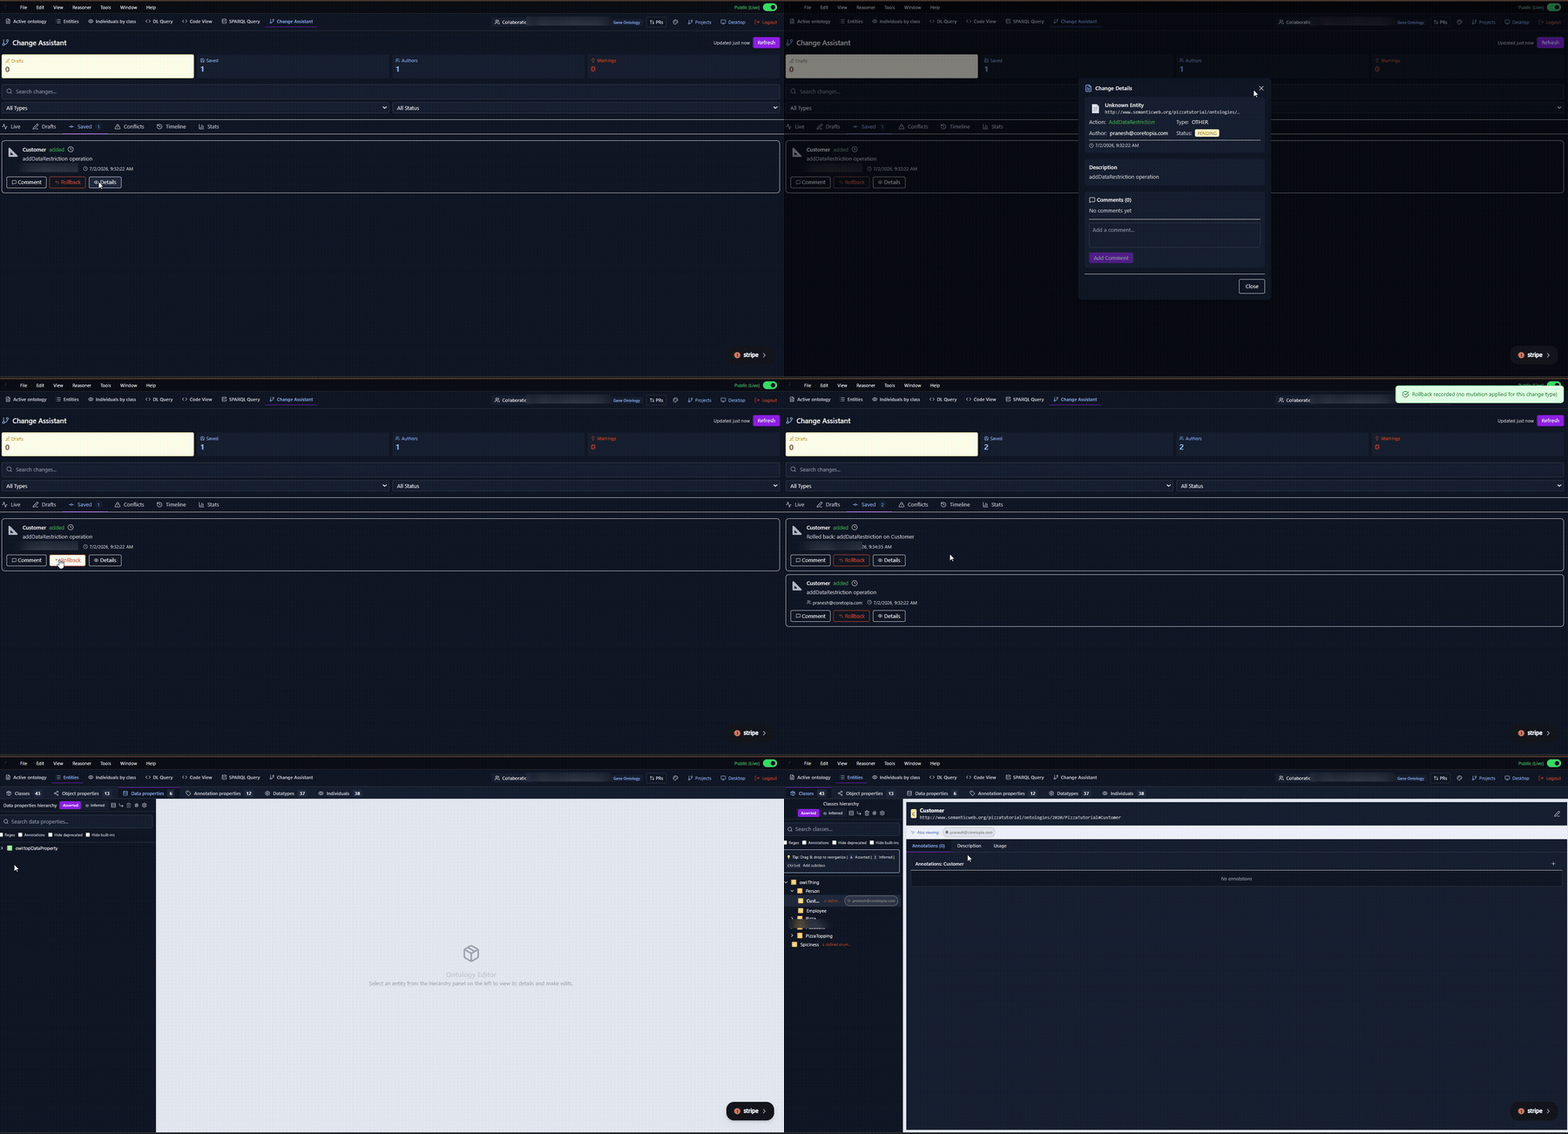
- Change Assistant — every edit is tracked as a reviewable change (drafts, saved, conflicts, timeline, rollback) with per-author attribution.
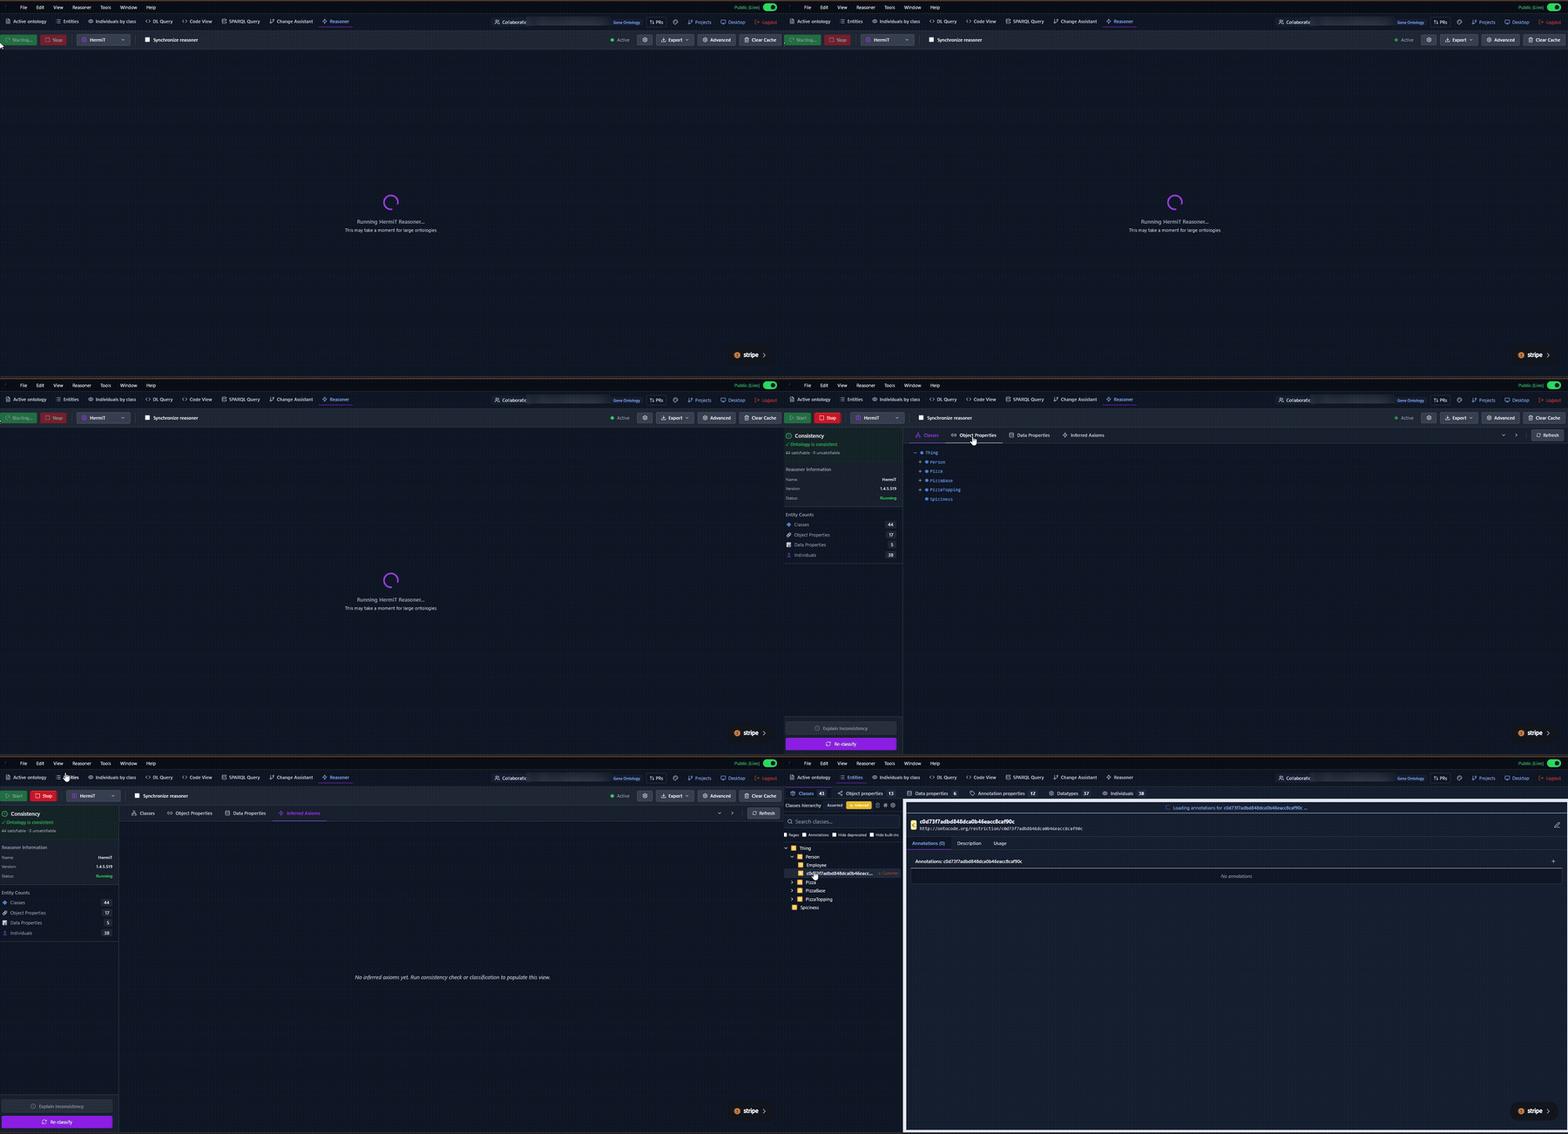
- Built-in reasoner — run HermiT (or other supported reasoners) for consistency checking, satisfiability, and inferred class hierarchies.
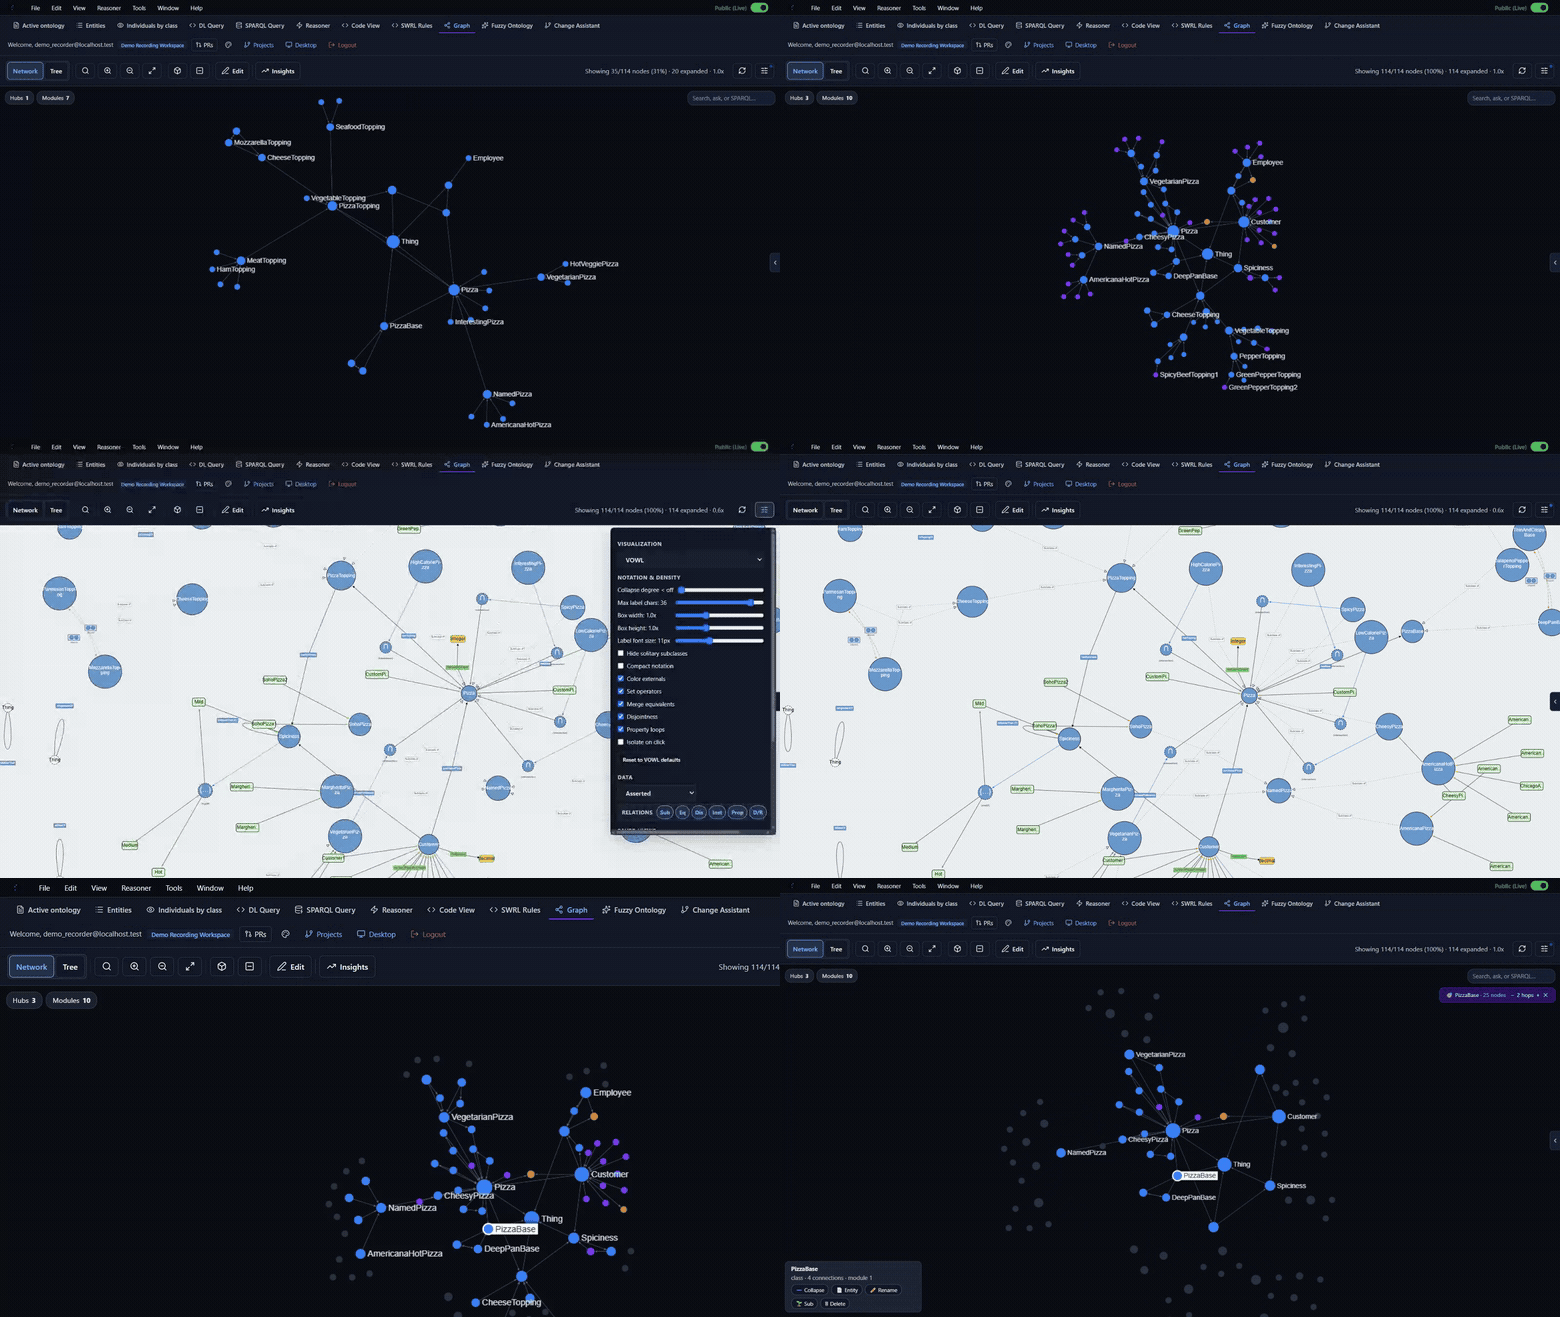
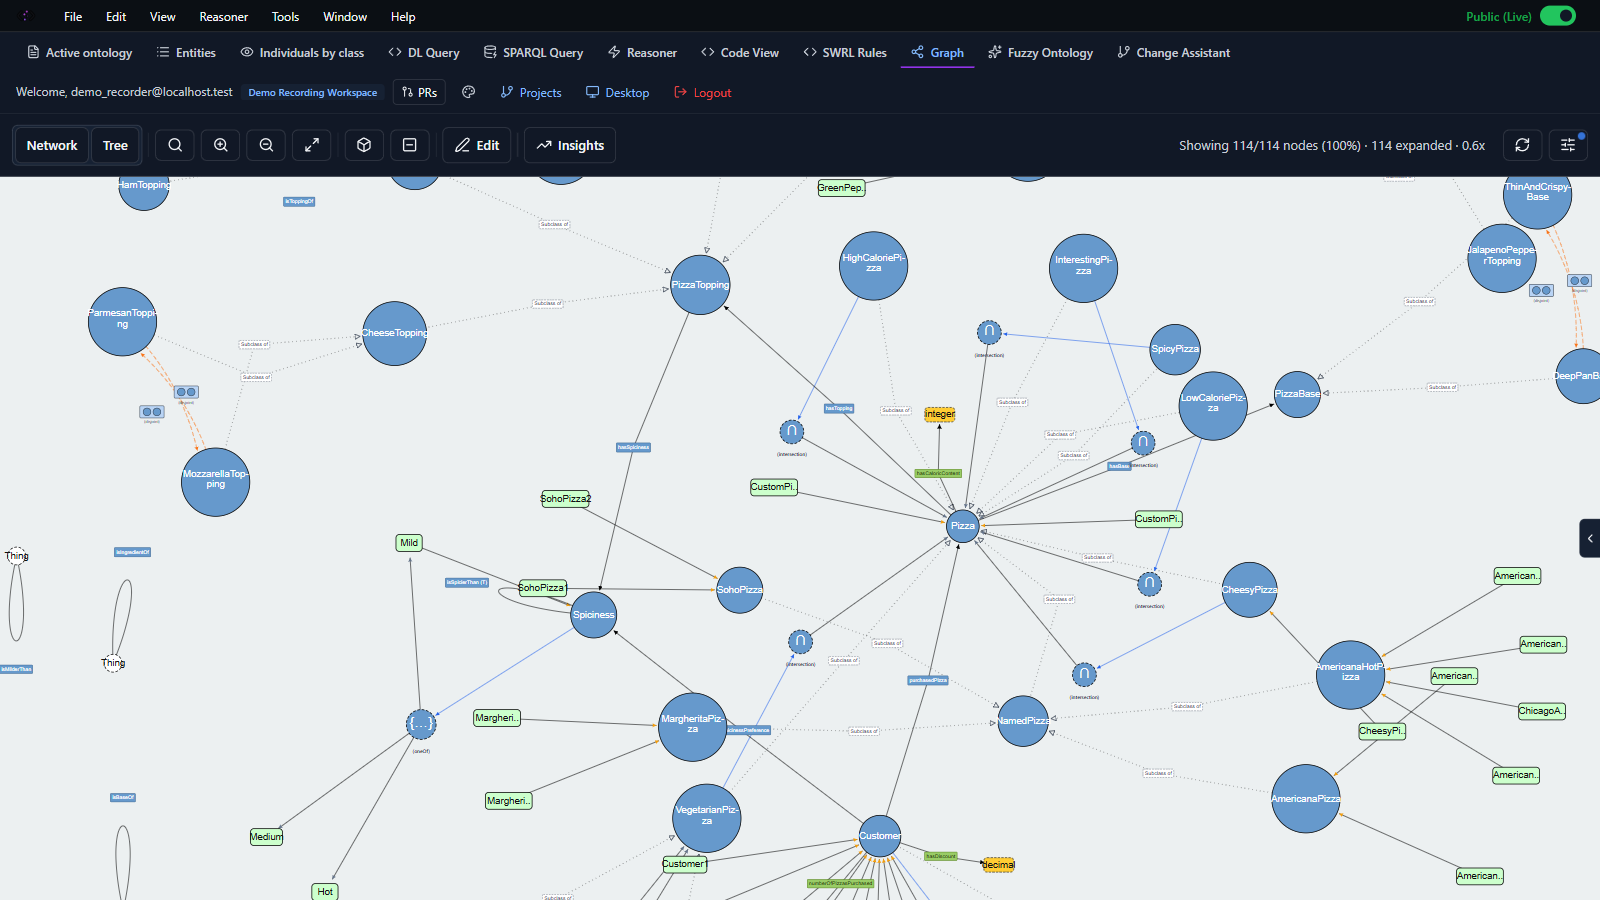
- Graph visualization — explore your ontology as an interactive D3 graph (tree, network, and VOWL notation) with AI-generated topic/cluster insights.
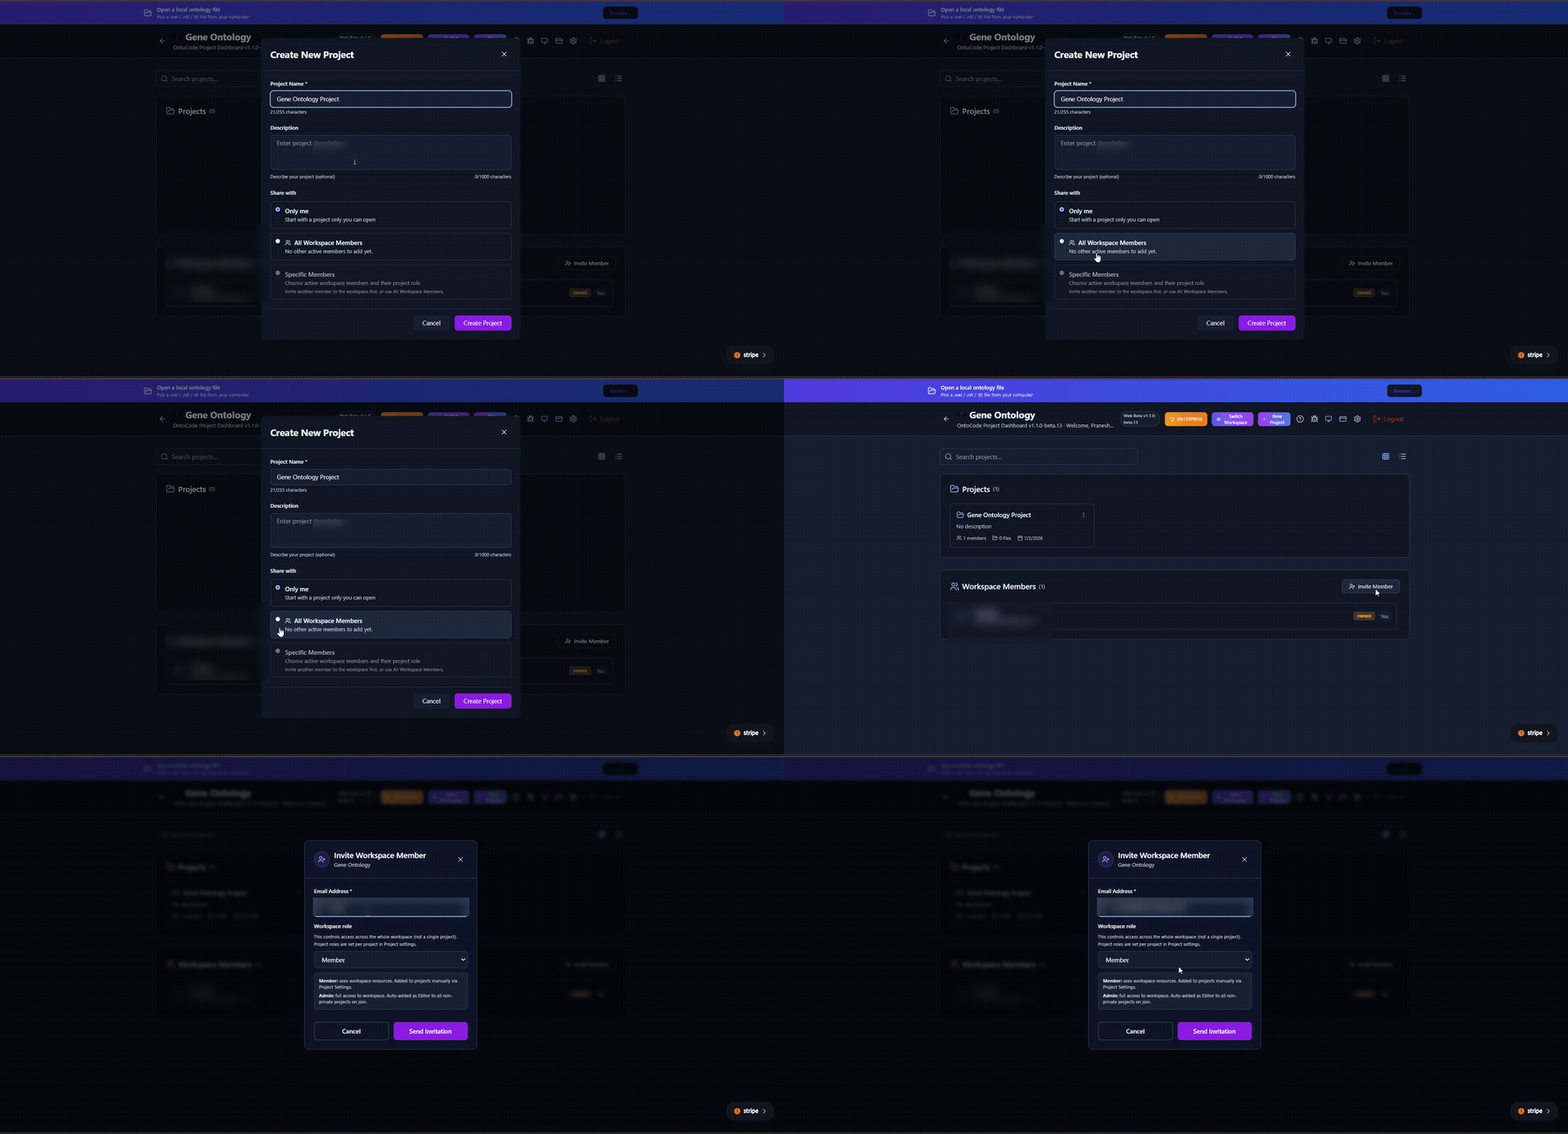
- Real-time collaboration — create workspaces, invite members with role-based access, and see collaborator presence live.
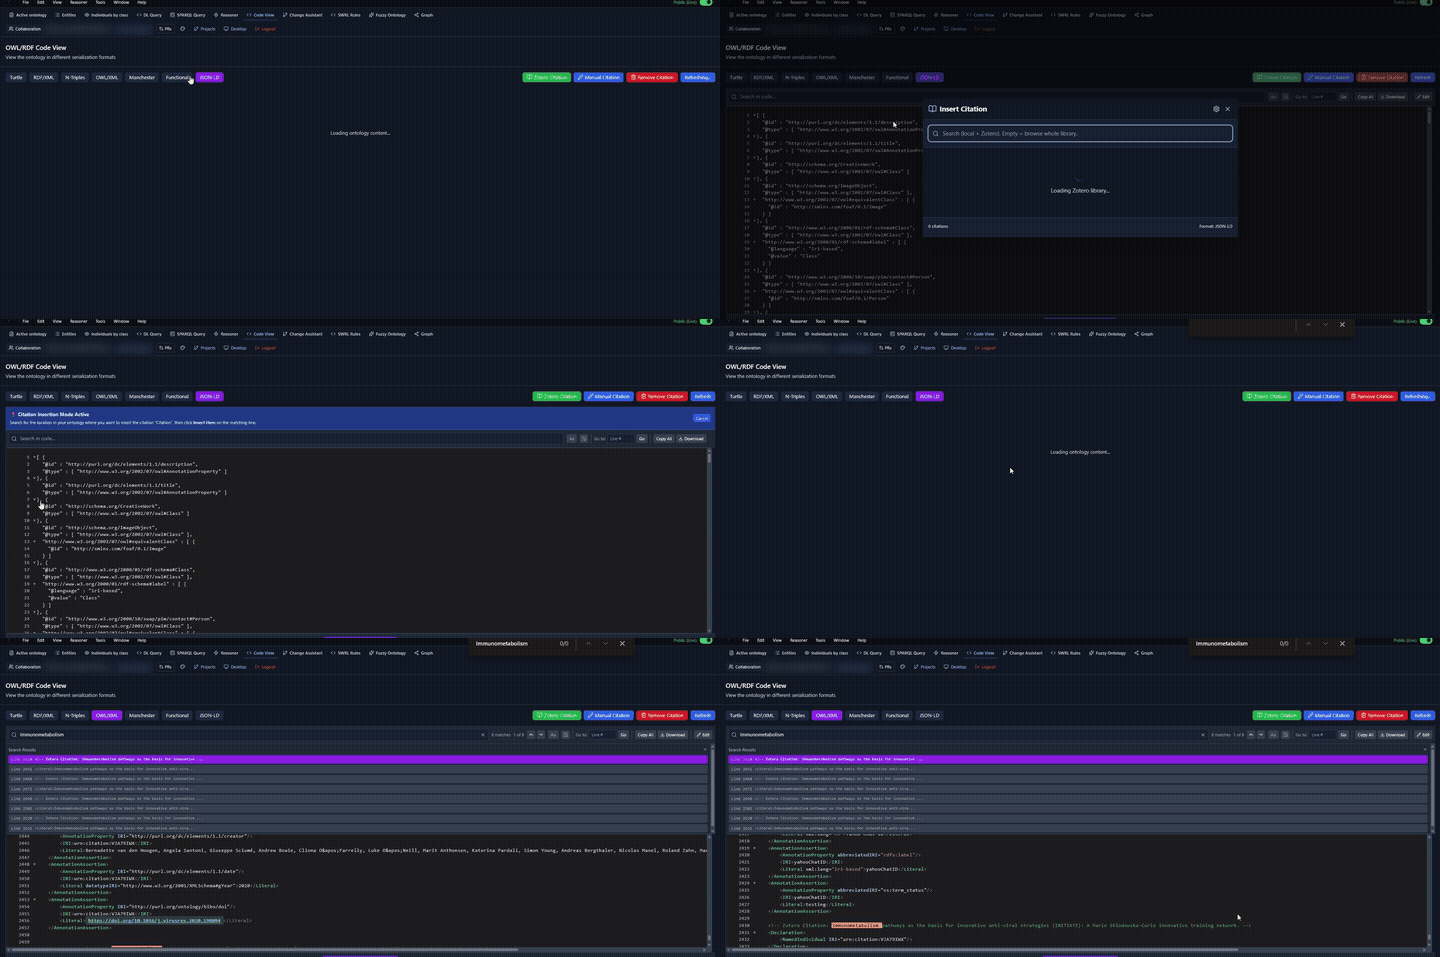
- Citation insertion — search your reference library and insert items as inline citations directly in
.owl/.ttl/.rdf/.n3 files from Code View — works the same in VS Code, the web app, and the desktop app.
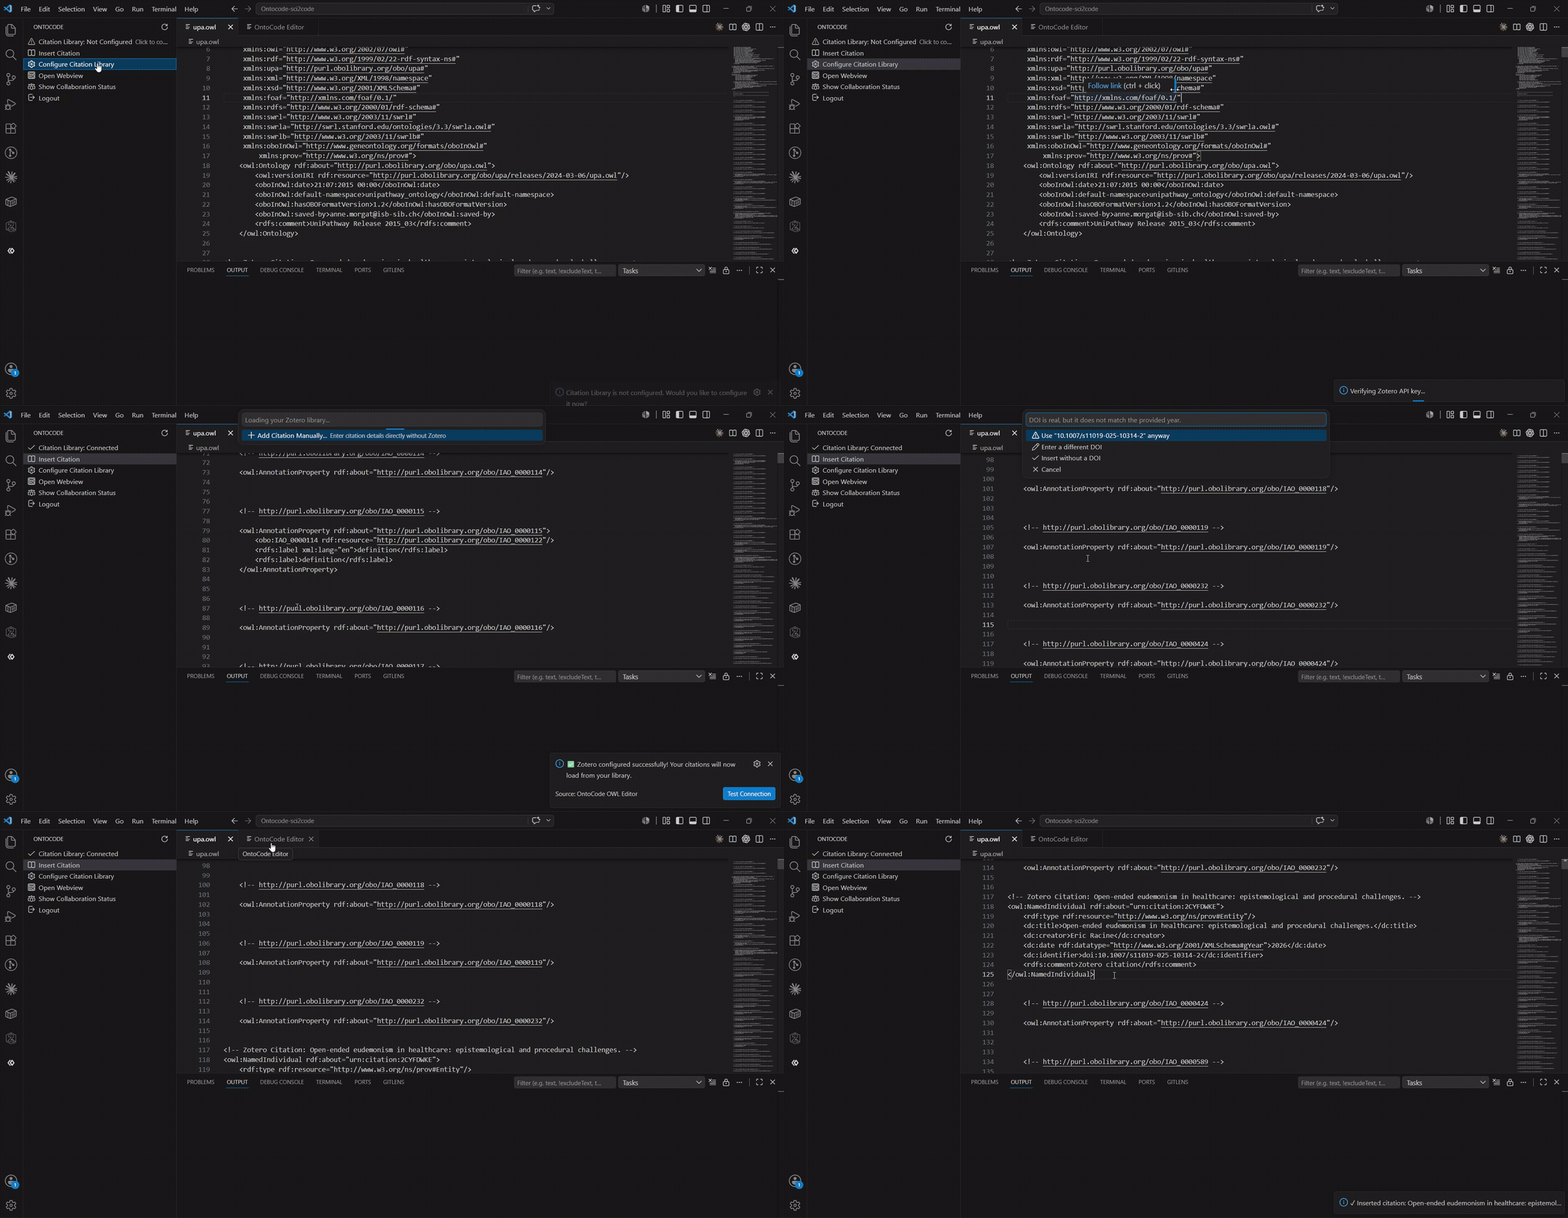
- Sci2Code editor integration — the
Ctrl+Shift+C / Insert Citation editor command is powered by Sci2Code, inserting a citation at your cursor in any open file (VS Code only).
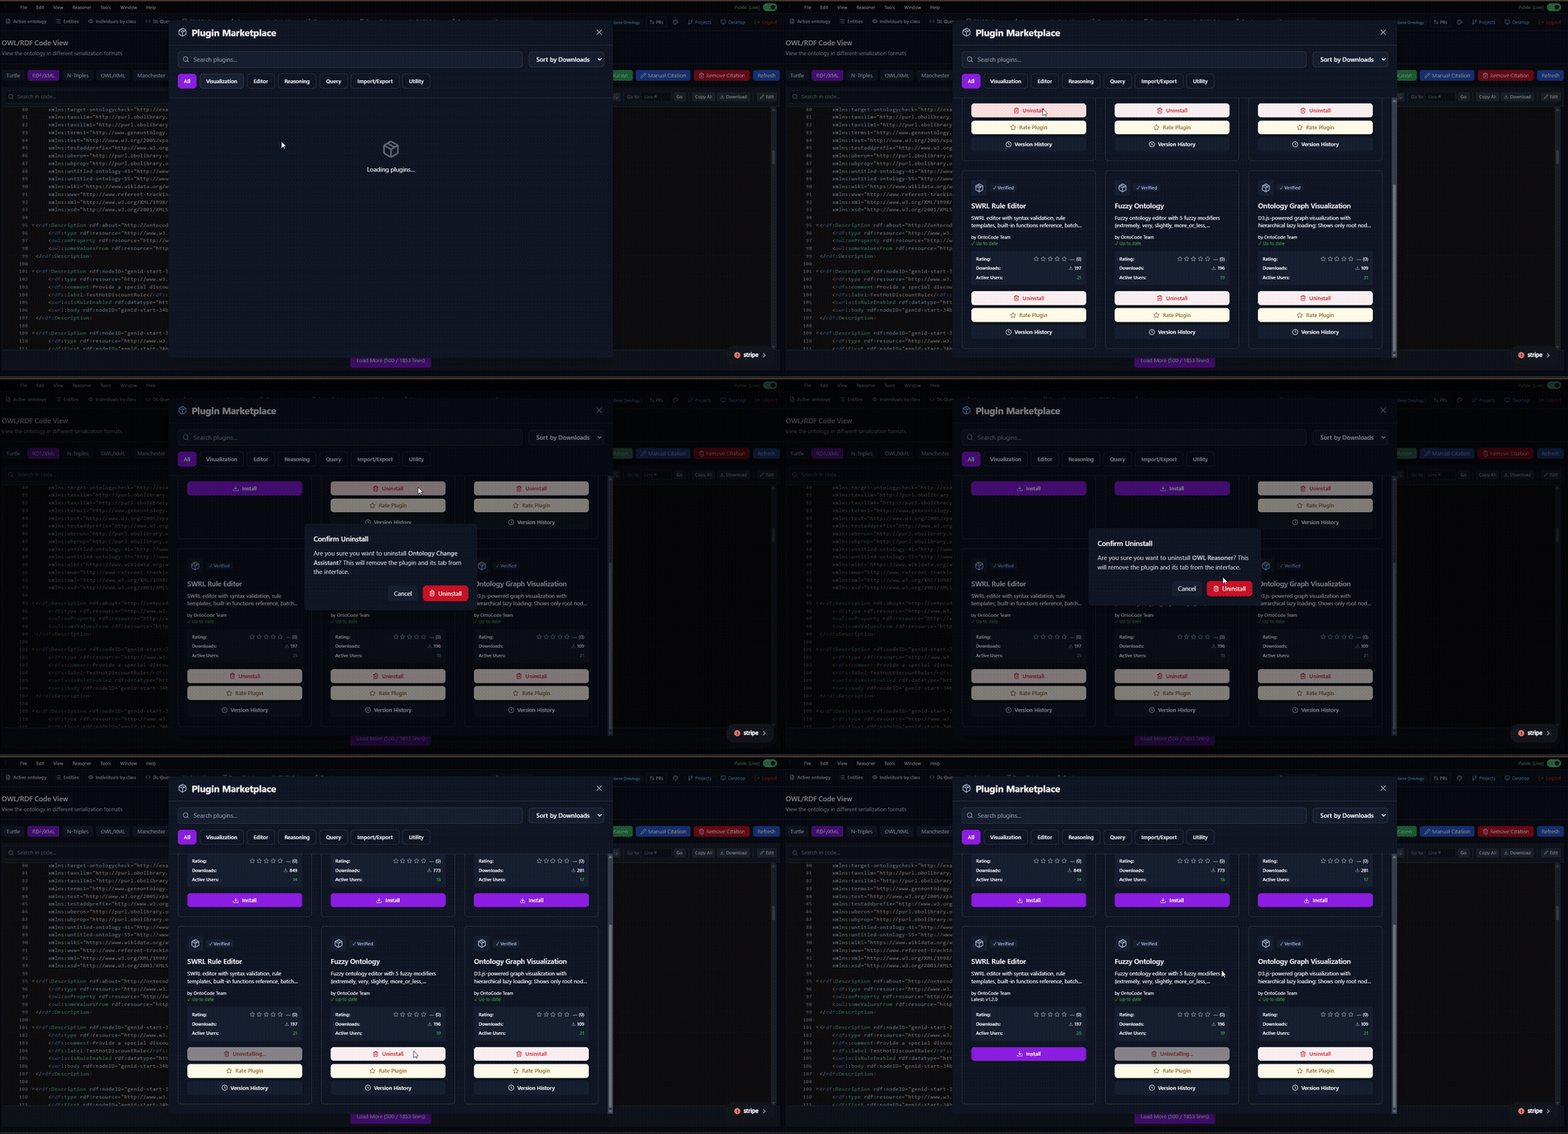
- Plugin Marketplace — install community and first-party plugins (SWRL Rule Editor, Fuzzy Ontology, additional graph visualizations, and more).
- Desktop app — an Electron-based desktop build for working outside VS Code.
🖼 Screenshots
1. Workspace & team collaboration
Create a project, choose who can access it, and invite workspace members by email with role-based permissions.
Read and edit the same ontology as Turtle, RDF/XML, N-Triples, OWL/XML, Manchester, Functional, or JSON-LD syntax — switch formats and keep editing, it's not a one-way export.
3. SPARQL Query Workbench
Write and run SPARQL queries against the active ontology, with results as a sortable table or raw JSON.
4. Change Assistant
Every mutation is tracked as a reviewable, attributable change — with drafts, conflicts, a timeline, and one-click rollback.
5. Built-in OWL reasoner
Run the HermiT reasoner to check consistency, satisfiability, and view the inferred class hierarchy.
6. Citation insertion
Search your reference library and insert a citation directly into the ontology, in whichever format the Code View tab is currently showing. Works identically in VS Code, the web app, and the desktop app.
7. Sci2Code editor integration
A separate, VS Code-only path: run Insert Citation (Ctrl+Shift+C / Cmd+Shift+C) from any open file and it's powered by Sci2Code, OntoCode's companion extension. Pick a reference from your library via the command palette and it's inserted at your cursor, formatted to match the file — OntoCode also detects and offers to fix any RDF namespace declarations the citation needs.
8. Plugin Marketplace
Browse, install, and manage plugins — SWRL rule editing, fuzzy ontology support, alternate graph visualizations, and more.
9. Graph visualization + AI insights
Explore the ontology as an interactive graph (tree, network, or VOWL notation), with AI-generated topic clusters and trend summaries.
Screenshots and GIFs are generated from a real product walkthrough recording — see images/screenshots/ and images/gifs/ for the full set.
📚 Table of Contents
🧠 Overview
The Ontology VS Code Extension allows users to:
- Edit and visualize OWL ontologies directly in VS Code.
- Use a custom web-based editor (built with React).
- Interact with backend ontology services (Auth, Gateway, OWL Editor, SWRL).
It provides an integrated development environment for ontology engineers and knowledge graph developers.
📁 Folder Structure
ontology-vscode-extension/
├── src/
│   ├── extension.ts          # Entry point for the extension (desktop)
│   ├── extension.web.ts      # Entry point for the web extension (vscode.dev / vscode-test-web)
│   ├── collaboration/        # Real-time collaboration (CRDT sync, presence)
│   ├── features/             # Citation insertion and other feature modules
│   ├── services/             # Citation lookup, issue reporting, sci2Code, etc.
│   ├── config/                # Deployment/environment configuration
│   ├── resources/             # Static resources bundled with the extension
│   └── utils/                 # Helper utilities
├── webview-src/               # React-based webview UI (Vite)
│   ├── App.tsx
│   ├── components/
│   ├── contexts/
│   ├── services/
│   ├── hooks/
│   ├── assets/
│   ├── dist/                  # Build output consumed by the extension (git-ignored, built by build:vscode)
│   ├── package.json
│   └── vite.config.ts
├── images/
│   ├── icon.png                # Extension marketplace icon
│   ├── screenshots/            # Static feature screenshots used in this README
│   └── gifs/                   # Feature walkthrough GIFs used in this README
├── package.json               # Extension metadata, contributes, and build scripts
├── tsconfig.json               # TypeScript configuration
└── README.md                  # This file
⚙️ Setup
Prerequisites
- Node.js 18+
- npm
- VS Code
- Ontology Platform backend services running (optional for UI testing)
Install Dependencies
From the ontology-vscode-extension directory:
npm install
🏗️ Build
1. Build the Webview (React App)
From the root of ontology-vscode-extension:
npm run build-webview
This runs vite build --base ./ inside webview-src and compiles the React webview into webview-src/dist/, used by the extension.
⚠️ Do not run cd webview-src && npm run build directly for the VS Code extension. That script builds with an absolute / base path intended for the standalone cloud webapp deployment (Dockerfile.webapp) and will break asset loading (e.g. the logo will fail to render) inside the VS Code webview. Use npm run build-webview (or webview-src's own npm run build:vscode) instead. npm run build:electron is the equivalent for the Electron desktop app.
2. Build the Extension (TypeScript → JavaScript)
From the root of ontology-vscode-extension:
npm run compile
🚀 Run and Debug
Launch the Extension in VS Code
- Open the
ontology-vscode-extension directory in VS Code.
- Open
extension.ts.
- Press F5 or go to Run → Start Debugging.
A new Extension Development Host window will open.
🧩 Usage
- In the new window, open an
.owl ontology file.
- Right-click the file (or open the Command Palette with
Ctrl+Shift+P / Cmd+Shift+P) and run Edit with OntoCode (ontocode.edit) — or OntoCode: Edit Ontology File (ontocode.editLargeFile) for large files.
- The Ontology Web Editor UI (React webview) will open in a new tab.
- You can now edit and visualize ontology content.
💡 Commands
| Command |
ID |
Description |
| Edit with OntoCode |
ontocode.edit |
Opens the ontology web editor view for an .owl file. |
| OntoCode: Edit Ontology File |
ontocode.editLargeFile |
Opens the editor for large ontology files (streamed/buffered load). |
| OntoCode: Logout |
ontocode.logout |
Signs out of the current OntoCode session. |
| Insert Citation |
ontocode.insertCitation |
Inserts a citation into an .owl/.ttl/.rdf/.n3 file (Ctrl+Shift+C / Cmd+Shift+C). |
| OntoCode: Show Collaboration Status |
ontocode.showCollaborationStatus |
Shows real-time collaboration/presence status. |
| OntoCode: Configure Citation Library |
ontocode.configureZotero |
Sets up the citation library API key/user ID for citation lookup. |
| OntoCode: Test Citation Library Connection |
ontocode.testZoteroConnection |
Verifies the configured citation library credentials. |
| OntoCode: Test Invitation Flow |
ontocode.testInvitationFlow |
Debug command for testing collaboration invite links. |
| Open WebView |
ontocode.openWebview |
Opens the OntoCode webview panel directly. |
See contributes.commands in package.json for the authoritative list.
⚙️ Settings
Open Settings and search ontocode:
| Setting |
Default |
Description |
ontocode.zotero.apiKey |
(empty) |
Your citation library API key. |
ontocode.zotero.userId |
(empty) |
Your citation library user ID. |
ontocode.zotero.libraryType |
user |
Type of citation library to read from: user or group. |
ontocode.zotero.groupId |
(empty) |
Group ID, required when libraryType is group. |
See contributes.configuration in package.json for the authoritative list.
🧰 Development Notes
- The webview communicates with the backend via REST APIs through the Gateway service.
- During local development, you can configure the backend URL via
webview-src/.env (see .env.production, .env.selfhosted-test, .env.cloud-test for other targets).
- Make sure to rebuild (
npm run build-webview) the React webview after making UI changes, then reload the Extension Development Host (Ctrl+R / Cmd+R in the host window) or use Developer: Reload Window.
npm run dev-webview starts the Vite dev server (http://localhost:3001) with HMR for faster UI iteration.
🧱 Common Commands
# Build the React webview for the VS Code extension (relative asset paths)
npm run build-webview

# Build + package everything (webview, extension host bundle, web bundle)
npm run bundle:all

# Compile the extension host TypeScript
npm run compile

# Package a .vsix
npm run package

# Run in debug mode
code .

# Lint and check
npm run lint
🤝 Contributing
Contributions are welcome — see the GitHub repository for source, and open an issue to report a bug or request a feature.
📄 License
AGPL-3.0

