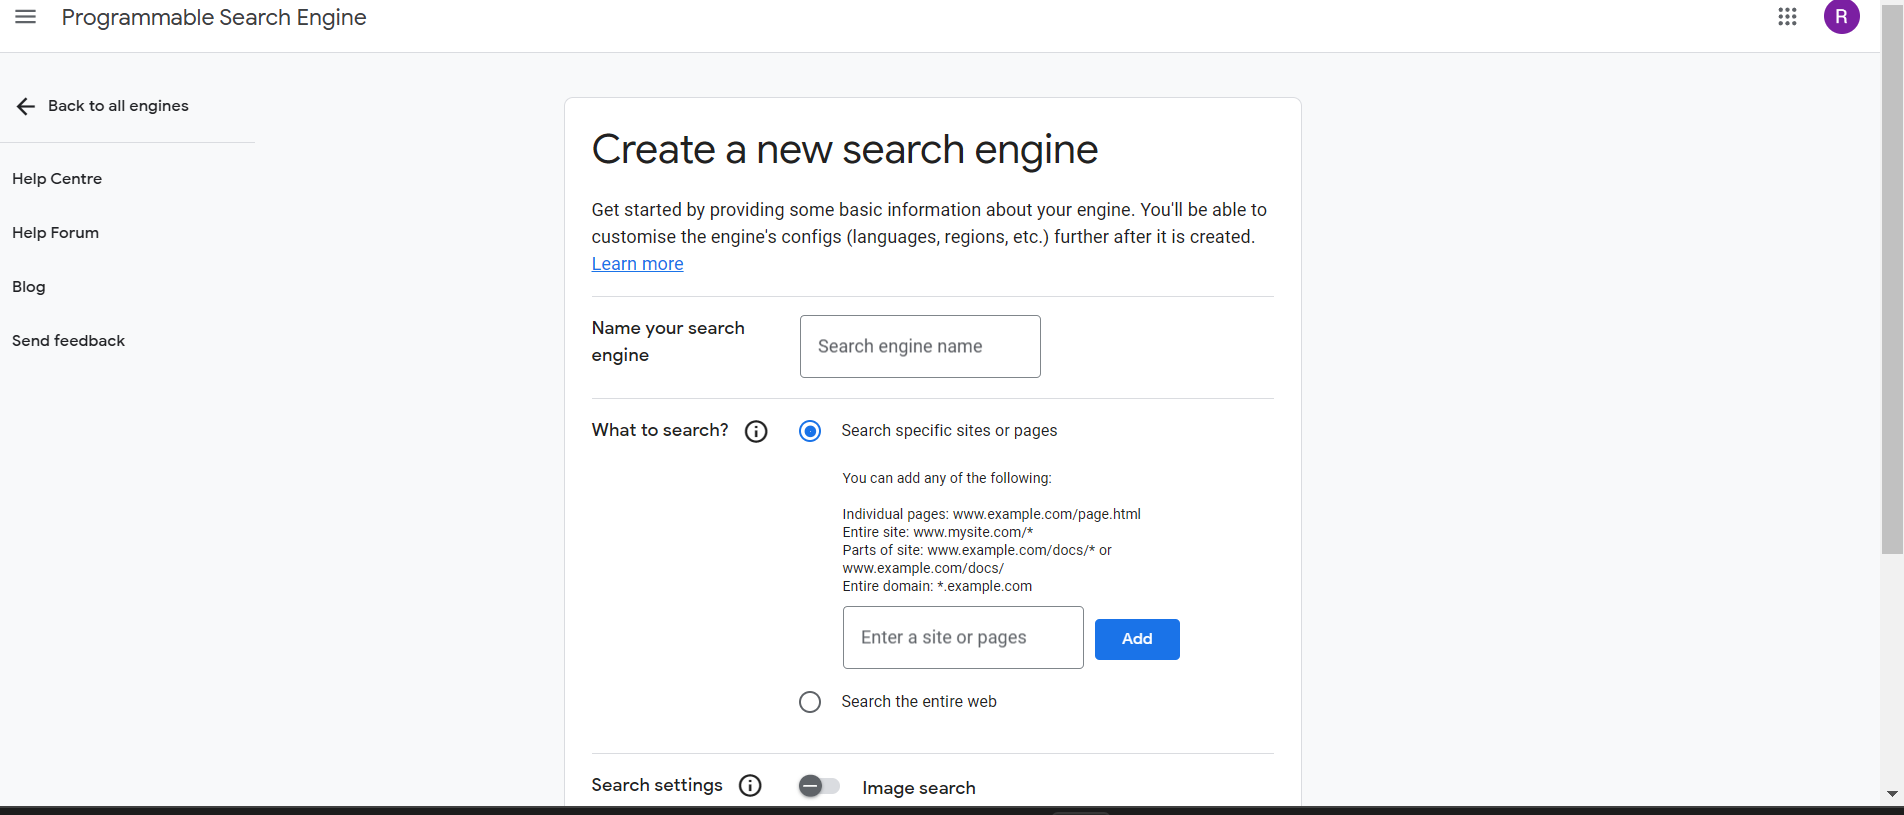
Configure your search engine:
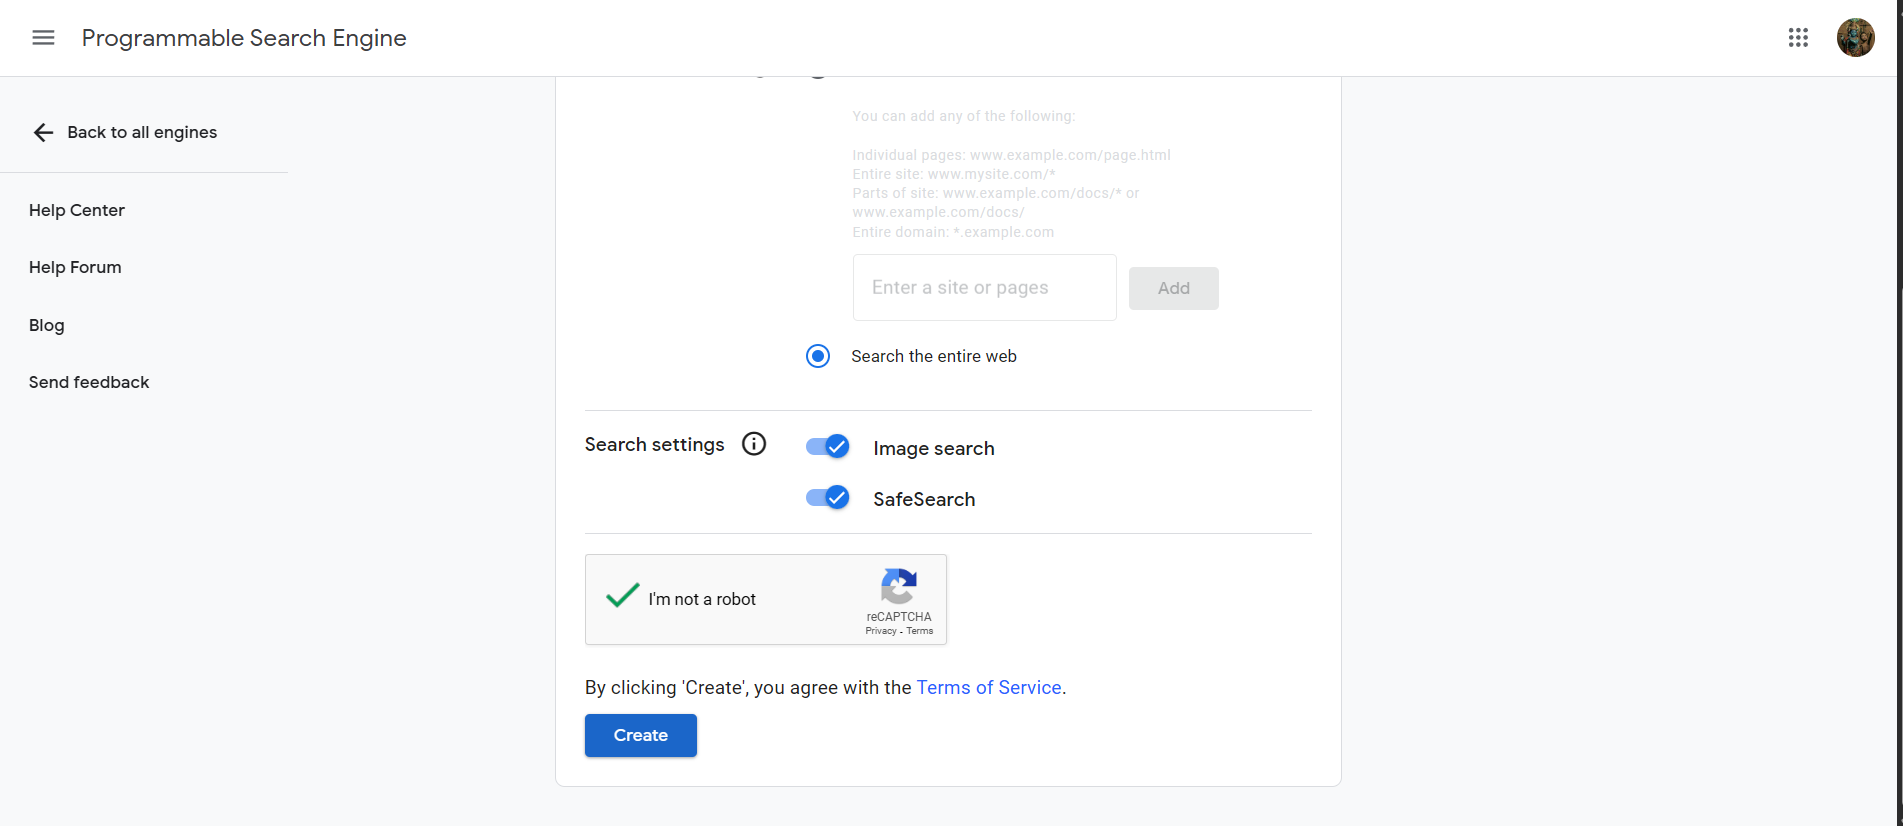
a. Select "Search the entire web" option
b. Name your search engine (any name you prefer)
c. In "Sites to search", select "Search the entire web"
d. Make sure to enable "Search the entire web" option
e. Click "Create"
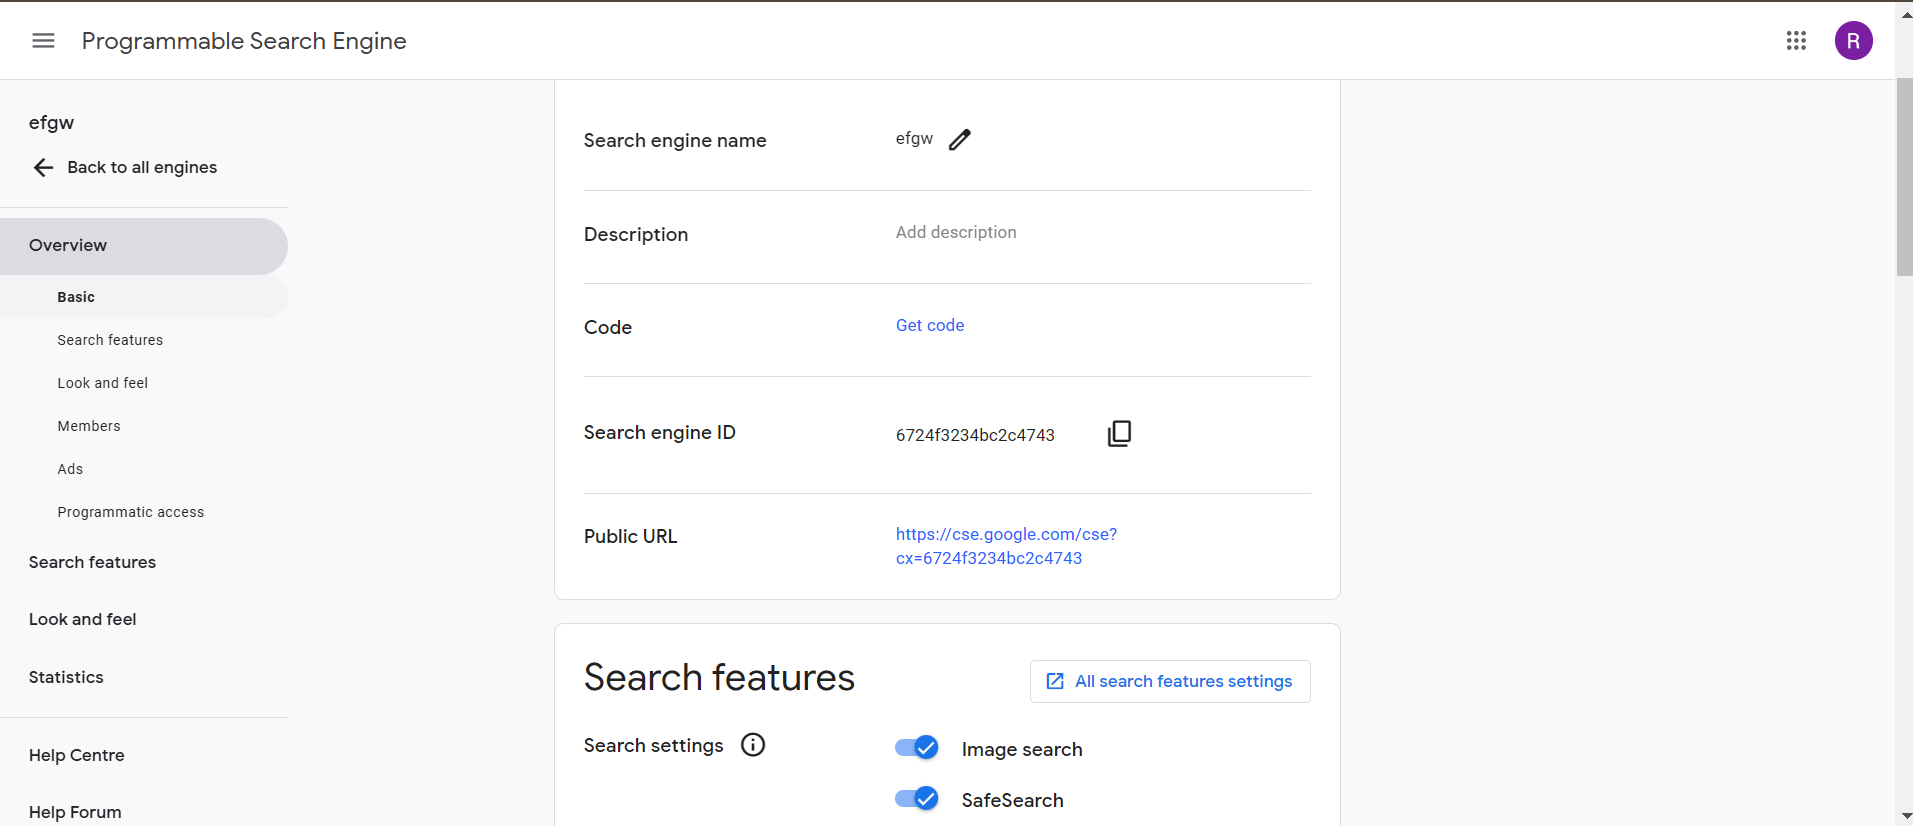
After creation:
a. Click on "Customize"
b. Go to "Basic" tab
c. Make sure "Search the entire web" is enabled
d. Find your Search Engine ID (it looks like: 012345678901234567890:abcdefghijk)
Important Notes:
The Search Engine MUST be configured to "Search the entire web"
If you see "Search only included sites" option, change it to "Search the entire web"
The Search Engine ID is case-sensitive
Double-check for any extra spaces when copying the ID
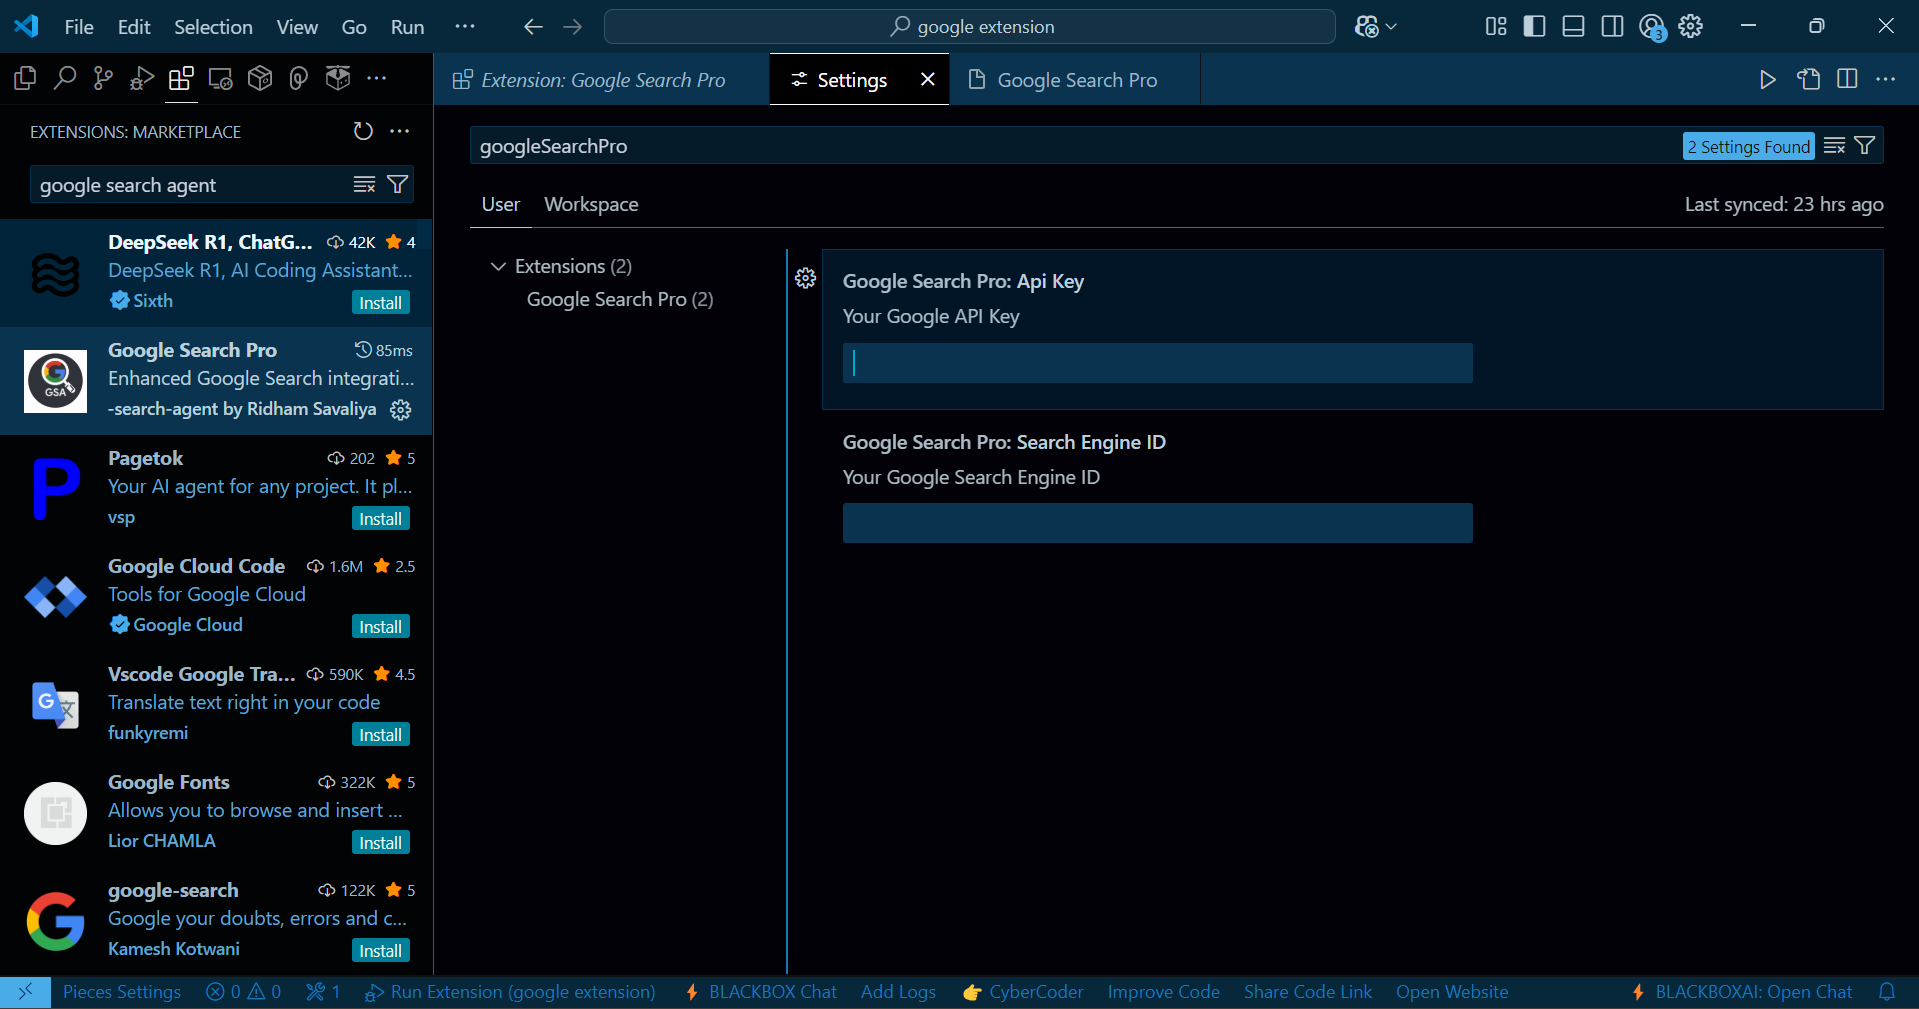
3. Configure the Extension in VS Code
Open VS Code Settings (File > Preferences > Settings or Ctrl+,)
Search for "Google Search Pro"
Enter your API Key in the Google Search Pro: API Key field
Enter your Search Engine ID in the Google Search Pro: Search Engine ID field
Save the settings
Usage
Open the command palette (Ctrl+Shift+P)
Type "BrowserX: Open Search"
Enter your search query
Choose between Web or Image search
Click on results to open them in your default browser
Features in Detail
Search
Web search with rich snippets
Image search with grid view
Instant results with smooth animations
UI/UX
Dark/Light mode toggle
Responsive design
Smooth animations
Tab-based navigation
Security
Secure API key storage
No data collection
Privacy-focused
Requirements
VS Code 1.60.0 or higher
Google API Key
Google Custom Search Engine ID
Known Issues
None at the moment
Release Notes
0.1.0
Initial release
Basic search functionality
Dark mode support
Setup wizard
Contributing
Feel free to submit issues and enhancement requests!