RelationalAI VS Code Extension
Support for the Rel language and the RelationalAI Knowledge Graph System. For Rel documentation and training, see https://docs.relational.ai and https://learn.relational.ai.
Overview video
Quick tips
- This extension is designed to work with your project directory as the workspace folder in VS Code. If you have a different directory open in VS Code --- perhaps a parent directory which contains multiple projects -- then open the project you want to work on in another VS Code window. Your models should be saved in a directory called
model (or another directory of your choosing -- see configuration options below).
- The RelationalAI View, which you can access by clicking the RelationalAI icon in the Activity Bar on the left side of the VS Code window, shows the state of your system in the cloud. In particular, when you click a cloud icon next to a model, you get an editor which displays and edits that model directly in the cloud. It is recommended that -- unless you want to edit the model specifically in the cloud -- you instead edit models locally in the
model directory. You can set the auto-sync-models configuration option to sync them to the cloud on save, or you can sync them manually with the command RelationalAI: Sync Models with Cloud.
- To see all available commands, do
Ctrl+Shift+P (Cmd+Shift+P on Mac) to open the Command Palette and start typing RelationalAI.
- You can open your Secondary Side Bar on the right side of the screen (
View: Toggle Secondary Side Bar Visibility in the Command Palette) and drag the RelationalAI icon from the Activity Bar to the Secondary Side Bar. This will enable you to see your files and your RelationalAI View at the same time.
Features
The RelationalAI VS Code extension provides the following features:
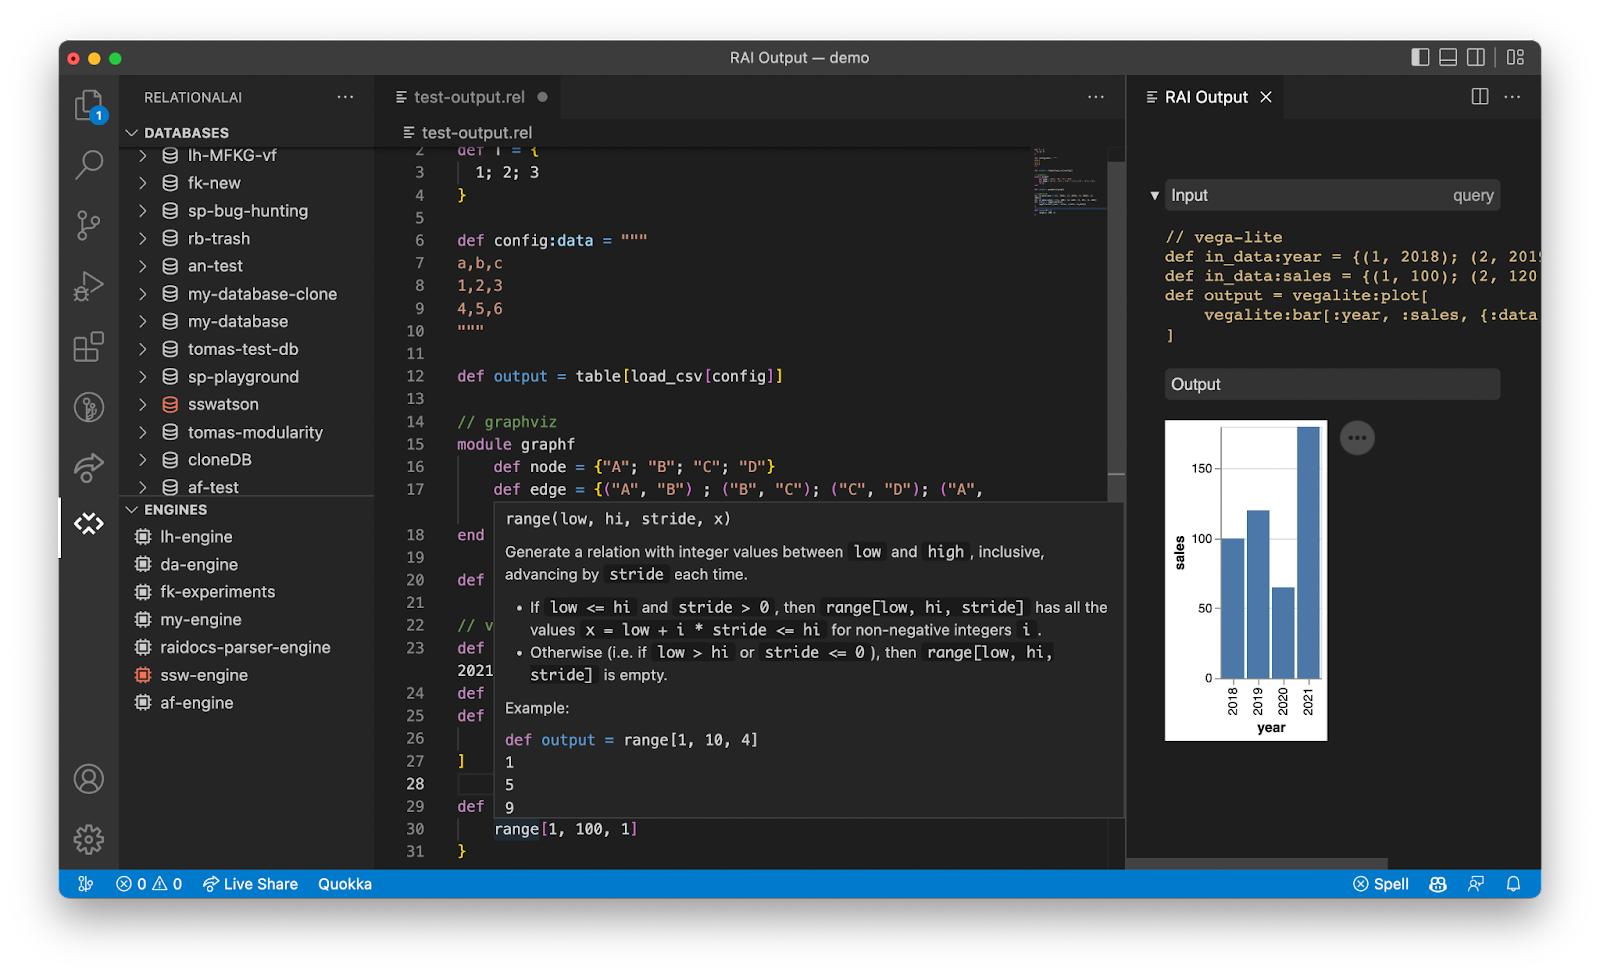
- Commands for sending selected code from any editor to the RelationalAI Query Engine and displaying the results in a rich-output webview that opens in a second Editor Group. The output viewer supports Graphviz, Vega-Lite, and other MIME types.
- CodeLens buttons and a
shift+enter keyboard shortcut for sending queries from a .rel or Markdown file.
- A command called
RelationalAI: Sync Models with Cloud that can be used to keep your local collection of model files in sync with the models stored in the database in the cloud.
- Rel Syntax highlighting:
.rel files.- Fenced code blocks in Markdown.
- In strings in Julia, Go, Python, Javascript, TypeScript, C#, Java files: sections of code between
//beginrel and //endrel comments are syntax highlighted.
- Hover help for standard-library relations and for user-defined base relations and derived relations.
- Autocomplete for:
- Relations in the standard library.
- User-defined base relations and derived relations.
- Control relations like
insert and delete.
- Unicode symbols (like
\sqrt).
- Support for the VS Code Outline View, so users can see which relations are defined in the currently open
.rel file and click on a relation name to navigate to its definition.
- A RelationalAI View, which shows the user's engines, databases, and transactions. Databases and engines can be created and deleted, and transactions can be cancelled. The database items support several features:
- They open to show a list of base relations and derived relations, as well as a list of model files.
- They can be selected or deleted using action buttons.
- Their relations and relation dependencies can also be visualized as a graph that opens in a new Editor Group.
- Action icons for the relations in the Side Bar:
- You can click on a base or derived relation to reveal its contents in a table viewer.
- You can click on the cloud icon on a derived relation to open a view of the remote version of the model in a new editor. The remote views are editable. Alternatively, click on the document icon to open the local file in which that relation is defined.
- Support for specifying read/write/model mode for fenced Markdown blocks that begin with:
```rel type=model&id=profit
- CSV and JSON loaders, available via the Command Palette as
RelationalAI: Load CSV and RelationalAI: Load JSON.
- A task runner that allows you to specify workflows in configuration files and excute them.
- A graph visualization of the dependency relationships between derived relations, including an interactive table for exploring the contents of each relation.
Getting started
Put your RelationalAI credentials into ~/.rai/config as explained in the RelationalAI Javascript SDK README. In VS Code, open a directory containing a RelationalAI project.
Use the RelationalAI button in the Activity Bar to select your database and engine, and run RelationalAI: Open Output Viewer from the Command Palette to open the output viewer. You can use the Side Bar to create or delete an engine or database.
You can also open the database Side Bar items to reveal lists of base and derived relations. If you click on a base or derived relation item in the Side Bar, it will show the relation in the viewer. The derived relation items have action buttons --- one for the server and one for your local file system --- that will open an editor to the relation's first def statement in your models.
The graph button computes the dependencies between derived relations and as an interactive graph in a new pane. You can click on each item to show summary information about that relation and preview its contents.
You will also find a transactions list in the Side Bar. You can use it to view the details of each transaction, cancel a running transaction, or open the page for that transaction in the Console. Running transactions are indicated by an orange transaction icon, and the cancel button appears on the right side of the transaction item on hover.
Tasks
You can specify sequences of operations to be performed in a task file, to be stored in a directory called task. Here's an example task file (task/example.toml, say):
[[step]]
name = "load helper relations"
mode = "model"
file_path = "model/helper"

[[step]]
name = "load data"
mode = "write"
file_path = "write/load-data.rel"
inputs = [
    { csv_data = "data/my-data.csv" }
]

[[step]]
name = "load remaining models"
mode = "model"
file_paths = [
    "model/business-logic.rel",
    "model/display-features.rel"
]
This example assumes that:
load-data.rel contains code like this:
def config[:data]: csv_data
def insert[:my_relation]: load_csv[config]
data/my-data.csv is a valid CSV containing the desired data.
model/helper is a directory containing .rel files.
Each step should include a name, a mode (which can be read, write, or model), either file_path or file_paths, and optionally inputs. The file_path or file_paths field should be a path or paths, respectively, to files relative to the root of the project directory. Alternatively, any entry may be a directory, in which case it will be expanded to all of the .rel files contained in that directory (recursively).
The inputs field should be a list of objects, each of which should have a single key-value pair. The key should be the name of a variable to be referred to in the Rel file or files, and the value should be the path to a file whose contents will be inserted for that variable in the Rel files.
You can create a new task or a new step in a task using the commands "RelationalAI: New Task" and "RelationalAI: New Task Step", respectively. It will walk you through a series of prompts and insert a TOML entry that corresponds to the options you selected.
Running a task
To run a task, open the Command Palette and type RelationalAI: Run Task. You will be prompted to select a task file. The task will be run in the background, and you can view its progress in the Status Bar (along the bottom of the window).
Loading data
To load a CSV or JSON file, select RelationalAI: Load CSV or RelationalAI: Load JSON from the Command Palette (Ctrl+Shift+P, or Cmd+Shift+P on Mac).
Sending code to the server
In a .rel file or a .md file, you can select some text and invoke RelationalAI: Query from the Command Palette to send the text as a query. Alternatively, you can send a query with the shift+enter keyboard shortcut. If you want to send the whole file, do Ctrl+A (Cmd-A on Mac) to select all of the text before doing shift+enter.
To execute code as a write query or to load a model, use the Command Palette to run RelationalAI: Run Selection As Write Query or RelationalAI: Load Selection As Model, respectively. If you load a model, the model name is determined by the file path of the open editor relative to the project root (the folder you have open in VS Code). For example, if you've opened ~/my-project/ and the file name is ~/my-project/model/profit.rel, then the model name will be model/profit.rel.
This code execution feature includes several conveniences:
You can place your cursor in a block of text and do shift+enter to automatically select the whole block. For this purpose, a block is delineated by Rel comments that start at the beginning of a line (read or write query files) or a Rel module declaration or definition (for model files).
If the document is in the Markdown language mode (for example, if it has an .md extension), then you can send an entire fenced code block like this:
```rel type=model&id=profit
def profit[t]: revenue[t] - cost[t]
```
Such a block will be loaded as a model the given id value used as the model name. The ID can be omitted if the block is not a model, and the type can be omitted if you want the code to be executed as a read query.
Furthermore, you don't have to select the entire block to send it. You can put your cursor anywhere inside the code block and do shift+enter, and the block contents will be selected for you.
The command RelationalAI: Sync Models with Cloud syncs the .rel files in your model directory with the cloud.
Outline view
If you click the Explorer icon at the top of the Activity Bar on the left side of the VS Code window, the Side Bar will open to a view that includes a menu item called "OUTLINE". This shows you which relations are defined in the currently open editor. You can click on an item to navigate to it in your editor.
Note: the contents of your Rel file must be correct for this feature to work. If errors are encountered while parsing your code, the Outline view will be empty.
Autocomplete and hover support
When you start typing a relation name (in a .rel file), you will get autocomplete suggestions. The suggestions come from the standard library as well as the list of the base and derived relations defined in the currently selected database. Completion is also available for Unicode characters; see the Appendix below. You can view the docstring for any standard library relation by hovering over the name or by clicking the arrow on the right side of the autocomplete suggestion.
Configuration
Profiles and default databases and engines
If you have multiple profiles in ~/.rai/config, you can switch between them using the command RelationalAI: Set Profile or by clicking on the profile indicator in the Status Bar (the thin strip along the bottom of the window).
The selected profile, database, and engine for each project will be remembered by the extension and used when you re-open a project folder in VS Code. If you want to set defaults for these yourself, you can put them in a file named relationalai-vscode.toml in the root of your project. The file should look like this:
profile = "my_profile"
database = "my_database"
engine = "my_engine"
You can create this file using the command "RelationalAI: Configure. The command will show you the list of configuration options, prompt you for values, open your relationalai-vscode.toml --- creating it if necessary --- and insert an appropriate line in the TOML file.
In addition to the project-level configuration, you can create the file ~/.rai/relationalai-vscode.toml and use it to associate default settings for the profiles in ~/.rai/config.
The priority order for these settings is as follows:
- Project configuration file.
- User configuration file.
- Settings used in this project the last time it was opened.
- Settings used the last time you used the extension (any project).
Identifying query mode by file name
If you prefer to use a name other than model to store your Rel files, you can configure the extension to use a different name. You can also notify the extension that certain files should be run in a specific mode (read or write) by default. To do this, put the following lines in the relationalai-vscode.toml file in the root of your project (or in ~/.rai):
model-directory = "my_model_dirname"
write-query-files = ["**/write/*"]
read-query-files = ["**/read/*"]
The entries in write-query-files and read-query-files are glob patterns.
Output caching
The extension can be configured to cache query output. This is useful if you want to go back and look at the output of a long-running query that you ran earlier. To enable this behavior, put the following line in the relationalai-vscode.toml file in the root of your project (or in ~/.rai):
cache-output = true
The outputs are cached in a folder called .rai in the root of your project. You can clear this cache at any time by deleting this folder.
If you are caching query results, then the alt+shift+enter (option+shift+enter on Mac) keyboard shortcut can be used the same as shift+enter except that it only hits the cache and does not send the query to the cloud. You will get an error message if no cache is available for the given query.
Model names
By default, a model with a name of profit will be stored in your local model directory with the name profit.rel. Similarly, if you create a local file called revenue.rel, it will be called revenue when sent to the cloud. In other words, the .rel file extension is added when copying a model from the cloud and removed when copying a model to the cloud.
If you want your models to have the same name in the cloud and local file system, you can put the following line in the relationalai-vscode.toml file in the root of your project (or in ~/.rai):
use-dot-rel-extension-in-model-name = true
With this setting, a local file called sales.rel will fsto the cloud as a model named sales.rel. Likewise, a model named employees will sync to the local file system as a file called employees (no extension).
Output inference
You can set the VS Code extension to automatically translate a query like this:
def R {
    1; 2; 3
}
into this:
def R {
    1; 2; 3
}

def output {R}
This setting doesn't affect queries that contain multiple rules. To turn this setting on, put the following line in the relationalai-vscode.toml file in the root of your project (or in ~/.rai):
infer-output = true
Engine, database, and transaction filters
If you want to limit the results that display in the Databases, Engines, and Transactions Views in the RelationalAI View, you can do that with the database-filter, engine-filter, and transaction-filter settings in your relationalai-vscode.toml file:
database-filter = "^anon.*"
engine-filter = "^anon.*"
[transaction-filter]
    database_name = "^anon.*"
The settings above, for example, would show you only the databases and engines whose names start with anon as well as the transactions whose associated database name starts with anon. The other fields you can use with [transaction-filter] are engine_name, database_name, id, query, state, tags.
By default, transaction-filter is set to tags = "vscode-user", meaning that you only see the transactions you issued from the VS Code extension.
These features are implemented by evaluating (new RegExp(yourSetting)).test(engineName) in Javascript, so you can consult documentation for Javascript regular expressions for specific regex details for this feature.
Auto Save Models
If you want to sync models to the cloud each time you save a file, adjust the auto-sync-models setting in relationalai-vscode.toml:
auto-sync-models = true
Other Configuration Options
The other configuration options are described in the list of options you get when you run the command "RelationalAI: Configure".
User relationalai-vscode.toml file
If there are settings that you want to use for all of your projects, you can put them in a file called ~/.rai/relationalai-vscode.toml, where ~ represents your home directory. Each setting is resolved by first consulting the project-level relationalai-vscode.toml file and then the user-level relationalai-vscode.toml file if that setting is not present in the project-level file.
Support
Note: This extension is currently being supported by a small team. Feedback is very much welcomed. We expect to address bug reports and will do our best with feature requests as well.
Appendix
There are also Unicode completions available:
| trigger |
description |
character |
| \registered |
Registered Sign / Registered Trade Mark Sign |
® |
| \degree |
Degree Sign |
° |
| \pm |
Plus-Minus Sign / Plus-Or-Minus Sign |
± |
| ^2 |
Superscript Two / Superscript Digit Two |
² |
| ^3 |
Superscript Three / Superscript Digit Three |
³ |
| ^1 |
Superscript One / Superscript Digit One |
¹ |
| \1/4 |
Vulgar Fraction One Quarter / Fraction One Quarter |
¼ |
| \1/2 |
Vulgar Fraction One Half / Fraction One Half |
½ |
| \3/4 |
Vulgar Fraction Three Quarters / Fraction Three Quarters |
¾ |
| \questiondown |
Inverted Question Mark |
¿ |
| imes |
Multiplication Sign |
× |
| \div |
Division Sign |
÷ |
| \Alpha |
Greek Capital Letter Alpha |
Α |
| \Beta |
Greek Capital Letter Beta |
Β |
| \Gamma |
Greek Capital Letter Gamma |
Γ |
| \Delta |
Greek Capital Letter Delta |
Δ |
| \Epsilon |
Greek Capital Letter Epsilon |
Ε |
| \Zeta |
Greek Capital Letter Zeta |
Ζ |
| \Eta |
Greek Capital Letter Eta |
Η |
| \Theta |
Greek Capital Letter Theta |
Θ |
| \Iota |
Greek Capital Letter Iota |
Ι |
| \Kappa |
Greek Capital Letter Kappa |
Κ |
| \Lambda |
Greek Capital Letter Lamda / Greek Capital Letter Lambda |
Λ |
| \upMu |
Greek Capital Letter Mu |
Μ |
| \upNu |
Greek Capital Letter Nu |
Ν |
| \Xi |
Greek Capital Letter Xi |
Ξ |
| \upOmicron |
Greek Capital Letter Omicron |
Ο |
| \Pi |
Greek Capital Letter Pi |
Π |
| \Rho |
Greek Capital Letter Rho |
Ρ |
| \Sigma |
Greek Capital Letter Sigma |
Σ |
| \Tau |
Greek Capital Letter Tau |
Τ |
| \Upsilon |
Greek Capital Letter Upsilon |
Υ |
| \Phi |
Greek Capital Letter Phi |
Φ |
| \Chi |
Greek Capital Letter Chi |
Χ |
| \Psi |
Greek Capital Letter Psi |
Ψ |
| \Omega |
Greek Capital Letter Omega |
Ω |
| \alpha |
Greek Small Letter Alpha |
α |
| \beta |
Greek Small Letter Beta |
β |
| \gamma |
Greek Small Letter Gamma |
γ |
| \delta |
Greek Small Letter Delta |
δ |
| \varepsilon |
Greek Small Letter Epsilon |
ε |
| \zeta |
Greek Small Letter Zeta |
ζ |
| \eta |
Greek Small Letter Eta |
η |
| \theta |
Greek Small Letter Theta |
θ |
| \iota |
Greek Small Letter Iota |
ι |
| \kappa |
Greek Small Letter Kappa |
κ |
| \lambda |
Greek Small Letter Lamda / Greek Small Letter Lambda |
λ |
| \mu |
Greek Small Letter Mu |
μ |
| \nu |
Greek Small Letter Nu |
ν |
| \xi |
Greek Small Letter Xi |
ξ |
| \upomicron |
Greek Small Letter Omicron |
ο |
| \pi |
Greek Small Letter Pi |
π |
| \rho |
Greek Small Letter Rho |
ρ |
| \varsigma |
Greek Small Letter Final Sigma |
ς |
| \sigma |
Greek Small Letter Sigma |
σ |
| \tau |
Greek Small Letter Tau |
τ |
| \upsilon |
Greek Small Letter Upsilon |
υ |
| \varphi |
Greek Small Letter Phi |
φ |
| \chi |
Greek Small Letter Chi |
χ |
| \psi |
Greek Small Letter Psi |
ψ |
| \omega |
Greek Small Letter Omega |
ω |
| \upvarbeta |
Greek Beta Symbol / Greek Small Letter Curled Beta |
ϐ |
| \vartheta |
Greek Theta Symbol / Greek Small Letter Script Theta |
ϑ |
| \phi |
Greek Phi Symbol / Greek Small Letter Script Phi |
ϕ |
| \varpi |
Greek Pi Symbol / Greek Small Letter Omega Pi |
ϖ |
| \upoldKoppa |
Greek Letter Archaic Koppa |
Ϙ |
| \upoldkoppa |
Greek Small Letter Archaic Koppa |
ϙ |
| \Stigma |
Greek Letter Stigma / Greek Capital Letter Stigma |
Ϛ |
| \upstigma |
Greek Small Letter Stigma |
ϛ |
| \Digamma |
Greek Letter Digamma / Greek Capital Letter Digamma |
Ϝ |
| \digamma |
Greek Small Letter Digamma |
ϝ |
| \Koppa |
Greek Letter Koppa / Greek Capital Letter Koppa |
Ϟ |
| \upkoppa |
Greek Small Letter Koppa |
ϟ |
| \Sampi |
Greek Letter Sampi / Greek Capital Letter Sampi |
Ϡ |
| \upsampi |
Greek Small Letter Sampi |
ϡ |
| \varkappa |
Greek Kappa Symbol / Greek Small Letter Script Kappa |
ϰ |
| \varrho |
Greek Rho Symbol / Greek Small Letter Tailed Rho |
ϱ |
| \varTheta |
Greek Capital Theta Symbol |
ϴ |
| \epsilon |
Greek Lunate Epsilon Symbol |
ϵ |
| \backepsilon |
Greek Reversed Lunate Epsilon Symbol |
϶ |
| ^0 |
Superscript Zero / Superscript Digit Zero |
⁰ |
| ^i |
Superscript Latin Small Letter I |
ⁱ |
| ^4 |
Superscript Four / Superscript Digit Four |
⁴ |
| ^5 |
Superscript Five / Superscript Digit Five |
⁵ |
| ^6 |
Superscript Six / Superscript Digit Six |
⁶ |
| ^7 |
Superscript Seven / Superscript Digit Seven |
⁷ |
| ^8 |
Superscript Eight / Superscript Digit Eight |
⁸ |
| ^9 |
Superscript Nine / Superscript Digit Nine |
⁹ |
| ^+ |
Superscript Plus Sign |
⁺ |
| ^- |
Superscript Minus / Superscript Hyphen-Minus |
⁻ |
| ^= |
Superscript Equals Sign |
⁼ |
| ^( |
Superscript Left Parenthesis / Superscript Opening Parenthesis |
⁽ |
| ^) |
Superscript Right Parenthesis / Superscript Closing Parenthesis |
⁾ |
| ^n |
Superscript Latin Small Letter N |
ⁿ |
| _0 |
Subscript Zero / Subscript Digit Zero |
₀ |
| _1 |
Subscript One / Subscript Digit One |
₁ |
| _2 |
Subscript Two / Subscript Digit Two |
₂ |
| _3 |
Subscript Three / Subscript Digit Three |
₃ |
| _4 |
Subscript Four / Subscript Digit Four |
₄ |
| _5 |
Subscript Five / Subscript Digit Five |
₅ |
| _6 |
Subscript Six / Subscript Digit Six |
₆ |
| _7 |
Subscript Seven / Subscript Digit Seven |
₇ |
| _8 |
Subscript Eight / Subscript Digit Eight |
₈ |
| _9 |
Subscript Nine / Subscript Digit Nine |
₉ |
| \forall |
For All |
∀ |
| \complement |
Complement |
∁ |
| \partial |
Partial Differential |
∂ |
| \exists |
There Exists |
∃ |
| \nexists |
There Does Not Exist |
∄ |
| \emptyset |
Empty Set |
∅ |
| \increment |
Increment |
∆ |
| \nabla |
Nabla |
∇ |
| \in |
Element Of |
∈ |
| \notin |
Not An Element Of |
∉ |
| \sqrt |
Square Root |
√ |
| \cbrt |
Cube Root |
∛ |
| \fourthroot |
Fourth Root |
∜ |
| \propto |
Proportional To |
∝ |
| \infty |
Infinity |
∞ |
| \cap |
Intersection |
∩ |
| \cup |
Union |
∪ |
| \therefore |
Therefore |
∴ |
| \because |
Because |
∵ |
| \leq |
Less-Than Or Equal To / Less Than Or Equal To |
≤ |
| \geq |
Greater-Than Or Equal To / Greater Than Or Equal To |
≥ |
| \subset |
Subset Of |
⊂ |
| \supset |
Superset Of |
⊃ |
| \nsubset |
Not A Subset Of |
⊄ |
| \nsupset |
Not A Superset Of |
⊅ |
| \subseteq |
Subset Of Or Equal To |
⊆ |
| \supseteq |
Superset Of Or Equal To |
⊇ |
| \nsubseteq |
Neither A Subset Of Nor Equal To |
⊈ |
| \nsupseteq |
Neither A Superset Of Nor Equal To |
⊉ |
| \bowtie |
Bowtie |
⋈ |
| \ltimes |
Left Normal Factor Semidirect Product |
⋉ |
| \rtimes |
Right Normal Factor Semidirect Product |
⋊ |
| \vdots |
Vertical Ellipsis |
⋮ |
| \cdots |
Midline Horizontal Ellipsis |
⋯ |
| \adots |
Up Right Diagonal Ellipsis |
⋰ |
| \ddots |
Down Right Diagonal Ellipsis |
⋱ |
