QM Dev Tool is a VS Code extension that combines four workflows in one sidebar:
- Run builds for multiple local project paths
- Generate Jira-ready descriptions from your current branch changes
- Run Jira-guided or logic-focused AI code review for the current branch
- Run common Git and branch merge actions in a visible VS Code terminal
This README is the content shown on the extension details page in VS Code and Marketplace.
Screenshots
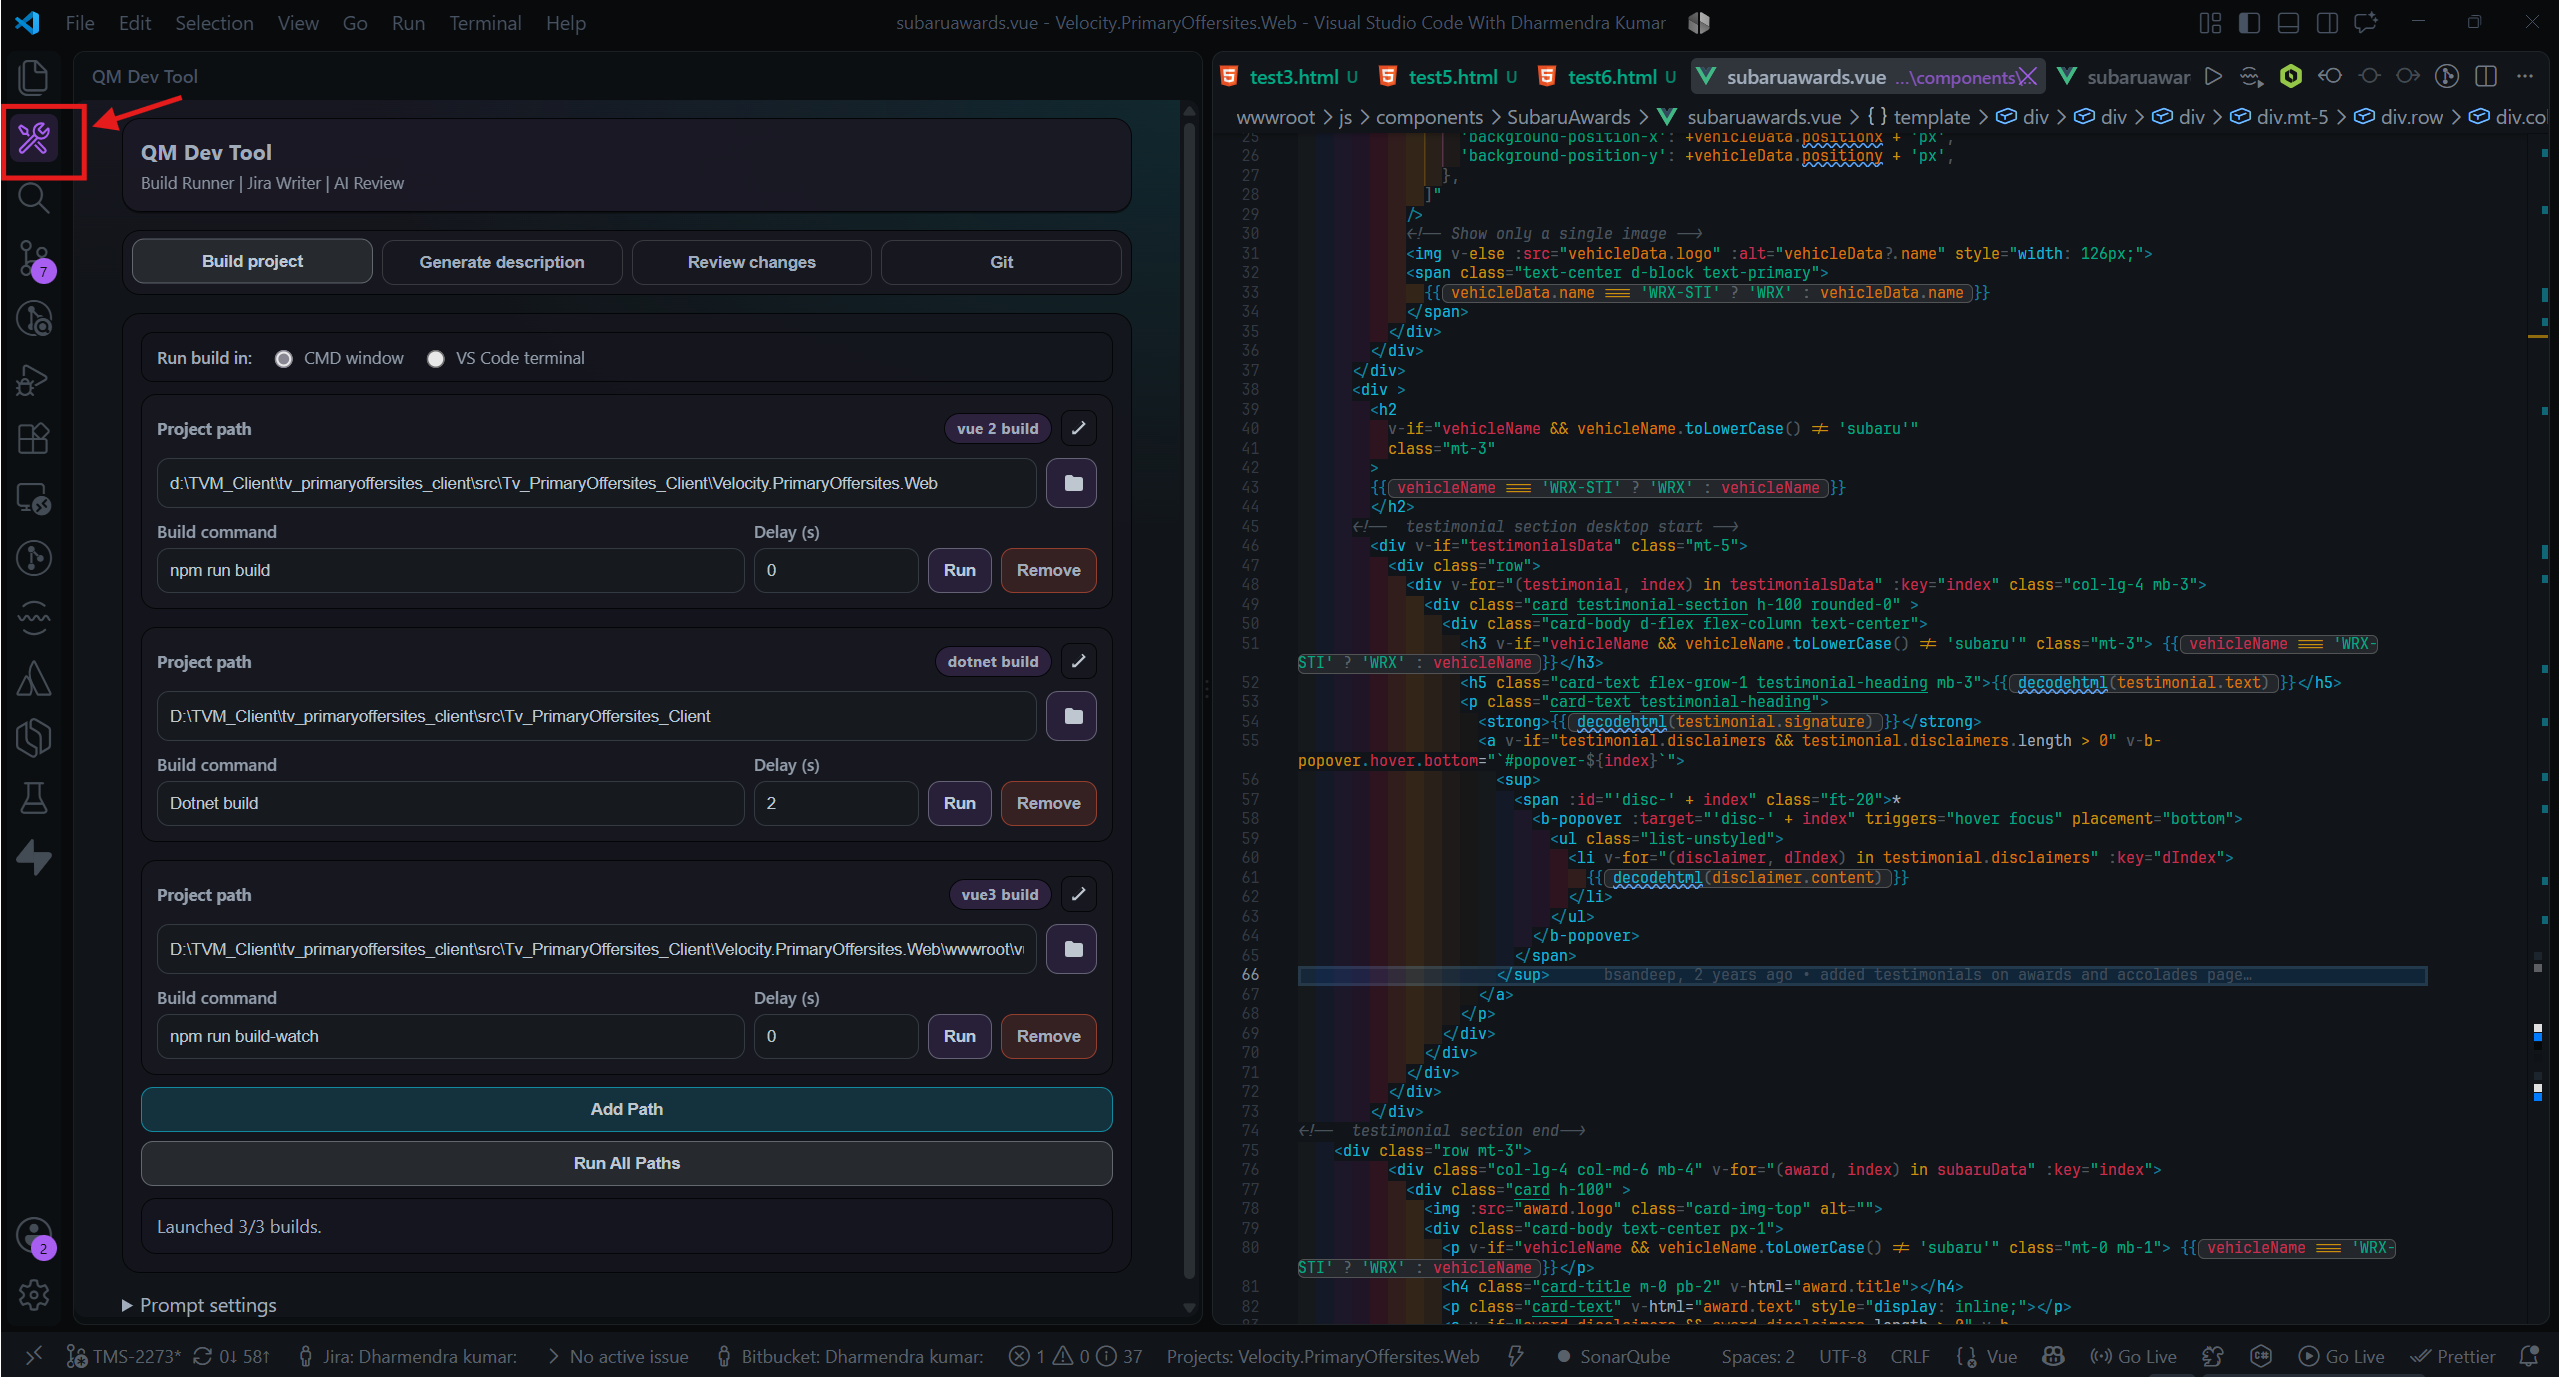
Build tab
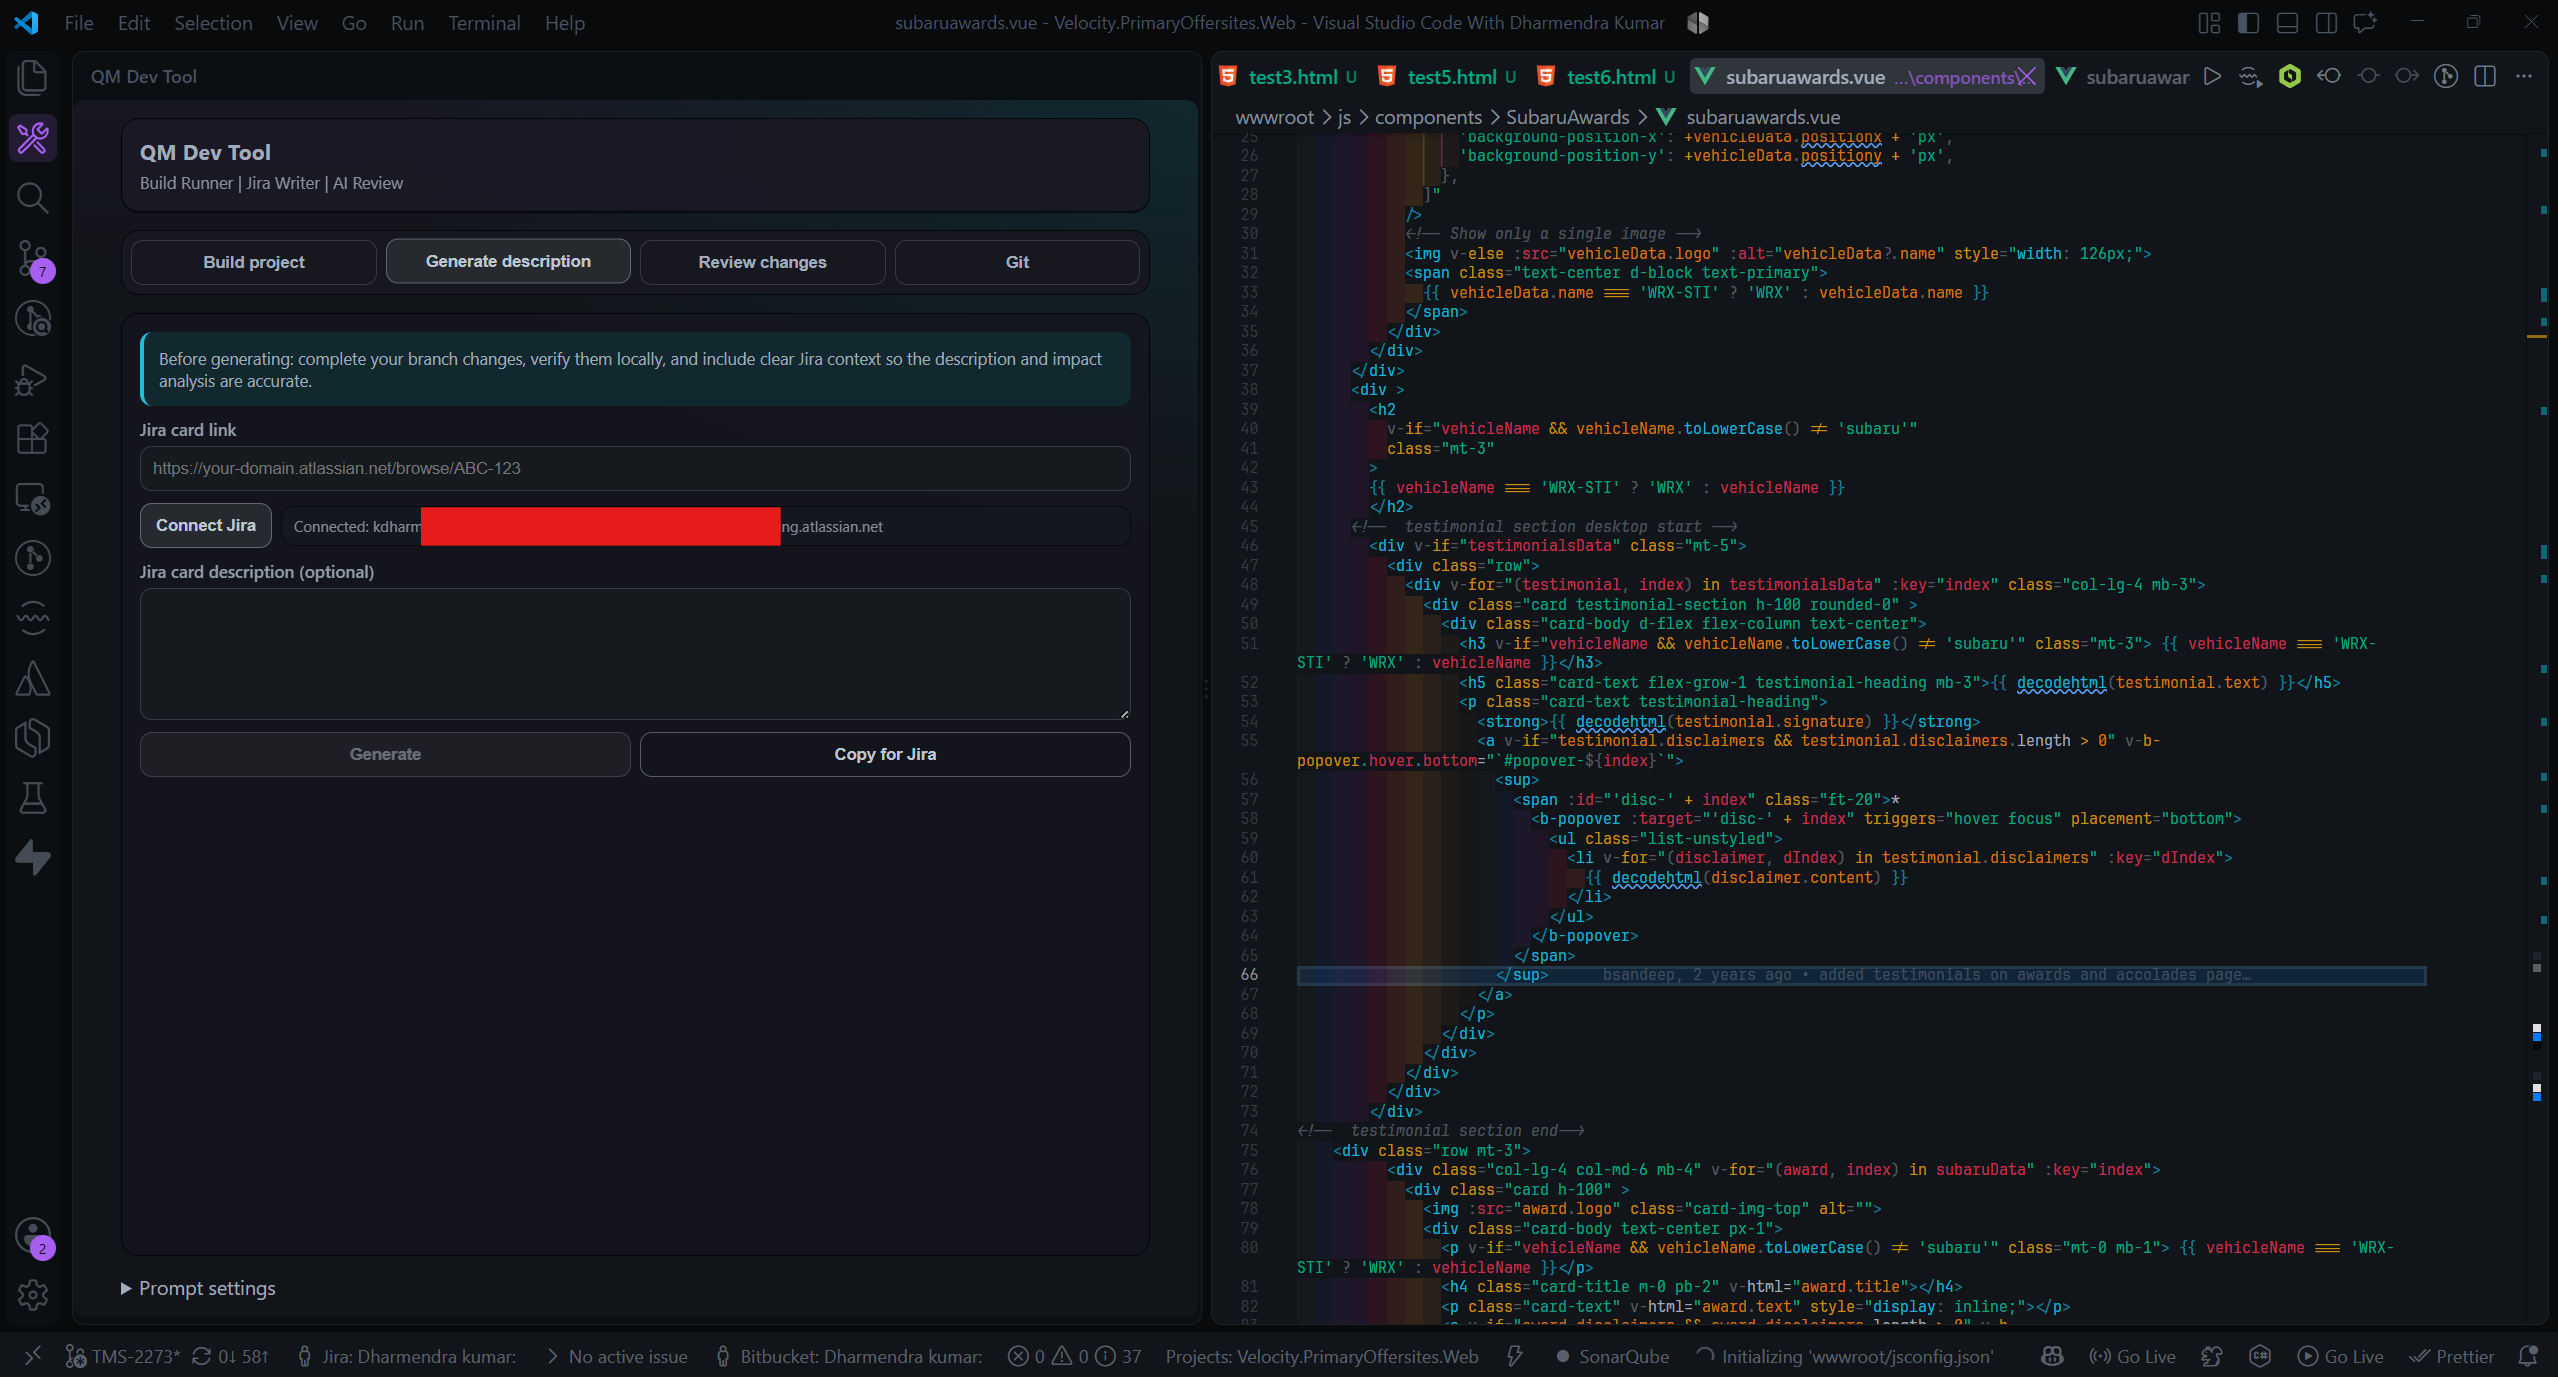
Jira tab
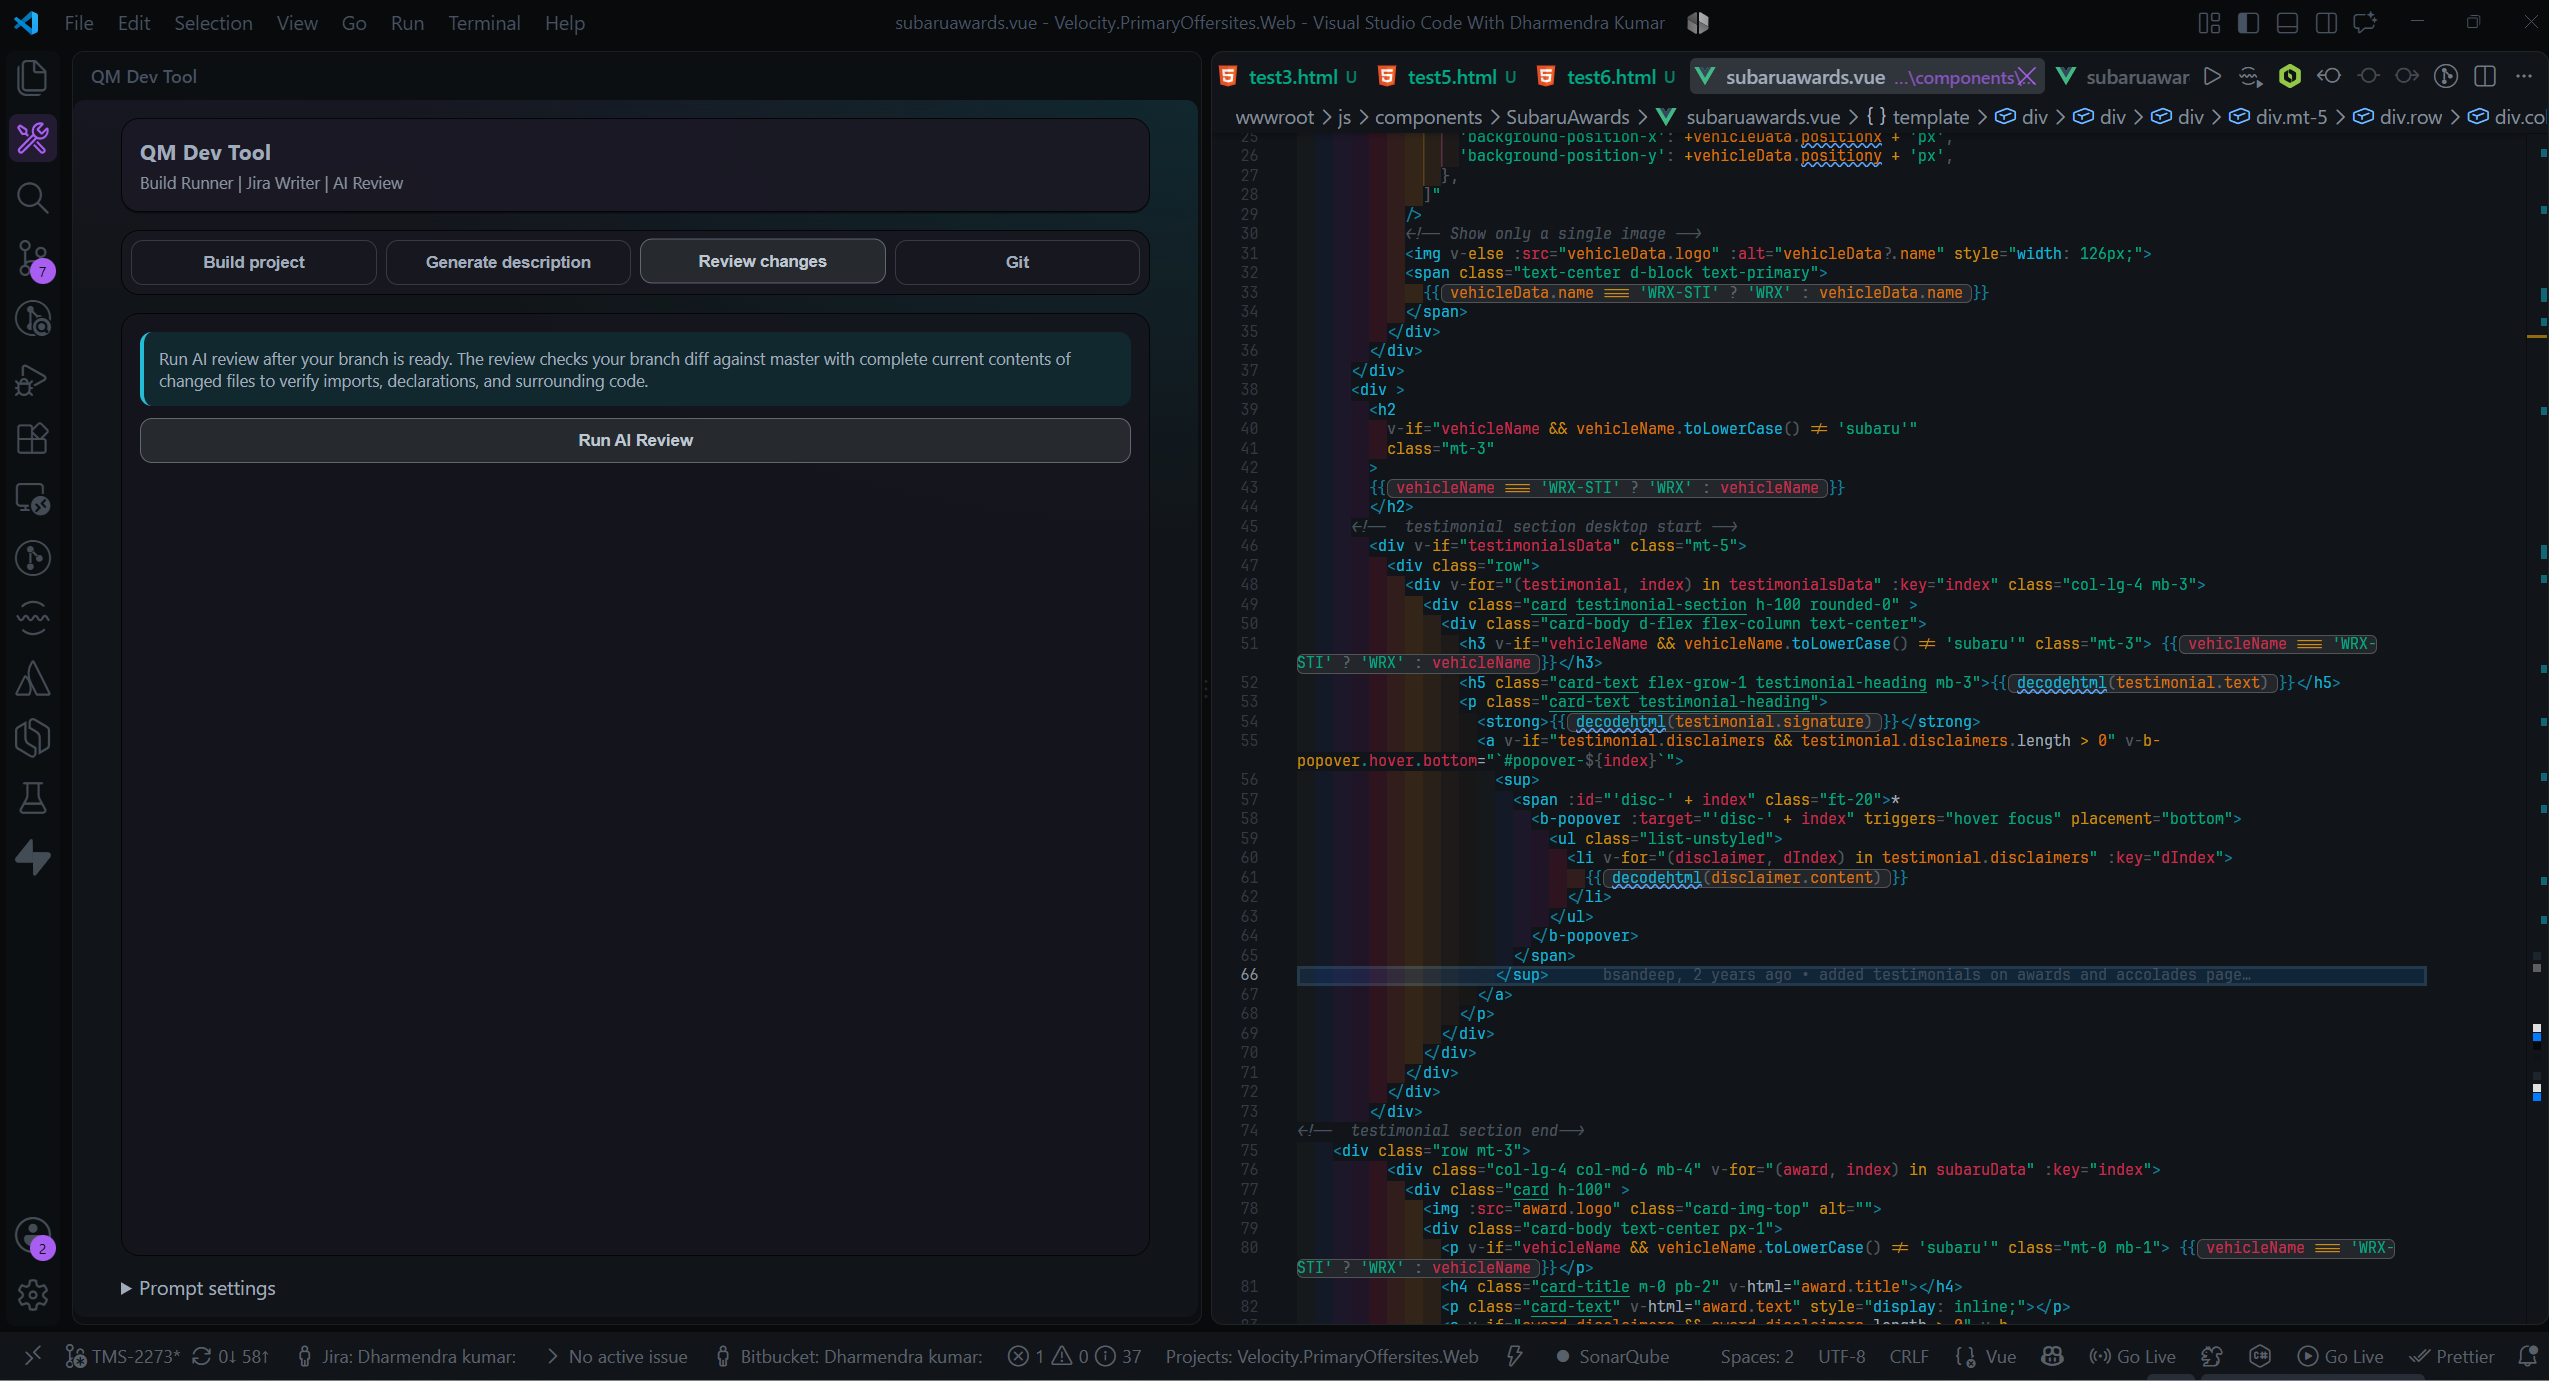
Review tab
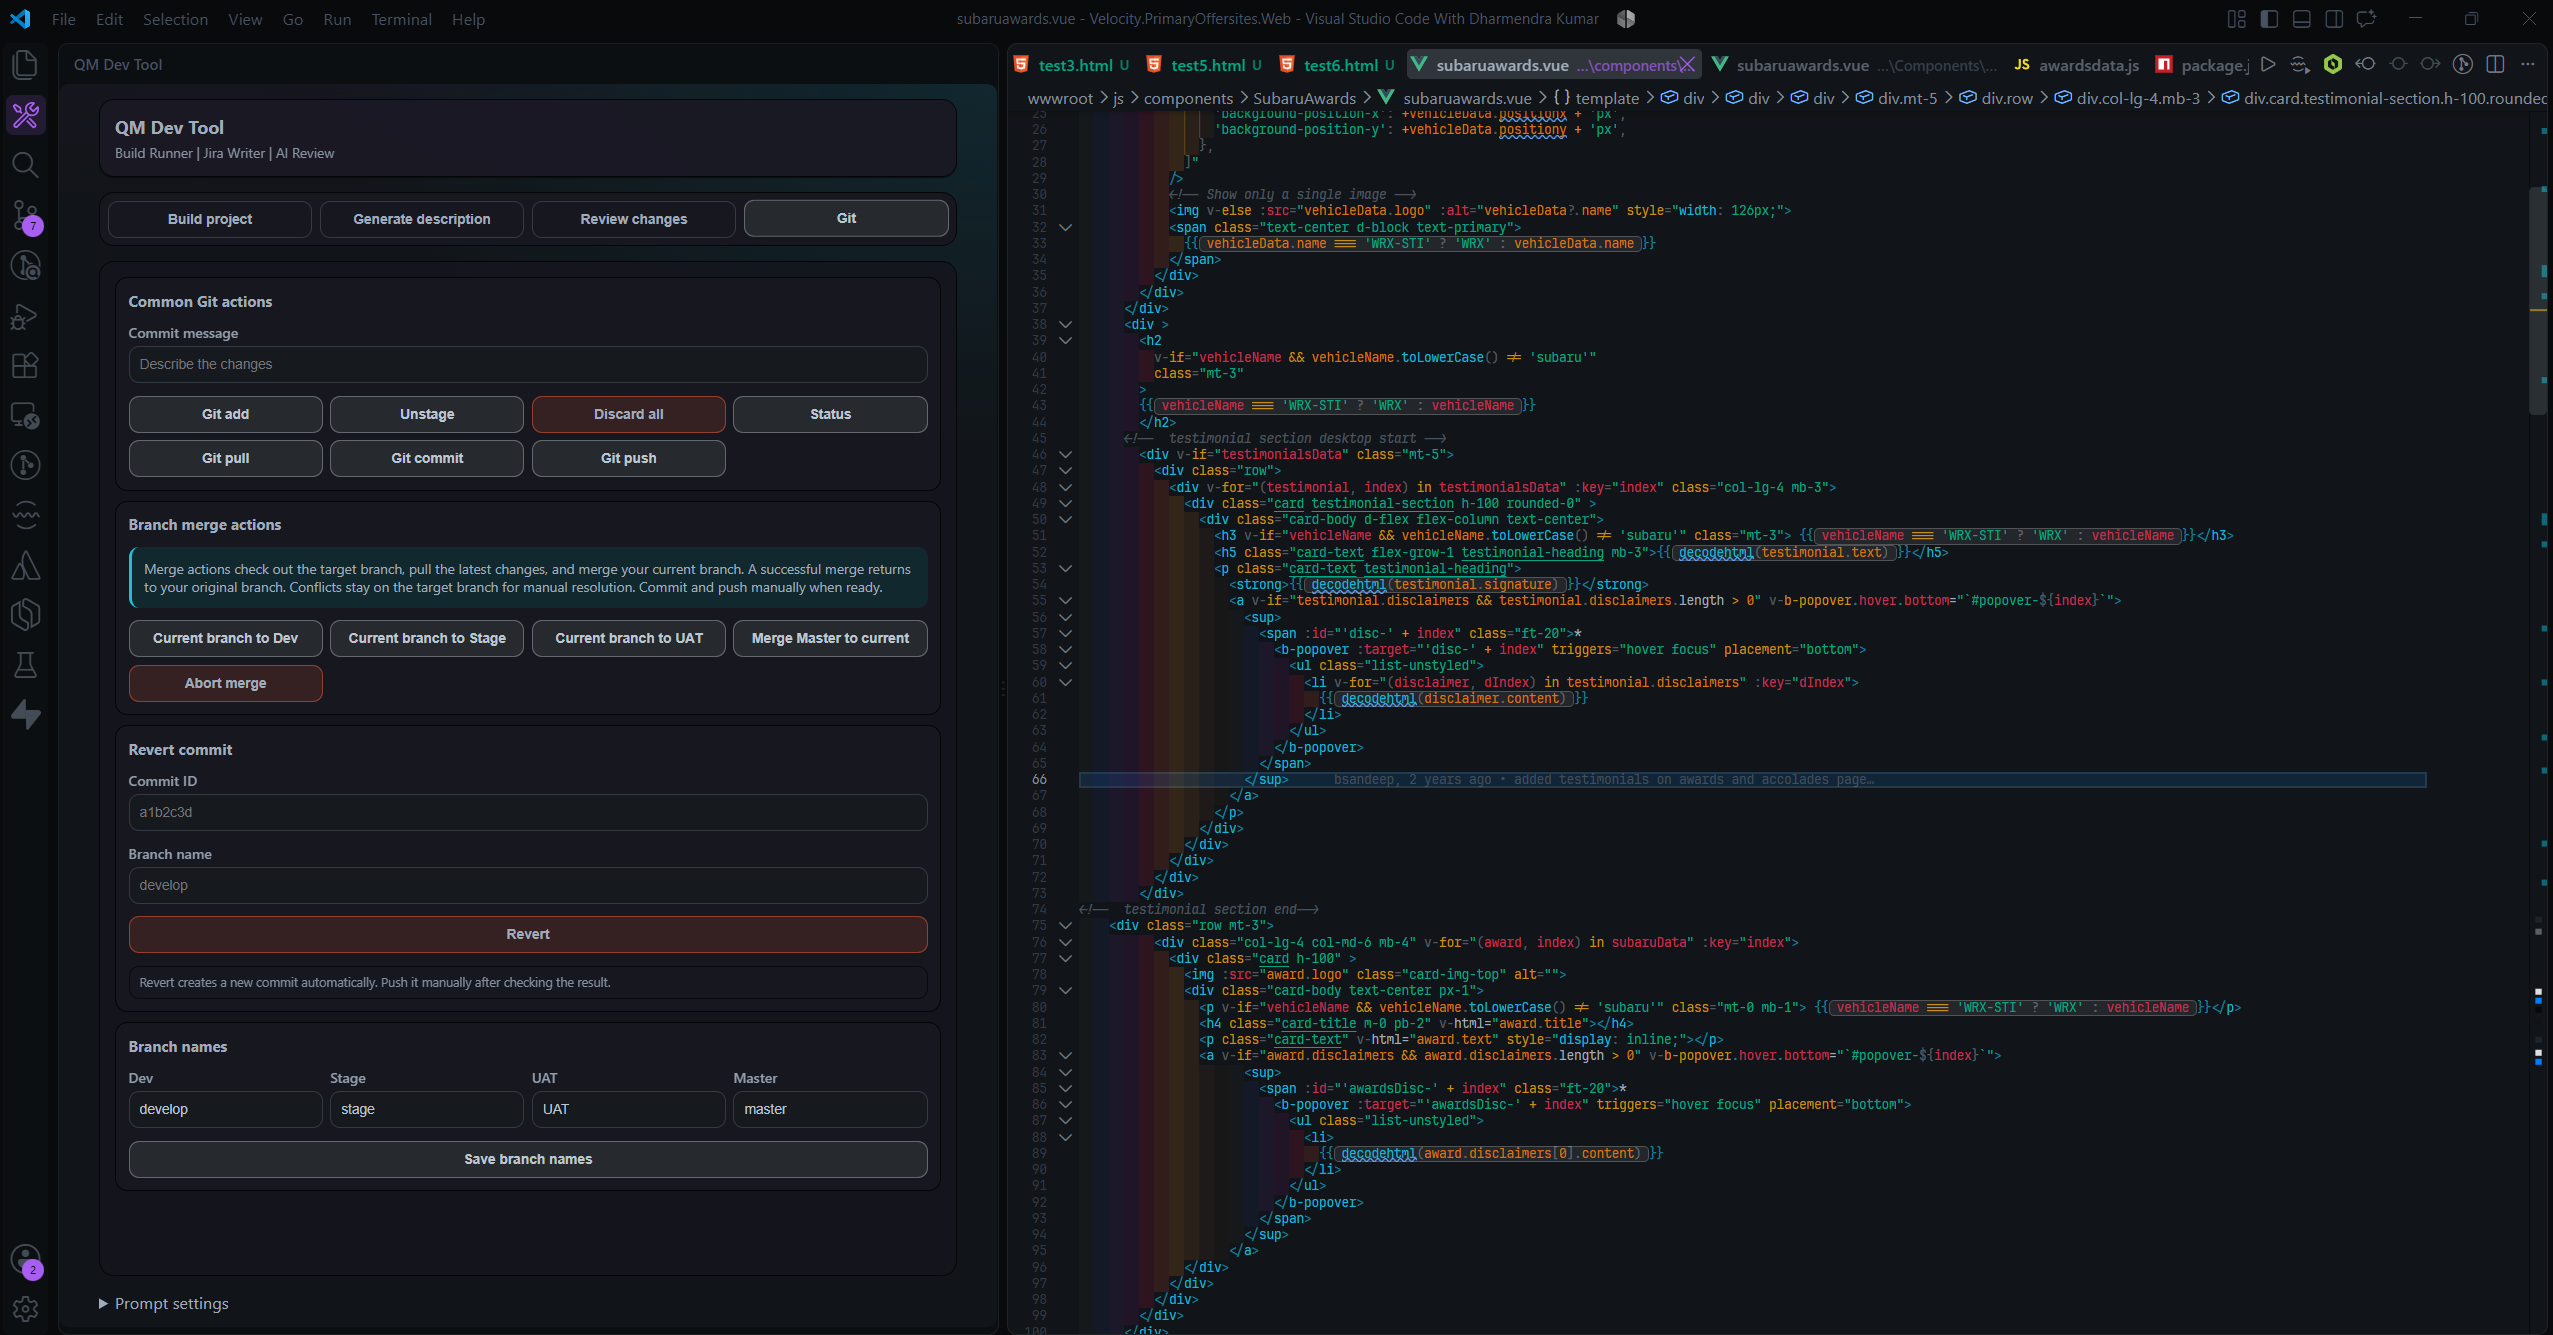
Git tab
Features
Build Tab
- Add multiple project paths
- Select a project folder with the folder picker
- Set custom build command and delay per project
- Run all projects or run a single row
- Rename project cards with the pencil button or double-click on the project label
- Full project names wrap in the project header instead of being hidden
- Choose where builds run:
- CMD window is the default and opens each build outside VS Code
- VS Code terminal runs builds in visible integrated terminals
- Run All Paths starts terminal-mode builds in parallel, with one terminal per project
Jira Tab
- Connect Jira using site URL, email, and API token
- See the current connection status and reconnect when credentials need to change
- Paste a valid Jira card link such as
https://your-domain.atlassian.net/browse/ABC-123
- Generate is enabled only when Jira is connected and the ticket link is valid
- Add extra context (optional)
- Generate Jira-friendly output and copy it
Review Tab
- Reviews the current branch against the configured base branch
- Sends the complete current contents of readable changed files with the focused diff so imports, declarations, and surrounding logic can be verified
- Jira ticket + code is the default mode and checks implementation against ticket requirements and acceptance criteria
- Jira review is enabled only when Jira is connected and a valid ticket link is entered
- Logic review checks conditions, edge cases, state, async behavior, fallbacks, regressions, and framework parity without requiring Jira
- Keeps Jira and Logic review results separate when switching modes
- Uses short, evidence-based output with verified issues, a verdict, and up to three next steps
Git Tab
All Git commands run in a visible integrated terminal named QM Dev Tool Git, opened at the first workspace folder.
Common Git actions
- Git add runs
git add -A
- Unstage runs
git restore --staged .
- Discard all runs
git reset --hard HEAD after confirmation
- Status runs
git status --short --branch
- Git pull runs
git pull
- Git commit runs
git commit -m "your message"
- Git push runs
git push
Create branch
Enter a branch name based on the Jira ticket key, using either the ticket key alone or the key followed by a short summary of the change. The Git tab provides two options:
- Create from current branch pulls the latest changes for the current branch, then creates the new branch from it
- Create from Master checks out the configured master branch, pulls the latest changes, then creates the new branch from master
The new branch name must contain only letters, numbers, dots, dashes, underscores, and slashes. The extension does not automatically push the newly created branch.
Quick switch branch
Switch the current branch without leaving the sidebar:
- Switch to Dev / Stage / UAT / Master use the branch names configured in the Git tab. The extension checks whether the branch exists locally, then on
origin, and checks it out. If the branch cannot be found either place, it shows Unable to find branch '<name>'.
- Enter any branch name in the input field and click Switch to given branch (enabled once text is entered) to switch to a branch not covered by the four presets
Revert commit
Enter a commit ID and branch name, then click Revert. The extension runs:
git checkout <branch-name>
git pull
git revert <commit-id>
Git creates a new revert commit automatically. The extension returns to the original branch after a successful revert, but does not push the result. If a conflict occurs, it leaves the terminal on the requested branch for manual resolution.
Branch merge actions
The default branch names are:
| Environment |
Branch |
| Dev |
develop |
| Stage |
stage |
| UAT |
UAT |
| Master |
master |
Branch names can be changed and saved in the Git tab.
When checking the current branch against Dev, Stage, or UAT, the extension checks out the target branch, pulls the latest changes, and runs a no-commit merge test:
git checkout <target-branch>
git pull
git merge --no-commit --no-ff <current-branch>
If no conflicts are found, the extension aborts the test merge and returns to the original branch. It does not merge, commit, or push; it shows: No conflicts found. Ask your lead to approve and merge.
If conflicts are found, the extension leaves the merge active on the target branch so the developer can resolve it manually. It shows: Merge conflicts found. Get approval from your lead, resolve them manually, and push.
The Merge Master to current action updates the configured master branch, returns to the original branch, and merges master into it. Commit and push remain manual.
AI Model Usage (No API Key)
QM Dev Tool uses VS Code chat models through your signed-in Copilot account.
- No direct OpenAI/Anthropic API key is required in this extension
- You must be signed in to GitHub Copilot in VS Code
- Model availability depends on your Copilot plan and organization policy
Requirements
- VS Code 1.100.0 or newer
- GitHub Copilot Chat access for AI features
- Git installed and available in PATH
- For Jira integration: Jira Cloud site, email, and API token
Install
From VSIX
Build package:
npm run package:vsix
In VS Code open Extensions view
Use Install from VSIX and select generated .vsix file
The package command creates a file such as qm-dev-tool-extension-0.0.13.vsix in the workspace root.
From Marketplace
- Open Extensions in VS Code
- Search for QM Dev Tool
- Open the extension details page
- This README will be visible there
Local Development
Install deps:
npm install
Build extension:
npm run build:extension
Press F5 and choose Run QM Dev Tool Extension
In Extension Development Host, open QM Dev Tool from Activity Bar
Package and Publish
Update the version in package.json
Install dependencies if needed:
npm install
Build and validate the extension:
npm run build:extension
Create a local VSIX package:
npm run package:vsix
Login with the publisher:
npx vsce login
Publish:
npm run publish:vsix
Before publishing, test the generated VSIX in a clean Extension Development Host or another VS Code profile. Confirm that the Build, Jira, Review, and Git tabs load correctly and that Git actions run in the intended workspace.
Known Notes
- Jira must be connected and a valid Jira ticket link is required before Generate or Jira-guided review is enabled
- Build paths must exist on your machine
- Review Git commands and changed-file reads resolve from the Git repository root; terminal Git actions open from the first workspace folder
- Git actions require Git to be installed and available in PATH
- Git merge actions require a clean enough working tree for checkout and pull; resolve conflicts manually when they occur
- Discard all removes tracked local changes and cannot be undone through the extension
- Revert and merge conflicts must be resolved manually in the visible Git terminal
- Build terminal mode creates separate visible terminals so Run All Paths can execute projects in parallel

