The VS Code avatar panel for Primeta's MCP server — your MCP client's responses rendered as a 3D VRM character that speaks and emotes.
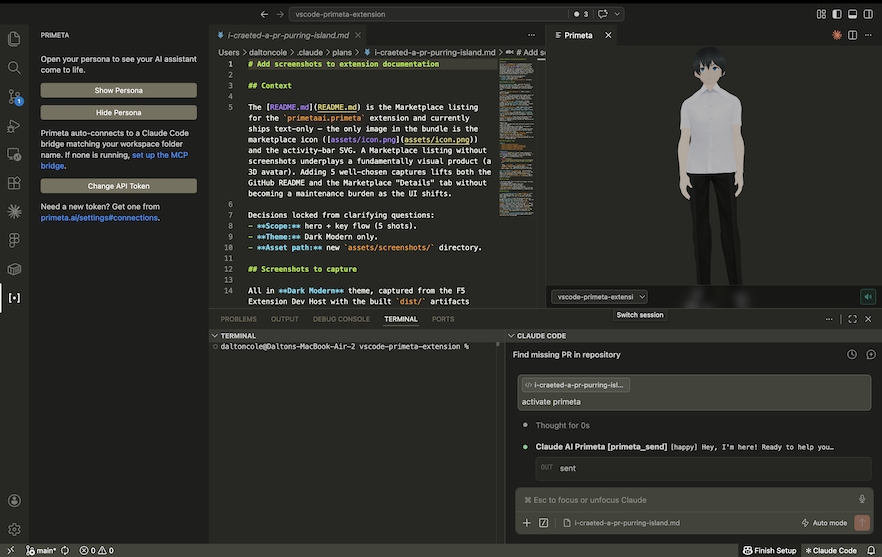
This extension is the avatar renderer half of Primeta. The other half — and the one doing the actual work — is Primeta's remote MCP server at https://primeta.ai/mcp, which you connect to from an MCP client like Claude Code, Claude Desktop, or Cursor. When your client calls Primeta tools (primeta_send, primeta_set_persona, primeta_list_personas, …), the activity lands on the Primeta server; this extension subscribes to that activity over WebSocket and renders it as a speaking, emoting avatar in your editor. Without an MCP connection to Primeta, the panel has nothing to render.
Features
- 3D Avatar Rendering — Full VRM model support powered by Three.js, displayed in a VS Code side panel
- Text-to-Speech with Lip-Sync — Hear responses spoken aloud with phoneme-accurate mouth animation
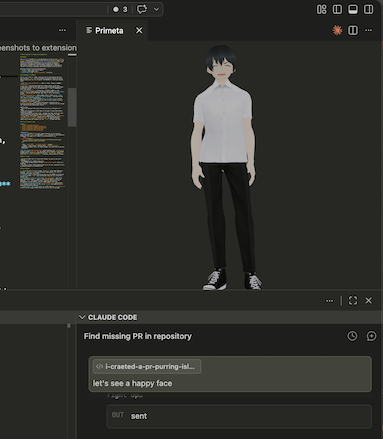
- Emotion-Driven Expressions — Avatar reacts with facial expressions: joy, surprise, anger, sadness, thinking, and more
- Persona Switching — Choose from multiple AI personas, each with their own model and personality
- Real-Time Bridge Connection — Subscribes to your Primeta server via ActionCable WebSocket for live MCP activity
- Idle Animations — Procedural breathing, swaying, and blinking for a natural presence
How it works
Your MCP client ──(MCP tool call)──▶ https://primeta.ai/mcp ──(WebSocket)──▶ this extension (renders avatar)
Primeta supports the standard remote MCP spec — OAuth for interactive clients, Bearer tokens for headless or committable configs. This extension is transport-agnostic; it just subscribes to your account's MCP activity and renders the messages.
Commands
Open the Command Palette (Cmd+Shift+P / Ctrl+Shift+P) and run:
| Command |
Description |
Primeta: Show Persona |
Open the avatar panel |
Primeta: Hide Persona |
Close the avatar panel |
Primeta: Set API Token |
Paste your Primeta API token |
Configuration
Configure the extension in VS Code Settings (Cmd+, / Ctrl+,) under Primeta:
| Setting |
Default |
Description |
primeta.serverUrl |
https://primeta.ai |
Your Primeta server URL |
primeta.apiToken |
— |
API token from your Primeta Settings page |
Getting Started
Connect Primeta as an MCP server in your client. Pick whichever fits your workflow:
OAuth (recommended for Claude Desktop, Cursor, Zed, etc.):
{
  "mcpServers": {
    "primeta": {
      "type": "http",
      "url": "https://primeta.ai/mcp"
    }
  }
}
First connection opens a browser to log in. Full guide: OAuth MCP setup.
Token-based (committable configs, headless, or clients without OAuth):
{
  "mcpServers": {
    "primeta": {
      "type": "http",
      "url": "https://primeta.ai/mcp",
      "headers": {
        "Authorization": "Bearer YOUR_PRIMETA_API_TOKEN"
      }
    }
  }
}
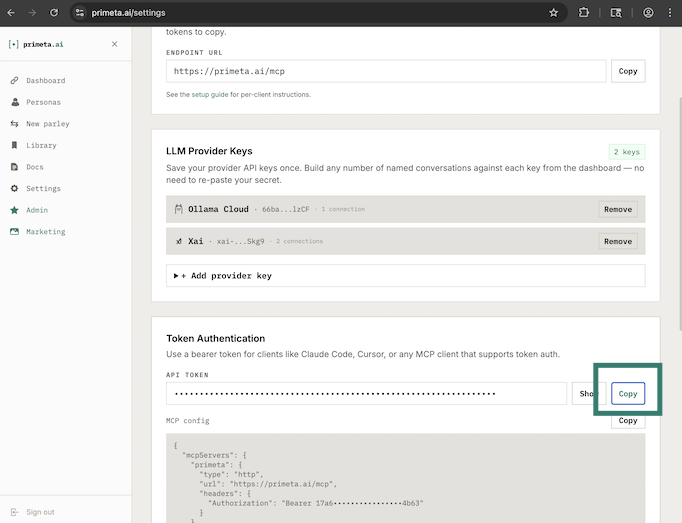
Grab the token from primeta.ai/settings#connections. Full guide: Token MCP setup.
Install this extension from the VS Code Marketplace.
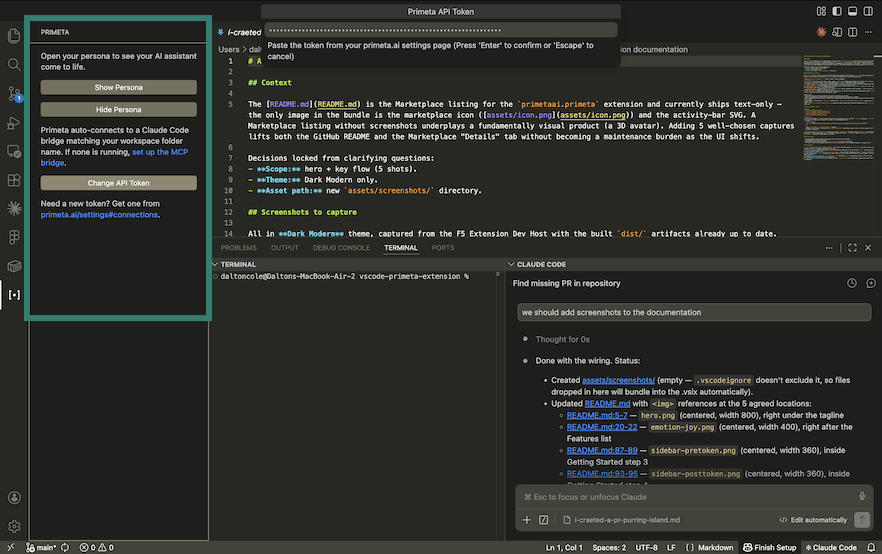
Click the Primeta icon in the activity bar, click Set API Token, and paste the same token from primeta.ai/settings#connections — the extension uses it to authenticate its WebSocket subscription.
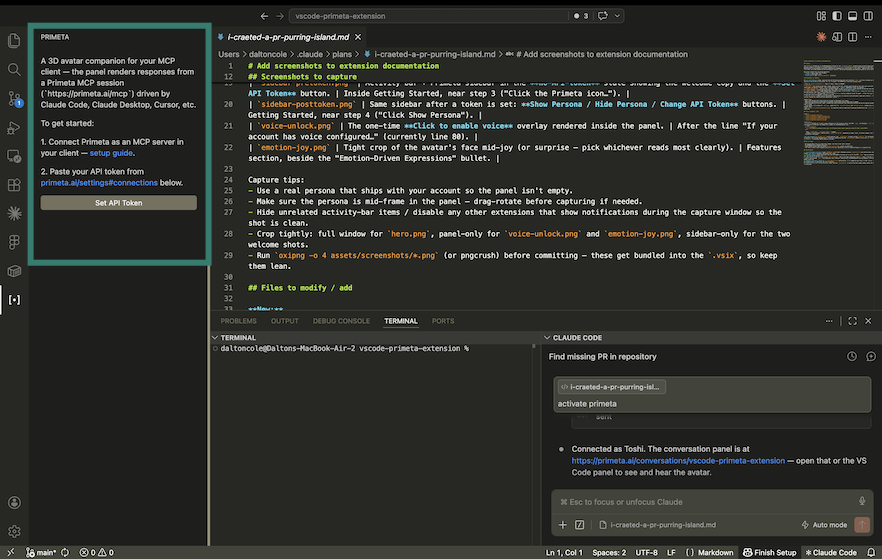
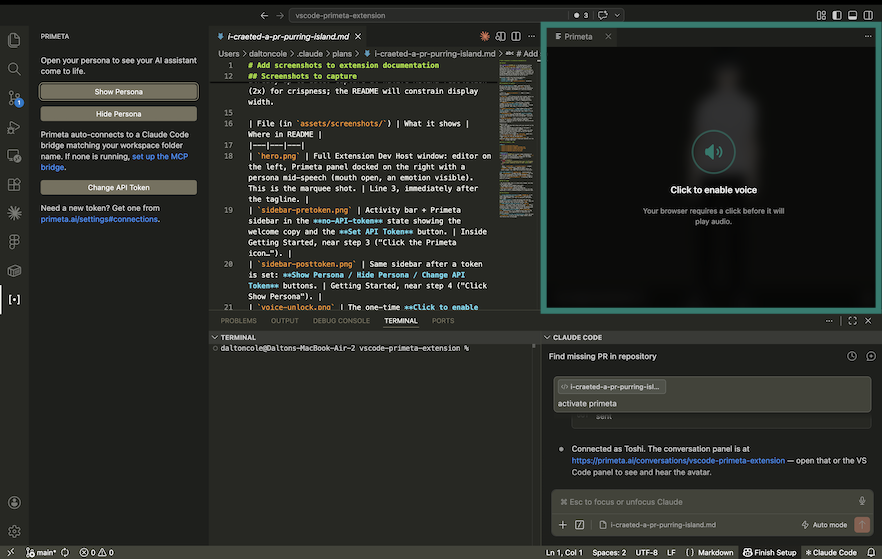
Click Show Persona. The panel opens and subscribes to your account's MCP activity — the next time your MCP client calls primeta_send, the message is spoken and animated through the avatar.
If your account has voice configured, the panel will show a one-time Click to enable voice prompt — VS Code's webview (like any browser) requires a user click before it will play audio. Click anywhere on the prompt to enable speech for the session.
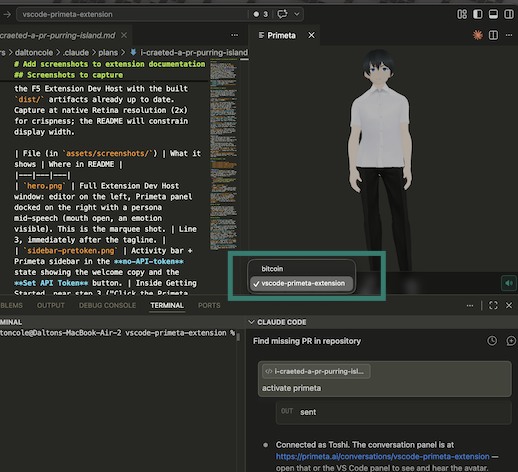
You can drag inside the avatar panel to rotate the camera around the model and use the scroll wheel to zoom in or out.
If the panel shows activity from a different project than the one you're working in, use the project switcher at the bottom of the panel to pick the right one. The extension auto-connects to a bridge matching your VS Code workspace folder name, but if multiple are running you can switch between them here.
Requirements
- An MCP client connected to
https://primeta.ai/mcp via OAuth or Bearer token (this is the prerequisite — see Getting Started)
- A Primeta account with an API token
- Network access to your Primeta server
- A configured TTS provider on your Primeta account if you want spoken responses (the avatar still animates and emotes without TTS)
License
See LICENSE for details.

