openHASP Page Editor
Design openHASP touchscreen pages visually inside VS Code — drag
widgets onto a canvas sized to your device, bind them to Home Assistant entities, and generate
the .jsonl layout and Home Assistant YAML your device needs.
1. Core features
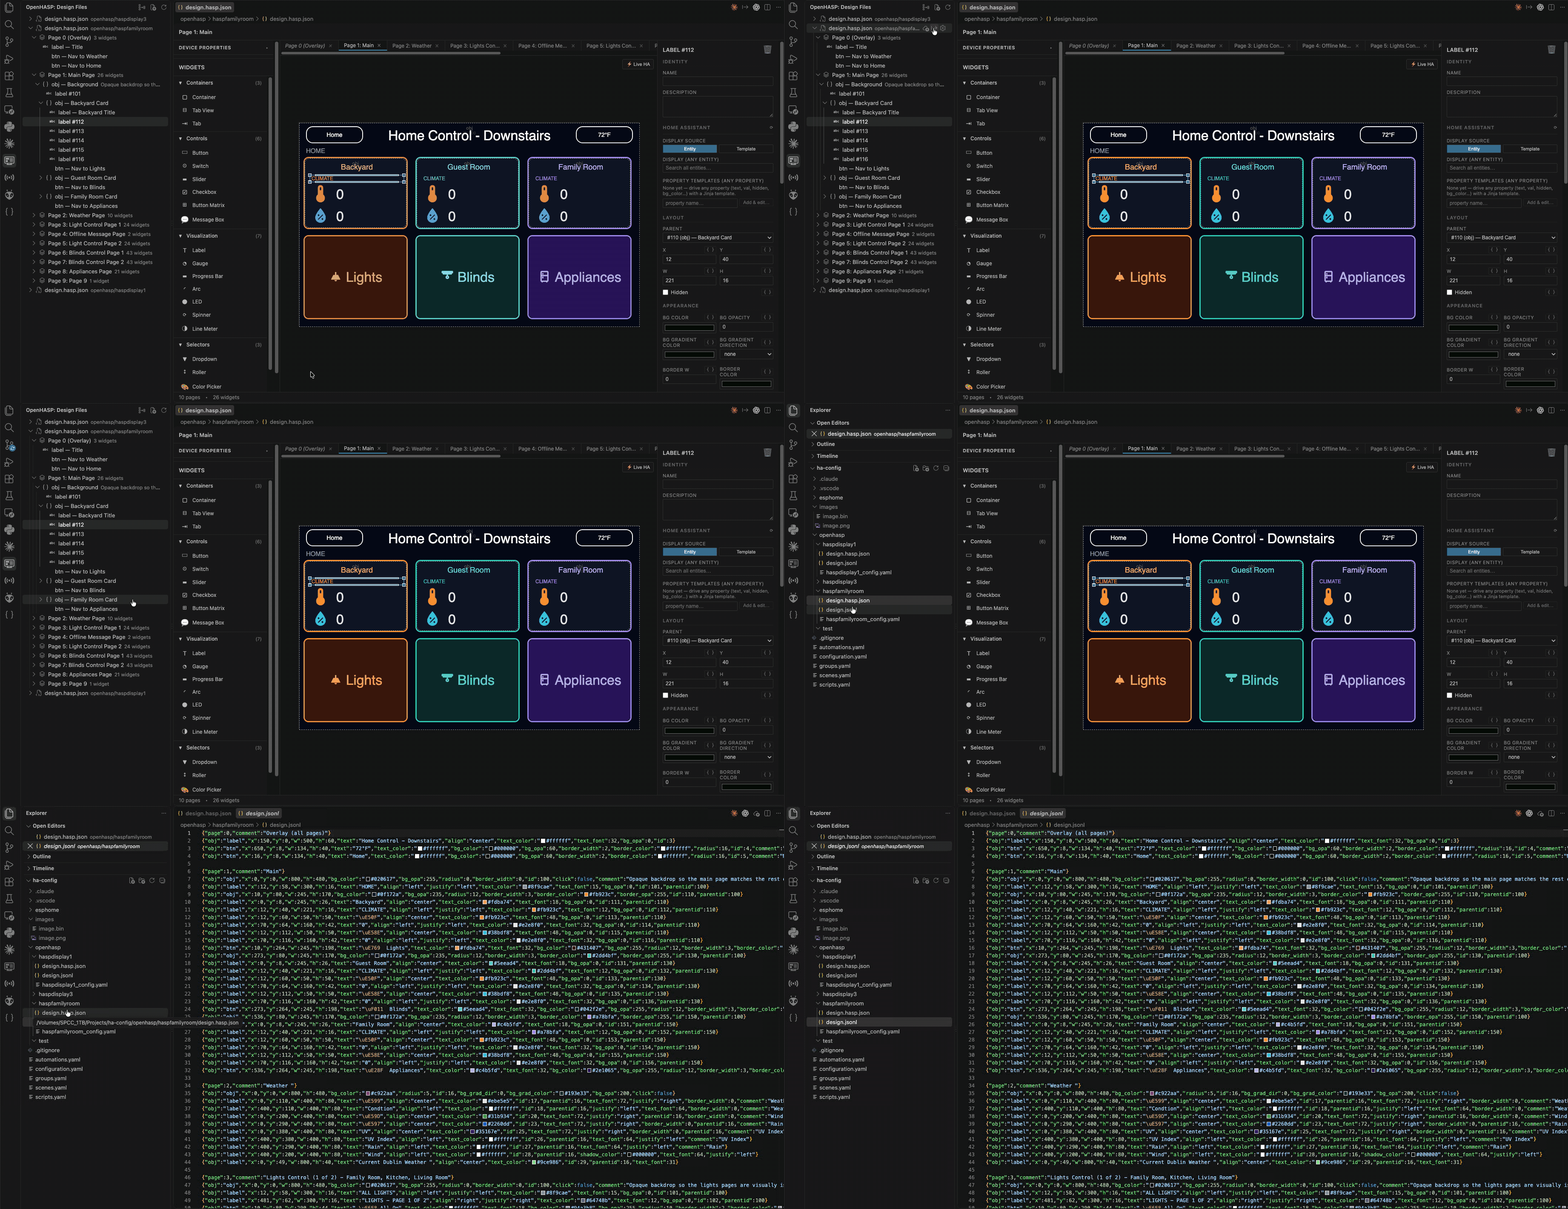
Visual page editor
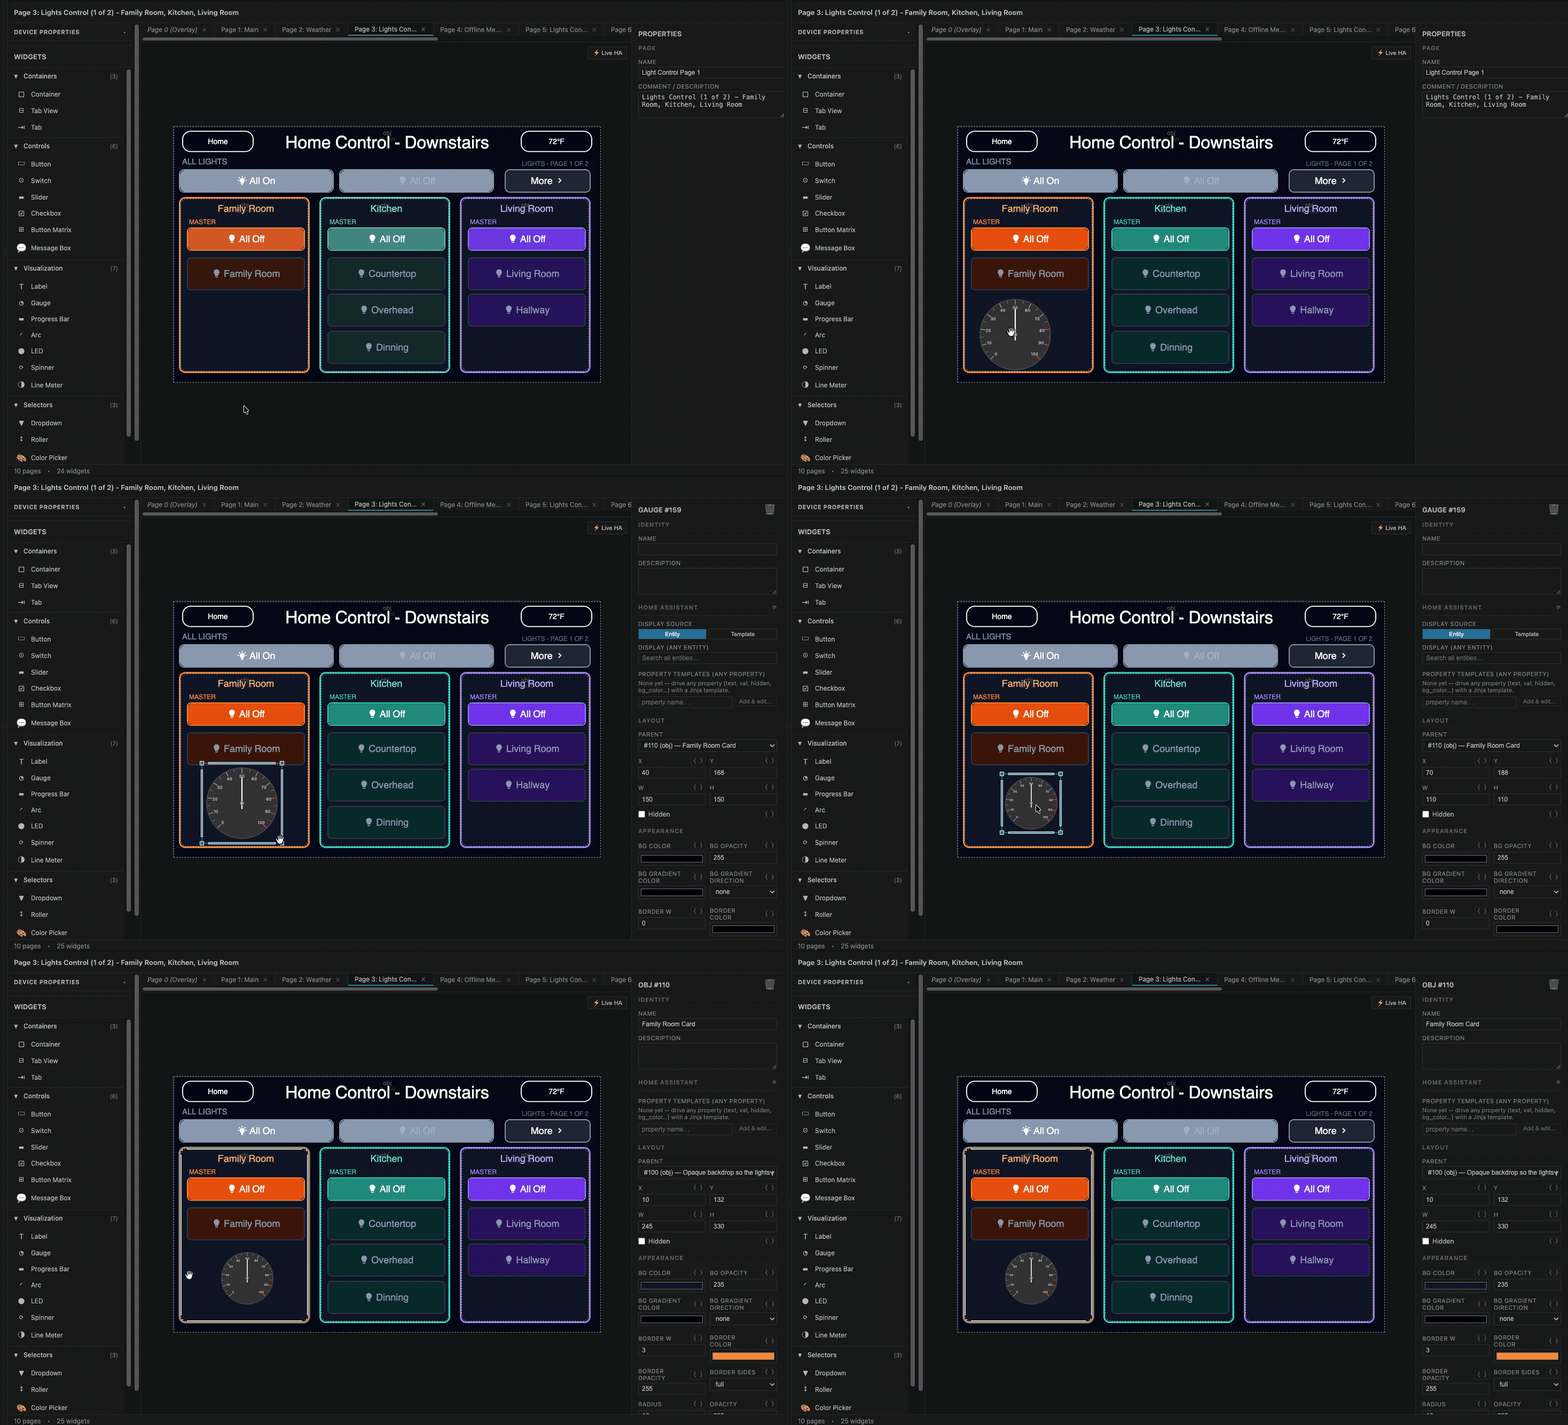
Drag widgets from a palette onto a canvas that matches your device's resolution. Move, resize, and
nest widgets inside containers; the widget's x/y/w/h update as you drag, with snap-to-grid.
Design files
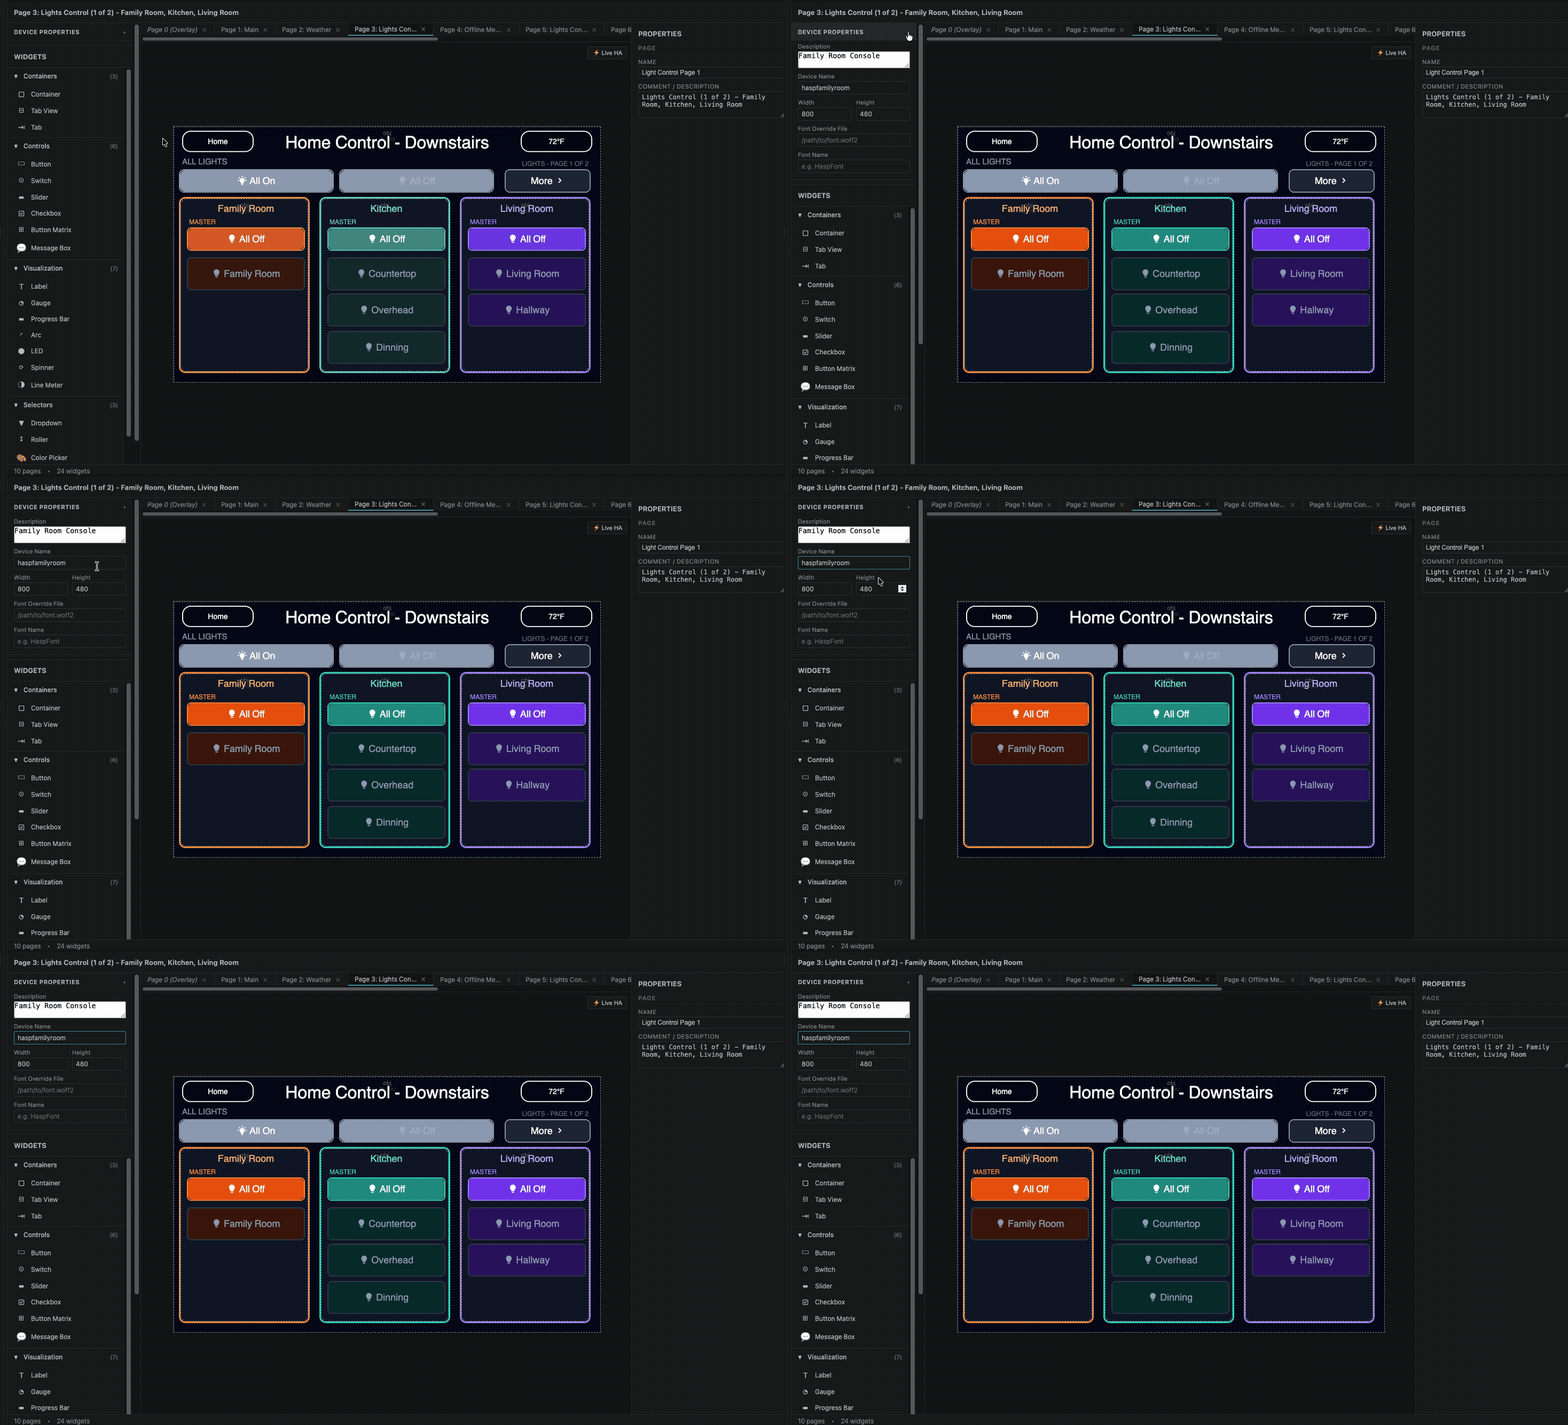
Work in a .hasp.json design file that keeps device properties, page names, widget
names/descriptions, and Home Assistant bindings alongside the layout. The plain .jsonl the device
consumes is generated from it.
Live device-accurate preview
Widgets render the way LVGL draws them, using your own icon font and the images from your device's
LittleFS folder.
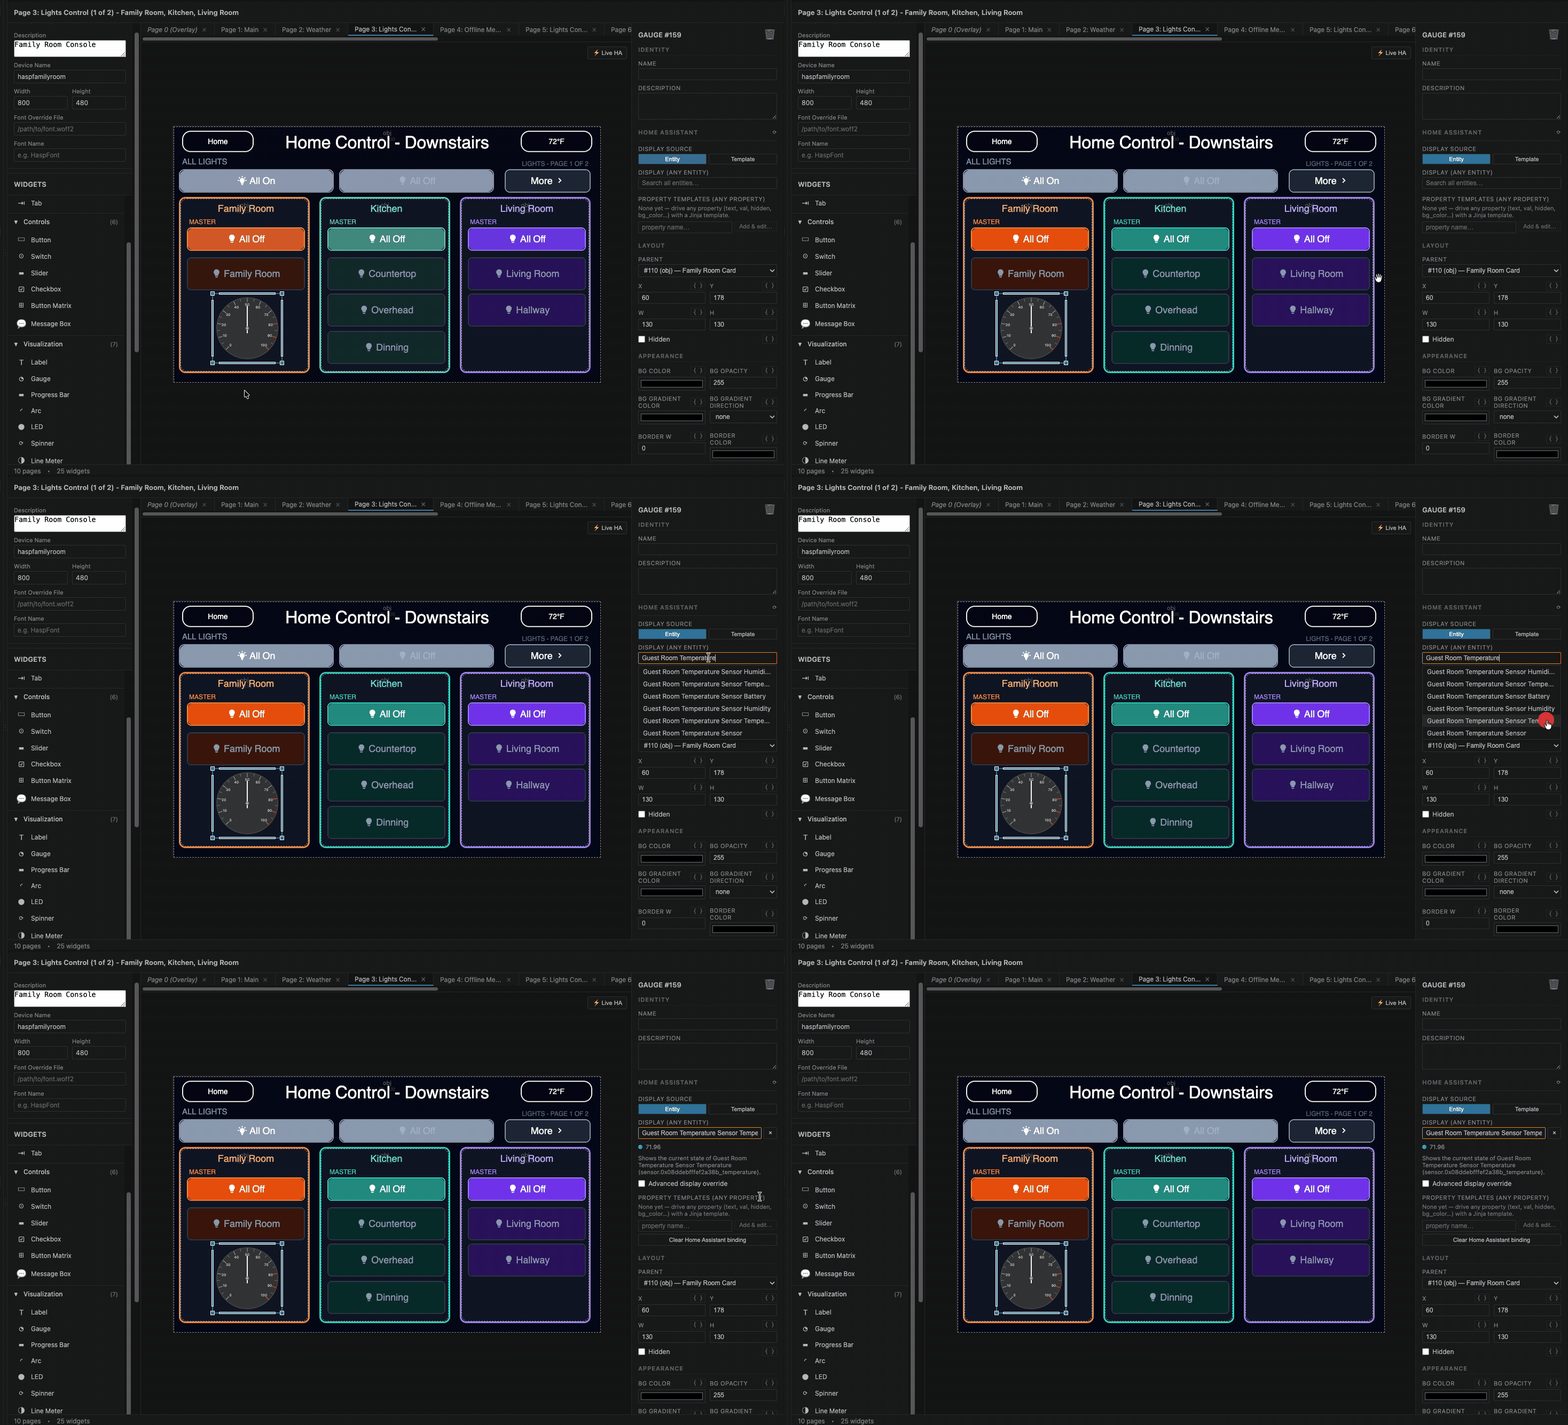
Home Assistant bindings
Pick an entity per widget, choose what it does when pressed or dragged, and let the extension write
the Home Assistant configuration for you.
Live Home Assistant values
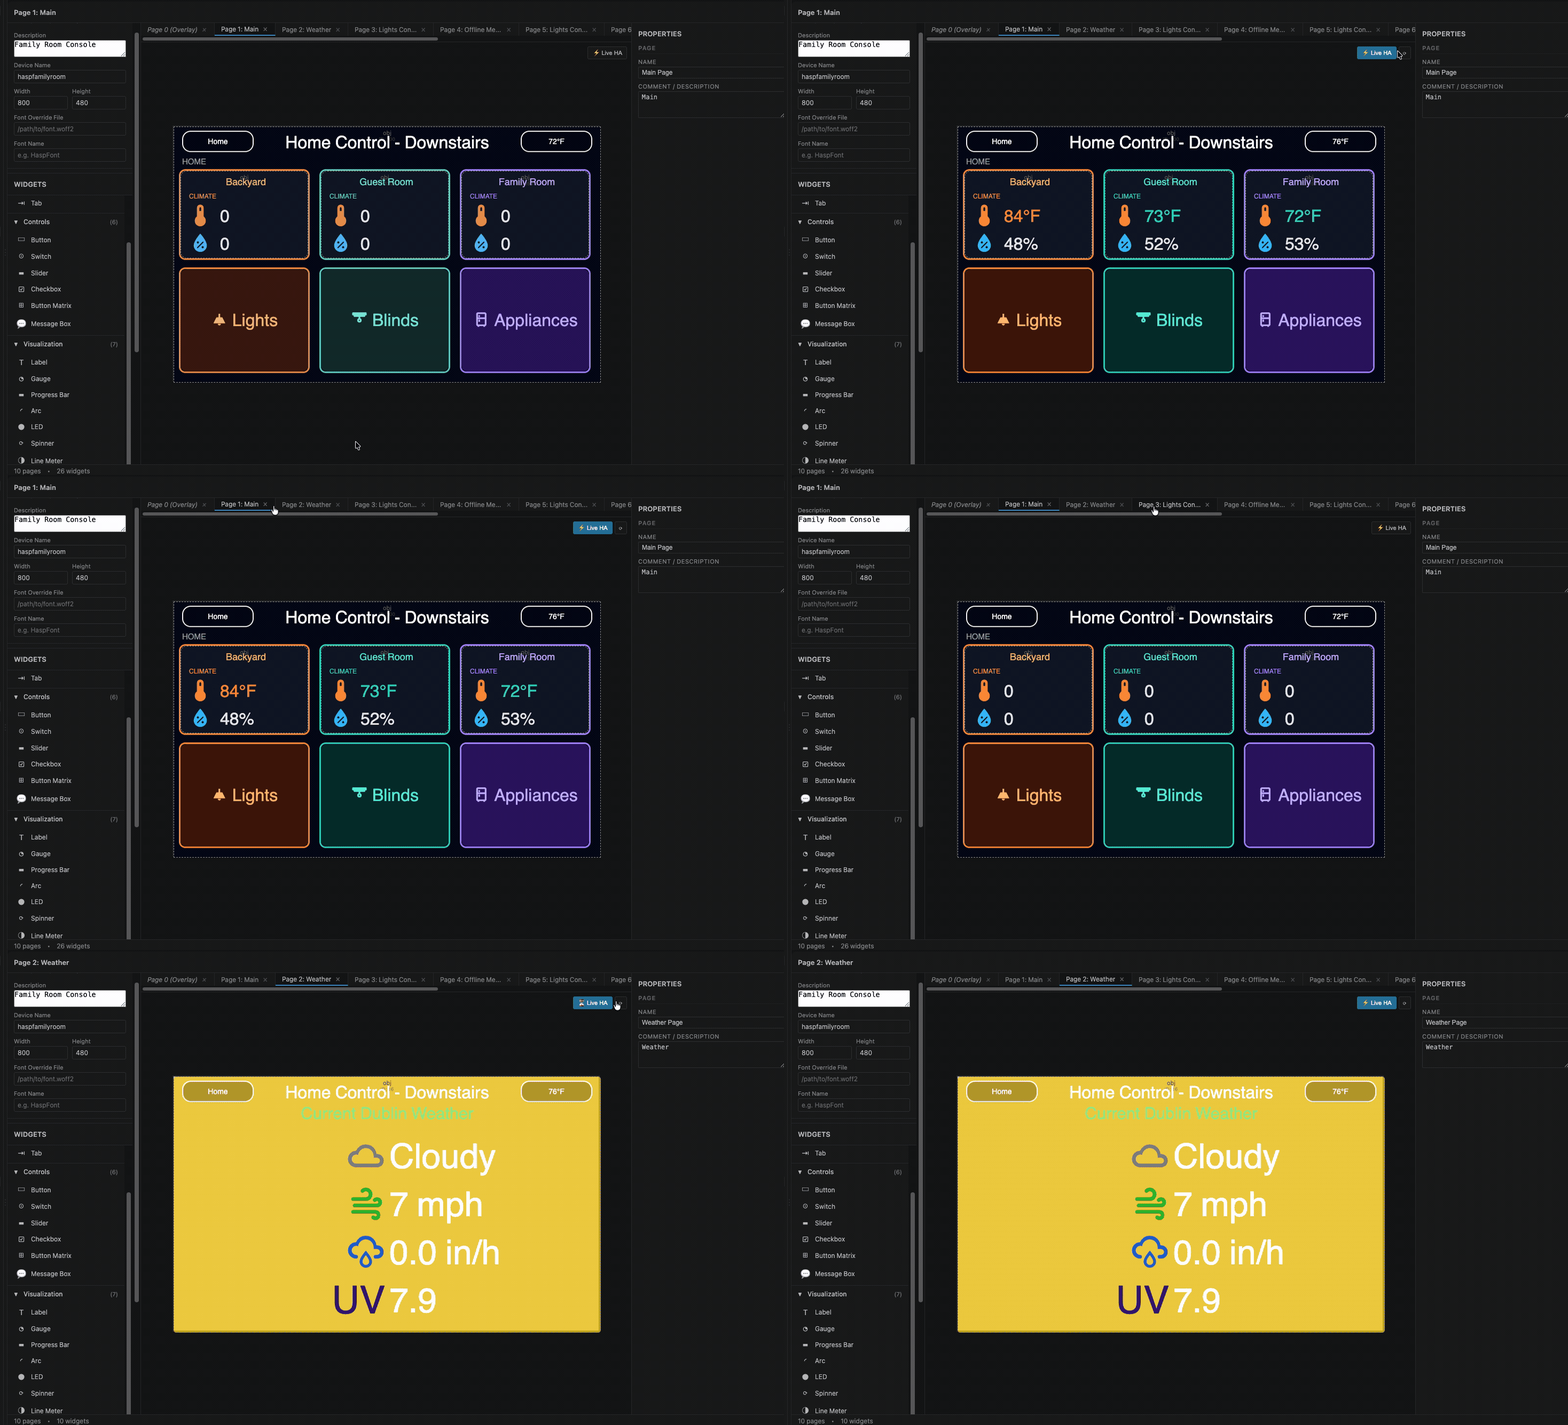
Flip on ⚡ Live HA in the canvas toolbar and bound widgets show real entity values, refreshed
every 10 seconds.
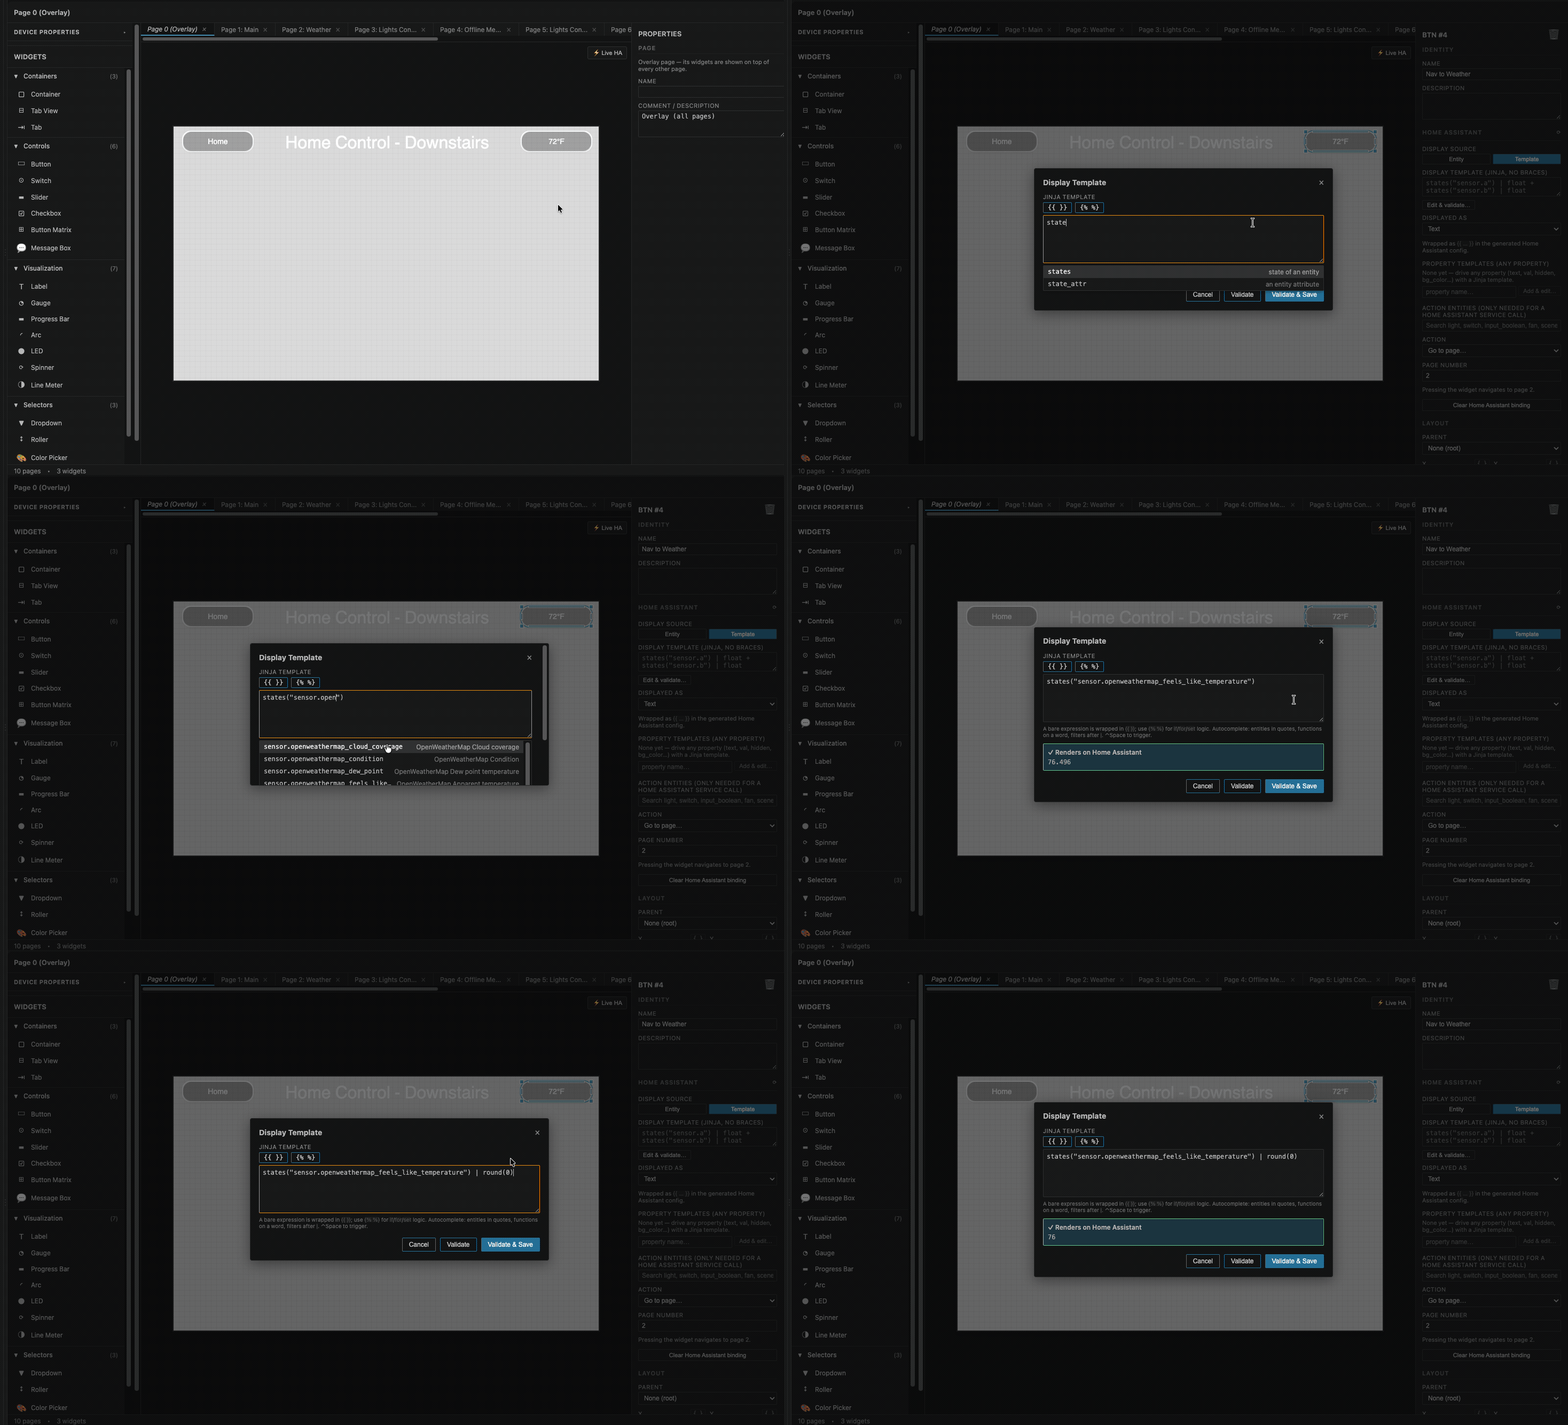
Jinja template editor
Write templates for any widget property with entity/function/filter autocomplete
(Ctrl/Cmd+Space) and one-click validation against your live Home Assistant.
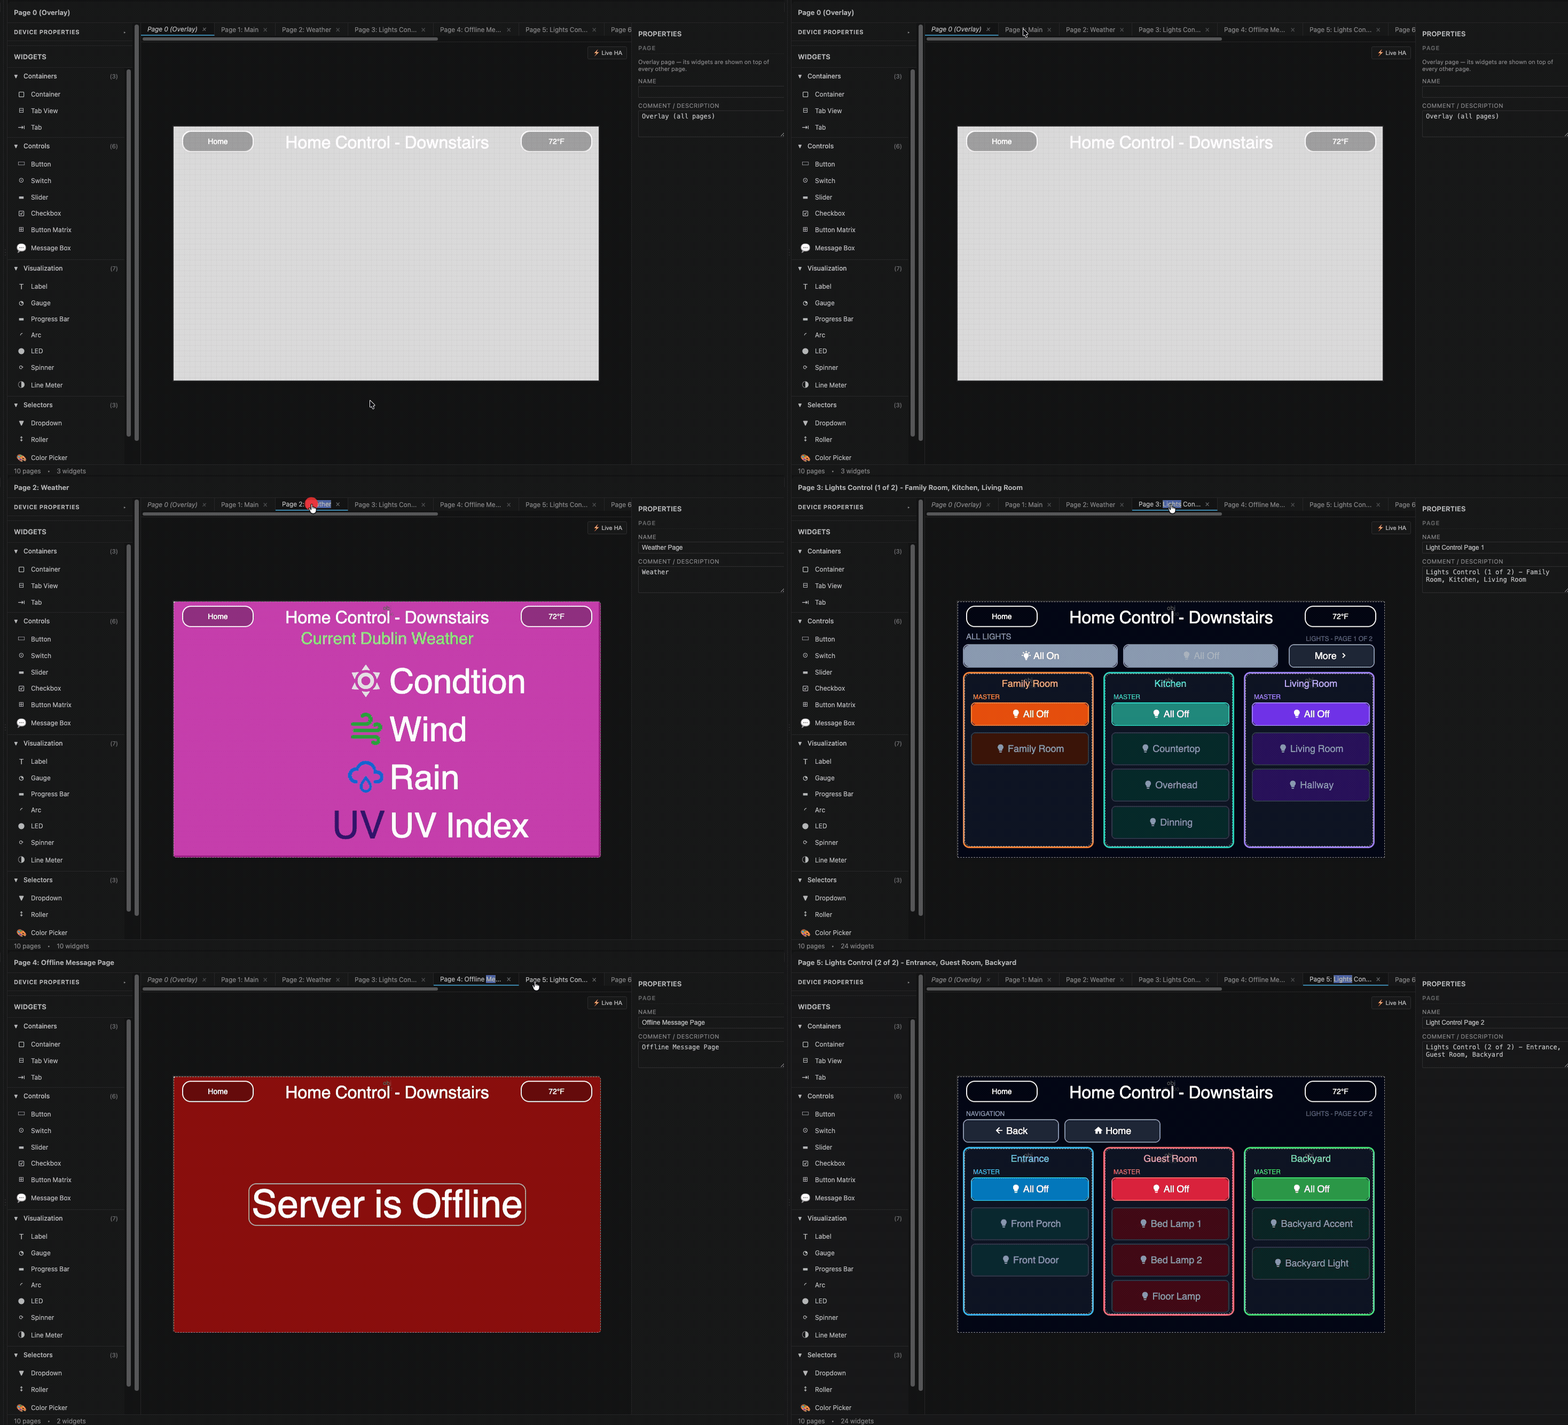
Multi-page designs
Page tabs, plus openHASP's page 0 overlay shown on top of every page.
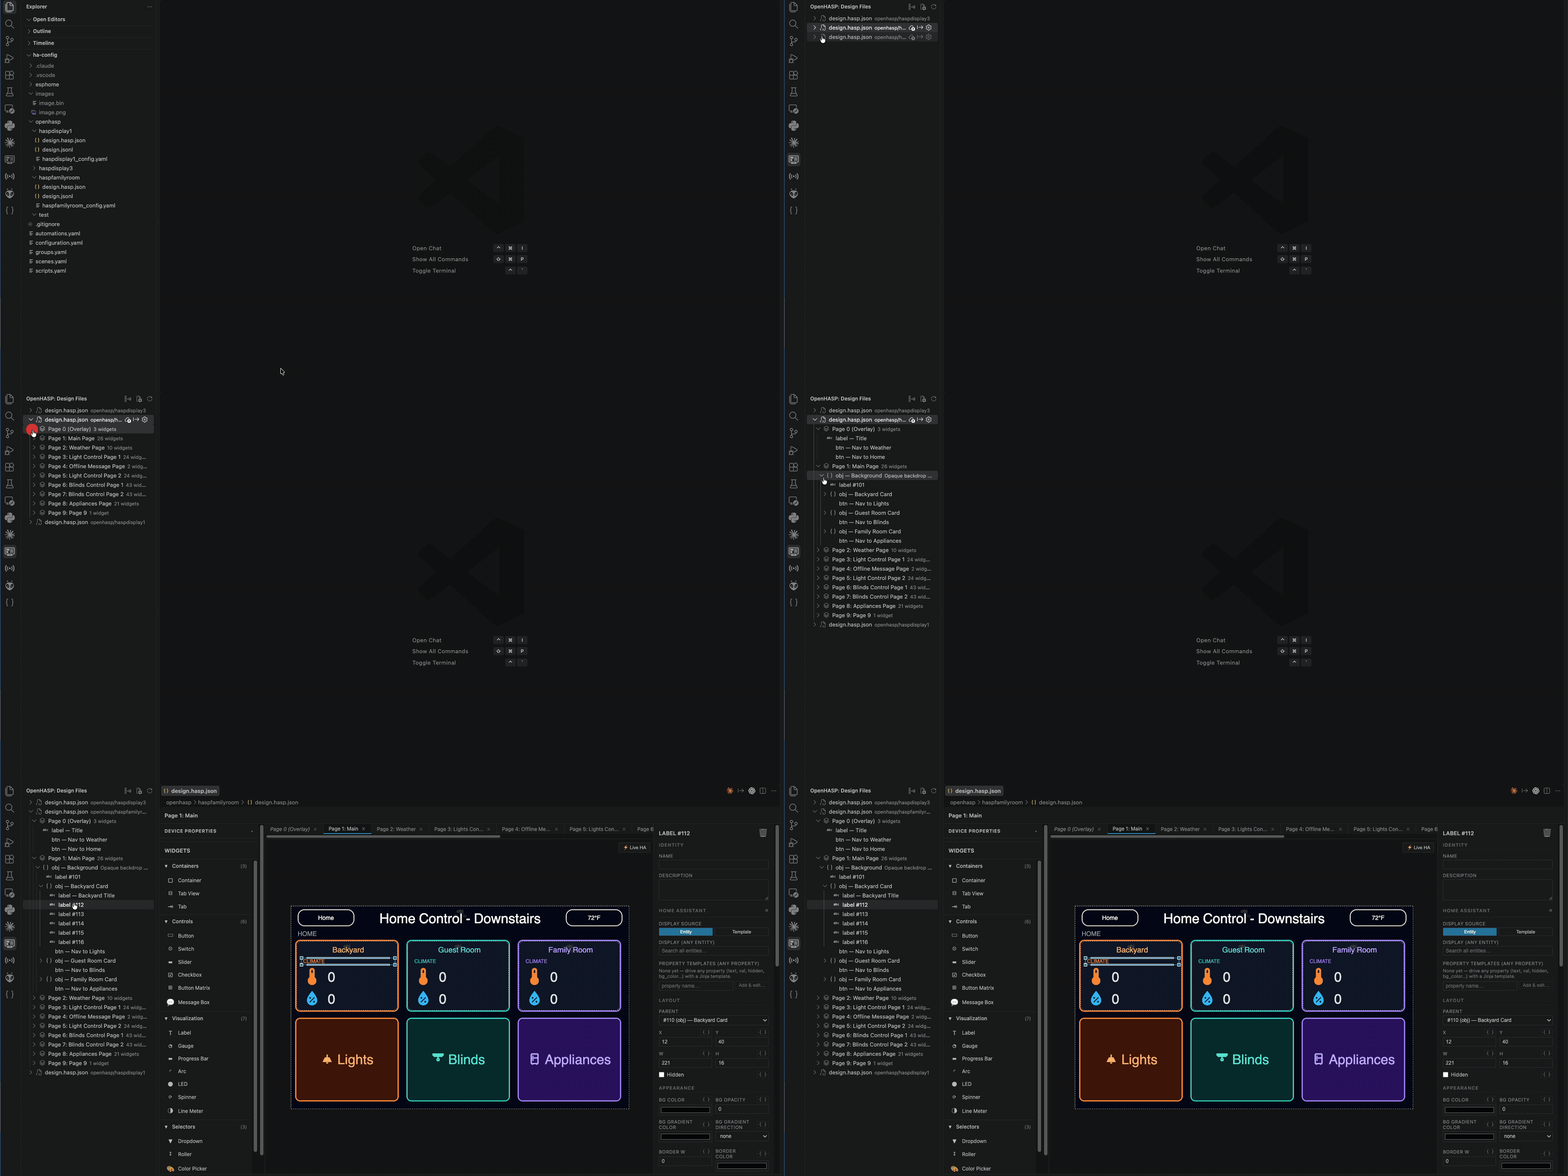
openHASP explorer
An activity-bar view listing every design file in the workspace, drilled down to pages and widgets;
click a widget to jump straight to it on the canvas.
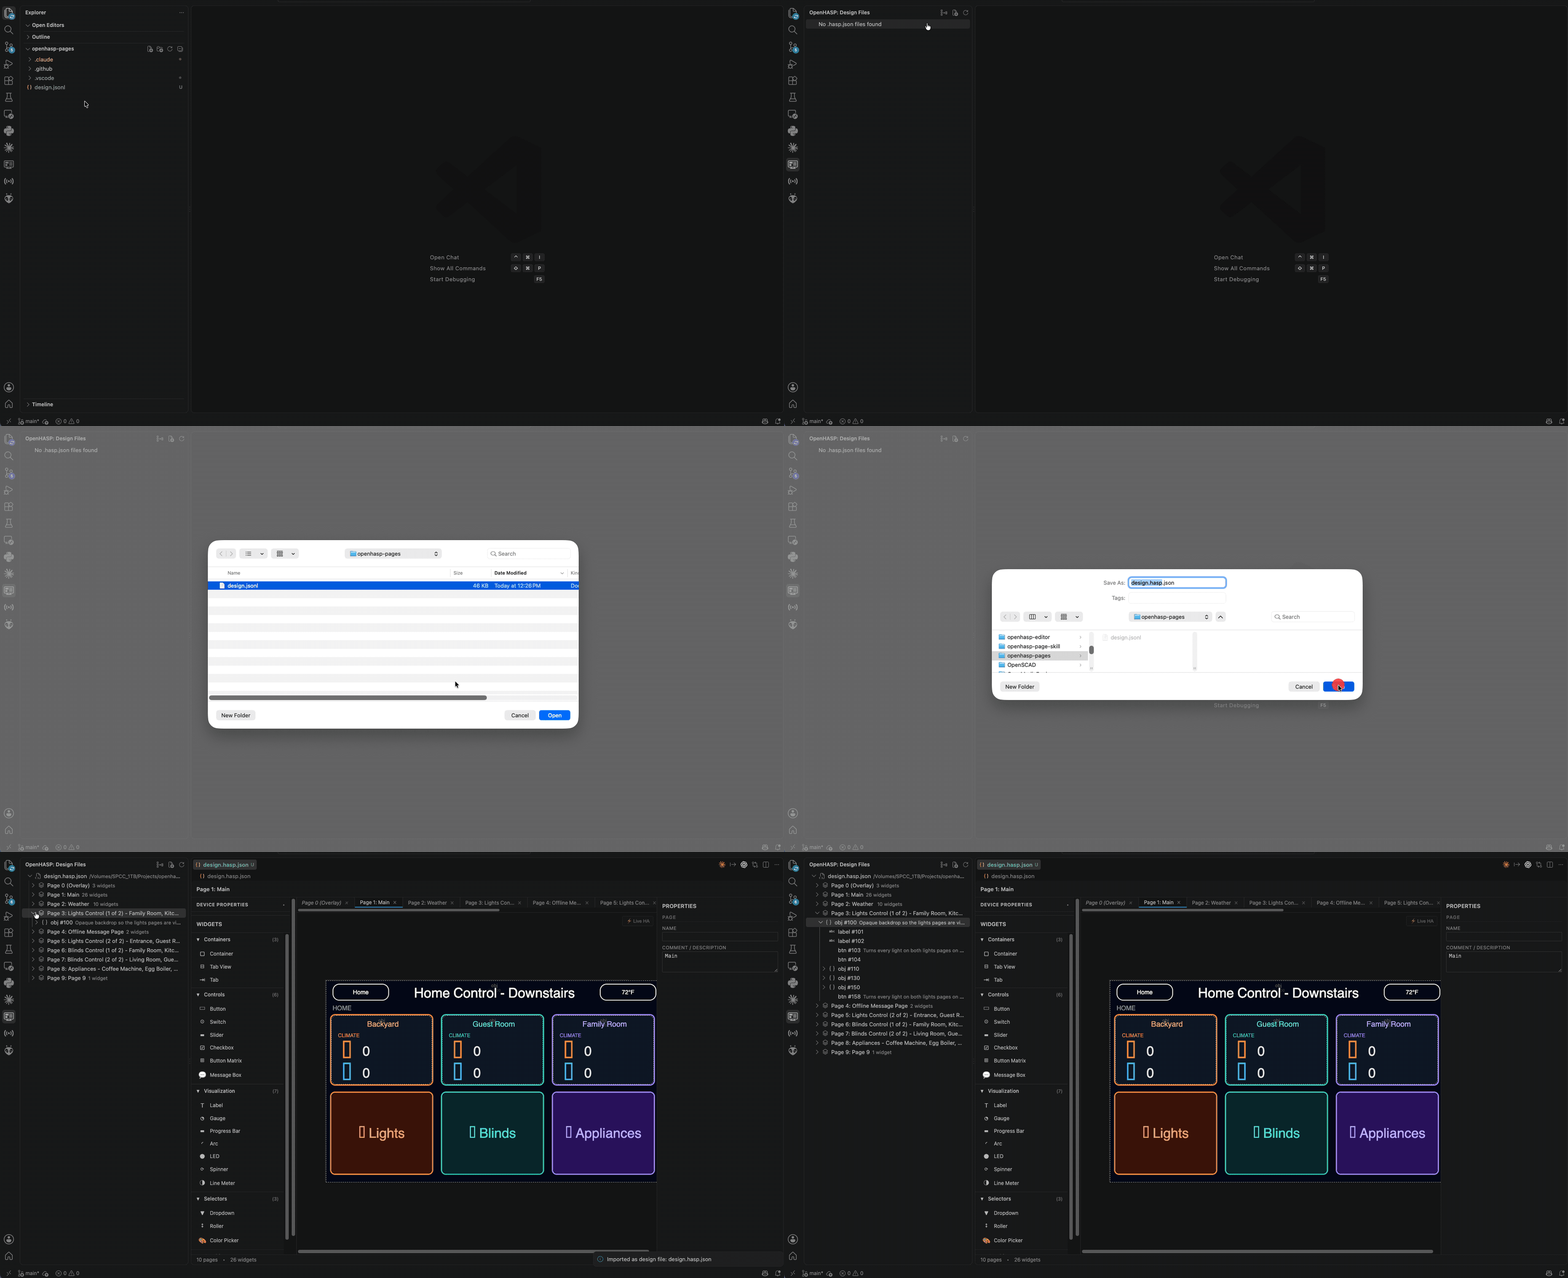
JSONL import/export
Bring an existing .jsonl into the editor, and export back out at any time.
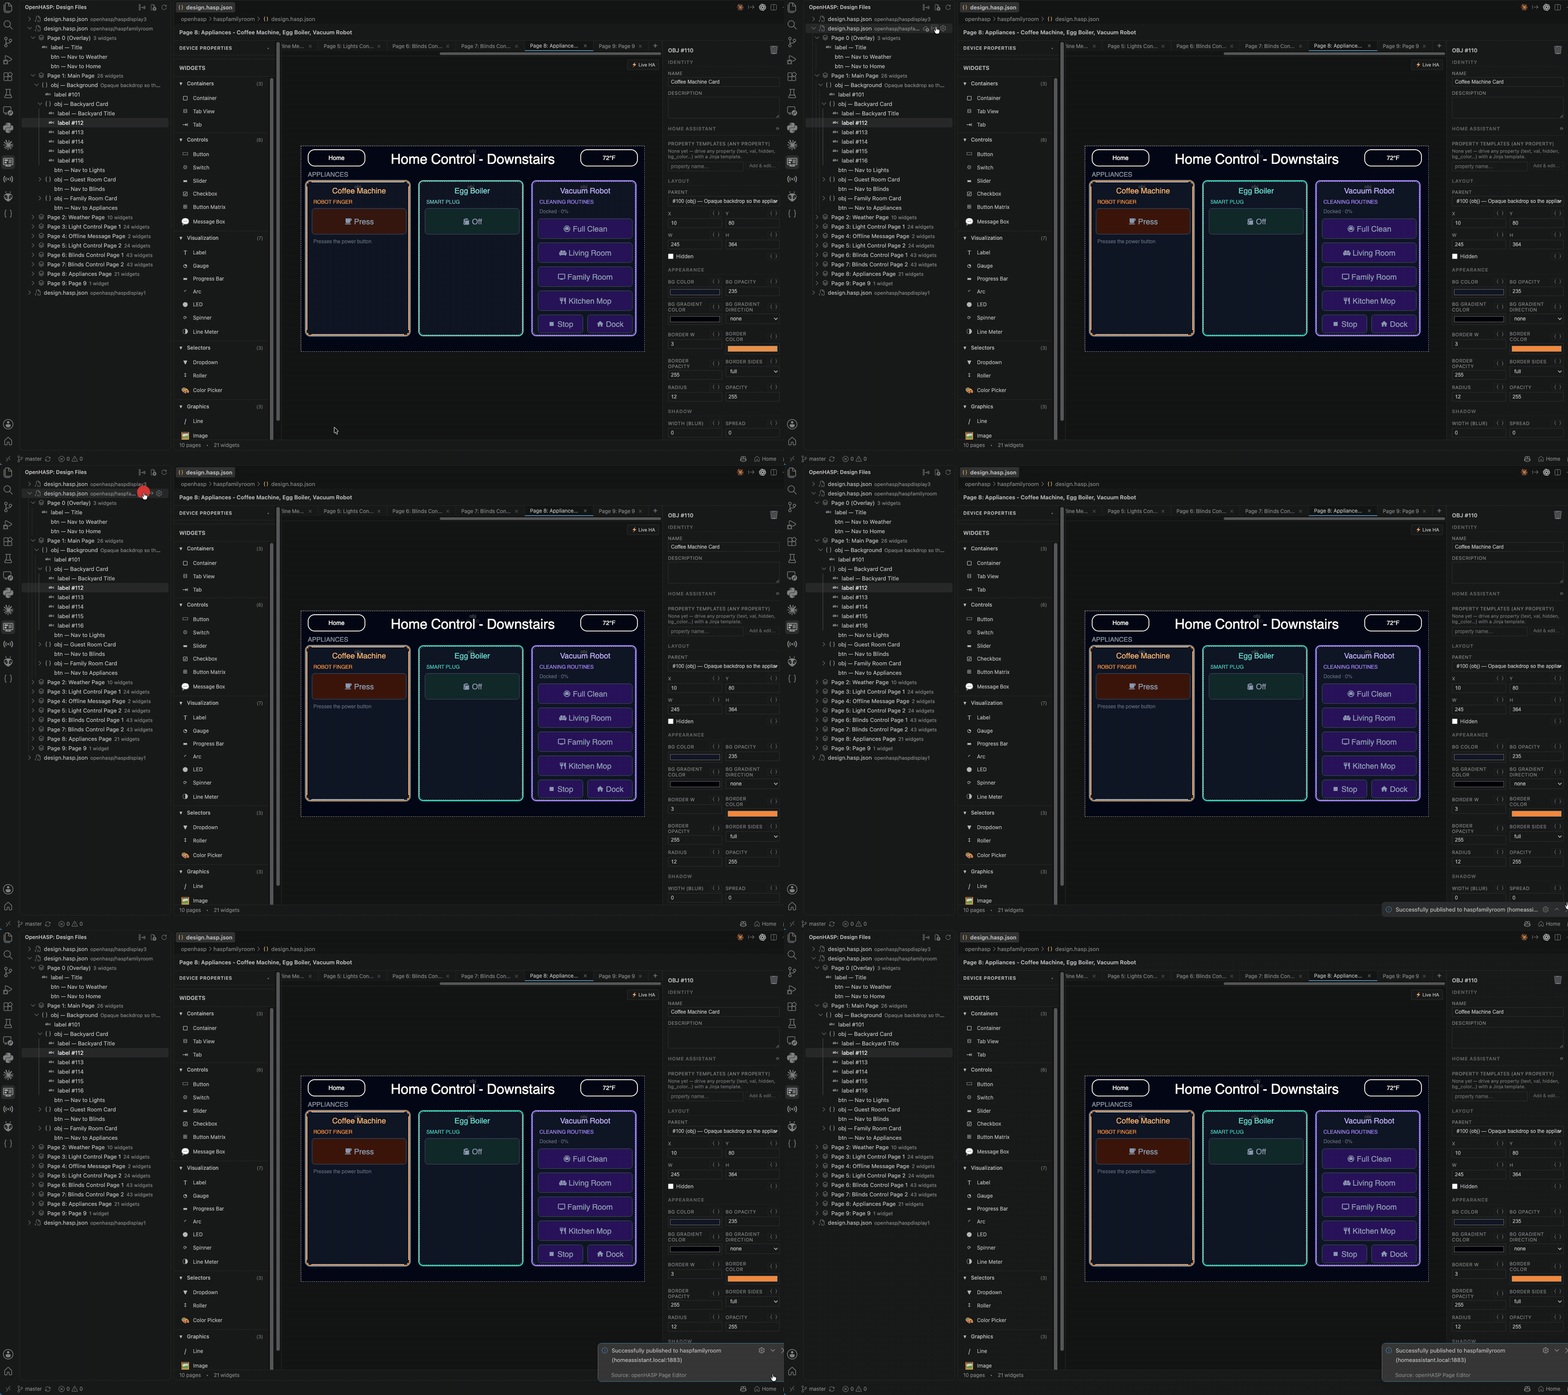
Upload over MQTT
Push the current design to a running device without leaving the editor.
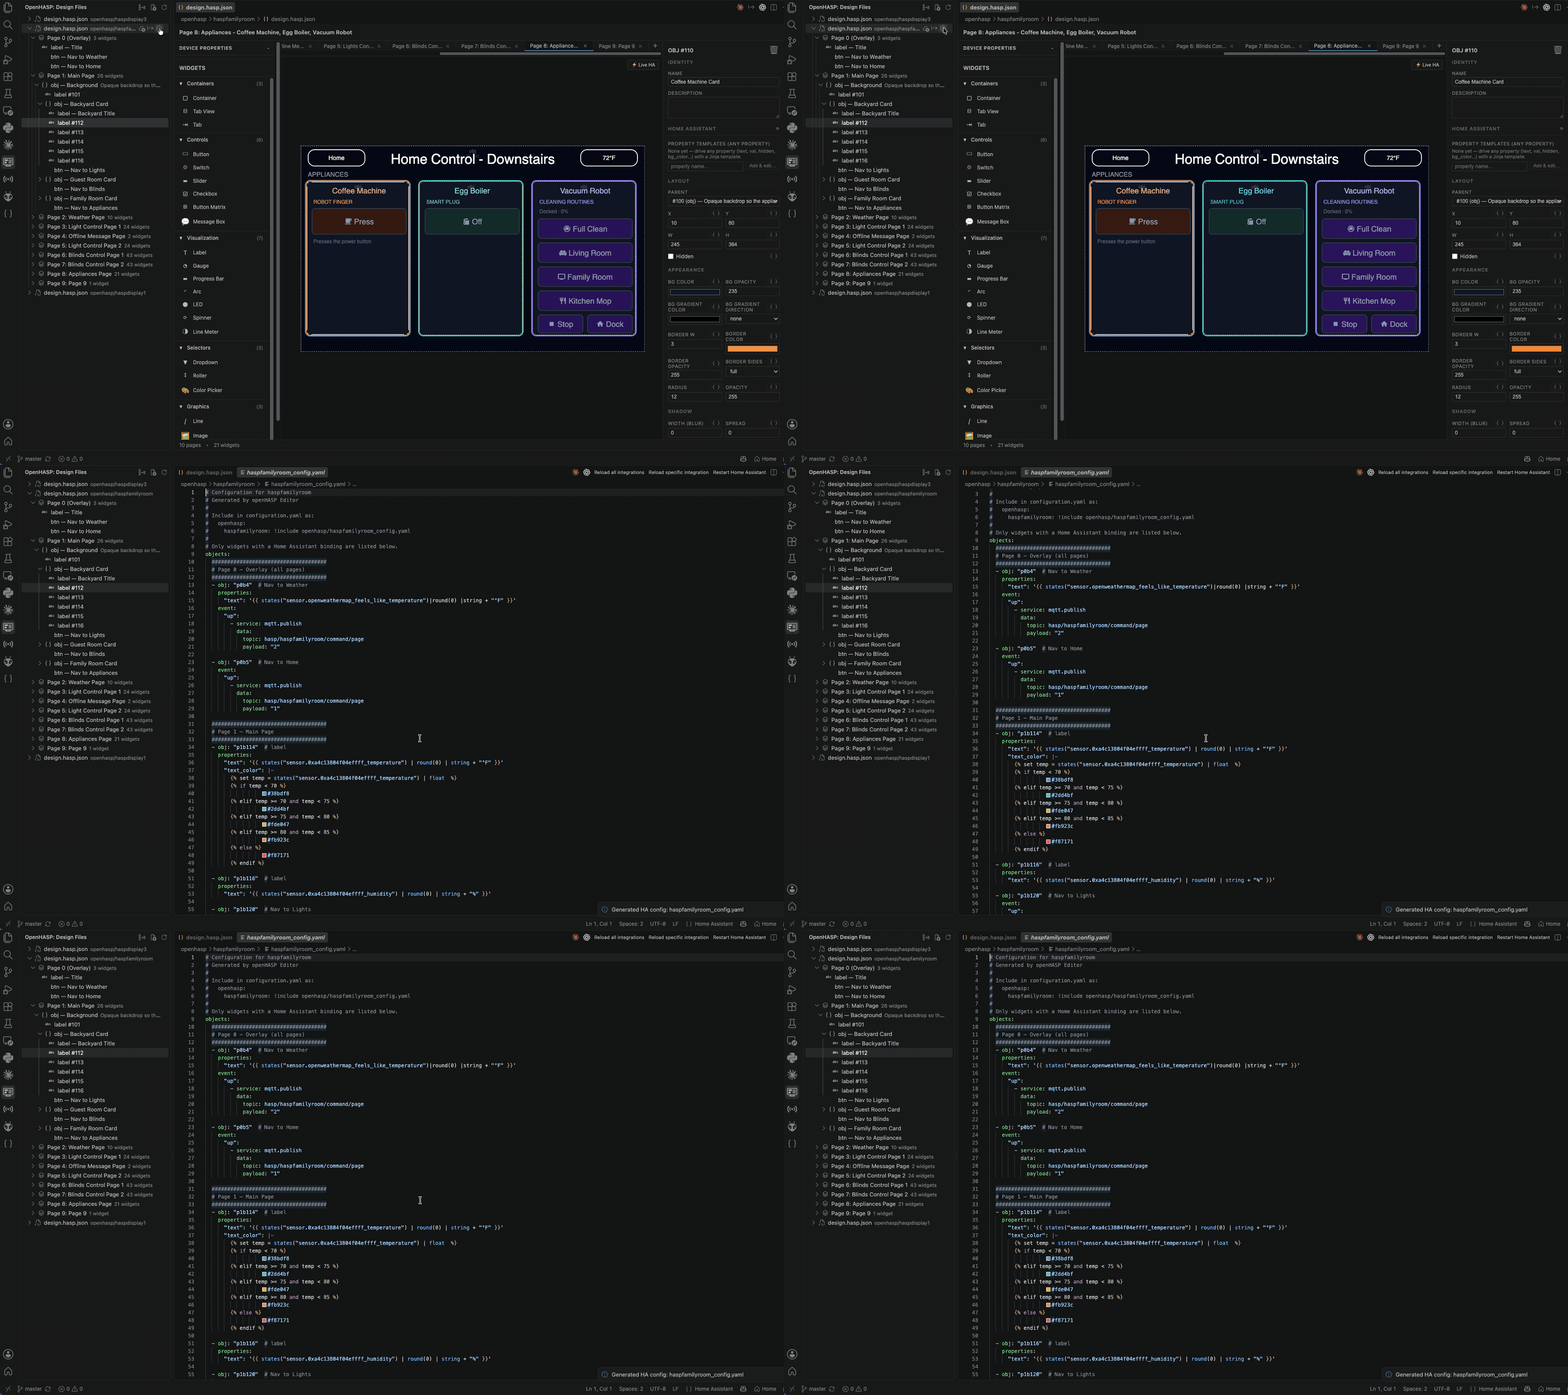
Home Assistant YAML generation
Produce the objects: config for the openHASP integration from your bindings.
| Category |
Widgets |
| Containers |
Container (obj), Tab View (tabview), Tab (tab) |
| Controls |
Button (btn), Switch (switch), Slider (slider), Checkbox (checkbox), Button Matrix (btnmatrix), Message Box (msgbox) |
| Visualization |
Label (label), Gauge (gauge), Progress Bar (bar), Arc (arc), LED (led), Spinner (spinner), Line Meter (linemeter) |
| Selectors |
Dropdown (dropdown), Roller (roller), Color Picker (cpicker) |
| Graphics |
Line (line), Image (img), QR Code (qrcode) |
Every widget supports the common openHASP style properties — position and size, background,
border, radius, shadow, outline, padding, text and font, alignment, and hidden. Anything not
surfaced as a field can be added under Advanced (Custom Properties) in the properties panel, so
you are never blocked by a property the editor doesn't know about yet.
Home Assistant bindings are available on these widget types:
| Binding |
Widgets |
| Show an entity's state |
btn, switch, checkbox, slider, arc, dropdown, roller, label, led, bar, gauge, linemeter |
| Trigger an action |
btn, switch, checkbox, slider, arc, dropdown, roller |
| Template-driven properties |
every widget type |
3. Extension settings
Open Settings (Ctrl/Cmd+,) and search for openHASP, or edit settings.json directly.
Editor
| Setting |
Default |
What it does |
openhasp.editor.canvasWidth |
720 |
Fallback canvas width in pixels — used when importing a JSONL file, and when opening a plain .jsonl in the editor. A .hasp.json design always uses the width stored in its own device properties, so this setting doesn't affect it. |
openhasp.editor.canvasHeight |
480 |
Fallback canvas height in pixels, same rules as above. |
openhasp.editor.gridSize |
10 |
Reserved. The canvas grid is currently fixed at 10 px. |
openhasp.editor.snapToGrid |
true |
Reserved. Snapping to the 10 px grid is currently always on. |
openhasp.editor.iconFont |
"" |
Absolute path to the icon font (.woff2, .woff, or .ttf) built into your device firmware. Load it and \uXXXX icon values in widget text render on the canvas exactly as they will on the device. Example: /path/to/hasp_10_icons.woff2 |
openhasp.editor.imagesRoot |
"" |
Absolute path to a local folder mirroring the root of your device's LittleFS storage. Image src values such as L:/logo.png or L:/logo.bin resolve against it so the real image is drawn on the canvas. LVGL .bin images (true color, true color + alpha, chroma-keyed, indexed 8-bit, alpha 8-bit) are decoded and rendered directly. Example: /path/to/device-littlefs |
Set iconFont and imagesRoot early — they are what turn the canvas from an approximation into
a faithful preview of the device screen.
MQTT (used by Upload to Device)
| Setting |
Default |
What it does |
openhasp.mqtt.host |
localhost |
Broker hostname or IP. Upload is refused until this is set. |
openhasp.mqtt.port |
1883 |
Broker port. |
openhasp.mqtt.username |
"" |
Broker username; leave blank if the broker is open. |
openhasp.mqtt.password |
"" |
Broker password; leave blank if not required. |
Home Assistant
| Setting |
Default |
What it does |
openhasp.homeAssistant.url |
"" |
Base URL of your Home Assistant instance, e.g. http://homeassistant.local:8123. Normally written for you by the Connect to Home Assistant command. |
Your Home Assistant access token is never stored in settings — it goes into VS Code's encrypted
secret storage. See 4.3.
Commands
All commands are available from the Command Palette (Ctrl/Cmd+Shift+P) under the
openHASP category:
| Command |
Purpose |
openHASP: New Design File |
Create a .hasp.json design |
openHASP: Import JSONL as Design File |
Convert an existing .jsonl into a design |
openHASP: Open with openHASP Editor |
Open the active file in the visual editor |
openHASP: Export as JSONL |
Write the device-ready .jsonl |
openHASP: Upload to Device |
Publish the design to a device over MQTT |
openHASP: Generate Home Assistant Config |
Write the objects: YAML for the openHASP integration |
openHASP: Connect to Home Assistant |
Store the HA URL and access token |
openHASP: Show Log |
Open the openHASP output channel (MQTT and HA diagnostics) |
Keyboard shortcuts
| Keys |
Action |
Delete / Backspace |
Delete the selected widgets |
Ctrl/Cmd+C |
Copy the selection (including nested children) |
Ctrl/Cmd+V |
Paste, offset from the original |
Ctrl/Cmd+Space |
Autocomplete inside the Jinja template editor |
4. Usage
4.1 Create a new design file
- Click the openHASP icon in the activity bar to open the Design Files view.
- Click New Design File (the new-file icon in the view's title bar), or run
openHASP: New Design File from the Command Palette.
- Answer the prompts:
- Description — optional, e.g. Main screen for the hallway panel.
- Device name — this matters. It becomes the MQTT node name, so a device named
Hallway Panel publishes to hasp/hallway_panel/… and appears as hallway_panel in the
generated Home Assistant config. Use the same name your device reports.
- Display width and height in pixels — e.g.
320 × 240, or 480 × 320.
- Choose where to save the
.hasp.json file. It opens straight into the visual editor.
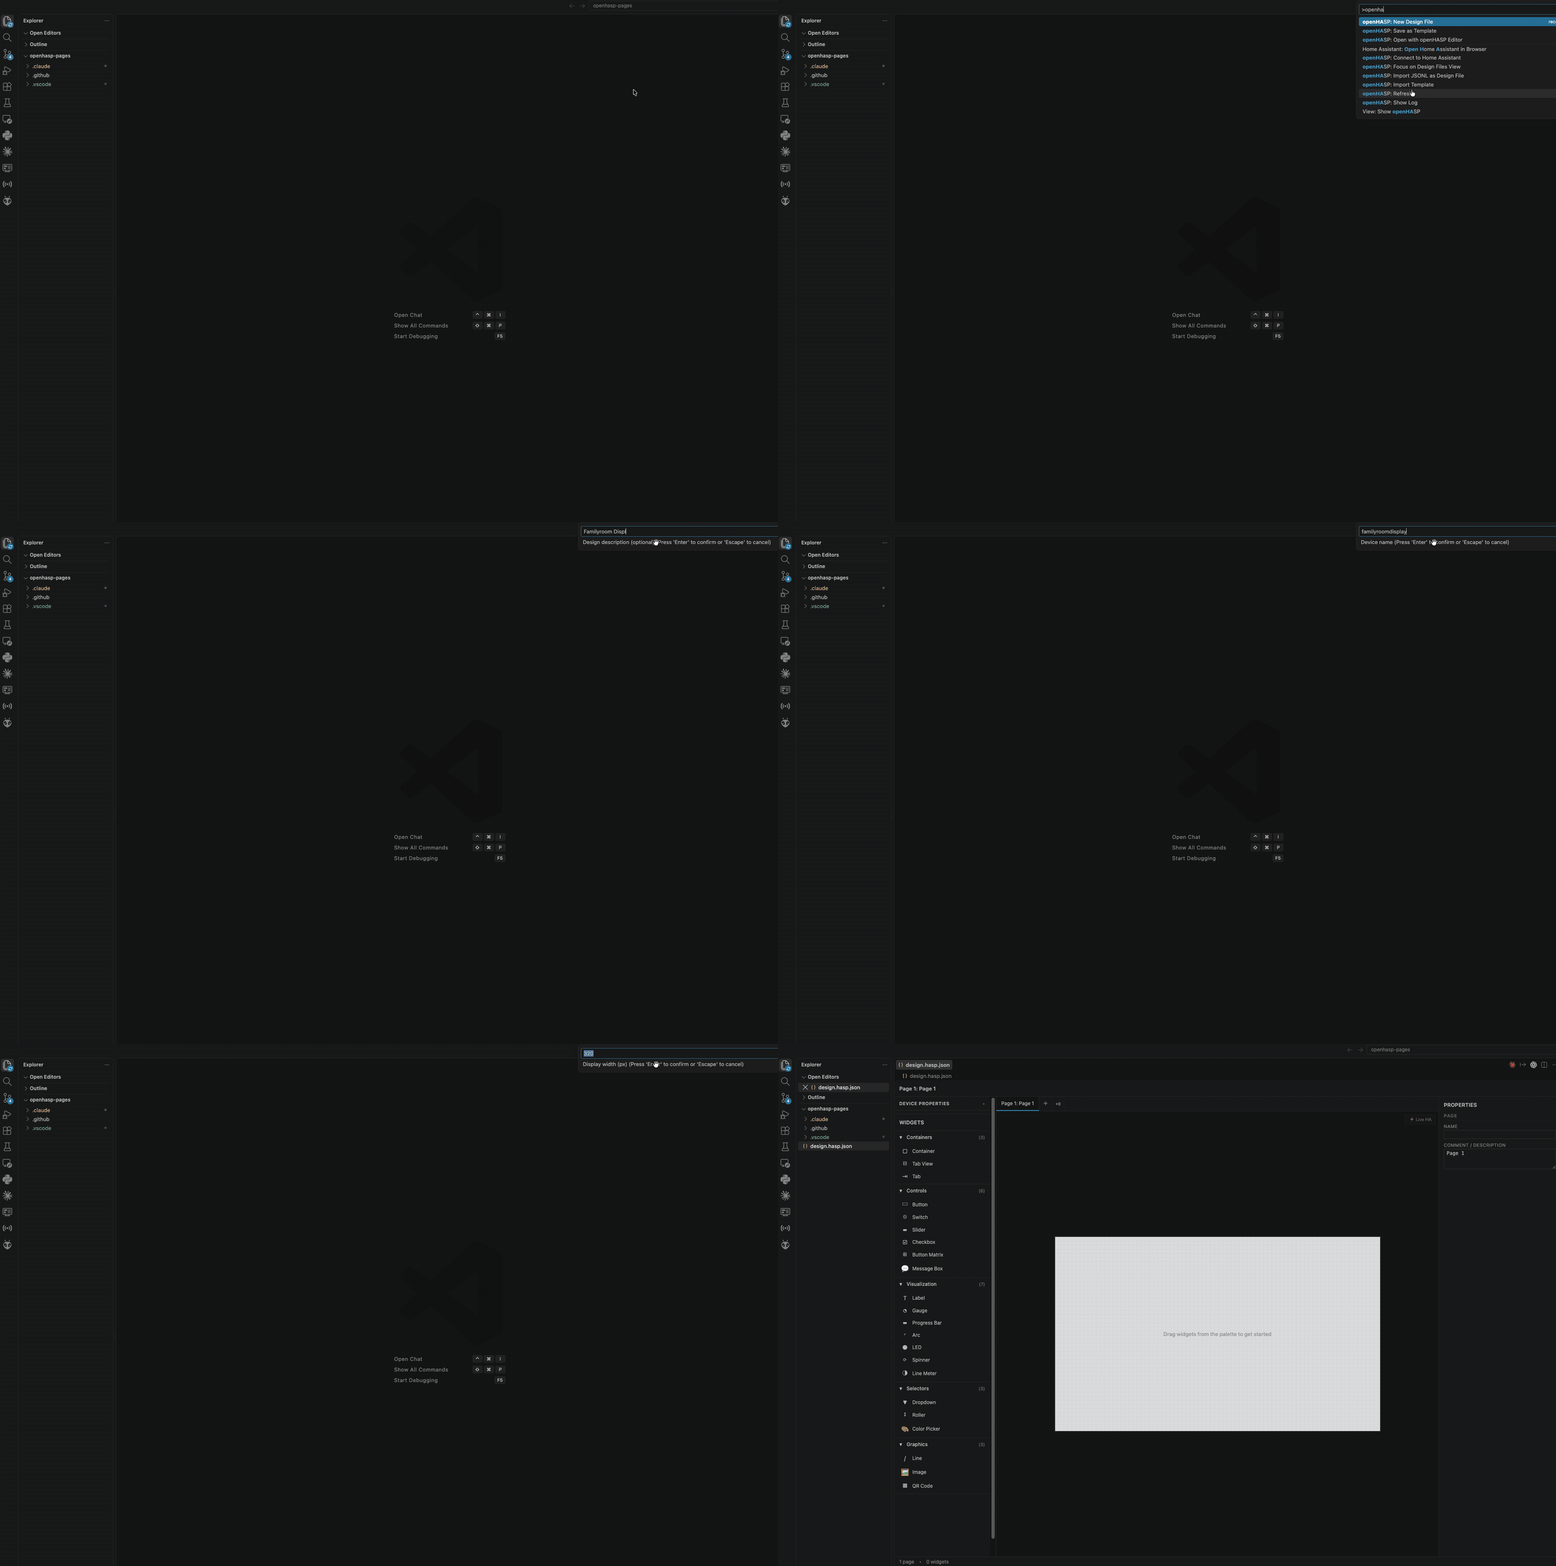
You now have a one-page design. From here:
- Add widgets — drag from the palette on the left onto the canvas. Drop a widget on top of a
container and it becomes a child of that container.
- Edit properties — select a widget and use the properties panel on the right. Give it a
Name and Description under Identity; those show up in the explorer tree and as comments
in the generated Home Assistant config, which makes a large design much easier to navigate.
- Add pages — use the
+ button in the page tab bar. The separate overlay button adds
page 0, whose widgets openHASP draws on top of every other page (a status bar, for example).
Overlay widgets appear greyed on other pages' canvases so you can lay out around them.
- Adjust the device — expand Device Properties at the top of the left panel to change the
device name, resolution, or the font used for previewing this specific design.
Changes are written back to the .hasp.json file as you edit; save with Ctrl/Cmd+S.
4.2 Create a design file by importing existing JSONL
If you already have an openHASP layout on a device or in a pages.jsonl file:
- First set
openhasp.editor.canvasWidth and openhasp.editor.canvasHeight to your device's
resolution — a JSONL file carries no display size, so the import takes it from these settings.
(You can also correct it afterwards under Device Properties.)
- In the Design Files view, click Import JSONL as Design File, or run
openHASP: Import JSONL as Design File.
- Select the
.jsonl (or .hasp) file to import.
- Choose where to save the resulting
.hasp.json. It opens in the visual editor.
The import keeps every property from the source lines, including ones the editor has no dedicated
field for — those stay visible and editable under Advanced (Custom Properties). The original
.jsonl is left untouched; the design file is a new, richer copy that can be exported back to
.jsonl at any time.
4.3 Configuring the Home Assistant connection
The editor talks to Home Assistant to list your entities, validate templates, and show live values.
- In Home Assistant, go to your profile → Security → Long-Lived Access Tokens and create a
token. Copy it — Home Assistant shows it only once.
- In VS Code, run
openHASP: Connect to Home Assistant.
- Enter the base URL of your instance, e.g.
http://homeassistant.local:8123.
- Paste the token when prompted.
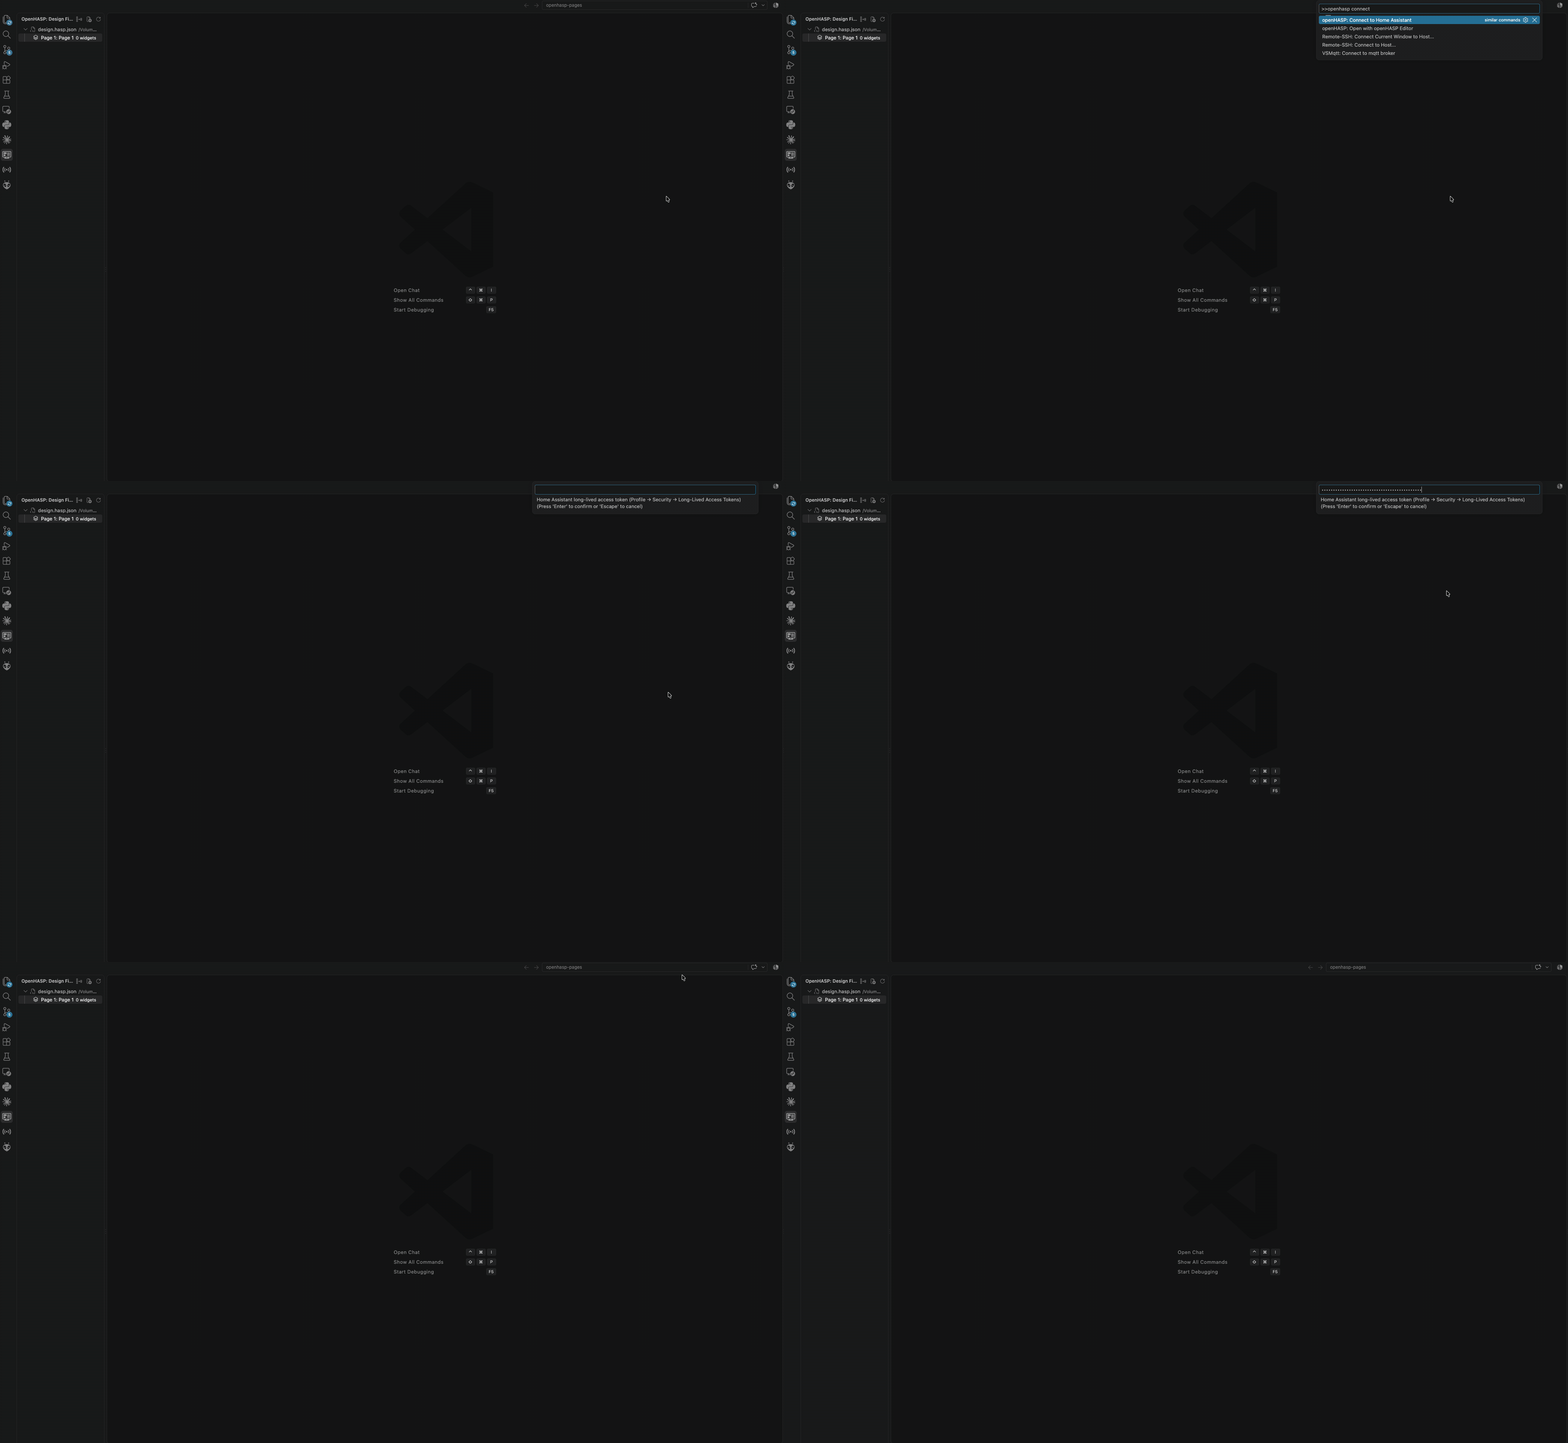
The extension immediately tests the connection and reports success or failure. The URL is saved to
openhasp.homeAssistant.url; the token goes into VS Code's encrypted secret storage, so it is never
written into settings.json or into any file you might commit.
If the connection fails, run openHASP: Show Log — the openHASP output channel records the URL
used, the HTTP status, and the failure reason.
Select a widget and open the Home Assistant section of the properties panel. It has two
independent halves: what the widget shows, and what it does.
Use ⟳ next to the section title to reload the entity list whenever you add entities in HA.
Example: a switch that controls a light
- Drop a Switch on the canvas.
- Display source → Entity, then search for
light.living_room in Display.
- The panel confirms Shows the current state of Living Room (light.living_room) — the switch
reads on/off from the light with no template writing on your part.
- Under Action entities, pick
light.living_room as well. Action defaults to Toggle.
That single binding generates both directions:
  - obj: "p1b3"  # Living room switch
    properties:
      "val": '{{ 1 if is_state("light.living_room", "on") else 0 }}'
    event:
      "up":
        - service: light.toggle
          target:
            entity_id: light.living_room
Example: a slider for light brightness
- Drop a Slider and set its Min/Max to
0 and 100.
- Display →
light.living_room. Because a slider is a range widget, the editor derives
brightness rather than on/off: ((state_attr("light.living_room","brightness") | default(0)) * 100 // 255).
- Action entities →
light.living_room, then Action → Set brightness (drag). It fires
on openHASP's changed event and sends the slider value as brightness_pct.
  - obj: "p1b4"  # Brightness
    properties:
      "val": '{{ ((state_attr("light.living_room", "brightness") | default(0)) * 100 // 255) }}'
    event:
      "changed":
        - service: light.turn_on
          target:
            entity_id: light.living_room
          data:
            brightness_pct: "{{ val }}"
Example: a label showing a sensor
Drop a Label and set Display to sensor.outside_temperature. A label defaults to showing
the state as Text, producing "text": '{{ states("sensor.outside_temperature") }}'.
More things you can do here
- Several targets at once — the action entity picker is multi-select. Pick three lights of the
same domain and one press acts on all of them.
- Long press — push-button widgets offer a Toggle (long press) action for
light,
switch, input_boolean, and fan entities, firing on openHASP's long event so a short
press and a long press can do different things. Toggle buttons and sliders don't emit long,
so the option is hidden for them.
- Page navigation without Home Assistant — set Action to Go to next page, Go back, or
Go to page…. This publishes an openHASP page command over MQTT and needs no entity at all.
- Anything not in the catalog — choose Custom… and type the openHASP event trigger
(
up, down, release, changed, long), the Home Assistant service, and optional data lines.
- Change what's displayed — tick Advanced display override to switch between
val and
text, or to replace the auto-derived expression with your own.
Curated actions exist for the light, switch, input_boolean, fan, cover, lock, scene,
script, number, input_number, select, and input_select domains.
Any widget property can be driven by a Jinja template — not just the value or the text. This is how
you make a widget change colour, hide itself, or show a formatted string.
Example — a label that turns red when it's freezing:
Select the label and scroll to Property templates (any property) in the Home Assistant
section.
Choose text from the property dropdown and click +. Click Edit and enter:
"Outside: " ~ states("sensor.outside_temperature") | round(1) ~ "°C"
Add a second entry for text_color:
{% if states("sensor.outside_temperature") | float(0) < 0 %}#4FC3F7{% else %}#FFFFFF{% endif %}
Both are written into the generated config:
  - obj: "p1b7"  # Outside temp
    properties:
      "text": '{{ "Outside: " ~ states("sensor.outside_temperature") | round(1) ~ "°C" }}'
      "text_color": |-
        {% if states("sensor.outside_temperature") | float(0) < 0 %}#4FC3F7{% else %}#FFFFFF{% endif %}
Notes that save time:
- Write expressions without braces. A bare expression is wrapped in
{{ … }} for you. If you
need a statement block, type {% … %} yourself and it is used verbatim.
- Use the template editor. Click Edit on any template to open an editor with autocomplete
(
Ctrl/Cmd+Space) for entity IDs, Home Assistant functions such as states, is_state, and
state_attr, and Jinja filters. It renders the template against your live instance and shows the
actual result, so you catch mistakes before they reach the device.
- Common property names are offered in the dropdown:
text, value_str, val, min, max,
hidden, options, bg_color, text_color, border_color, line_color, src, value_font.
Any other property name can be typed in.
- Templates win. If a property has both an entity-derived display value and a property
template, the property template is the one that is used.
- Check it on the canvas. Turn on ⚡ Live HA in the canvas toolbar to render every bound
widget with real values, refreshed every 10 seconds (⟳ refreshes on demand).
4.6 Generating JSONL and Home Assistant YAML
A finished design produces two artefacts: the layout for the device, and the configuration for
Home Assistant. They are separate steps.
The layout — export or upload
Export to a file: with the design open, click the export icon in the editor title bar, or run
openHASP: Export as JSONL, and choose where to write it. Copy the resulting .jsonl onto the
device (its web UI's file editor, or straight onto the LittleFS partition) as the pages file your
device loads — typically pages.jsonl.
Or upload directly over MQTT: set openhasp.mqtt.host (and port/credentials if needed), then
right-click the design in the Design Files view and choose Upload to Device. The extension
publishes clearpage all to hasp/<device>/command/clearpage, then sends each JSONL line to
hasp/<device>/command/jsonl, and the screen redraws in place. <device> is your device name
lowercased with spaces replaced by underscores. This is ideal while iterating; note it updates the
running device, it does not persist a file on it.
The Home Assistant configuration
- Right-click the design file in the Design Files view and choose
Generate Home Assistant Config (or run the command with the design open).
- Accept the suggested filename —
<device_name>_config.yaml. The file opens for review.
Only widgets that have a binding appear in it. The file is organised by page, with your widget
names as comments, and each widget addressed the openHASP way as p<page>b<id>:
# Configuration for Hallway Panel
# Generated by openHASP Editor
#
# Include in configuration.yaml as:
#   openhasp:
#     hallway_panel: !include openhasp/hallway_panel_config.yaml
#
# Only widgets with a Home Assistant binding are listed below.
objects:
  #####################################
  # Page 1 — Lights
  #####################################
  - obj: "p1b3"  # Living room switch
    properties:
      "val": '{{ 1 if is_state("light.living_room", "on") else 0 }}'
    event:
      "up":
        - service: light.toggle
          target:
            entity_id: light.living_room
Wiring it into Home Assistant
This config is consumed by the
openHASP custom integration, which
must be installed (via HACS or manually) and configured with your plate.
Copy the generated file into your Home Assistant config directory, e.g.
config/openhasp/hallway_panel_config.yaml.
Reference it from configuration.yaml — the generated header shows the exact lines:
openhasp:
  hallway_panel: !include openhasp/hallway_panel_config.yaml
The key (hallway_panel) must match the plate's node name, i.e. the MQTT topic the device
publishes under.
Check the configuration in Developer Tools → YAML → Check configuration, then restart Home
Assistant (or reload the openHASP integration).
Home Assistant now pushes property updates to the plate whenever an entity changes, and runs your
service calls when the plate reports a touch event.
Re-generate this file whenever you change bindings, and re-export or re-upload the .jsonl
whenever you change the layout — the two must agree, because the YAML addresses widgets by their
p<page>b<id> numbers.
Troubleshooting
Run openHASP: Show Log first — the openHASP output channel logs MQTT connections and publishes,
Home Assistant requests, and template validation errors with their causes.
| Symptom |
Likely cause |
| Entity pickers are empty |
Not connected: run openHASP: Connect to Home Assistant. If it was working, the token may have been revoked. |
| "MQTT host is not configured" |
Set openhasp.mqtt.host in Settings. |
| Icons render as boxes |
Point openhasp.editor.iconFont at the icon font used by your firmware. |
| Images don't appear on the canvas |
Point openhasp.editor.imagesRoot at a local copy of the device's LittleFS root, so L:/… paths resolve. |
| Widget doesn't update in Home Assistant |
Its p<page>b<id> changed since the YAML was generated — re-generate the config. |
| Live HA button is disabled |
No widget in the design has a Home Assistant binding yet. |
Links
Licensed under the MIT License.

