VS Snippets - Snippets, Prompts & AI Skills for VS Code
One workspace for code snippets, reusable AI prompts, and AI skills inside VS Code. Save, organize, search, and sync the building blocks of both your code and AI workflows.
Built by Peter Csipkay.
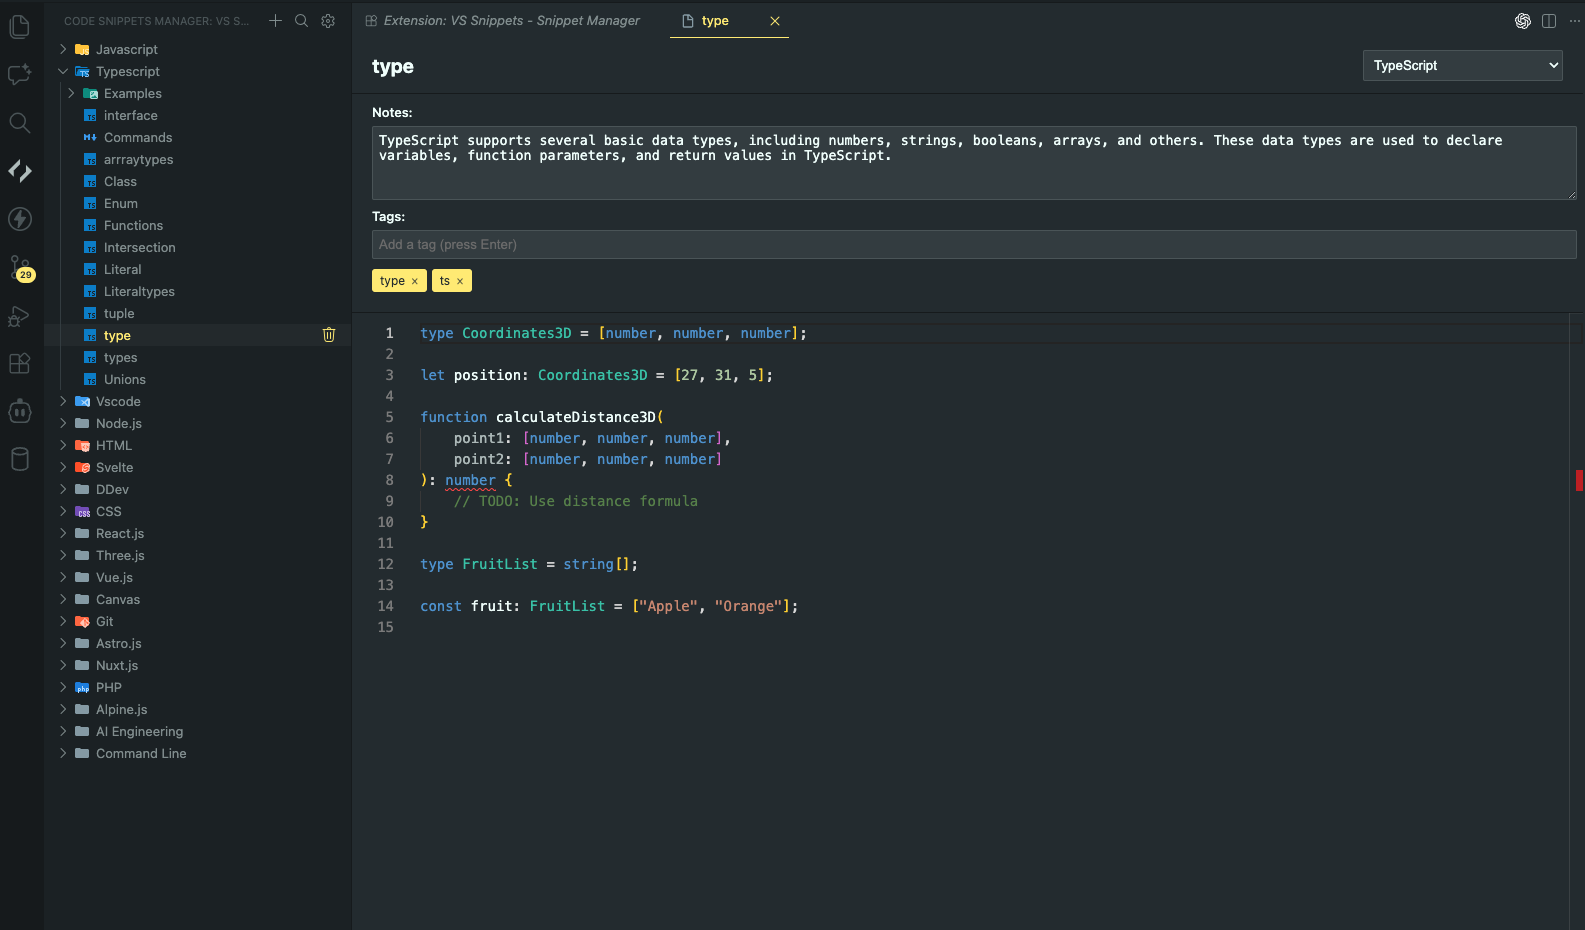
Best for developers who want to:
- Reuse common code patterns faster
- Build a searchable library of proven AI prompts and skills
- Keep snippets structured with folders, notes, and tags
- Sync snippets across machines with cloud-backed folders
Content types
The sidebar has separate Snippets, Prompts, and Skills sections. Each type has its own folders, so items cannot accidentally be moved between libraries.
- Snippets keep the active file's language and expand VS Code snippet placeholders when inserted.
- Prompts are reusable AI prompts, always written in Markdown and inserted as literal plain text.
- Skills are reusable AI skills, always written in Markdown and inserted as literal plain text.
Use VS Snippets: Save to VS Snippets to choose a type, or use Save as Snippet, Save as Prompt, or Save as Skill to skip the type picker. Each command saves the selection when one exists; otherwise it saves the whole active document. A destination folder is always required and can be created from the picker.
30-second setup
- Install VS Snippets from VS Code Marketplace.
- Create your first folder and snippet from the sidebar.
- (Optional) Configure a backup folder for cross-device sync.
Features
- 📝 Create and organize code snippets with a modern editor
- 📁 Advanced folder organization
- Create folders and subfolders
- Drag and drop snippets and folders
- Rename folders and snippets
- Delete items you no longer need
- Split screen feature for copy snippets to projects
- 🔍 Powerful search functionality
- Filter by one or more content types, a folder (including its descendants), tags, and text
- Search names, content, notes, languages, and tags while preserving matching folder paths
- ⌨️ Search and insert from the keyboard
- Press
Ctrl+Alt+S (Cmd+Option+S on macOS) in an editor
- Search for a snippet, press Enter, and insert it at the cursor
- 🎨 Rich code editing
- Syntax highlighting for 40+ programming languages
- Modern Monaco editor integration
- Language specific icons
- 📝 Snippet metadata
- Add notes to snippets
- Language specification
- Tags support
- 💾 Backup and sync
- Local backup support
- Import/Export functionality
- Auto sync on startup option
- Configurable backup location
- Cloud sync support (via Dropbox, Google Drive, etc.)
- 🔄 Cross-platform compatibility
- Works with VS Code based editors
Need help? We're here for you:
Installation
- Open VS Code
- Go to Extensions (Ctrl+Shift+X / Cmd+Shift+X)
- Search for "VS Snippets"
- Click Install
- Reload VS Code when prompted
Getting Started
- Install the extension from:
- VS Code Marketplace for VS Code and GitHub Codespaces
- Start creating folders and snippets
Managing Snippets
- Create folders to organize your snippets
- Click the "+" icon in the title bar to create root folders
- Use the folder context menu to create subfolders
- Add snippets to folders
- Click the "New File" icon on a folder
- Use drag and drop to move snippets between folders
- Edit snippets in the dedicated snippet editor
- Add your code
- Specify the programming language
- Add notes and tags
- Organize your structure
- Drag and drop folders to reorganize
- Rename folders and snippets as needed
- Delete items you no longer need
Search and Insert with a Keyboard Shortcut
With an editable file focused, press Ctrl+Alt+S (Cmd+Option+S on macOS). Type to search snippets, prompts, and skills by name, language, tags, notes, or content, then press Enter to insert it at the cursor. Snippets expand snippet syntax; prompts and skills insert literal text. You can customize this shortcut from Keyboard Shortcuts by searching for VS Snippets: Search and Insert.
Backup and Sync
Typed items use the existing JSON format and backup version: "1.0". On first upgrade, VS Snippets adds the new fields locally, first saving timestamped recovery copies next to folders.json and snippets.json, then atomically replacing the migrated files. Existing folders and items become Snippets and retain their IDs, notes, tags, pin state, timestamps, and nesting. Editing typed data with an older extension version is unsupported.
- Open VS Code Settings (
Ctrl/Cmd + ,)
- Search for "Snippets Manager"
- Configure:
- Backup Folder location
- Auto-sync on startup option
Cloud Sync Setup
You can use any cloud storage service to sync your snippets across computers:
Using Dropbox:
- Set your backup folder to a location inside your Dropbox folder
- Enable auto-sync on startup
- Dropbox will automatically sync the backup file across your computers
Using Google Drive:
- Set your backup folder to a location inside your Google Drive folder
- Enable auto-sync on startup
- Google Drive will handle the synchronization automatically
Using OneDrive:
- Set your backup folder to a location inside your OneDrive folder
- Enable auto-sync on startup
- OneDrive will keep your snippets in sync across devices
Using any other cloud service:
- Choose any cloud service that provides a local sync folder
- Set your backup folder to that location
- Enable auto-sync on startup
- Your cloud service will handle the rest
Tips for cloud sync:
- Use the same backup folder path on all your computers
- Let the sync complete before closing VS Code
- If conflicts occur, you can always import the backup file manually

