NAG Library for Python
Welcome to the NAG Library for Python extension!
This extension simplifies initial access to the NAG Library for Python.
Key Features
| Feature |
Command (Ctrl+Shift+P / ⌘+Shift+P) |
| NAG Library installation using Python virtual environments |
NAG: Quick Install, NAG: Custom Install |
| Licence key request and storage |
NAG: Trial Licence Request, NAG: Store Licence Key |
| Get Python usage examples (.py, .ipynb) of the NAG Library |
NAG: Show NAG Python Example, NAG: Download Jupyter Notebook Sample |
| Manage paths where the Library has been installed |
NAG: Manage Stored Paths |
General notes
- The extension provides most of its functionalities as commands accessible from the command palette (
Ctrl+Shift+P / ⌘+Shift+P).
- The installation commands (Quick Install and Custom Install) are done by executing commands on VS Code's integrated terminal. You will be able to see the commands issued.
- To get started with the NAG Library, use the Quick Installation.
Jump to Section
Quick Installation (Command: NAG: Quick Install)
This command creates a Python environment in the current open folder and installs the NAG Library for Python naginterfaces within it. See Custom Installation for more customised installation options.
Create a new folder to install and test the NAG Library. Open the folder with VS Code (File > Open Folder...).
Run the NAG: Quick Install command from the Command Palette (Ctrl/⌘+Shift+P).

- This creates a Python virtual environment within the new folder named nag_py, where the the
_mkl version of the NAG Library package naginterfaces will be installed using pip.
- The
ipykernel package will also be installed with the quick installation.
Besides the nag_py virtual environment folder, two other items will appear in the new folder:
- an example Python file using the NAG Library.
- an example Jupyter Notebook using the NAG Library (downloaded from NAG's github repository).
See Installation: Next Steps for further instructions.
Installation: Next Steps
If a valid licence key is not detected, follow the prompt to request a trial licence by completing an online form. Alternatively, use the NAG: Trial licence Request command.
You will receive your requested trial licence key by email containing one or more lines like the following:
<PRODUCT_CODE> TRIAL <EXPIRY_DATE> "EMnxidA3oeoj0F1Yvi5ibxPjB7"
Store the licence key by pasting it into the prompt. The key will be stored in your home directory.

Alternatively, use the NAG: Store Licence Key command.
Once a valid licence key is stored, the quick_check function will be called to confirm availability of a licence and perform a small check that the underlying compiled libraries load correctly.
When the installation has completed, the Python interpreter located within the (virtual environment) installation directory will be automatically selected (see status bar at the bottom).
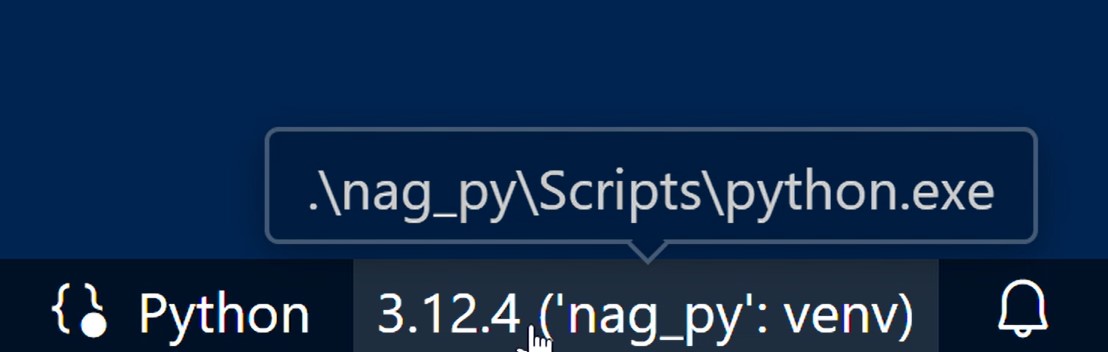
- If it is not selected, use the Command Palette > Python: Select Interpreter to select the created venv as the interpreter.
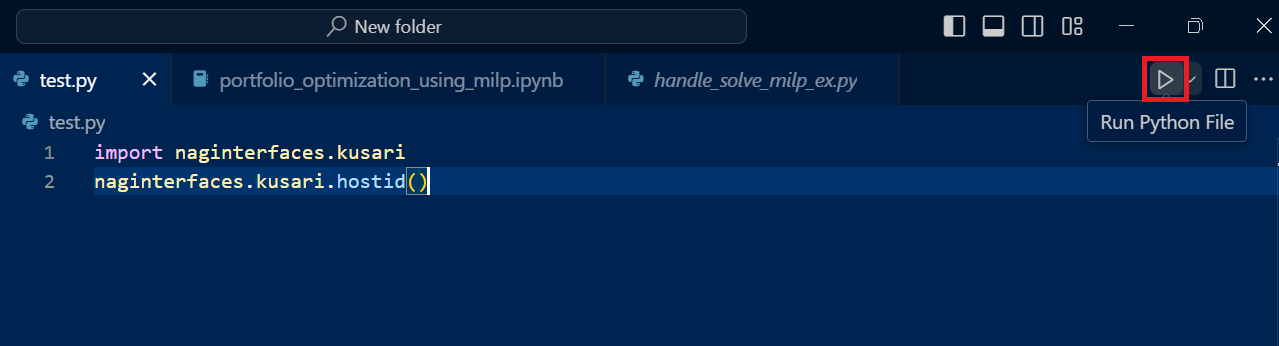
Python files (.py) can be run simply by clicking on the "Run Python File" button.
Various IntelliSense features should work with the naginterfaces library. Trigger IntelliSense with Ctrl+Space or by typing a trigger character (such as .). See IntelliSense in Visual Sudio Code for more information.
Jupyter notebooks (.ipynb) can be run by executing the cell > Python Environment > nag_py (or another custom named environment). The environment that has naginterfaces installed should be automatically recommended. This requires the Jupyter extension.

- Alternatively, to select a kernel, use the 'Select Kernel' button (top right corner) or the Command Palette > Notebook: Select Notebook Kernel.
Following a successful deployment of the naginterfaces materials, it is recommended that you review the full documentation for the Python package before use. Please see also the getting started guide for the NAG Library.
[Optional] Use the NAG: Show NAG Python Example command to show an example source file shipped along with the Library.
Working with Python Virtual Environments (Basic Guide)
- The installation options provided by this extension uses the Python
venv module to create virtual environments and installs naginterfaces within a virtual environment.
- Packages installed in the virtual environment are isolated from your global Python environment. Hence, you may need to reinstall some of the libraries in the virtual environment that you already have been using in the global environment.
- To use the virtual environment from the command line (to run Python files or install Python libraries), you can do one of the following:
- activate the environment. This allows you to invoke the virtual environment interpreter by just using
python. From the directory containing the virtual environment named nag_py, use
.\nag_py\Scripts\activate (on Windows). nag_py/bin/activate (on Linux or Mac)
- (without activation) specify the full path to that environment's Python interpreter when invoking Python, e.g. (
"c:\newfolder\nag_py\Scripts\python.exe" test.py instead of python test.py). See the commands issued by the created NAG terminal for examples.
- if you are using VS Code's integrated terminal, see Using VS Code's Integrated Terminal.
- [Tip] To check if the desired Python interpreter is selected, use the Python
sys module: import sys; print(sys.prefix).
- This guide only mentions some of the basic concepts of
venv, see the venv documentation for more details.
Using VS Code's Integrated Terminal
Other commands
The list of commands provided by this extension can be found from the Command Palette if you start typing "NAG:".
Custom Installation (Command: NAG: Custom Install)
- Open a folder with VS Code. Although the library may not be installed in this open folder, having a folder open helps verify if the created Python virtual environment can be used.
- Run the NAG: Custom Install command (
Ctrl/⌘+Shift+P).
- An installation path can be chosen, either by
- browsing the file system, or
- typing the installation path. This will default to the extension's global storage, e.g.
.../Code/User/globalStorage/numericalalgorithmsgroup.nag-library-for-python; missing directories will also be created automatically. Note that upon the uninstallation of the NAG Library for Python extension, the extension's global storage path and its constituents will be removed.
- Input the name of the Python virtual environment. The environment will be created in the chosen installation path. E.g. if the name is nag_py, the environment content will be located in
.../Code/User/globalStorage/numericalalgorithmsgroup.nag-library-for-python/nag_py.
- Select the package version (
naginterfaces_mkl or naginterfaces_nag)
- If
naginterfaces_mkl is selected, there is an option to select the SMP-tuned version of the Library.
- You will also be prompted to download the Jupyter Notebook sample.
- If you select 'Yes', the notebook will be downloaded to the current folder open in vscode (NOT the installation directory). The
ipykernel package is required to be installed to run Jupyter notebook cells in vscode.
- See Installation: Next Steps for further instructions.
- For more installation options, see the naginterfaces Installation documentation.
Store Licence Key
Paste your licence key into the prompt. If a nag.key file is not present in your home directory, the file will be created with the licence key as its content; otherwise, the licence key will be added to the nag.key file in your home directory.
[Optional] Click on "Show nag.key" to view or manually edit the file.
Show NAG Python Example
The extension searches for an example within the (activated) environment directory for an example. The one currently used is handle_solve_milp_ex.py under mip.
To display the full list of example source files that are shipped along with the NAG Library, execute the following on the integrated terminal.
python -m naginterfaces.library.examples --locate
Download a Jupyter Notebook sample
Manage Stored Paths
- The extension keeps track of a list of paths where it created Python virtual environments in using Quick Install or Custom Install (more specifically, paths towards the "virtual" Python executables).
- To use a particular environment created from a different location, use the command NAG: Manage Stored Paths > "Select Python Interpreter from Stored Paths". This provides an alternative to the Python: Select Interpreter command.
- Except for the option "Select Python Interpreter from stored Paths", all other options (Show, Store, Remove, Remove All) will not have any effect on how Python runs the file. Any removed paths can be restored.
Remove nag_py
- The extension can remove the virtual environment directory (named nag_py) and its constituents created within the workspace folder. This doesn't work for environments installed elsewhere.
FAQ
Q. I have made an installation using NAG: Quick Install in a specific directory. Can I use the NAG Library outside of this directory?
A. Yes. From a different folder, use Command Palette > NAG: Manage Stored Paths > Select ... and select the previously created environment.
| |