BIDS ExplorerBrowse BIDS studies, preview metadata and open NIfTI images locally or over SSH. Installation Launch VS Code Quick Open ( Ctrl+P), paste the following command, and press enter.Copied to clipboard |

BIDS ExplorerExplore your neuroimaging study by participant, session and scan—locally or over SSH. BIDS Explorer is a read-only study browser for datasets organized using the Brain Imaging Data Structure (BIDS). View MRI images, understand acquisition metadata and find participants with the sessions or processing outputs you need. Browse ordinary folders, ZIP files, supported tarballs and SquashFS collections in one logical study tree.
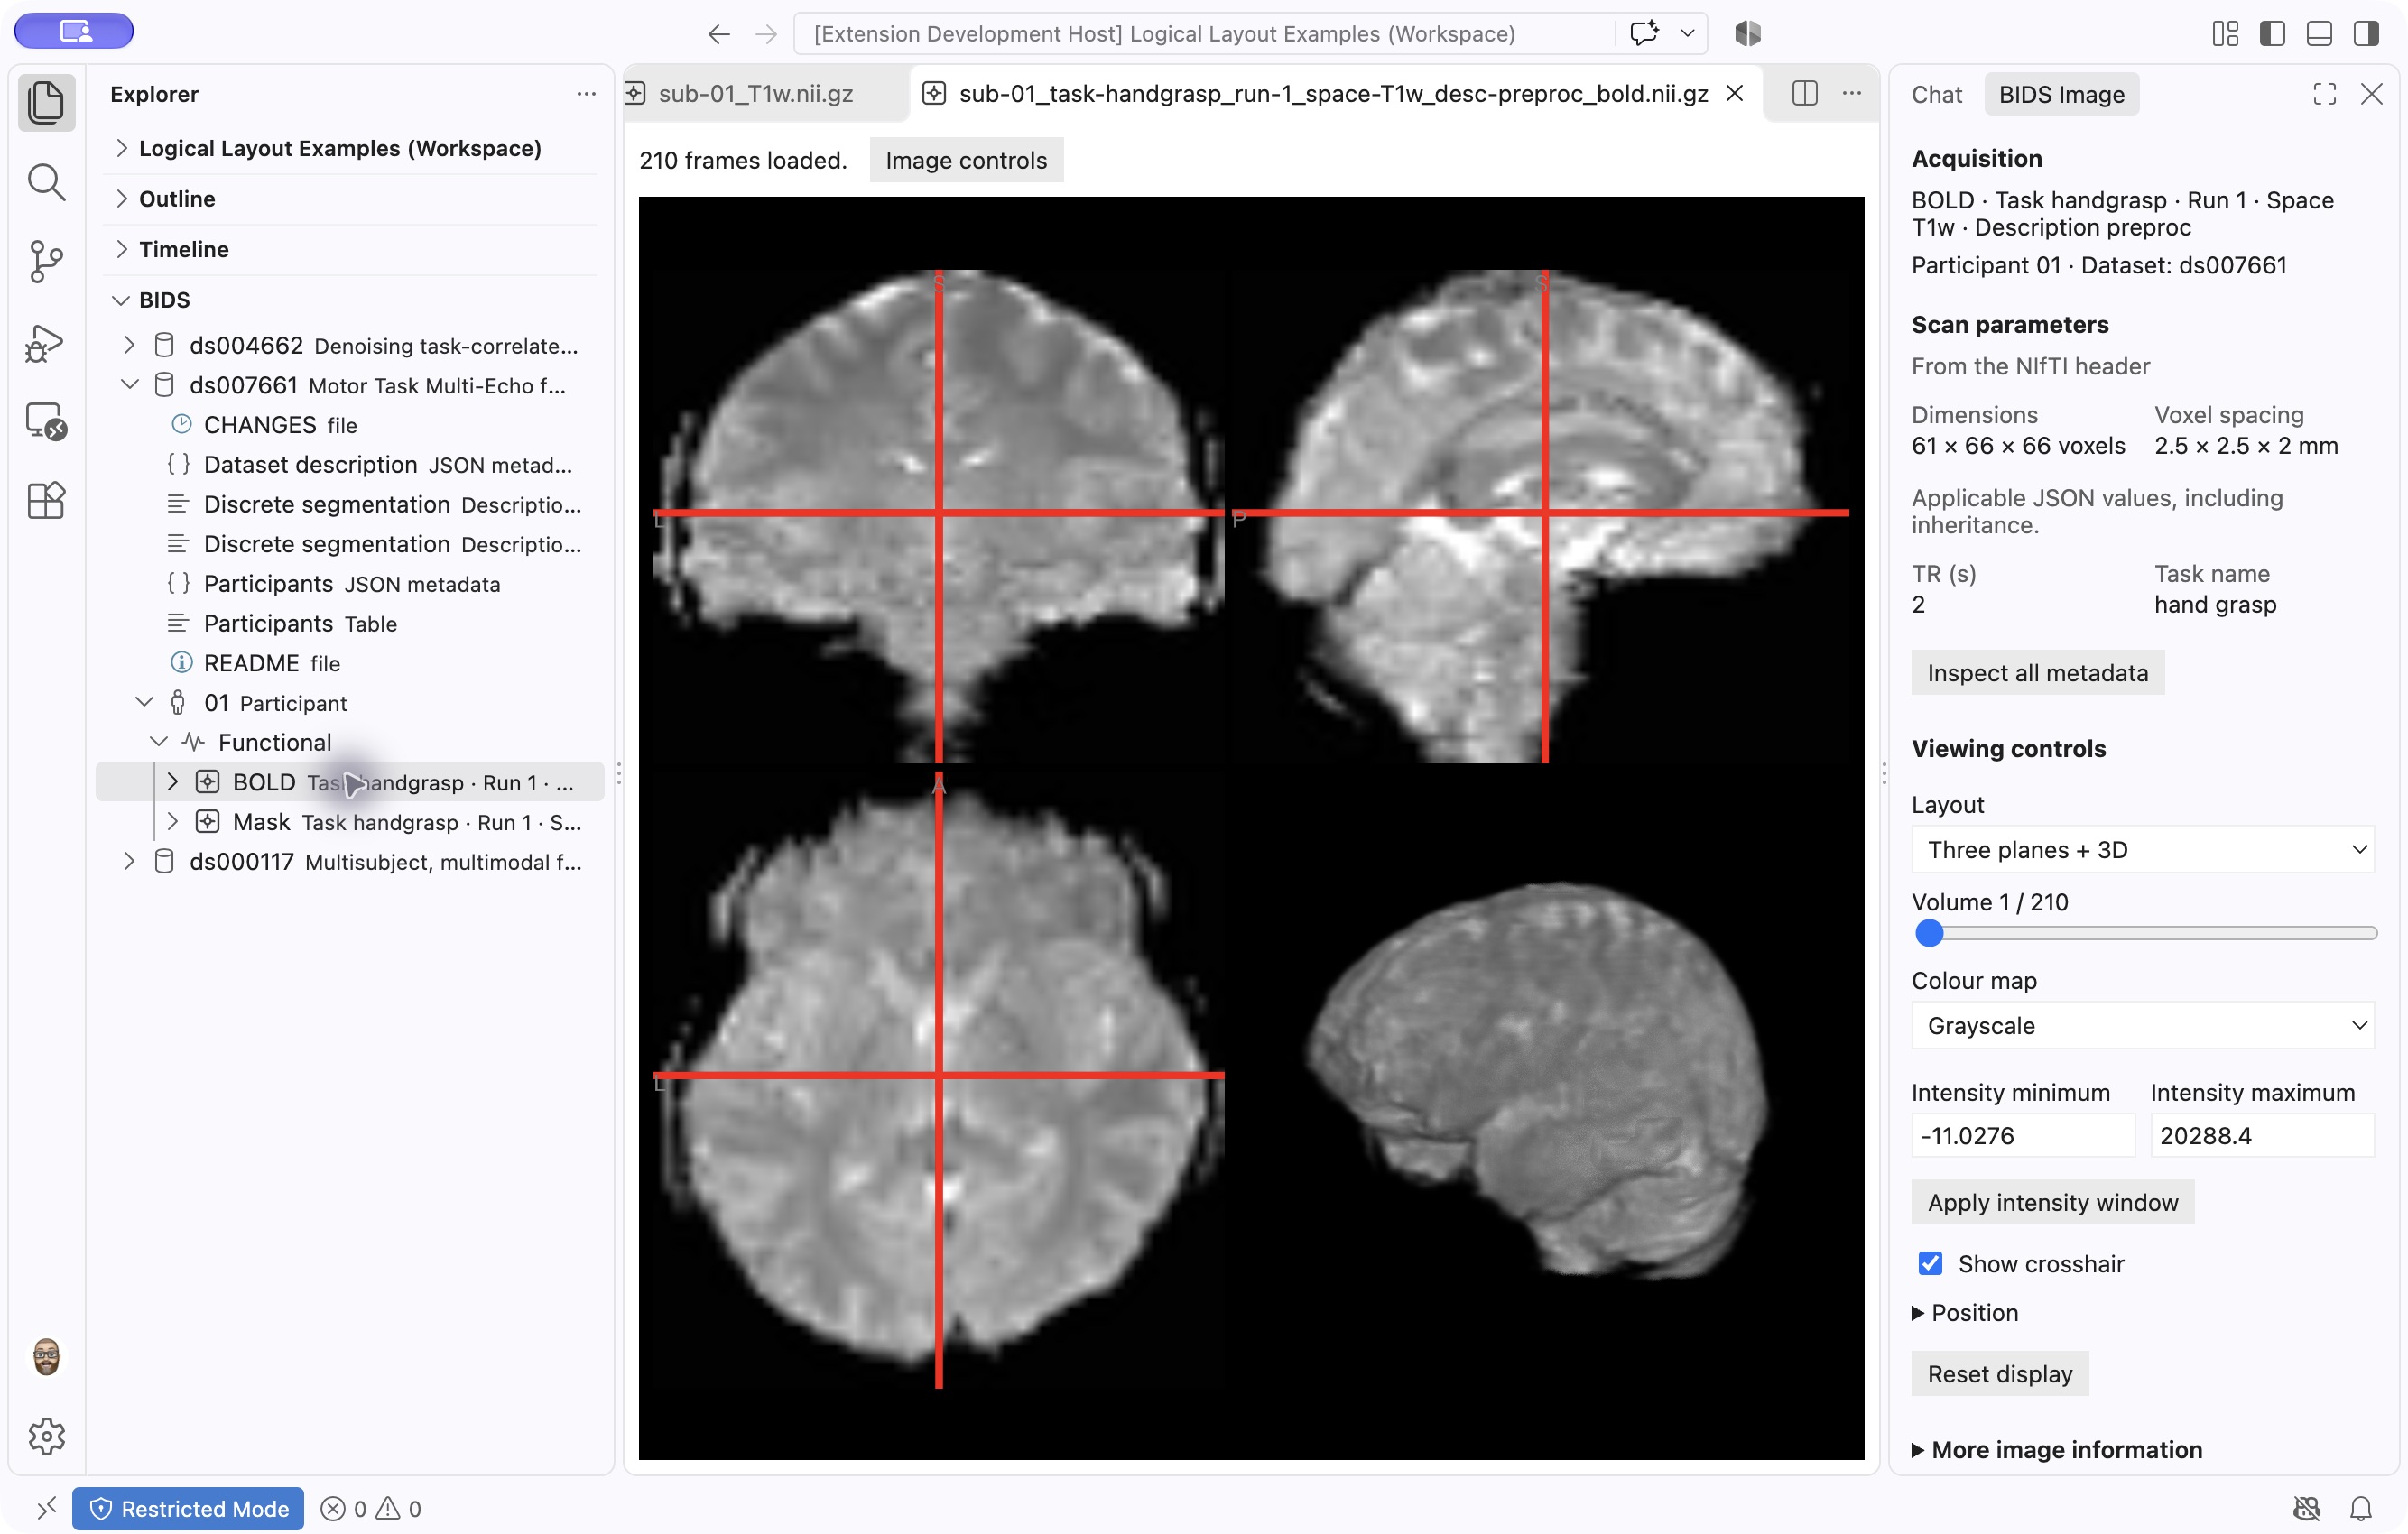
Public functional MRI example from OpenNeuro ds007661. Study navigation is on the left; image information and controls are on the right. InstallSelect Install on this Marketplace page or in VS Code’s Extensions view. The publisher is Darcy Quesnel, with publisher ID MCIN-dlq. The full extension identifier is You need desktop Visual Studio Code 1.96 or newer and access to a study folder you trust. For data on a server, also install Microsoft’s Remote - SSH extension. A separate NiiVue extension, Python, archive utilities and administrator access are not required for the supported browsing and imaging workflows. If you previously installed a development VSIX published as New to BIDS Explorer? Follow the five-minute walkthrough with a ready-to-open 13 MB public sample. No programming or terminal setup is required. Open your first study
The BIDS tree presents a logical study layout. Participant and session labels omit the repeated Sessionless studies work too. Multi-echo acquisitions group their echoes together. Metadata entries appear before subtrees to make each level easier to scan. Work with a study over SSH
Archive reading and indexing run beside the data on the server, using the VS Code connection. Selected images still need to reach your computer to be displayed. No separate SSH configuration is needed inside BIDS Explorer. See Microsoft’s Remote SSH guide for connection setup. View MRI images and acquisition parametersClick a NIfTI image or its acquisition label to use the built-in viewer. The default layout shows axial, coronal and sagittal planes plus a 3D volume view. For a 4D scan, the first volume can appear while the remaining volumes load. Choose Image controls to open the native Image sidebar. To place it on the right, right-click BIDS Image and choose Move To → Secondary Side Bar. VS Code remembers its position. The sidebar includes:
Use Reset display to restore the default presentation. Open Image With… lets you choose another installed VS Code editor if you prefer. Reopening an already-open image returns to its existing viewer. Understand metadata, events and diffusion gradients
Opening a JSON file directly shows what that file records. The acquisition metadata view can also resolve applicable values inherited from broader dataset, participant or session scopes, with their sources. Conflicting or incomplete sources are explained rather than silently combined. Use Filter rows in table previews and Reload snapshot when the source has changed. Open original opens the underlying resource in an editor; saving from a regular editor is a separate action that can change an ordinary source file. Find participants with the data you needRight-click the dataset and choose Show Participant Availability. Select the raw sessions and processing outputs you need, then choose Apply filters. Search and page through the matching participants instead of displaying tens of thousands of rows at once. Missing means no matching data was found within the checked scope. Not checked means coverage is incomplete; it is not evidence that the data is absent. Large collections can build an availability index in the background, with progress and cancellation. Supported cached indexes can be reused after reconnecting when their sources are unchanged. Processing outputs appear under matching session-level Derivatives branches. Outputs without a session appear under Derivatives without a session. Raw and derivative datasets stored separately need explicit links; matching participant labels alone do not establish that relationship. See linking separate datasets. Browse archives without unpacking the studyAdd or open the folder containing your archives. Supported sources can contribute to the logical participant/session tree while retaining their original archive and member identities. If files conflict, source choices remain available. For one SquashFS image, use BIDS Explorer: Browse SquashFS Image.
Large collections may need an initial index. Selected archived images are prepared in a private cache before viewing; a tarball may require a sequential scan. Unsupported compression is reported explicitly. NIfTI viewing currently has a 1 GiB decoded-data limit, and selected archive image extraction has a 512 MiB limit. Metadata and table previews are bounded snapshots rather than unlimited table readers. See format, size and platform details. For fuller recovery instructions, see Troubleshooting. If something does not appear or open
Keyboard accessUse arrow keys to navigate and expand the BIDS tree, Enter to open, and Shift+F10 for the selected entry’s actions. Use Tab to reach filters, table scrolling regions and disclosure controls. The volume selector accepts arrow keys, and the Image sidebar’s Position buttons provide keyboard crosshair movement. Open the Command Palette with Cmd+Shift+P on macOS or Ctrl+Shift+P on Windows/Linux. Extension commands start with BIDS Explorer:. Previews follow the VS Code theme; sampled keyboard, high-contrast and VoiceOver checks are documented in the usability record. Read-only exploration and current boundariesBrowsing, filtering and previews leave source datasets unchanged. Selected archived images, inventories and indexes use extension storage outside the dataset. BIDS Explorer does not send dataset content to an analytics service. Check original-file editor behavior separately if you open a resource for editing. This extension does not currently validate or fix BIDS conformance, rename or reorganize files, run processing pipelines, or display derivative images as overlays on a reference image. Those are separate future workflows. The most extensive interactive testing has been on macOS and Linux Remote SSH; hosted Linux tests use synthetic studies. See the compatibility record for tested versions and limits. Help, feedback and credits
BIDS Explorer is MIT-licensed. Image rendering uses the bundled NiiVue library. Dependencies and datasets retain their own licenses; see third-party notices. To acknowledge the software in research, use citation information for the version you used, and cite datasets and methods separately. |