
DASE — Design-Aided Software Engineering
A visual design environment for modeling and generating multi-tier, multi-platform,
multi-database, and multi-paradigm web applications — right inside VS Code.
Overview
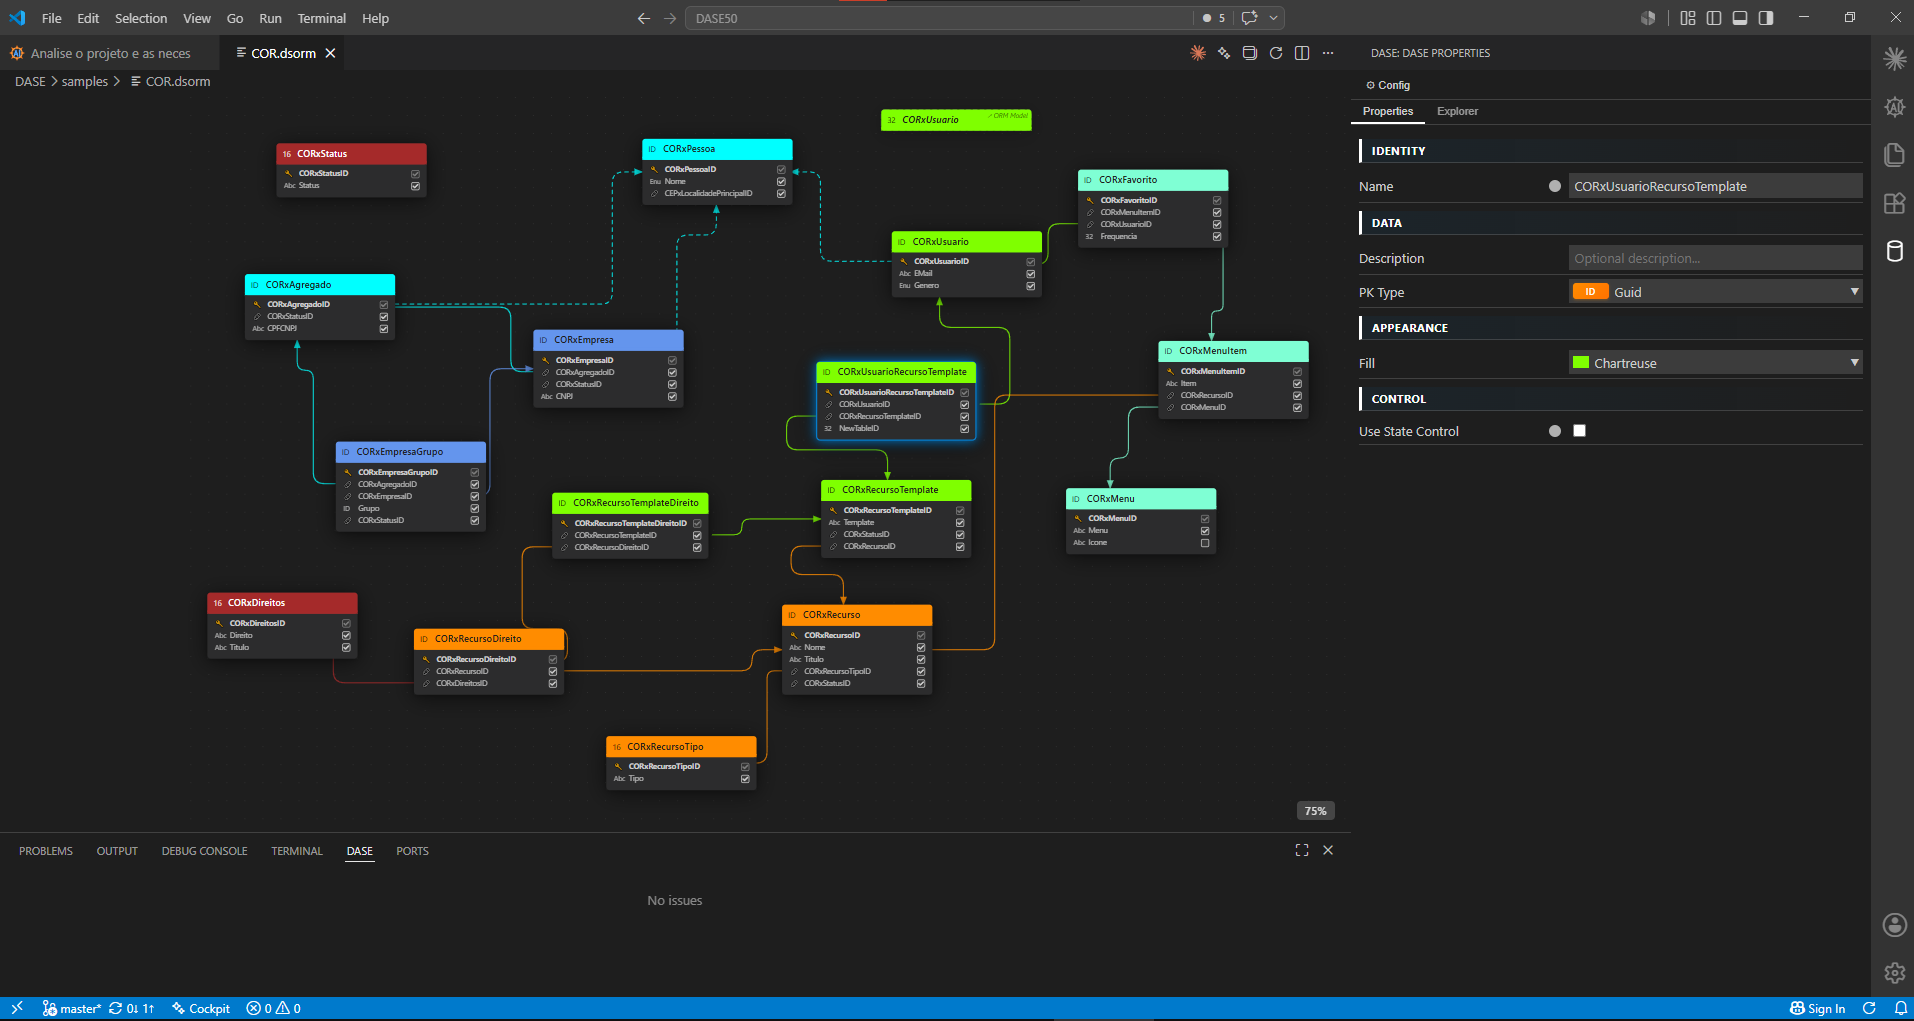
DASE turns VS Code into a visual software-modeling workbench. The current phase ships the
ORM Designer: an interactive canvas for building Entity-Relationship models stored as .dsorm
files. Design your schema visually, validate it in real time, exchange it with DBML, and drive the
whole thing with AI — through GitHub Copilot and any external Model Context Protocol (MCP) client.
Features
🎨 Visual ORM Designer
- Drag-and-drop tables, fields, and foreign-key references on an infinite SVG canvas
- Automatic FK routing with clean orthogonal, rounded connectors
- Color-coded tables and functional grouping for large schemas
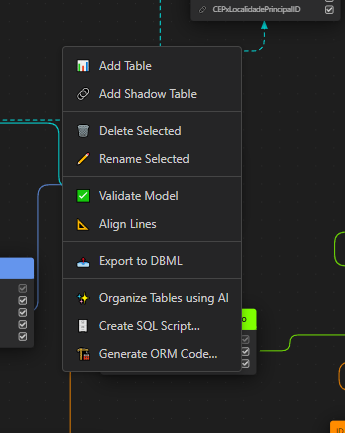
- Marquee multi-select, group drag, and one-click Align Lines
- Zoom, pan, search, and a detachable designer window
🧩 Properties & Issues panels
- Live Properties editor (identity, data type, PK type, appearance, control) that reacts to selection
- Issues panel with real-time validation — duplicate names, missing primary keys, dangling FKs, empty tables
🔁 DBML interoperability
- Export any model to DBML
- Import existing DBML into a fully laid-out
.dsorm
💾 Transparent persistence
- Models are plain XML (
.dsorm) — diff-friendly and version-control-ready
AI Integration
DASE has AI woven into the modeling loop at three levels:
1. @dase Chat Participant
Ask questions and run commands directly in Copilot Chat:
@dase /model              Overview of the current ORM model
@dase /table Customer     Details of a specific table
@dase /validate           Run validation and list errors/warnings
@dase /export             Export the model to DBML
@dase /types              List available data types
@dase /help               Usage help
Plain-language questions work too — "How should I model a many-to-many between Product and Category?"
When Copilot is in Agent Mode, it can invoke DASE tools to read and modify the model directly:
dase_add_table, dase_add_field, dase_add_reference, dase_move_table, dase_set_color,
dase_update_property, dase_organize_layout, and more. Just describe what you want:
"Create a Customer table with Name, Email and BirthDate, then add an FK from Order to Customer."
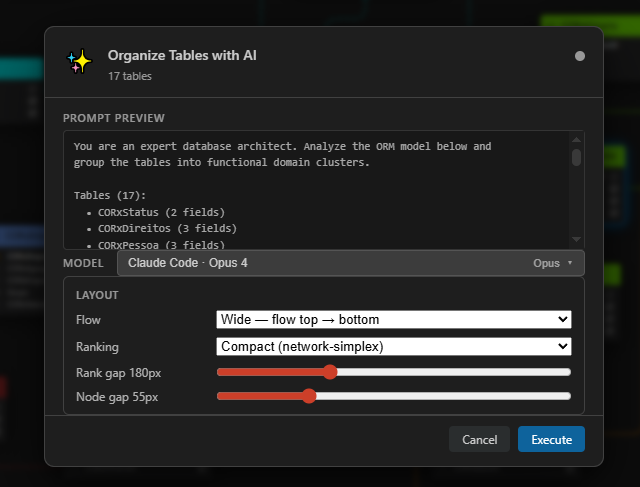
3. AI Table Organization
DASE: Organize Tables using AI analyzes table names, fields, and FK relationships to infer functional
domain clusters, repositions everything into readable groups, and color-codes each group. Pick your model,
tune the layout, preview the prompt — and Revert in one click if you don't like the result.
Model Context Protocol (MCP) — standard, client-agnostic AI
Beyond Copilot, DASE ships an embedded MCP server so any MCP-speaking client
(Cursor, Cline, Claude Desktop, custom agents) can drive the live designer over the open
Model Context Protocol. It exposes 40 tools — the full
DASE surface (read, write, and command triggers) — as thin wrappers over the same engine the
built-in AI uses.
Enable it:
- Open Settings and turn on
DASE › Mcp: Enabled (dase.mcp.enabled).
- The server binds to loopback only —
http://127.0.0.1:39100/mcp (port configurable via dase.mcp.port).
- DASE writes an
mcp-endpoint.json (endpoint URL + per-session Bearer token) into the extension's
global storage. Use it to point your client at DASE:
{
  "mcpServers": {
    "dase": {
      "url": "http://127.0.0.1:39100/mcp",
      "headers": { "Authorization": "Bearer <token-from-mcp-endpoint.json>" }
    }
  }
}
Security by default: loopback-only bind, per-session random Bearer token, and an Origin
allowlist (anti DNS-rebind, per the MCP spec). Disabled until you opt in.
A sample of the exposed tools: dase_get_model, dase_list_tables, dase_get_table,
dase_validate, dase_export_dbml, dase_add_table, dase_add_field, dase_add_reference,
dase_move_table, dase_set_color, dase_update_property, dase_apply_organization, and more.
Quick Start
- Create a new file with the
.dsorm extension (or open an existing one)
- The ORM Designer opens automatically
- Right-click the canvas to add tables, fields, and references
- Watch the Issues panel for validation, tweak in Properties
- Save to persist — or ask
@dase / your MCP client to build it for you
Requirements
- VS Code 1.99.0 or newer
- (optional) GitHub Copilot for the
@dase chat participant and Agent Mode tools
- (optional) Any MCP client for the standard-protocol integration
Documentation
For full documentation, development guides, and contribution instructions, see the
main repository README.
License
MIT License — see LICENSE for details.
Built entirely through AI-driven development.