CodeWhale for VS Code — a lightweight GUI frontend for the CodeWhale agent





CodeWhale for VS Code is the graphical frontend for CodeWhale — an open-source, actively developed coding agent. It brings the agent into a native VS Code sidebar, so you get the full engine (reading your workspace, editing files, running commands, searching the web, delegating to sub-agents) without leaving the editor.
Based on CodeWhale, community effort offers two surfaces over one engine: a TUI for people who live in the terminal, and this GUI for people who live in the editor. They share the same engine and core runtime concepts, but the GUI is intentionally optimized for the editor workflow and still leaves some advanced surfaces TUI-only.
The split is deliberate: the agent stays in the engine, the ergonomics stay in the editor. This extension never bundles, forks, or reimplements the agent — it is a thin, local GUI over a runtime you install and upgrade on your own schedule.
Why it stays lightweight
|
|
| VSIX size (0.8.4) |
~390 KB |
| Runtime npm dependencies |
none — webpack inlines the extension's own TypeScript (and marked for rendering) |
| Bundled engine or model |
none — codewhale is a separate native binary |
| Duplicated agent logic |
none — the GUI is an adapter over the engine's local runtime API |
| Authoritative conversation state store |
none in the extension — the engine is the single source of truth for threads, turns, tools and file changes |
The frontend is a webview. ChatProvider runs in the extension host, speaks HTTP to 127.0.0.1, and renders what the engine reports. When the installed engine exposes a newer runtime endpoint the UI uses it; when it does not, the feature is disabled with an explanation instead of failing at runtime — that is why Undo, Retry and snapshot Restore can show a muted "unavailable" state rather than a broken button.
Because nothing about the agent is copied into the extension, the engine can ship new capabilities and fixes without a frontend release.
Engine compatibility for 0.8.4
0.8.4 is verified against engine v0.10.1: everything it ships is client-side or rides on routes v0.10.1 already carries — and so does everything earlier releases were still waiting on. The Branch row, a command's own change rows in the Changes panel, moving an open conversation to another provider, undo's file rollback and the per-file Revert, user-defined providers in the picker, a fork keeping its session document and the quick thread rails all light up the moment the engine reads v0.10.1.
What still needs a Codewhale build newer than any tagged engine release:
Which client a session reports itself as — needs 5166473, in Codewhale main and not yet in any tagged engine release. Until an engine carries it, sessions this extension starts are counted as an anonymous serve rather than naming the client they belong to; the brotherwhale.telemetry off-switch itself works on any engine.
A second window of this extension, or another CodeWhale client beside it — the runtime ownership model, new in engine v0.10.1, allows one driving client per machine: a second VS Code window running this extension, or the extension alongside the TUI or any other CodeWhale client on the same machine, is refused instead of starting its own engine. The fix — one control endpoint per runtime store, one driver per workspace, so web, desktop, TUI and this extension work side by side — is Codewhale#6924, still open; until an engine carries it, keep to one window and one CodeWhale client on the machine.
On engine v0.10.0 the rest stays as it was on 0.8.3: the Branch row is not offered (and a branch of a conversation that lost a tool call may refuse its first message), a command's change rows stop at the paths, an open conversation stays on its provider, undo leaves the changed files on disk and Revert answers 409 for a snapshot that exists, a [providers.<name>] route is missing from the picker, a fork starts a session document of its own, and a large thread store is slow engine-side. The Skills panel, new in this release, dims its activation and detail view there with the reason, while listing, toggling and the install / update / remove / trust / audit actions keep working.
Keep the engine current with codewhale update; codewhale --version is the check.
Preview
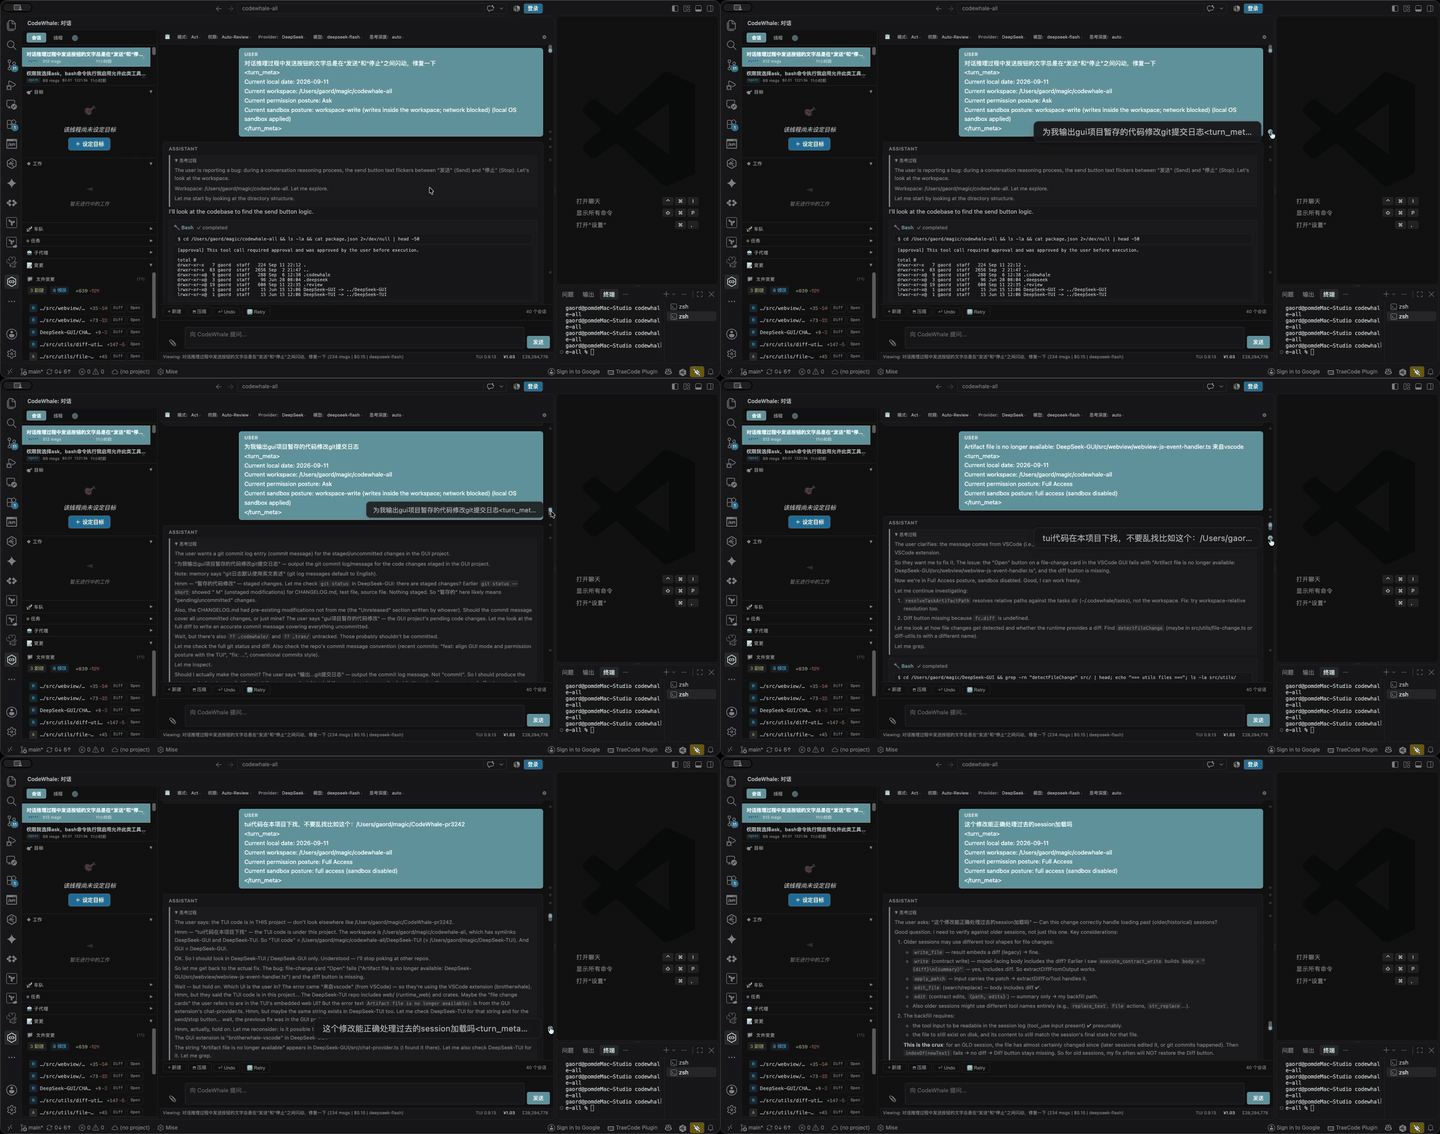
Message navigation rail — the dots along the right edge jump to any user message; Ctrl/Cmd+Up / Ctrl/Cmd+Down step between them.
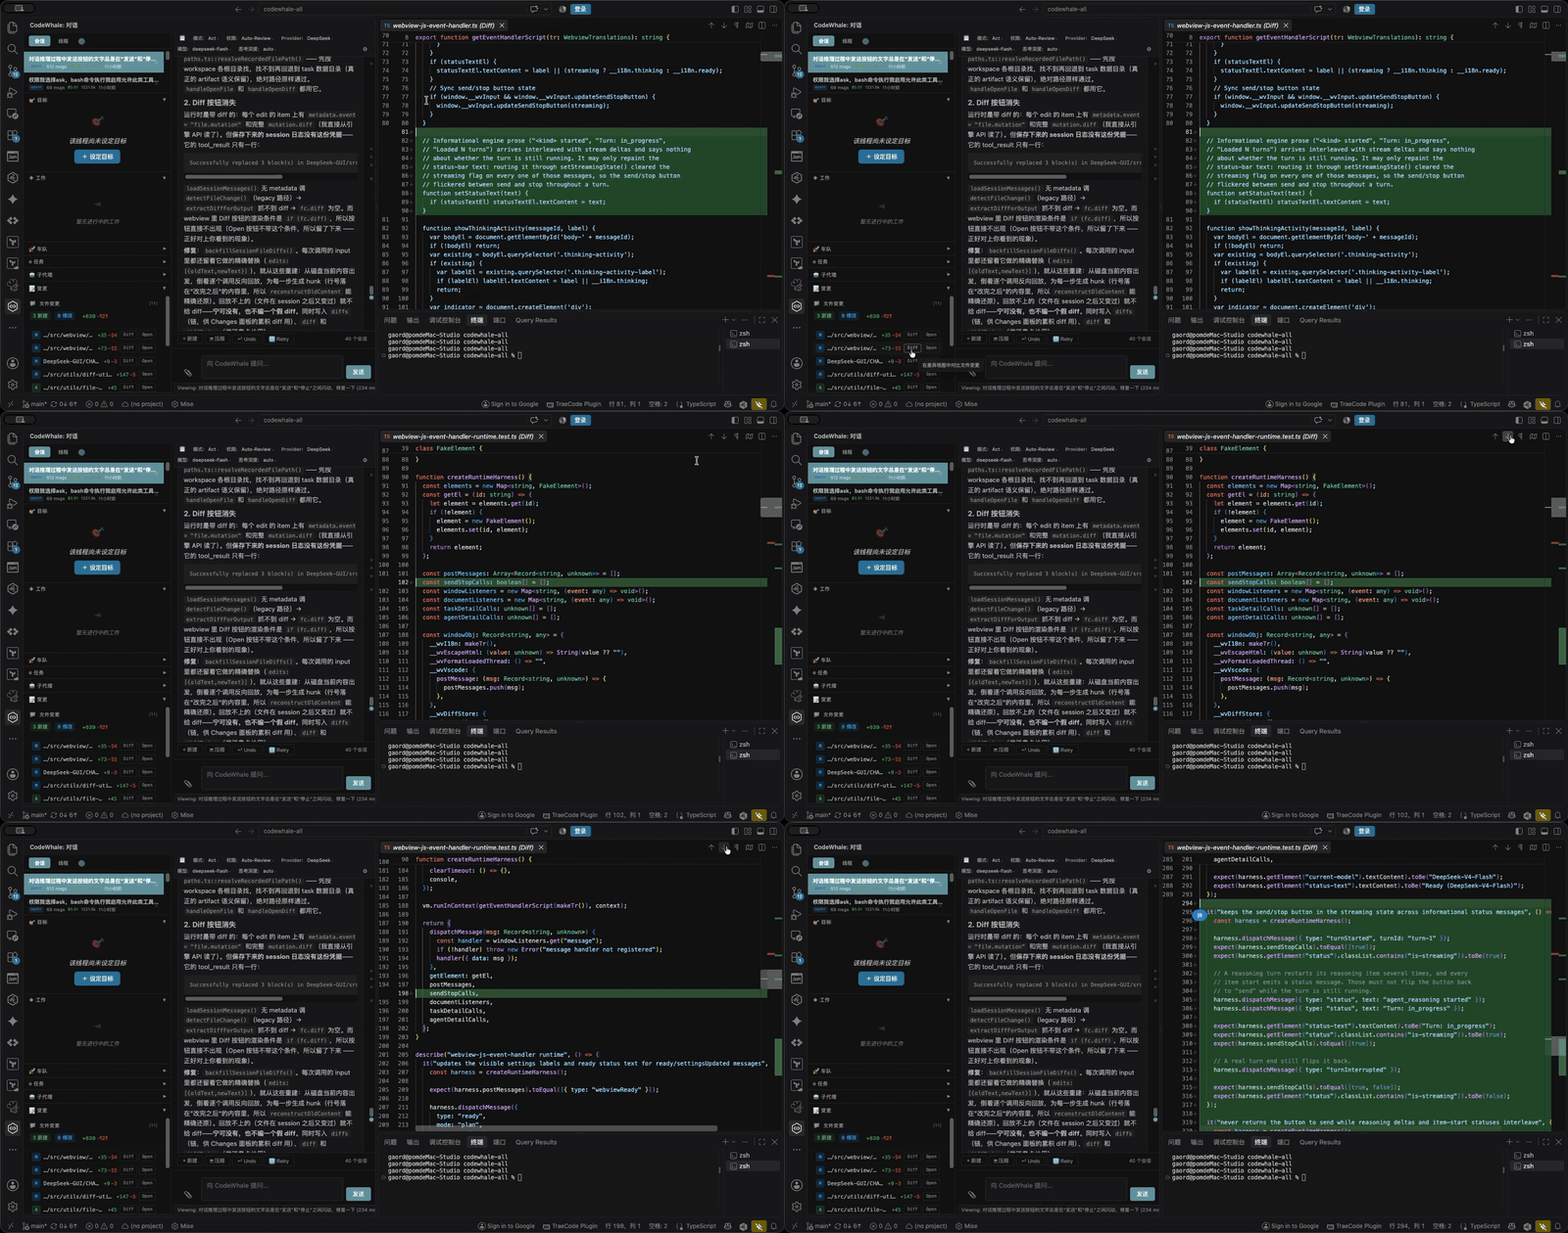
Inline diff for file changes — a change card opens the diff with correct line numbers, reconstructing the file the model actually saw.
Highlights
One entry point for three workloads — Goals, Tasks and Threads are created and switched in the same sidebar. Think something through, hand something off, or just talk it over: each has its place, and you never carry context between windows.
Steer the turn you are in, without stopping it — When the model's approach starts drifting, or the real world hands you something new while it is still working, you do not have to hit Stop and start over. Type your guidance and press Enter: it lands inside the running turn, the agent course-corrects from where it actually is, and the message carries a steer badge so you can see exactly where the conversation turned. A course correction stays part of the conversation instead of restarting it.
Work in parallel and put the whole engine to use — Several tasks can move forward at once: every turn is owned by the Runtime, so a goal loop or a long task keeps running while you keep chatting in another thread. That is real concurrency, not a queue — you decide when to come back and collect results.
Status and progress, visible at any moment — The three peer tabs — Sessions, Threads and Activity — lay out what is happening right now: running threads, the live work panel, the change list, Fleet and sub-agent state, task progress. Each active thread holds one lightweight SSE stream, so status and progress stay live without a polling timer.
The moment your decision is needed, it reaches you in one click — When a background thread stops for an approval or a question, its own card carries a pending count (grouped under Needs you), the toolbar's Agent label shows the total, and a VS Code notification fires. Approve or answer right in the card, without switching threads first.
Roll back at the level you need — turn or file — Not happy with the last turn? Undo and Retry act on that turn. Badly edited file? Per-file Revert restores just that one recorded change and names the restore point taken before it, leaving the file's other changes and every other file untouched. For a wider sweep, snapshots roll the workspace files back to a point in time.
One workspace, many projects — Plenty of work simply spans repositories. Symlink each project into a single folder, turn on VS Code's follow symlinks setting, and open that folder once: the agent sees every project as one tree, and you develop across all of them from one sidebar and one conversation.
Requirements
| Requirement |
Notes |
| VS Code 1.85+ |
Or a compatible IDE — Trae CN is supported |
| CodeWhale engine |
The codewhale CLI. Not bundled — install it separately (below) |
| Node.js |
Only for building the extension from source, or installing the engine via npm |
1. Install the engine
The engine is a native binary published by the upstream project. macOS / Linux:
curl -fsSL https://codewhale.net/install.sh | sh
"$HOME/.local/bin/codewhale"
Windows: download the matching installer from GitHub Releases.
Verify it is on your PATH:
codewhale --version
codewhale update          # keep the engine current
npm and Cargo are supported as secondary packaging routes (npm install -g codewhale). The engine is also where you connect your model provider — configure it on first run with /provider and /model.
Engine not found? The extension searches the usual locations (~/.cargo/bin, Homebrew and npm global node_modules, ~/.local/share/codewhale). If you installed via install.sh to ~/.local/bin and VS Code does not inherit that PATH, set brotherwhale.enginePath explicitly.
2. Install the extension
Option A — VS Code Marketplace: search for "CodeWhale" in the Extensions panel (Cmd/Ctrl+Shift+X) and click Install.
Option B — build from source:
git clone https://github.com/HengQuWorld/CodeWhale-VSCode.git
cd CodeWhale-VSCode
npm install
npm run compile
npx @vscode/vsce package --no-dependencies
Then install the generated .vsix (Extensions: Install from VSIX...), or from a terminal:
code --install-extension ./brotherwhale-vscode-0.8.2.vsix --force
Trae CN users: if code is not on your PATH, use the bundled CLI:
"/Applications/Trae CN.app/Contents/Resources/app/bin/code" --install-extension ./brotherwhale-vscode-0.8.2.vsix --force
3. Open it
Click the CodeWhale icon in the activity bar. The extension starts the engine on demand for your workspace, health-checks it, and reports Ready in the status bar. The first message is the slowest — after that the engine is reused.
Features
Chat that behaves like an agent, not a text box
- Streaming turns with a collapsible thinking panel, tool-call cards that show the actual arguments (e.g. the shell command as a
$ ... block), and per-turn ↑/↓ token chips.
- Mid-turn steering — while a turn is running, pressing Enter sends guidance into that turn instead of starting a new one (mirrors the engine's steering input); the steered message is marked with a steer badge.
- One send/stop button that reflects the real turn state, plus Undo and Retry for the last turn.
- Attachments —
/attach opens a native file picker for images, PDFs, and other files.
- Message navigation rail — dots along the right edge jump to each user message;
Ctrl/Cmd+Up / Ctrl/Cmd+Down step between them.
Modes and permission posture
Two independent controls, aligned with the engine's own vocabulary:
| Mode |
Behavior |
Act (agent) |
Works autonomously, asking for approval according to the posture |
| Plan |
Proposes a plan before touching anything |
| Operate |
Long-running, orchestration-oriented work |
| Posture |
Behavior |
| Ask |
Every gated action needs approval |
| Auto-Review |
The agent proceeds; the runtime reviews risky steps |
| Full Access |
No approval prompts — implies auto-approval |
Switch from the status bar or with /mode (shortcuts 1/2/3) and /auto. The legacy /mode yolo is kept as a one-way alias that means Act + Full Access; it is never shown as a mode of its own.
Sessions, not just threads
- Save and resume conversations as sessions, with search and delete.
- Per-turn auto-save, so a reload or restart does not lose the thread.
- Background threads keep running — switching threads, sessions or starting a new chat no longer touches the running turn: the Runtime owns it, so a goal loop or a long turn keeps going while you work elsewhere. Switching back re-attaches the view to that turn (Stop and Steer work again); stopping one stays explicit (Stop).
- Cross-workspace resumption — loading a session from another project rebinds it to the workspace you are in.
- Workspace filter — show sessions from all workspaces or only the current one.
- Attention surfacing — a thread waiting on an approval or your input carries a count on its rail card (grouped under Needs you), a total on the toolbar's Agent label, and a VS Code notification you can turn off with
brotherwhale.backgroundThreadNotifications. Approvals and questions from another thread can be answered inline in its rail card, without switching to it.
- A chime when a turn finishes — audible from wherever you are: the cue rings for the conversation you are watching and for a parked thread finishing in the background. A failed or interrupted turn stays silent, turns finishing together are heard once, and
brotherwhale.completionSound turns it off.
- Watched, not polled — every background thread that is running or waiting on you holds one lightweight SSE stream, so badges, notifications and the auto-save stay live without a polling timer.
- Three peer sidebar tabs — Sessions (saved conversations), Threads (the active ones) and Activity (live agent status: Work, Changes, Fleet, Tasks, Agents) — each with a hint line saying what it holds.
Changes and diffs in the editor
- A Changes section per conversation, with one card per recorded change, built from the engine's authoritative mutation metadata.
- Diff view with correct line numbers, reconstructing the file the model actually saw.
- Open a changed file directly in the editor, or Diff it inline.
- Revert restores one recorded change through the engine's file-scoped endpoint, naming the restore point taken before that change; the rest of the file's changes — and every other file — are left alone.
- Replayed sessions rebuild diffs from the recorded replacements — and deliberately show no diff rather than a fabricated one when the chain no longer lines up.
Tasks, agents, and Fleet
- Tasks — create from a modal, track progress, open a detail overlay, filter by workspace; background threads raise attention when they need you.
- Agent runs — delegated work with inline detail views.
- Fleet — managed multi-agent runs: workers, tasks, receipts, start/stop and per-worker interrupt/stop/restart, plus a live SSE event timeline filtered by issues / progress / all.
Goal, memory, and skills
- Thread Goal — status, token budget (red when over), elapsed time and continuation count, with set / edit / complete / block / delete.
- Background goals — tick Run on a background thread when setting a goal and it moves to its own thread, inheriting the model, mode and permission posture of the one you are on; the Work panel lists those goals below the current one, with Open Thread. Resume re-arms a goal left parked by a Runtime restart (the engine has no startup sweep for them).
- Memory —
/memory reads and writes the engine's native memory store through the runtime API.
- Notes —
/note for quick per-workspace notes.
- Skills — the Activity tab's Skills panel lists your skills and the shipped ones, switches each on or off, installs one from GitHub (
github:owner/repo, a URL, or a registry name), and offers update / remove / trust / audit for the skills you own. /skill <name> arms a skill for your next message — its instructions go with that one message, while the message you see stays the one you typed — /skill <name> <task> sends the task immediately, /skill <name> on|off toggles it, and /skills <name> (or typing /skill ) shows a skill's detail and completes its name. Install/update/remove/trust/audit and activation need an engine that answers the skill routes; on an older one the panel dims those controls and says why, and listing/toggling keep working.
- MCP —
/mcp opens MCP-related settings in VS Code.
- Snapshots —
/restore lists snapshots and can revert workspace files to one.
Models, cost, and diagnostics
- Provider and model switching from the status bar, with a live model preview per provider.
- Reasoning effort from
off to max.
- Runtime-sourced cost — usage and pricing come from the engine, so provider rate changes do not need a frontend release.
costCurrency follows your UI language (auto), and unrecorded cost shows an em dash rather than an estimate.
- Diagnostics —
/context, /tokens, /cost, /status, /cache (per-turn prefix-cache telemetry), /system, /diff, /translate.
- Config panel — the gear in the settings bar (or
/config) reads and writes engine runtime config, including sandbox mode, strict tool mode, memory, search provider and prompt suggestion.
Built for the editor
- Activity-bar container whose sidebar holds the Sessions, Threads and Activity tabs, the last grouping the Work, Changes, Fleet, Tasks, Agents and Skills panels. The threads panel sits beside the chat and takes its width from it rather than covering it, up to what that view can spare — the conversation keeps a column of its own however narrow the sidebar is — and closes with its ✕ button or
Esc.
- Status bar for engine state, mode, posture, provider, model and reasoning effort.
- Resizable sidebar and input area; follows your VS Code theme.
- English and Simplified Chinese UI, following VS Code's display language.
Commands
VS Code commands (Command Palette)
| Command |
Description |
CodeWhale: Open Chat |
Reveal the CodeWhale sidebar |
CodeWhale: New Thread |
Start a fresh conversation |
CodeWhale: Compact Context |
Compact the current conversation |
CodeWhale: Restart Engine |
Restart the local engine process |
Slash commands (in chat)
Core — /help, /clear, /home, /exit, /links, /feedback, /attach, /anchor, /jobs, /trust, /verbose
Config & models — /mode, /auto, /model, /models, /provider, /reasoning, /config, /settings, /workspace, /profile, /mcp, /init
Sessions & files — /sessions, /load, /save, /export, /rename, /compact, /edit, /undo, /retry, /restore, /diff
Tasks, agents & goals — /task, /goal, /skills, /skill, /note, /memory
Diagnostics — /status, /context, /tokens, /cost, /cache, /system, /translate
Some TUI-only commands are recognised but reported as unavailable in the GUI — for example /agent, /subagents, /hooks, /queue, /stash, /review, /lsp, /theme, /statusline. They answer with a reason instead of "unknown command", so the surface stays predictable.
Settings
Search for brotherwhale in VS Code settings (Cmd/Ctrl+,).
| Setting |
Default |
Description |
brotherwhale.enginePath |
"codewhale" |
Path to the engine binary. Leave at the default to use built-in discovery |
brotherwhale.defaultModel |
"deepseek-v4-pro" |
Fallback model for new threads: used only when the route has no entry in brotherwhale.modelByProvider and its runtime catalog publishes no model |
brotherwhale.modelByProvider |
{} |
The model each provider route's new threads start from, keyed by the route id (model_provider_id when it has one). Written by /model and the provider picker |
brotherwhale.defaultMode |
"agent" |
agent (Act), plan, or operate. A legacy yolo value resolves to Act + Full Access |
brotherwhale.defaultPermissionPosture |
"ask" |
ask, auto_review, or full_access |
brotherwhale.reasoningEffort |
"auto" |
auto, off, low, medium, high, max |
brotherwhale.autoApprove |
false |
Legacy fallback for auto-approval. Prefer the Full Access posture, which already implies it |
brotherwhale.costCurrency |
"auto" |
auto follows the UI language (Chinese → CNY, otherwise USD), or force usd / cny. Falls back to USD when no native CNY price exists |
brotherwhale.backgroundThreadNotifications |
true |
Show a VS Code notification when a background thread needs your approval or input (once per attention episode; the rail badge and its count stay live either way) |
brotherwhale.completionSound |
true |
Play a chime when a turn finishes — in the conversation you are reading or in a background thread. Failed and interrupted turns stay silent, and turns finishing at the same moment are heard once |
brotherwhale.telemetry |
true |
Let the engine this window starts count anonymous usage. Application-scoped; what is collected is the engine's concern (see Usage reporting) |
How it works
CodeWhale sidebar (webview: HTML/CSS/JS rendered by the extension)
        │  postMessage
ChatProvider  (extension host: chat-provider.ts, i18n, session state)
        │  HTTP on 127.0.0.1:<ephemeral port>
codewhale serve  (the engine — installed and upgraded separately)
        │
your workspace + the model provider you configured in the engine
- On activation the extension resolves the
codewhale binary, allocates a free loopback port, and spawns codewhale --workspace <folder> serve --http --host 127.0.0.1 --port <port>.
- Each trusted window owns the Runtime process it spawns: a fresh bearer token is generated per start and handed to the child through its environment (never on the command line), the extension waits for the child's own bind receipt before sending any request, and the local API rejects anonymous callers. No port state is persisted between sessions; only the child a window started is stopped on restart or shutdown.
- The webview talks only to
ChatProvider; ChatProvider talks only to the engine's runtime API. There is no second source of truth, and no agent logic in the extension.
- At startup the extension probes which runtime endpoints exist, so features backed by newer API surfaces degrade gracefully on older engines.
- Because everything is local, the engine owns model access, tools, and file mutations — the GUI only renders and steers them.
Runtime ownership and recovery
Each trusted VS Code window starts its own authenticated local Runtime. Old port files are ignored; restarting never kills an unrelated service. The Runtime token is generated for that process and kept out of command arguments, settings, and logs.
Reloading or closing the extension stops that window's Runtime and interrupts active work. Completed, saved sessions remain available through Sessions. Save or finish active work before reloading; active-turn continuity across reload is not supported. Per-file Revert works against the engine's file-scoped restore endpoint; on an engine that predates it the control stays disabled with an explanation, and Undo last turn remains available through the existing thread API.
Troubleshooting
Engine fails to start
- Check the install:
codewhale --version.
- Run
CodeWhale: Restart Engine from the Command Palette.
- Read the CodeWhale output channel (View → Output → CodeWhale); the engine log is also appended in the extension's global storage as
engine.log.
"Engine not found"
- Set the full path in
brotherwhale.enginePath, e.g. /opt/homebrew/bin/codewhale or ~/.local/bin/codewhale.
- Confirm the binary works in a terminal outside VS Code first.
The extension does not activate
- Reload the window (
Developer: Reload Window) and confirm VS Code 1.85+.
A button is greyed out / "unavailable"
- That feature needs a runtime endpoint your installed engine does not expose. Update the engine (
codewhale update) — the UI enables the feature automatically once the endpoint appears.
Installing a VSIX
code --install-extension /path/to/brotherwhale-vscode-0.8.2.vsix --force
Privacy & data
The extension talks to a locally running engine on 127.0.0.1. Conversation data reaches your model provider only through the engine, using the provider, model and credentials you configured there. You control the provider, the model, and the data flow.
Usage reporting
Usage counting lives in the engine the extension starts — the same code the CodeWhale CLI and TUI use. This frontend owns one switch, brotherwhale.telemetry, and the client name its sessions report as; what is collected, how it is identified, and where it is sent are the engine's implementation, documented in docs/TELEMETRY.md.
Set it to false to turn reporting off. It is on by default and application-scoped (user settings only), so a workspace cannot turn it back on for you. The engine reads it at startup, so a change applies from the next engine start — CodeWhale: Restart Engine applies it immediately.
Development
npm install
npm run compile   # development build with source maps
npm run watch     # rebuild on change
npm test          # vitest unit tests
npm run lint      # eslint
npm run package   # production build
npx @vscode/vsce package --no-dependencies   # build the VSIX
Project layout: src/extension.ts (entry) → src/chat-provider.ts (orchestration) → src/api/ (engine process + runtime API client) → src/commands/ (slash commands) → src/webview/ (HTML/CSS/JS split by domain) → src/utils/ (diff, cost, session state). See AGENTS.md for the deeper architecture and the "reuse the engine, never reimplement it" rule that keeps this frontend thin.
Pull requests follow the checklist in CONTRIBUTING.md (bilingual, English / 中文).
Feedback & contributing
Issues, discussions and pull requests are welcome — in English or Chinese. Several of the best parts of this extension came from community pull requests (#9–#12), and there is plenty left to build.
- Bugs and feature ideas — open an issue; bug reports and feature requests each have a template. Problems in the agent engine itself (
codewhale CLI: prompts, models, providers, tools) belong upstream, not here.
- Questions and ideas — Discussions, for anything that is not a bug.
- Code — CONTRIBUTING.md has the dev setup, the ground rules (the engine owns agent behavior; the GUI stays a thin adapter), and the PR checklist. First-time contributors are welcome — comment on an issue and a maintainer will help you find a starting point.
- CodeWhale — the open-source coding agent this extension fronts. Engine docs, releases, and provider setup live there.
Contributors
Thanks to everyone who has improved this extension through pull requests:
- @eoli — #9 restored the sidebar resize handle with a hardened drag, redesigned the composer with a bottom toolbar, and moved the settings entry to the sidebar title-bar gear (after iterations in #4–#8); #10 added the sidebar Activity tab and per-tab hints, and gave the panel an agent status label and a close button; #11 added the floating approval panel with tool input details, the thinking tail preview with tool blocks clipped by default, and removed smooth scrolling so programmatic scrolls land reliably; #12 made a completed plan approvable and executable in one click, and moved the mode and permission dropdowns into the toolbar
- @Hmbown — #2 made each window own and authenticate its Runtime, and guarded per-file restore
License
MIT

